
As a kid, I loved to pick flowers and press them between the pages of books. It's these fond memories of pressed flowers that inspired me to recreate them in royal icing for cookie decorations. This project is quick and easy and doesn’t require many tools. It is also a great way to utilize leftover cookies and royal icing.
- Baked cookies, shape and size of choice (I chose ovals and squares ranging between 7 and 8 centimeters, or 2 3/4 and 3 inches.)
- Offset spatula or palette knife
- Royal icing for covering cookies:
- Pastel colors (or any color of choice), medium thick-consistency to spread over cookies
- Royal icing for pressed daisies:
- Dark green piping-consistency, in tipless pastry bag* with opening equivalent to PME #1 tip
- White piping-consistency, in tipless pastry bag* with opening equivalent to PME #1 tip
- Yellow piping-consistency, in tipless pastry bag* with opening equivalent to PME #1 tip
- Parchment paper
- Your finger (or other blunt tool)
* Note: For this project, you can also use parchment paper cones to avoid the disposal of plastic bags. Check out @Julia M. Usher’s video for directions about how to successfully make and handle these cones.
Step1 : Ice cookies
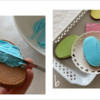
a. Using an offset spatula or a palette knife, spread medium thick-consistency royal icing over a cookie. Make sure to smooth the icing so the cookie surface is as flat as possible. Let the icing dry completely.
b. Continue icing any remaining cookies that you have, using different colors or just one color. The choice is yours! Again, let all icing dry completely.
Step 2: Create pressed daisy decoration
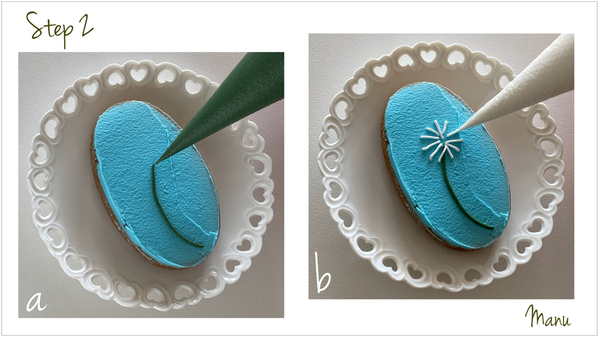
a. Use dark green piping-consistency royal icing and a PME #1 tip (or equivalent) to pipe a curved stem on a cookie.
b. Now use white piping-consistency royal icing and a PME #1 tip (or equivalent) to pipe several lines radiating from the top of the stem. Leave some space between each line. (The lines will be pressed, and the goal is for them to remain distinct from one another even after pressed.) Leave a space in the center of the flower too.
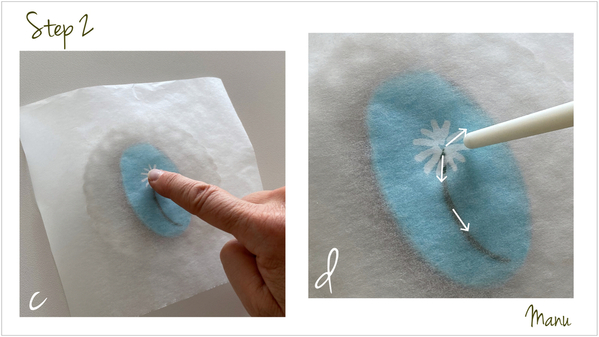
c. Place a piece of parchment paper over the cookie, and gently press the center of the flower with your fingertip so that the parchment paper sticks to the icing.
d. Use your finger (or a blunt tool, like the handle-end of a paint brush) to flatten and spread the icing along the stem and along each petal. As you can see, the previously piped lines in the flower have now taken the shape of large petals similar to those of a daisy. Let the icing dry under the parchment paper. Drying time depends on your ambient conditions, but it shouldn't take long, as the pressed icing will be quite flat (like stenciled icing). It was also a relatively thick consistency to start, and the thicker the icing consistency, the faster the icing dries.
e. Remove the parchment paper from the icing. If the icing is completely dry, the paper will probably pop off the icing all by itself. If you feel some resistance, leave the parchment paper on the icing until it can easily be removed; otherwise you will remove some of the icing from the flower.
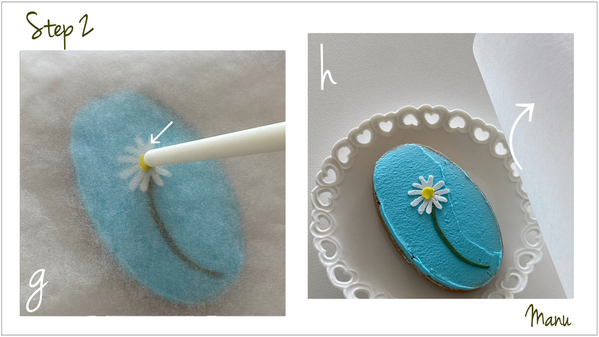
f. Now, use yellow piping-consistency royal icing and a PME #1 tip (or equivalent) to pipe some dots in the center of the flower.
g. Again, place a piece of parchment paper over the cookie, and gently press the yellow center with your fingertip or another blunt tool. You can use the same piece of parchment paper used previously if there is no icing on it.
h. Once again, let the icing dry completely before removing the parchment paper. Our pressed daisy decoration is ready!
Repeat Step 2 to create as many daisies on this cookie as you'd like, or as many daisies on other cookies as you'd like. Feel free to get creative with your daisy placement; just be careful not to press too hard on any previously dried flowers, or you might crack or break them. (Note: It's easiest to pipe all of the desired flowers on a cookie at once, and then to press once, as shown in my video below.)
Proceed to the next step for a flower bud variation.
Step 3: Create pressed bud decoration
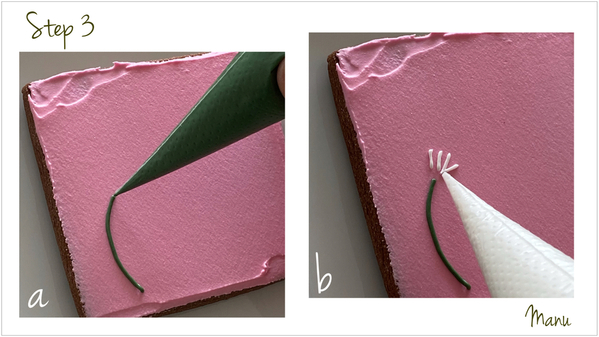
a. Again, use green piping-consistency royal icing and a PME #1 tip (or equivalent) to pipe a stem on another cookie.
b. Now, use white piping-consistency royal icing and a PME #1 tip (or equivalent) to pipe a few lines radiating from the top of the stem but just to one side. I forgot to take a picture, but also pipe a dot of green icing icing between the stem and the white lines. (See my video below for this entire process.)
c. Place a piece of parchment paper over the cookie, and gently press down on the green dot so that the parchment paper sticks to the icing. Then press and spread the icing along the stem and petals, just as you did in Step 2d. Let the icing dry completely.
d. Remove the parchment paper as previously instructed. And ta-da!
Again, add as many buds and open daisies to as many cookies as you like.
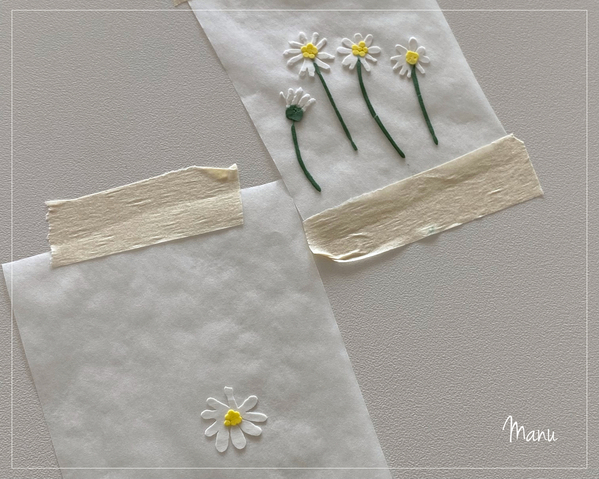
Tip: If you don’t feel confident enough to create the pressed flower decorations directly on your cookies, then practice piping them on parchment paper first. I did the same thing when testing if this tutorial idea was even feasible. By practicing on parchment paper, you will better understand your icing consistency, how much you should press the icing, and how much space to leave between each line/petal so that the final result looks like a pressed flower rather than a messy spot of flat icing! You’ll get some super delicate transfers, so be careful. And don't be surprised if some stems break.
Nevertheless, if you want to use these pieces as decorations, I recommend that you place the flower "heads" (carefully) on freshly spread icing so that they stick without further pressing. And then pipe stems directly on the cookies.
Here’s a video recap where I show the entire cookie-decorating and flower-pressing process. Only after watching the video did I realize that I didn’t press one of the petals. I kept on skipping right past it - LOL!
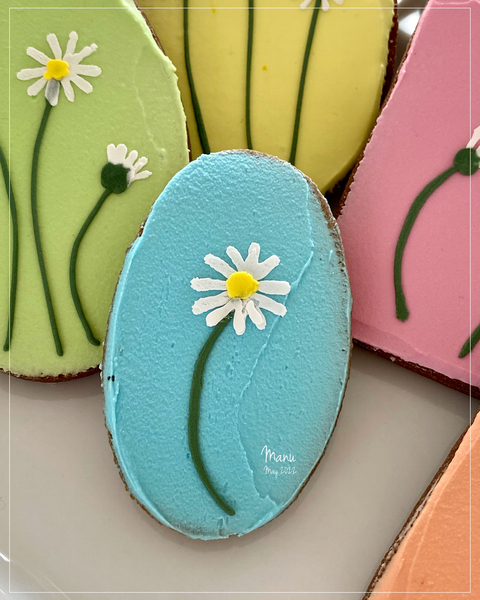
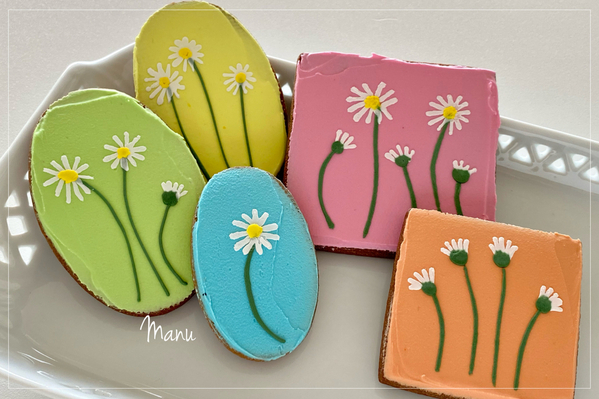
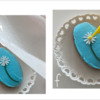
And, finally, here are some close-ups of several design variations . . .
Ciao, Manu

Manuela Pezzopane, affectionately called Manu by her friends and family, is a fan of everything handmade, and professes to have tried every possible hobby. However, it wasn’t until the end of 2014, when an American friend invited her to a Christmas cookie exchange, that she first discovered decorated cookies. In 2015, after watching Julia M. Usher's videos and signing up on Cookie Connection, Manu finally attempted her own. Since then, cookie decorating has become Manu’s passion. You can follow Manu on Facebook and Instagram, or email her at manubiscottidecorati@gmail.com.
Photo and cookie credits: Manuela Pezzopane
Note: Made by Manu is a Cookie Connection blog feature written by Manuela Pezzopane, where each month she shares the method behind a magical cookie of her own making. This article expresses the views of the author, and not necessarily those of this site, its owners, its administrators, or its employees. To read all of Manuela's past Made by Manu tutorials, click here. And to see all of Cookie Connection's tutorials, click here.








Comments (7)