You've probably noticed that most of our Cookier Close-ups have focused on how people got started in cookies and the business of cookie decorating. (And that's because they have!) This is all well and good, perhaps, but I’ve decided to turn things on end this time. Why? Well, partly for the fun of it, but also because you asked!
After reviewing this poll about the techniques that give members most trouble, and after seeing hand-painting rack up the second most votes (following lettering, BTW), I thought it was high time to give this feature a makeover in the form of technique “lift.” So this week, I’m pulling out all the stops and bringing in a hand-painting master to share insights about this technique, with the hope of elevating all of our work.
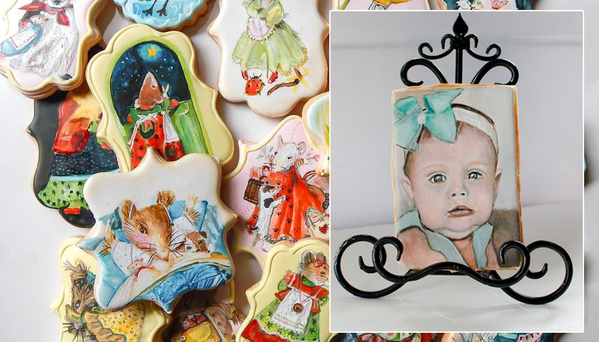
I’m sure many of you already know Kim Coleman of Sugar Rush Custom Cookies through the amazing works of art that she routinely posts to this site and her Facebook page, of course. If you don’t, you’re in for a huge treat! You see, she’s pretty much the Rembrandt of cookie decorating – widely known for her hand-painted cookie portraits and other insanely detailed cookie masterpieces. (Just check out the cookie baby portrait and Vera the Mouse set, below!)
Kim’s work has left an indelible impression on scores of us (myself included), but truth be told, she’s still an enigma to me. As talented as Kim obviously is, she isn’t one to broadcast her accomplishments. (Before writing this interview, I went to Kim’s page to read her bio, but all I saw was this: “Custom-designed and hand-painted edible creations.” “Un-freaking-believable custom-designed and hand-painted edible creations” might have been more appropriate, Kim! ![]() )
)
That being said, I AM going to ask Kim a few backgrounder questions before we dive into painting tips. She’s someone we all really ought to know better, if only to say, “I knew her when . . .”
![]()
JMU: Hi, Kim! So glad to have you here! I know that you make jaw-dropping hand-painted cookies; you hail from Ontario, Canada; and your worldwide cookie celebrity is on the rise! [EDITOR’S NOTE: Kim was recently invited to Spain to teach master classes about cookie painting. For more class info, click here.] But, apart from these things, I don’t know anything about why or how you got started in cookie decorating. Can you fill us in?
![]()
KC: I am so happy to be here, Julia. Thank you for the invitation. How did I get started with cookie decorating? All of us have a reason why we were drawn to making cookies, but I think my reason might be a little less typical than most of the cookie people out there. In 2009, I was a busy, home-schooling mom to four young children, and our life changed in an instant when my husband was involved in a car accident. We were under a tremendous amount of stress for three years as he was off work. It was a very difficult time.
After pouring over Martha Stewart's website, I took the plunge and made my first cookies to give away as gifts in December 2010. They weren't the best looking cookies, but I was hooked from the start! I knew that cake and cookie decorating were things I really wanted to learn more about.
A few months later, I lost my grandmother, and then my family was faced with an even bigger tragedy involving three of my children. By this point, the stress of the past few years had taken its toll and I practically hit rock bottom. It may sound trivial, but designing cookies helped ease the stress. In the wee hours of the night, I was able to quietly control something that was all my own. The cookies gave me an opportunity to hide away and create, imagine, reflect, and experiment without the fear of making mistakes. Looking back, I realize there is no way I could have predicted the course of my life. Sometimes I don't know how I got to this point, but I am very thankful.
![]()
JMU: Wow, I am so sorry to hear about this difficult chain of events. As they say, adversity makes us stronger, and you seem to be living proof of this. The cookie community is very lucky to have you. Please tell me more . . . Did you have formal training in art or experience painting with other media before you launched into cookie decorating?
![]()
KC: I have always been interested in art and had private lessons (oil painting) as a young child. I gave up painting to pursue gymnastics and piano and didn't start painting again until 2011.
![]()
JMU: Why did you choose hand-painting of cookies as your primary way of cookie expression? What is it about hand-painting that attracts you to that technique?
![]()
KC: In the beginning I did try to exclusively pipe a cookie and, as much as I liked the process, I didn't feel confident in my ability. I felt my work was mediocre. Everything seems to flow and feel more natural when I paint. As much as I would like to try something else, I keep coming back to what gives me the most joy. I never design anything just to be cute. It usually has to have a deeper meaning, coming from a place in my heart.
![]()
JMU: I’m of the school that believes you either have the hand-painting gene or you don’t! Do you believe that those who aren’t otherwise inclined toward painterly things can be taught to hand-paint cookies?
![]()
KC: I do believe that artists are born into the world with natural ability, and it is up to us to use and develop that gift. With that being said, I also think that people can be taught to hand-paint.
![]()
JMU: And what would you say to cookie decorators who say, “I will never be able to hand-paint?”
![]()
KC: I would say, go for it! Don't wait until you think you are good enough. Whatever your goal is, go after it with determination. Through trial and error, your confidence will build.
![]()
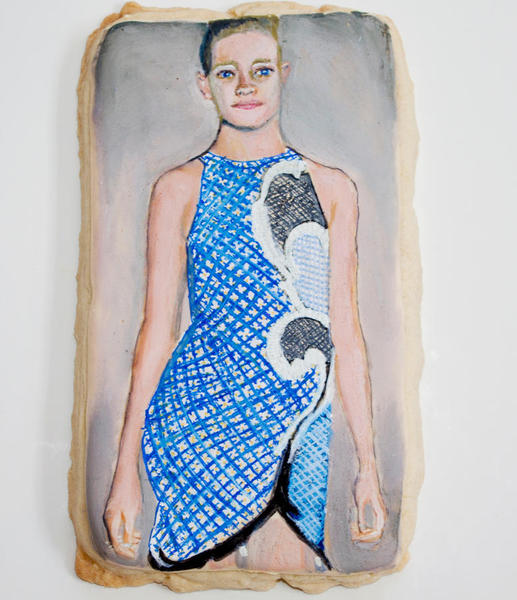
JMU: One more “backgrounder” before we get down to the nitty gritty: I read on your Cookie Connection profile that you once spent two hours decorating one cookie! Which cookie was it (picture, please!) and what about that cookie made it so time-intensive to do?
![]()
KC: It was the first cookie I made for a magazine and I was so stressed and nervous about it at the time. I kept fiddling with it and going back and changing things. [EDITOR'S NOTE: She's talking about the gorgeous fashion model cookie, immediately below.]
![]()
JMU: OK, onto painting details. People seem to paint with many different things. Some use soft-gel coloring straight-up or diluted with water. Some dilute with alcohol. And others, like me, most often extend powdered paints (or decorative dusts) with extract. The choice of paints can be very confusing, it seems to me. What type or types of paints do you use and why? Are certain types better for getting certain effects than others. Elaborate, PLEASE!
![]()
KC: I have tried a number of brands of food colouring including Duff, Americolor, Americolor airbrush colours, and Wilton. I have diluted with expensive extracts, imitation extracts, vodka, lemon extract (as it typically has a higher alcohol content, i.e., 85%), and distilled water.
After experimenting, I've found I prefer using part alcohol and part distilled water. I usually dilute my food colouring with alcohol if I want a more muted, water-colour effect on my cookies, as it evaporates very quickly and seems to always give me that translucent effect. Americolor airbrush colours do not need to be diluted, and I use them quite a bit for their vibrancy. They have a larger range of colours than the Wilton gel colours. I particularly like the black because it is already thinned out. I have read on blogs about people having problems with their black smudging, but I have never encountered that. I have had no problems at all with smearing using the airbrush color.
![]()
JMU: Brush choice can also be mind-boggling! I’ve heard “liners,” “spotters,” “mottlers,” “washers,” and myriad other brush names bandied about. Can you reduce all of this crazy terminology to the two or three brushes that every beginning painter should have in his/her tool kit? And why are those brushes a must?
![]()
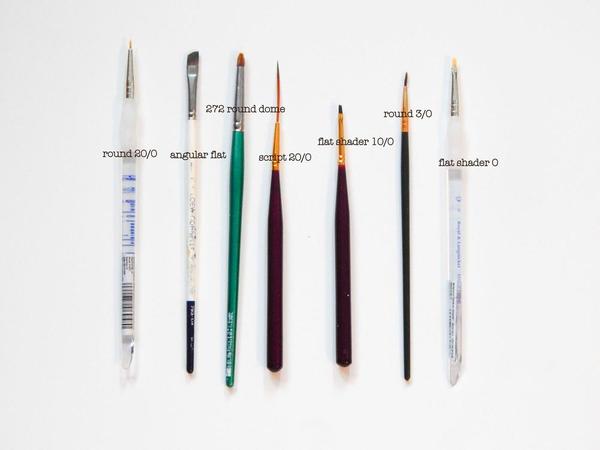
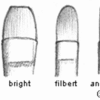
KC: Paint brushes will become your best friend the more you use them. The more you paint, the more familiar you will become with the way each brush handles. Below is a quick summary of how each brush (pictured above) is used:
- Round: Great for detail, outlining, and working in small spaces.
- Pointed Round: Good for fine detail, as it has a sharply pointed tip.
- Flat: Use for bold, sweeping strokes, graded washes. You can use the edge for fine lines.
- Bright: This is a flat bright that is rather short. Use for short, controlled strokes.
- Filbert: Can take the place of a round or flat depending on how it is held. These brushes don't leave stop/start edges when you make a stroke. Good brush for blending or making soft rounded edges, i.e., flower petals.
- Angular Flat: Can reach small areas with the tip. Good for curved strokes and filling in corners.
- Fan: For smoothing, blending, feathering, special effects (i.e., hair, fur, clouds, leaves on trees).
- Detail Round: Details and short strokes. This brush holds more colour than you might think.
- Script/Liner/Detail: All three brushes are used for painting fine lines. Liners are indispensable for detail work. The script brush is the longest of the three and holds the most colour. The liner brush is mid-length, and the detail brush has the shortest hair and offers the most control.
If I could recommend only a few brushes they would be a round, flat, detail, and filbert brush. One thing I should note is that brush sizes are not standardized and vary considerably by manufacturer.
![]()
JMU: Oh my, you gave us more brush names than I ever imagined! I better brush up on your list. ![]() (Sorry, I couldn't resist the obvious pun.) Now, can you share with us your favorite brushes and where you got them?
(Sorry, I couldn't resist the obvious pun.) Now, can you share with us your favorite brushes and where you got them?
![]()
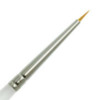
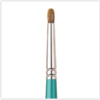
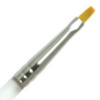
KC: The majority of my brushes are Loew Cornell and Royal & Langnickel. I purchased my Loew Cornell brushes at Michaels craft store here in Canada, and the Royal & Langnickel brushes at Hobby Lobby in the United States.
Here you can see the vast array of brushes available from both companies:
One of my absolute favourite brushes that has lasted years is my Loew Cornell 272 Dome Round brush that is shown in the photo above.
I also really like the following:
[EDITOR'S NOTE: For closer views of some of Kim's other favourite (oops, I meant favorite - I'm American ![]() ) brushes, see the attachments at the end of this post.]
) brushes, see the attachments at the end of this post.]
![]()
JMU: Do you have a preference for either natural hair or synthetic fiber brushes? If so, why?
![]()
KC: I have both natural and synthetic brushes and I think it all depends on how much you paint and what brand you are buying. I do like the natural brushes, but I find it is more economical for me to buy synthetic as I am painting more frequently. If you are painting hours and hours a week, it is probably more economical to buy cheaper brushes and replace them more often. If a synthetic brush performs just as well as a natural paint brush, I will use a cheaper synthetic.
![]()
JMU: I’m mystified as to how you achieve some of your very fine lines. Even my tiniest, thinnest brushes tend to splay after a few uses, rendering them useless for fine detail work. I’m pretty careful with them too – for instance, I always enclose the bristle-ends in their plastic sheaths before I store them. What am I doing wrong – is it the type of brush I’m using and/or my care of those brushes?
![]()
KC: Some of the lines in my cookies have been made with toothpicks, as well as calligraphy pens. I will use my brushes quite a bit and I definitely get months of use out of them.
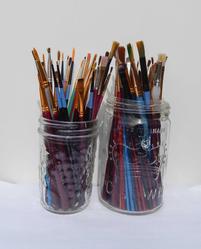
When I am painting, I always keep lots of clean water next to me. When I am finished with a particular brush, I rinse it and I squeeze the water out of the bristles and reshape the brush. I will then lay it down on a paper towel as I continue to paint. This whole process keeps any dirty water from flowing up the ferrule (metal part that holds the hair on to the handle). Brushes should be left flat to dry. NEVER leave your brush resting in the water or standing on its tip for any length of time. I have ruined so many brushes in the past because of this mistake. Too much moisture and the weight of the whole brush resting on the bristles causes them to bend and break. If you dry brushes with the tip of the handle down, the water and moisture will eventually destroy the epoxy barrier within the ferrule. It can then pop off and hair can start falling out. I store my (dry) brushes upright in mason jars. Never store brushes in a container where moisture cannot escape.
If your brush starts curling at the tip or gets stray hairs poking out at weird angles, it is probably time to throw it out! A brand new brush can make all the difference in the world when it comes to painting, so make sure your brushes are in top shape.
![]()
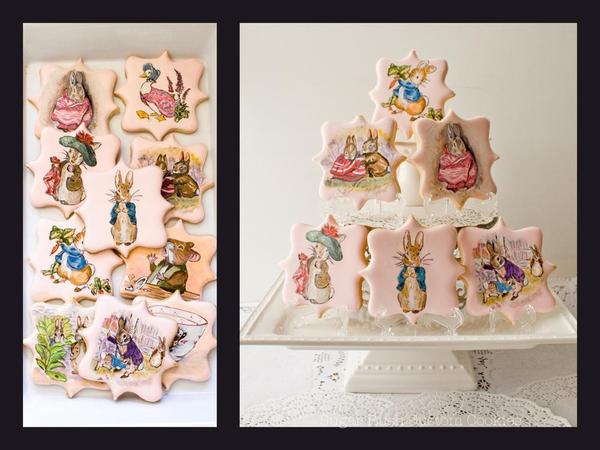
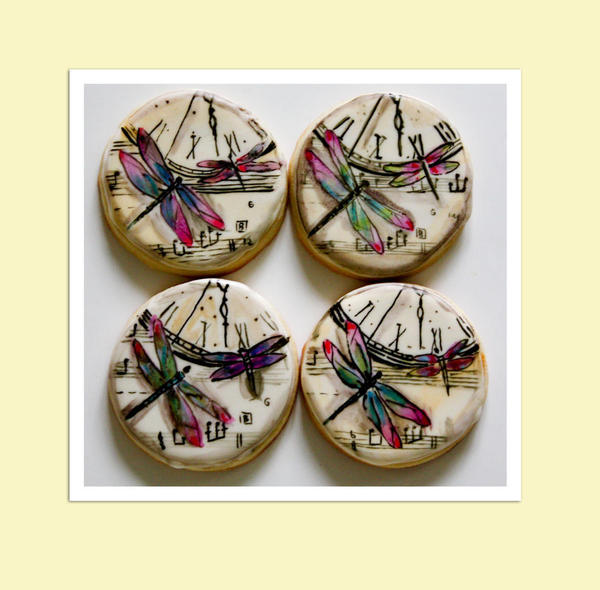
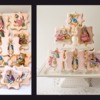
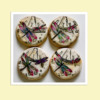
JMU: I think people often get intimidated with hand-painting because they see cookies like your Beatrix Potter characters and dragonflies (below), which are so darn realistic and rich and deep with texture, and have no idea how to get started. Where does your creative process begin? Do you sketch first on paper, trace or freehand the basic shapes, and then lay on the paint? Or do you approach your typical cookie a completely different way?
![]()
KC: I am a visual learner and so in the beginning I thought I would sketch everything before I started. Now it really depends on the project. If there is a lot of detail, I like to lightly outline on my cookie with a fine food marker or a tooth pick so I know the placement of the objects I want to paint. Other times I just throw caution to the wind and paint away without marking it beforehand.
![]()
JMU: Can you take the dragonfly cookies, for instance, and briefly walk us step-by-step through your process?
![]()
KC: Those cookies were quite fast and simple to paint. First, I did a graded wash along the edge of the cookies. Then I painted the music note and clock pattern with black airbrush food colour.
I let that sit and decided on the placement of the dragonflies to make sure there was a sense of balance with the cookie. I then proceeded to paint each one using various colour combinations. I used alcohol, as it helps to mix the various colours together so they merge and give more of a muted, translucent effect. After I finished the main elements in the cookies, I went back a few times to shade and add highlights as necessary.
![]()
JMU: Thanks! You've given us a truly eye-opening painting lesson! We have touched on food coloring and extenders, brush types, brush care, and your painting process. Have I missed any critical painting topics or tips that we must share with Cookie Connection members?
![]()
KC: I think that is about it. Thank you for having me!
![]()
JMU: Oh no, not so fast! I still have a couple of questions for you! While on the subject of lessons, I understand you are teaching classes in Bilbao very soon! How exciting! When is this class and what else can you tell us about what you’ll be teaching?
![]()
KC: I will be in Spain near the end of November teaching two separate painting classes (Beatrix Potter/Vera the Mouse) and one two-day royal icing structures/painting class.
![]()
JMU: And after all of these wonderful painting tips, what advice would you give to readers who might still be afraid of their paintbrushes?
![]()
KC: I would say . . . give it a try! Have fun! Don't compare yourself to others. No matter what your personal style is, cookie decorating allows you the chance to express your personality and to share the joy of creativity with others.
Cookie Photo Credits: Copyright Kim Coleman
Want to learn more from – and about - Kim? Great; then please join her upcoming live (text-based) cookie chat on August 31 at 12 pm central. Click here for more details and to get your questions logged in advance.
In the meantime, visit with Kim on Facebook or follow her on this site.

Cookier Close-ups is the place on Cookie Connection where we celebrate the change-makers of the cookie decorating world. Whether forging new enterprises, inventing novel decorating techniques, or consistently charming us with their cookie decorating prowess, each of our featured thought leaders has redefined in his/her distinctive way how we interact, create, or otherwise do business here in cookie space!
If there are other cookiers you'd really like to get to know, please post requests in this forum. We'll do our best to round them up for an upcoming Cookier Close-up! Thanks!







Comments (11)