
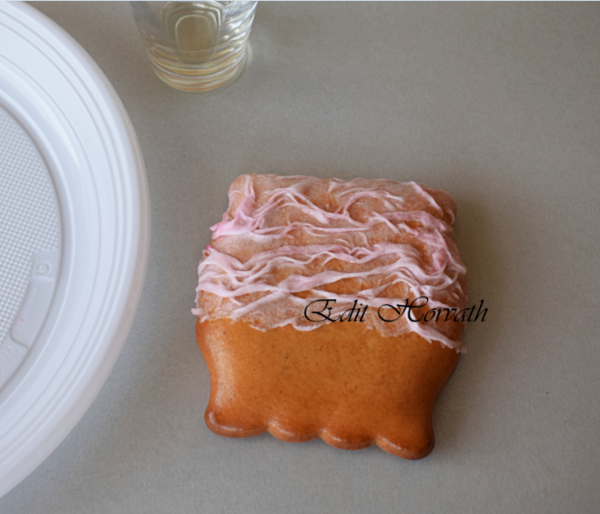
Thanks to @Julia M. Usher and some community members for their inquiries concerning the "interesting" surface texture on my gingerbread cookies made for Halloween, shown above.
I've been testing various techniques for a while, trying to come up with unique approaches that use commonly available materials for cookie making. My goal is to find simple and quick processes to create "surprising” decorated surfaces.
So . . . here's how I made the wafer paper texture on these hearts!
- Wafer paper, cut into about 3 (2 x 4-in/5 x 10-cm) pieces
- 1 (2 3/4 x 3 1/4-in/7 x 8.5-cm) un-iced cookie (or thereabouts)
- Textured work surface, for easy wafer paper removal (I used a textured plastic party plate, as shown in the first photo below.)
- 3 small paint brushes, for separate use with edible glue, Fabriliquid, and colorings
- Edible glue
- Fabriliquid (a vanilla-scented spray used to moisten wafer paper and make it flexible, like fabric)
- Wilton Christmas Red paste food coloring (or other coloring)
- Wilton Burgundy paste food coloring (or other coloring)
- Sponge brush or airbrush (optional)
- Food spray (optional; I used Lucidante spray.)
Phase 1: Prepare wafer paper surface foundation
Step 1
Cut or tear the wafer paper to fit the top of your cookie. Bear in mind that many small pieces will make the job of covering the cookie more difficult. It is better to use a few overlapping pieces. For this 2 3/4 x 3 1/4-in (7 x 8.5-cm) cookie, I used 3 (2 x 4-in/5 x 10-cm) pieces, which is the typical size and number that I use.

Step 2
Pour some Fabriliquid into a small glass. (Fabriliquid comes in a spray bottle, but I prefer to paint it in this application.) Set a piece of wafer paper on your textured work surface, and have your bare cookie nearby!
")
Step 3
Using a small paint brush, lubricate the cookie surface with edible glue. Coat only the portion of the surface that you can cover with the first piece of wafer paper.
Step 4
Wafer paper has a rough side and a smooth side. Start by lubricating the rough side with the Fabriliquid, using another small brush dedicated to this step. Be sure to keep the wafer paper on your textured surface. (A rough work surface will make it easier to lift the wafer paper later.)
Step 5
Turn over the wafer paper and now lubricate the smooth side of the wafer paper, leaving the rough side facing down. (It will also be easier to remove the wafer paper if the rough side faces down.) The Fabriliquid will quickly make the wafer paper soft and flexible.
Step 6
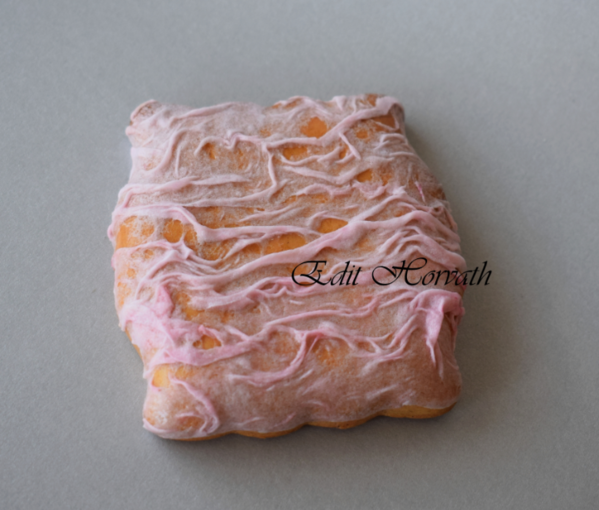
Using the same brush used for the Fabriliquid, carefully lift the wafer paper off your work surface and place it on the part of your cookie that you lubricated with edible glue in Step 3. Allow the wafer paper to form folds and creases, as shown below.

Repeat Steps 3 to 6 with the second and third pieces of wafer paper so that the cookie is completely covered.
Use your brush to "work" the areas of overlapping paper to minimize any visible seams. If you feel you have too much wafer paper at any of these seams, simply cut out the excess paper, and work the seams again to make them less visible.
Let the wafer paper dry completely before proceeding to paint it. I use a hairdryer to shorten the drying time to about 10 minutes.
Phase 2: Paint dry wafer paper
For this cookie, I used Wilton Christmas Red and Burgundy paste food colorings, but any hues and coloring types will work. You can extend powder colorings with alcohol with great results, or even airbrush with airbrush colorings. But, I don't own the latter, so I painted with both a small bristle brush and a sponge brush.
For a layered effect, start with the lighter coloring, and then apply the darker coloring. In my case, the lighter coloring was Christmas Red. For broad coverage, as pictured directly below, thin the paste food coloring with a little water.
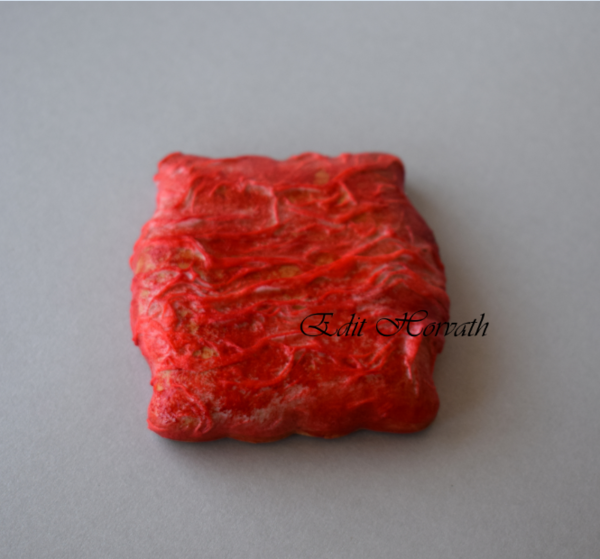
Next, paint on the Burgundy coloring, focusing it on the sides and leaving a lighter highlight of Christmas Red in the center.

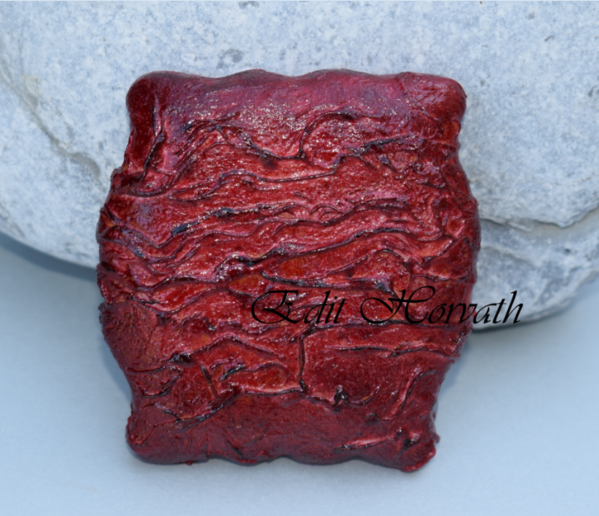
To accentuate the texture, I also painted the very topmost edges of the paper "wrinkles" with Burgundy. (In this case, I used the coloring without any added water.) You could, of course, use other colors for this step, such as black or gold, depending on your preference.

Finally, I protected the whole surface by spraying it with transparent food spray. I only recommend the application of this spray on "souvenir" cookies that will not be eaten for the simple reason that the spray does not taste very good (to me, anyway) . . . The practical reasons for using it are to fix the paint and to keep the wafer paper from deforming when handled, or if moisture should come in contact with it.
And that's all there is to it! Have fun giving it a try!


: Cookie and Photo by Edit Horvath")
Comments (9)