Hi! Yes, that site artist is me once again, so we'll skip the usual artist intro and move onto more important matters - like how to get your art featured instead of mine!
I'd really, truly love to have more submissions from all of you. One reason is selfish: I'm bored with seeing my cookies. Typically, I've looked at them for countless hours before posting them here, and enough is enough! But the primary reasons are for you. Featured cookiers get noticed by other members, potential customers, and people looking for cookie artists for competitions, classes, and other events. Plus, each featured artist gets his/her own in-depth Cookier Close-up interview here on Cookie Connection, which allows us all to get to know one another better. And what could be nicer than that?! ![]()
The other good news is: it's really easy to get your art featured, as I'll demonstrate with a simple example using this month's site art. First and foremost, getting featured requires no new cookie baking, decorating, or photographing. You can simply take an existing cookie photo (or photos) and crop it (them) to the proper sizes needed for our site banner and backdrop (690 W x127 H pixels for the former, and 1900 W x 1200 H pixels for the latter). Don't know how to crop? No worries; I'll share some handy apps for cropping at the end of this post.
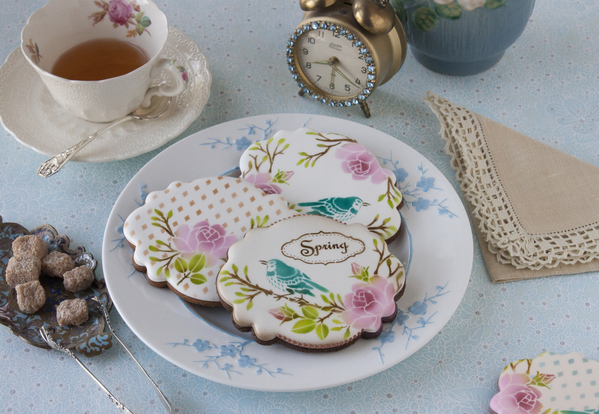
Now onto that simple example I mentioned. For this month's art, I started with this image that I shot for a stencil release a few months back:
I chose it not only because the flowers and birds on the cookies are super appropriate for the month of May, but also because the color palette works nicely with the Cookie Connection logo. Remember: The banner image sits right next to our logo at the very top of the site, so color compatibility is a huge plus.
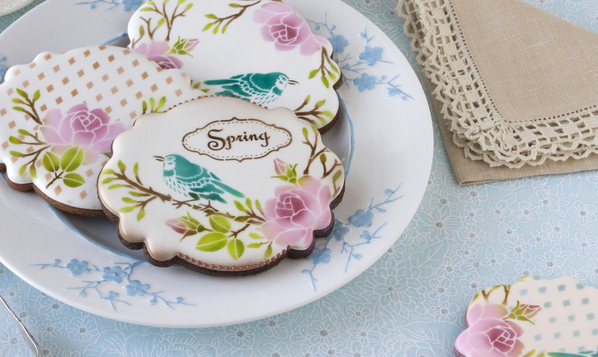
Once I selected the image, I cropped it to exactly 690 W x127 H pixels to extract this slice for the site banner:
BTW, don't worry about how to get your banner image nestled next to the Cookie Connection logo, as shown below. As long as you send me a banner image in the right size (again, 690 W x127 H pixels), I'll do the rest.
Now, for the background . . . While a 1900 W x 1200 H pixel image is ideal, it's not critical that it be exactly these dimensions. It can definitely be bigger, though it's best if it isn't any smaller. (If smaller, the image will automatically be tiled - aka repeated - to fit, which sometimes looks odd if the breaks between tiled photos appear to the sides of the text area, or body, of the site.) It's also important that (1) the image works well with the banner image, and (2) you have interesting photo content anchored in the upper left hand corner and far right, because those areas are most likely to show on most devices once the image is loaded to the site.
I began by cropping my original image as close to 1900 W x 1200 H pixels as possible, but found I had nothing but napkin and blue table covering in the far right. (Note: You could, of course, work with a different image than the one used for the banner. Either way is fine, as long as the banner and background make sense together visually.)
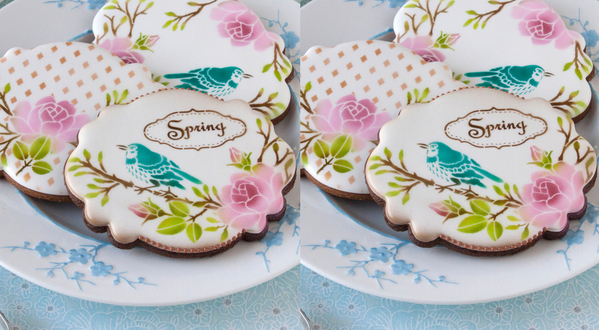
I ended up cropping the image very tightly around the cookies, and then placing a second copy of the cropped image directly to the right, to create an image of roughly the right size (below).
There's a line between the two tiled images, but since that line is dead-center, it can't be seen behind the body of the site. Plus, I now have some cookie content revealing on the far right edge of the site! Woo hoo!
Once you've assembled your two photos, you simply need to post them into our "Site Submissions" clip set following the guidelines found here. Please also specify the month for which you intend them in the title or caption of your post.
Now, back to the matter of how to crop photos to a specified size. I use Photoshop for all of my cropping, because it's also a powerful photo editing tool. But there is definitely a learning curve to it, and it is relatively expensive. That being said, I did a little research on the best apps for photo cropping, and I came across this post. Image Size sits at the top of their list, and I noticed it was reviewed favorably elsewhere, so I went ahead and downloaded and tested it. As the post says, it really is rather wonderful. You can crop any photo to any aspect ratio (W x H) through a simple four-step process: (1) upload the image you want to crop; (2) enter the aspect ratio you want at the top (this sets the size of the "crop viewer", a term I just coined); (3) move the photo around under the "crop viewer" until you have the crop you want (you can zoom in or out on the photo, and rotate it too); and (4) then hit the download arrow to save the cropped image to the photos area on your device. What's more, it's available for both Android and iOS devices. And, no, I don't own stock in Image Size! ![]()
So, with all of these tools now at your fingertips, I sure hope to see some wonderful site submissions from you in the coming months. If you have any questions about cropping, how to submit, or anything else, please don't hesitate to ask in the comments below. And, remember, all contributors will get their work featured prominently in the site's banner and background for a full month, plus the added PR benefits of a forum post like this one and a Cookier Close-up interview! So it's really a win-win proposition for all! Thanks for considering!

