 I love summer garden parties! The sun, all the greenery and blossoms around me, my family and friends, long leisurely talks, a delicious barbeque, a Caipirinha or two . . . Well, in my case, this idyllic picture is mostly theory. As some of you may already know, I live in Northern Germany, and, as much as I like my little part of the world, there is one thing we are missing – good garden party weather. A nice summer’s day is one where it rains only every second hour, which makes planning garden parties in advance kind of pointless. The planning actually goes more like: “Hey, there are only a few clouds, and the forecast has said only a mild chance of rain – wanna come over in the next five minutes and have a one-hour barbeque before a surprise hailstorm drives us inside?”
But still, this unpredictability doesn’t stop me from being very fond of garden parties. I like to plan the table styling, even though I hardly ever end up doing it. (Unpredictability doesn't lend itself well to elaborate table decorations!) I also like to scout out new recipes for the barbeque, which I sometimes end up trying. (Though let me tell you, roasting a complete chicken for hours in constant rain gets tiresome and takes a lot of coals.) This year, I’ll at least do some small decorations, something I can prepare in advance on a rainy day and simply drop onto plates when the time has finally come for our party. Mini drip cake cookies with name flags - so colorful that they will make everyone forget the dark clouds gathering overhead - should be perfect! I’m sure they will be just as nice in regions with more reliable weather, so here's what you will need for ten little cookie cakes . . .
- 7 oz (198 g) your favorite chocolate
- 7 oz (198 g) creamy peanut butter
- 30 (2-inch/5-cm) round cookies (3 per mini cake)
- Piping bag with #8 round tip or equivalent
- Yellow, blue, and pink royal icing, soft-peak consistency
- Small table knife
- White royal icing, thick flooding consistency
- Teaspoon
- Scribe tool
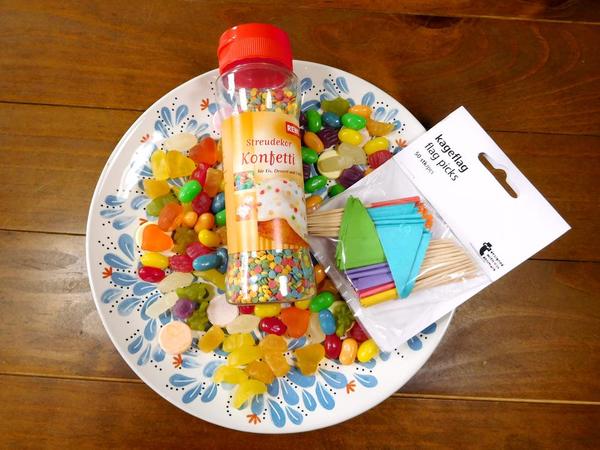
- Sugar confetti
- 10 flag picks in yellow, blue, and pink
- 7 oz (198 g) assorted mini candies (i.e., jelly beans, M&Ms, etc.)
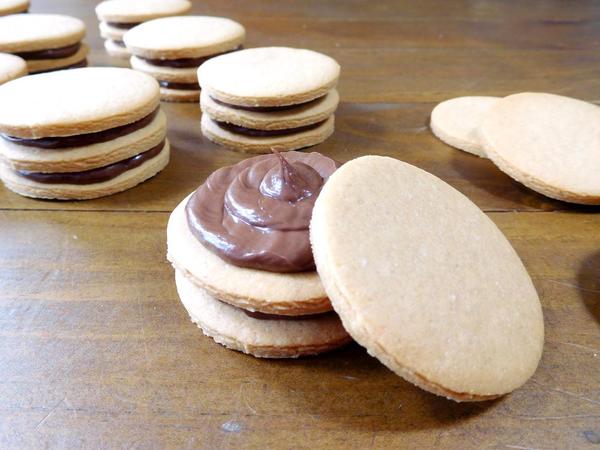
Start by making the filling. Melt the chocolate, and mix it with the peanut butter. Let the mixture cool to room temperature. You can speed up the cooling process in the fridge, but be careful not to leave the filling in there too long! If completely chilled, it will be way too hard. What you need is a creamy consistency.
Place the filling in a piping bag fitted with a #8 tip, or go without a tip, like I did, and just cut a 1/4-inch (or so) opening in the bag. Pipe the mixture on the center of a cookie, leaving a little room to the edges; add a second cookie on top with more filling on top of it; and then finally top the filling with a third cookie. Gently press everything together, taking care to keep the cookie stack from becoming lopsided. The cookies can now use some time in the fridge; about 30 minutes should be enough. The filling will become harder, which will minimize the risk of deforming the little cakes when decorating them in the next step.
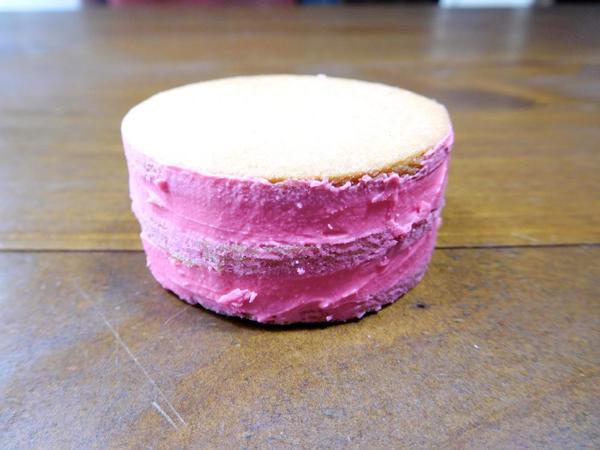
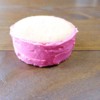
Take a bit of soft-peak icing, and use a small table knife to spread a thin layer of it around each cookie cake. Two layers of icing are needed, just like coating a real cake. This first layer, or "crumb coat", covers the gaps between the cookies and fixes any crumbs in place. Repeat with the remaining cookie cakes, changing out icing colors every so often to add interest to your cake collection. Let the icing dry about 30 minutes before applying the second coats.
The second icing layer is the finishing touch. Spread it with a serrated knife to add texture, or a smooth-edged knife for, well, a smoother look. I did the latter. If you want an even smoother surface without any knife "tracks", then I recommend dipping the cookies, but I personally like a little texture. Don't use too much icing; the cookies are supposed to be edible, and working through a lot of royal icing requires very strong teeth!

To be on the safe side, allow another 30 minutes of drying time – or use a spatula to handle the cakes so you don’t leave fingerprints on their sides.
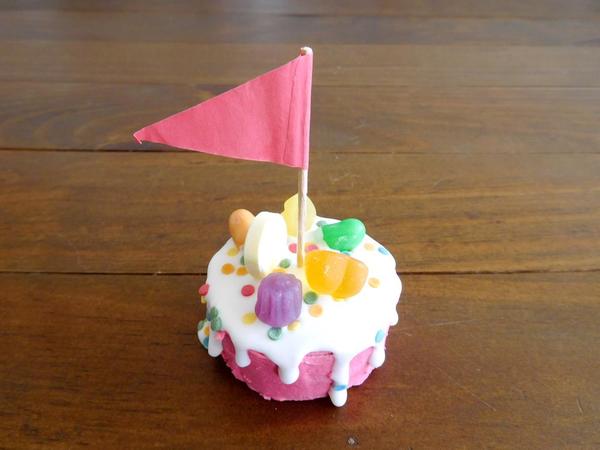
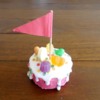
Work on one cookie cake at a time. Drop a half-teaspoon (or so) of flooding-consistency icing onto the top of a cookie cake. Use the backside of a spoon to spread the icing and to encourage some of it to flow over the cake's edge. With the help of a scribe tool, continue to ease the icing over the edge of the cake in various spots; then let gravity take over to form the telltale drips on a drip cake. If you don’t help the icing along in this way, chances are good that it will just sit on top or spill over the sides in an uneven or uncontrolled manner.
While the icing is still wet, sprinkle sugar confetti on top and insert a flag pick in the center; then decorate the top with a few pieces of assorted candy. Repeat the icing and decorating on the remaining cookie cakes.
Let the cookie cakes dry completely, wait for a sunny hour, and then write the names of those on your impromptu guest list on the flags. If you are lucky enough to have more reliable weather, add the names to the flags before sticking them into the cakes, as it's easier to write on them when they are lying down. Unfortunately, I usually can't do this . . . but I’d rather have a summer garden party with mini drip cake cookies and crooked writing on the flags than not have a garden party with cookie cakes at all!

 Leoni Eckart, aka Laegwen, started her baking career way before her own memory sets in, decorating Christmas cookies with her mother (at least that's what she's been told!), and has never entirely stopped puttering around in the kitchen since. Her first decorated cookies as an adult were her own wedding favors, and then, over Christmas 2014, her cookie fever went into overdrive! As of present, it shows no signs of cooling off. You can find Leoni on Facebook here, or you can reach her by email at laegwen@outlook.de.
Photo credit: Leoni Eckart
Note: Get Inspired with Laegwen is a bimonthly series of cookie decorating tutorials that follow Leoni Eckart's personal experiments with gumpaste, royal icing, and other cookie decorating materials and methods. This article expresses the views of the author, and not necessarily those of this site, its owners, its administrators, or its employees. To read all of Leoni's past Get Inspired tutorials, click here. And to catch all of our Cookie Connection tutorials, click here.




Comments (6)