 Ah, summer. When my kids were in grade school, those first few weeks of summer vacation were like paradise. Sleeping in, staying up late, slumber parties, and lazy days - summer was everything they thought they wanted. As the days passed, however, they’d always reach a point when the joy and freedom of summer vacation had worn off, but the imminence of the next school year hadn’t yet dawned on them. I’d find my kids draped over the furniture in a puddle of boredom. Arts and crafts became the key to our collective sanity. We’d fill the days constructing giant papier-mâché dinosaurs, illustrating clues for a treasure hunt, or designing decorations for a themed obstacle course. One of our favorite activities was painting rock mandalas. The project was simple: we’d search around the yard for some flat, round rocks, and then we’d paint them with patterns of colorful dots in concentric circles. Even when my kids were little, they could make impressive-looking designs. And those few, blissfully quiet hours while they labored over their work were as beautiful as the creations themselves.
[EDITOR'S NOTE: I just had to get this tutorial posted before the Fourth of July - these cookies remind me so much of fireworks in the night sky!]
Supplies:
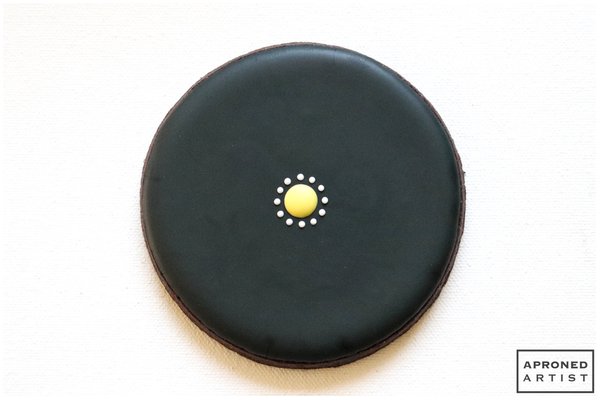
- 3 1/2-inch (8.9-cm) round cookie flooded with black royal icing, completely dry
- Royal icing (AmeriColor gel paste was used to color the icing):
- Thick flooding-consistency* light yellow (1 part Lemon Yellow/1 part Ivory)
- Thick flooding-consistency white
- Thick flooding-consistency yellow (2 parts Lemon Yellow/1 part Ivory)
- Thick flooding-consistency yellow-orange (2 parts Lemon Yellow/1 part Ivory/1 part Orange)
- Thick flooding-consistency orange (2 parts Orange/2 parts Lemon Yellow/1 part Ivory)
- Thick flooding-consistency dark orange (5 parts Orange/2 parts Lemon Yellow/1 part Ivory)
- Thick flooding-consistency orange-red (2 parts Orange/2 parts Super Red)
- Thick flooding-consistency red (Super Red)
- Thick flooding-consistency dark red (5 parts Super Red/1 part Electric Purple)
- Thick flooding-consistency maroon (5 parts Super Red/2 parts Electric Purple)
- Tips:
- Wilton #3 (or equivalent)
- PME #00, 0, 1, 1.5, 2 (or equivalents)
* Notes on consistency: For thick flooding-consistency, aim for about 25 seconds, meaning the "tracks" left by the icing when dropped into the icing bowl should disappear in about 25 seconds.
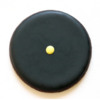
Step 1: Pipe large center dot
a. Using thick flooding-consistency light yellow royal icing and a Wilton #3 tip (or equivalent), pipe a circle measuring roughly 1 cm (3/8 in) in diameter in the center of your flooded cookie.
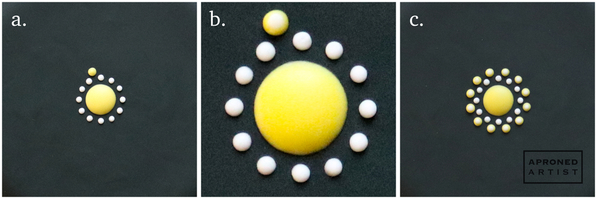
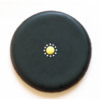
Step 2: Pipe first ring of dots
a. Using thick flooding-consistency white royal icing and a PME #00 tip (or equivalent), pipe 12 small dots around the circle piped in Step 1a, leaving a few millimeters of space between them and the center dot.
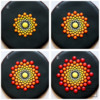
Step 3: Pipe second ring of dots with wet-on-wet centers
a. With thick flooding-consistency light yellow royal icing and a PME #00 tip (or equivalent), pipe a dot (slightly larger than the white dots piped in Step 2a) directly above the space between two of the white dots.
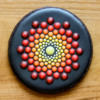
b. Using the same white royal icing and tip from Step 2a, immediately pipe a smaller dot in the center of the light yellow dot you just piped. Because the yellow icing is still wet, the white center will settle into the dot, creating a seamless wet-on-wet effect. (Wet-on-wet simply refers to wet icing piped on wet icing.) It’s difficult to see the effect in the picture since the colors are so similar, however, the white portion fills about one half of the light yellow dot. The wet-on-wet effect will become more noticeable as the pattern progresses with darker colors and larger dots.
c. To complete the second ring, continue making similar light yellow dots with white centers in the area above each pair of white dots from the previous ring.
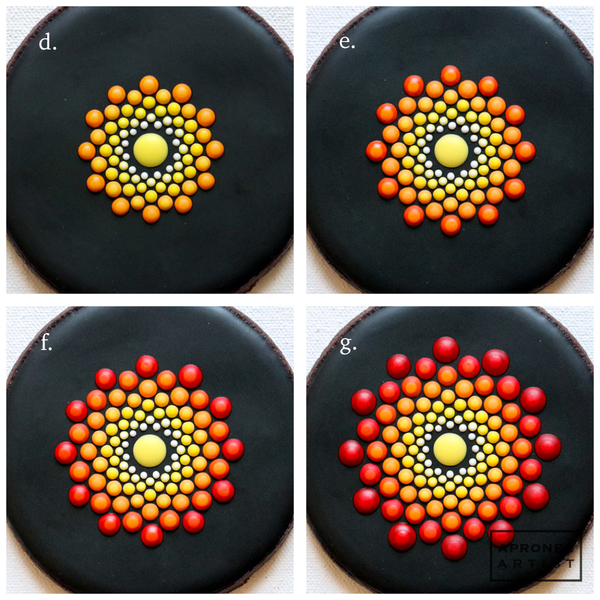
Step 4: Add more rings of dots with wet-on-wet centers
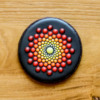
Continue this pattern with progressively darker colors. Each ring’s dots should be placed above the space between the dots in the previous ring; they should be slightly larger than the last ring’s dots; and they should have a wet-on-wet center using the bottom (first-applied) color in the previous ring.
a. For instance, for the third ring, start by piping a dot with thick flooding-consistency yellow royal icing and a PME #0 tip (or equivalent). Immediately add a wet-on-wet center with the light yellow icing used in Step 3a. Continue piping these dots around the circle to complete the third ring.
b. To start the fourth ring, pipe a dot with thick flooding-consistency yellow-orange royal icing and a PME #0 tip (or equivalent). Immediately add a wet-on-wet center with the yellow icing used in Step 4a. Repeat to complete the fourth ring.
c. Similarly, for the fifth ring, pipe a dot with thick flooding-consistency orange royal icing and a PME #1 tip (or equivalent). Add a wet-on-wet center with the yellow-orange icing used in Step 4b. Repeat to complete the fifth ring.
d. To start the sixth ring, pipe a dot with thick flooding-consistency dark orange royal icing and a PME #1 tip (or equivalent). Add a wet-on-wet center with the orange icing used in Step 4c. Repeat to complete the sixth ring.
e. To start the seventh ring, pipe a dot with thick flooding-consistency orange-red royal icing and a PME #1.5 tip (or equivalent). Add a wet-on-wet center with the dark orange icing used in Step 4d. Repeat to complete the seventh ring.
f. To start the eighth ring, pipe a dot with thick flooding-consistency red royal icing and a PME #1.5 tip (or equivalent). Add a wet-on-wet center with the orange-red icing used in Step 4e. Repeat to complete the eighth ring.
g. To start the ninth ring, pipe a dot with thick flooding-consistency dark red royal icing and a PME #2 tip (or equivalent). Add a wet-on-wet center with the red icing used in Step 4f. Repeat to complete the ninth ring.
h. Finally, start the tenth ring by piping a dot with thick flooding-consistency maroon royal icing and a PME #2 tip (or equivalent). Add a wet-on-wet center with the dark red icing used in Step 4g. Repeat to complete the tenth ring.
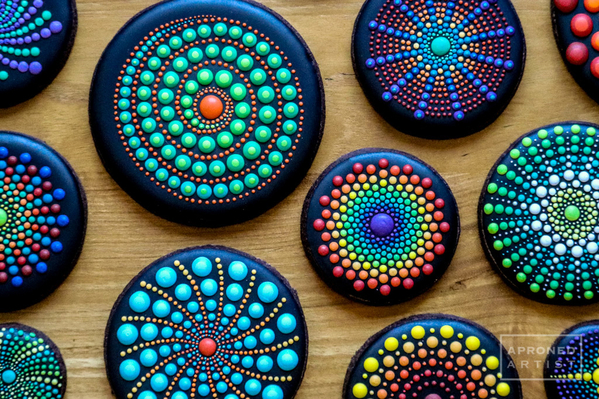
Experiment with different colors, spacing, dot sizes, and patterns. Even though these mandalas are comprised of only dots, the design possibilities are endless!


Samantha Yacovetta began cookie decorating in 2013. While working at a local bakery, Samantha became captivated by cookie art when a customer requested princess-themed cookies. Attracted initially to the precision of cookie decorating, Samantha soon found that the limitless design opportunities turned it into her artistic passion. Samantha began regularly stocking the bakery case with decorated cookies and for several years sold cookies through her own company, Aproned Artist, a cottage food operation. Having retired from the business life, Samantha now enjoys making cookies just for fun from her home in San Jose, California, USA. To learn more about Samantha, please check out her Cookie Connection portfolio, her Facebook page, and her past Every Little Detail tutorials here.
Photo and cookie credits: Samantha Yacovetta
Note: Every Little Detail with Aproned Artist is a bimonthly Cookie Connection blog feature written by Samantha Yacovetta focused on the special little details that make big statements in cookie design. This article expresses the views of the author, and not necessarily those of this site, its owners, its administrators, or its employees. To read all of Samantha's past Every Little Detail tutorials, click here. And to see all of Cookie Connection's tutorials, click here.







Comments (36)