Wow, maybe I'm just more tuned into the passing of time now that I'm making monthly stencil announcements, but doesn't it feel like this year is going CRAZY-FAST?! Whoosh - before you know it, we'll be stenciling cookies with stockings, reindeer, and jingle bells! (Come to think of it . . . I already am, because today marked the start of the design cycle for my Thanksgiving and Christmas sets! Yeah, I know . . . I just put away my Fourth of July decorations! ![]() )
)
But, I'm getting ahead of myself. Let's push the pause button and live in the moment for a bit! At this point in time, it's still summer and hot as blazes here in Missouri, with humidity levels approaching those of the tropics, so it seems only fitting to release some summery sets.
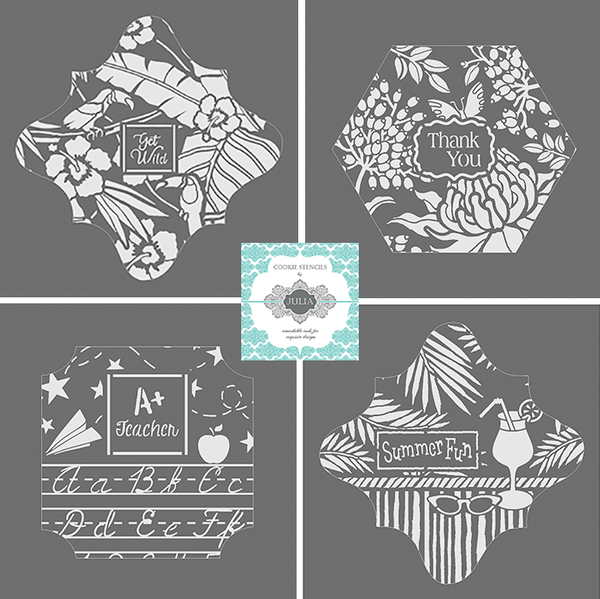
Speaking of the tropics . . . my first July set ("Get Wild" aka "Tropical Opulence") plays heavily into that theme with toucans, palm fronds, and hibiscus flowers. Just think of the many colors that will work wonderfully with this set! Following "Get Wild", I've got "Thank You", my new all-time favorite set and also my special Stencil of the Month*. (For a reminder of how my Stencil of the Month Club works, click here and/or refer to the asterisked footnote below.) Last but not least, I've got a summer-bordering-on-fall release in my "A+ Teacher" (aka "School Days") set, which is ideal for back-to-school teacher appreciation gifts. And lest you forget any of my previous summer-themed releases, you'll see "Summer Fun" taking up the fourth spot below, as a reminder of my existing summer stock. This set was released a few months ago, but is certainly applicable for at least another two!
All of these five-piece stencil sets and more can be found on my partner Stencil Ease's site, here. And if you join my Stencil of the Month Club in July, you'll get "Thank You" at nearly 20% off normal retail price, plus 15% off all other items on the site as long as you stay a member. Again, more Club details can be found here.
As always, I don't like to drop my stencils and dash. Instead, I prefer to stick around a bit and offer up unsolicited stenciling tips. ![]() Let's start first with "Thank You" - after all, it is our esteemed Stencil of the Month.
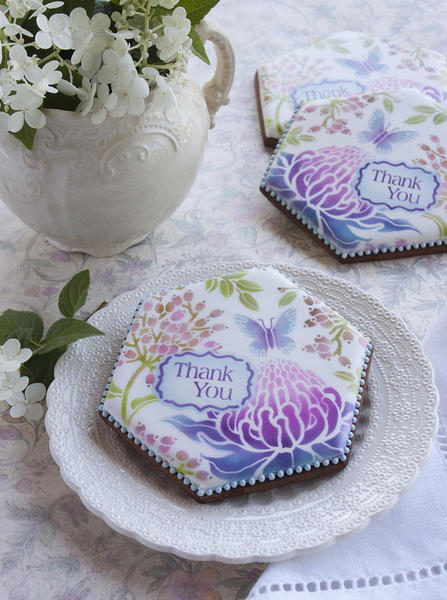
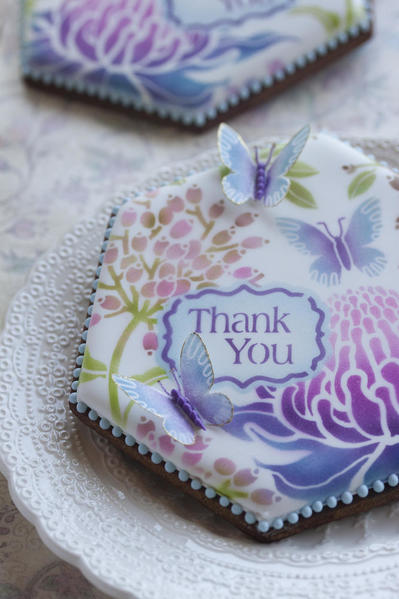
Let's start first with "Thank You" - after all, it is our esteemed Stencil of the Month. ![]() While its intricacy might make it look difficult to stencil, let me put any concerns to rest by saying, "Hogwash!" Seriously though, too many cookiers worry about overspray and spraying completely within stencil bounds, when they should relax and let a little conscious color-commingling work its magic. Purposeful overspray, and thus blending of colors, works incredibly well in organic patterns such as the background in this set. Overspray creates unexpected shades where colors overlap (especially when using water-based colorings) and results in a more natural and nuanced look. Cases in point here include: (1) the berries (a combo of pink, brown, and spring green); the butterfly (a custom-mixed blue on the edges with purple in the center); and the big flower (which includes pink, my custom-mixed blue again, and two shades of purple - Electric Purple and Regal Purple, both from AmeriMist). In a few weeks, I'll have a video showing how I "consciously commingle" colors in this set, as well as make the optional wafer paper butterfly toppers using the background stencil.
While its intricacy might make it look difficult to stencil, let me put any concerns to rest by saying, "Hogwash!" Seriously though, too many cookiers worry about overspray and spraying completely within stencil bounds, when they should relax and let a little conscious color-commingling work its magic. Purposeful overspray, and thus blending of colors, works incredibly well in organic patterns such as the background in this set. Overspray creates unexpected shades where colors overlap (especially when using water-based colorings) and results in a more natural and nuanced look. Cases in point here include: (1) the berries (a combo of pink, brown, and spring green); the butterfly (a custom-mixed blue on the edges with purple in the center); and the big flower (which includes pink, my custom-mixed blue again, and two shades of purple - Electric Purple and Regal Purple, both from AmeriMist). In a few weeks, I'll have a video showing how I "consciously commingle" colors in this set, as well as make the optional wafer paper butterfly toppers using the background stencil.
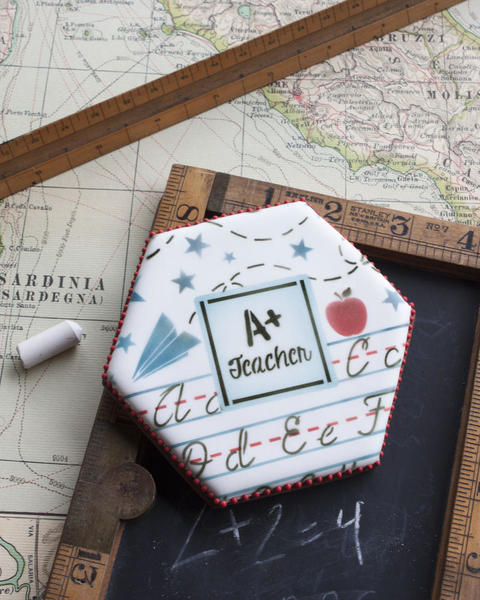
In the meantime, I'll leave you with a video (second image, below), quickly strung together with iPhone photos, that shows how I stenciled the "A+ Teacher" set in three colors (red, black, and another custom-mixed blue).
Here's that quickie video . . .
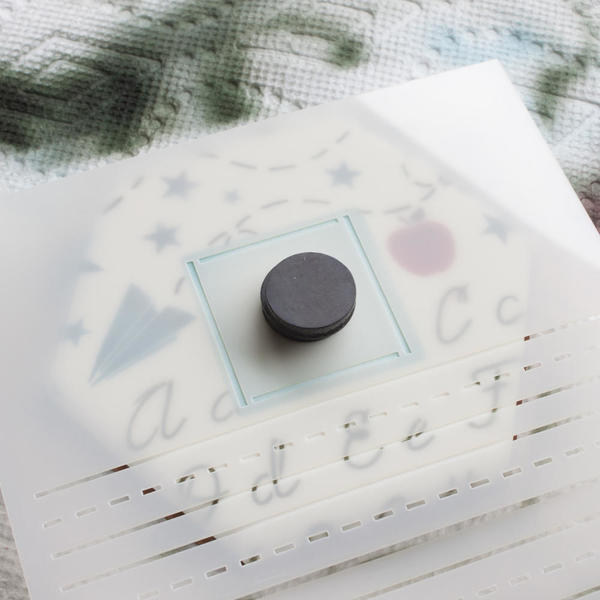
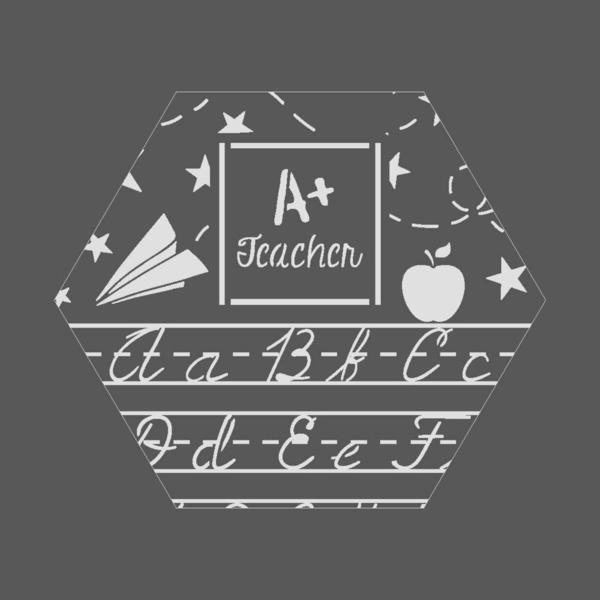
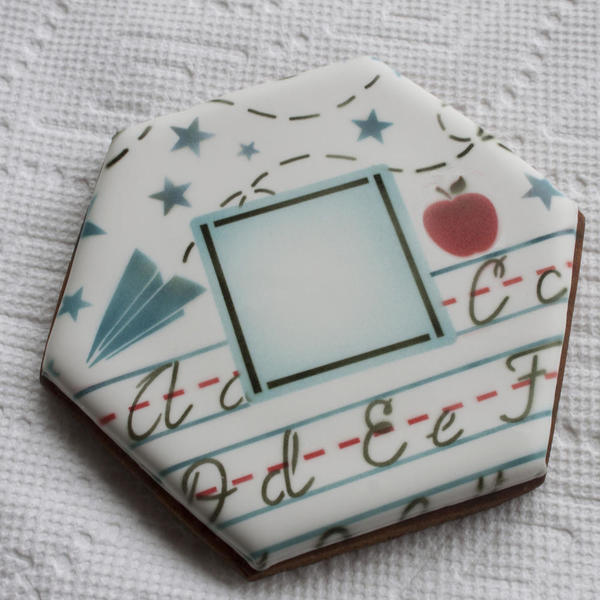
BTW, the frame stencil in this set is a bit different than most of my others, so let me tell you a little more about it. As you can see from the close-up process shot below, it includes more than the usual frame (or box) around the "A+ Teacher" message. It also contains the solid and dashed lines that run around and through the cursive letters. I didn't include these lines in the background stencil, as I normally would, in order to better "isolate" them and make it easier to spray different colors into them. I was going for the look of lined penmanship paper, like what I used in grade school!
Now, a few notes about its use. If you position your mask for your message above the first line that sits above the first row of letters, as depicted in the art below, then you can airbrush all elements on the frame stencil, box and lines, at the same time, without re-positioning that stencil.
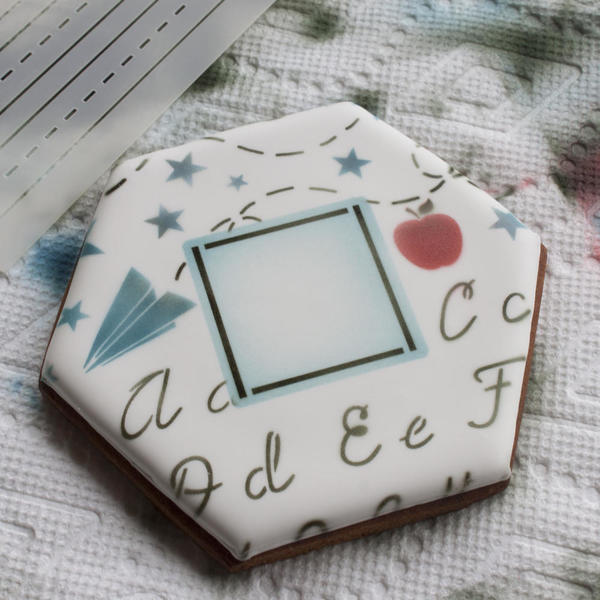
However, in the case of my cookie, I wanted the message to be lower and to cover some of the cursive letters. Because of the fixed spacing between the box and lines on the frame stencil, I had to therefore position the frame stencil twice to get the lines to hit the letters in the right spots. First, I masked the lines with tape and stenciled the black box, as shown below. (You could probably skip the taping step, but the lines are close-ish to the box, and I wanted to eliminate any risk of overspray.)
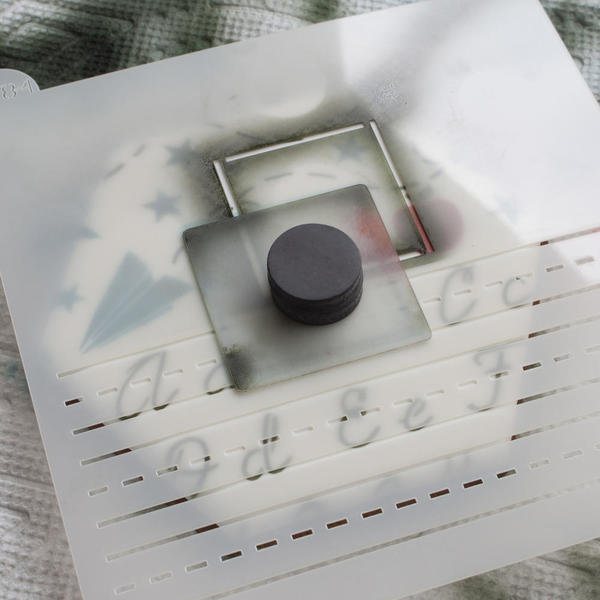
Next, I re-positioned the frame stencil, so the lines matched up with the letters, as shown below. To keep from stenciling lines through the central blue box, where the message would later go, I used the masking piece again to cover it. Then, at very close range to prevent overspray, I airbrushed blue into the solid lines, and red into the dashed lines.
And here's the final reveal, before the message was stenciled in the center. Again, this extra re-setting of the frame stencil is only needed if you place your box lower (or much higher) than that top blue line.
And that covers all you ever wanted to know about the "A+ Teacher" set! ![]()
I leave you now with a quick spray-test of "Get Wild" on paper to give you one possible color scheme. I didn't have time to photograph a polished set of "Get Wild" cookies this month, but if the colors work on paper, they'll work on cookies!
Again, all of my July sets and more can be found on my partner Stencil Ease's site at www.stencilease.com/juliausher.htm. If you have any questions about ordering, please direct them to service@stencilease.com. Design or technique questions can be directed to me at sweetlife@juliausher.com at any time. 'Til next month, live sweetly!
* As a reminder, my Stencil of the Month is part of my Stencil of the Month Club (naturally! ![]() ), which works like so . . . Once you subscribe, each month you'll automatically receive a surprise five-piece stencil set (the Stencil of the Month) valued at $18.99 for just $14.99 plus shipping and handling. Members also get an exclusive members-only 15% discount on all stencils and accessories on the Stencil Ease site. After you sign up, Stencil Ease will send you a personalized letter from me that explains when you can expect your stencils each month, how to redeem your 15% members-only discount, and a few other things. If you have any questions about these logistics, please check out the Stencil of the Month Club webpage, or send inquiries to service@stencilease.com. (Note: The Stencil of the Month is also available to non-Club members, but only at full retail price.)
), which works like so . . . Once you subscribe, each month you'll automatically receive a surprise five-piece stencil set (the Stencil of the Month) valued at $18.99 for just $14.99 plus shipping and handling. Members also get an exclusive members-only 15% discount on all stencils and accessories on the Stencil Ease site. After you sign up, Stencil Ease will send you a personalized letter from me that explains when you can expect your stencils each month, how to redeem your 15% members-only discount, and a few other things. If you have any questions about these logistics, please check out the Stencil of the Month Club webpage, or send inquiries to service@stencilease.com. (Note: The Stencil of the Month is also available to non-Club members, but only at full retail price.)






Comments (8)