
"There is almost nothing that has such a keen sense of fun as a fallen leaf."
~ Arthur Rackham, 1906
Recently I had an order for Victorian fairies, and feeling all autumnal, I chose one of my favourite illustrators, Arthur Rackham, and his illustration for J. M. Barrie's Peter Pan in Kensington Gardens as my guide. (You can see his picture here.) Apart from three fairy cookies, I needed to keep the order simple, but with plenty of cookies to share. And so I came up with this method to quickly create lots of colourful autumn leaves.
You will need:
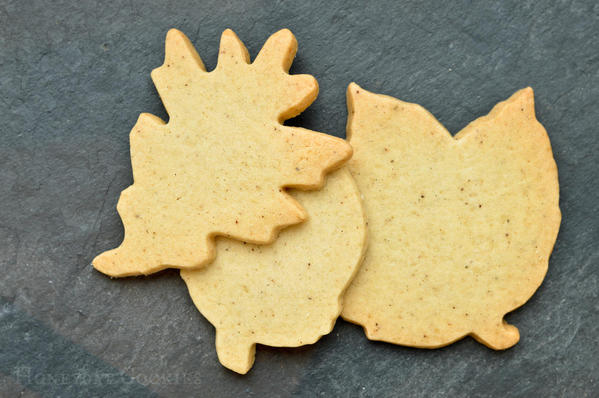
- Assorted leaf cookies (I also used mushrooms and acorns.)
- Very stiff white royal icing
- Offset palette knife or spatula
- Soft piping consistency white royal icing, in a bag with PME tip no. 1 or equivalent
- Food colouring gels or pastes in autumn colours (I used Sugarflair Christmas Red, Melon Yellow, Chestnut, and Dark Brown.)
- Absorbent paper towel
- Paint palette
- Wide food-use-only paint brush (I used a 1-cm-wide Winsor & Newton flat watercolour brush.)
- Edible metallic paint, either lustre dust mixed with alcohol-based extract or ready-mixed paint (I used Rainbow Dust Dark Gold metallic food paint.)
- Fine food-use-only paint brush
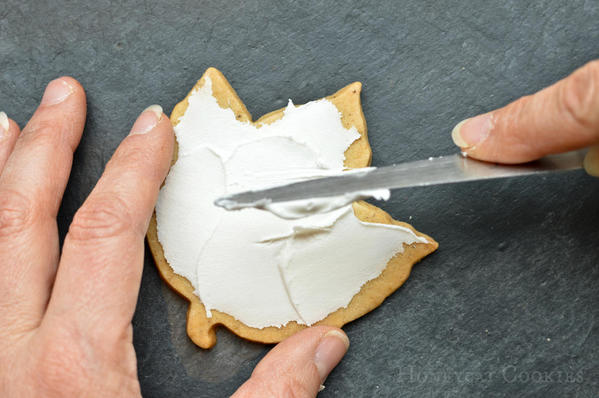
Take your stiff white royal icing and offset knife, and simply start to spread the icing on your cookie, like spreading butter on bread. Work it out to the edges, and don't worry about getting a little messy. Leave the top rough.
When you have the top looking as you want, gently scrape around the edges with the knife to remove excess icing, if necessary. Leave a little roughness though; it will help pick up the lustre paint later on.
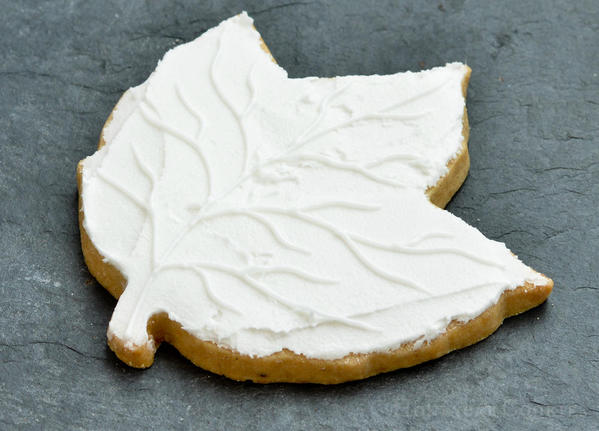
Though you can dry the cookies after the first step, there's no need. Pipe delicate leaf veins over the surface. The colour applied in the next step will pool around these veins and the texture beneath to create depth, so you want lots of texture and detail at this stage. Allow the icing to dry thoroughly for several hours.

Mix a few autumn colours in your palette. This is a much wetter painting technique than normally used when handpainting on cookies - it's much more like a watercolour wash, but with saturated colours. I mixed strong colours in water, picking up a dab of gel colouring straight from the pot with my paint brush and mixing until I reached the intensity you see in the paint palette above. I also tested the paint regularly on absorbent paper towel to check its saturation before using it on the cookie.
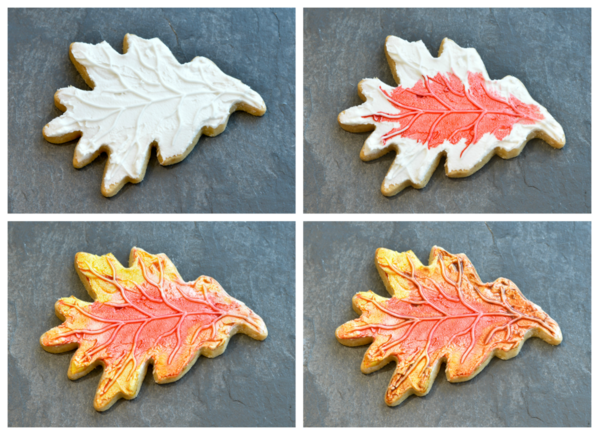
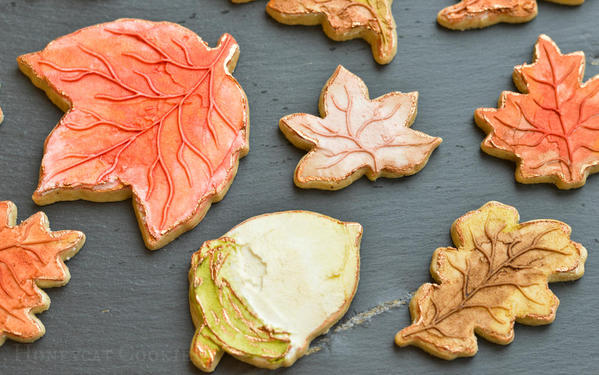
Starting with red, quickly wash the centre of the cookie, allowing the paint to pool around the veins; this color will dry dark and slightly shiny. With some of the yellow, wash around the edges of the first colour, creating orange blending out to yellow at the edges. Finally, add a little brown around the edges. You can lighten the colours, if desired, by loading the brush with more water, or by using a drier, but still damp brush to draw out the wet colour to where you want it on the cookie. If you get the cookie wetter than you want, simply blot gently with absorbent paper towel.
Tip: Be careful not to overwork the painting process. The royal icing can take quite a lot of wet paint on top as long as you don't make too many brush strokes, which will break down the surface, eventually making the paint sticky and brushing away the finer piping. If you feel or see this starting to happen, simply put the cookie aside to dry thoroughly. (Using a fan or dehydrator is ideal.) I had to be really strict with myself and not work on each cookie for more than a minute.
Continue the process with all of your cookies, experimenting with the whole spectrum of autumn colours!
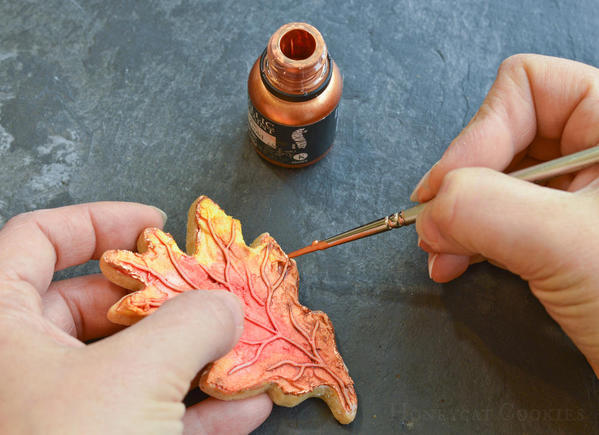
For the final touch, mix your lustre dust with a few drops of alcohol-based extract to create a paint, or use ready-mixed paint. I used ready-mixed metallic paint by Rainbow Dust, as it goes on with a thick coat, dries with a high shine, and doesn't rub off. Using the fine brush moderately loaded with lustre paint, paint around the edge of the cookie, allowing the texture to pick up the paint unevenly.
And that's all there is to it. This method can be used on small or large cookies, and a whole variety of shapes. It's great for filler cookies on platters, or how about favours for a Thanksgiving dinner? I used autumn colours here, but I've been experimenting with cooler colours and white lustre paint for a more wintry look, to add to my Christmas cookies. It's a technique to have fun with: no careful designs to transfer; no sitting under a Kopykake in the dark; no hours in the kitchen mixing colours . . . it's even great to do with children!
And finally, this is how my favourite of the little fairies turned out, dancing in a windblown autumn wreath of her own . . .
Cookie and photo credits: Lucy Samuels

 Lucy Samuels is the owner of UK-based Honeycat Cookies. Originally with an art-based career in mind, Lucy attended art college for a year after school but switched to nursing where she spent twenty years specializing in cardiology. After becoming a stay-at-home mom to her daughter Jess, Lucy experimented with a range of crafts, alighting upon decorative cookies almost by accident. In late 2011, she was persuaded to start her business Honeycat Cookies following several requests to place orders. She set about learning the craft from books, the internet, and trial and error. Lucy has a YouTube channel as well as a blog, Honeycat Cookies, that document some of her wider adventures in confectionery.
Photo credit: Lucy Samuels
Note: What's New, Honeycat? is a bimonthly Cookie Connection blog feature written by Lucy Samuels, which pushes the cookie envelope every other month with innovative cookie design ideas and tutorials. Its content expresses the views of the author and not necessarily those of this site, its owners, its administrators, or its employees. To catch up on all of Lucy's past posts, click here.








Comments (10)