
I'm badly in need of a holiday by the sea - we'll be going soon. Every year about this time, we stay in Cornwall (UK) with my aunt. Some of the most beautiful coastline and beaches in the world are in Cornwall. And every year, without fail, it rains all week. The Honeykitten has been known to swim in the sea, in the rain, whilst her Dad and I watch her in our waterproofs. So this year, I'm conjuring up the sunny seaside for myself with sugar and nuts and spice!
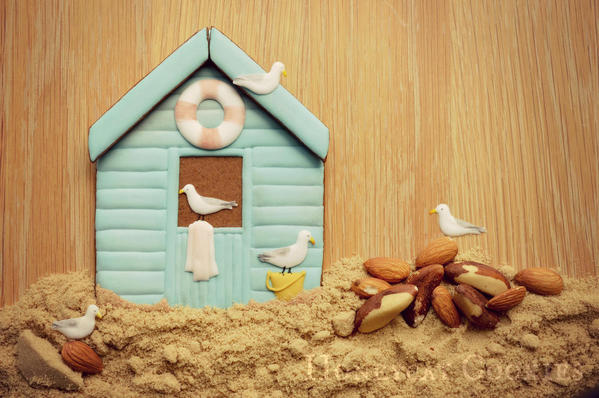
I made this beach hut out of gingerbread, primarily because I wanted the half-open doorway to be dark and contrast with the sun-bleached exterior (chocolate will work just as well). The sun always shines here, so the occupant is off having a swim, but the seagulls know it'll be time for a cup of tea and a cookie afterwards, and they're waiting . . .
You will need:
- Royal icing in thick flood consistency (around 20 seconds) mostly in blue, and small amounts in white, yellow, and beige
- Acetate or wax paper for royal icing transfers
- Printouts of seagulls, of about 2 to 3 cm in length, and circles about 3 cm in diameter
- Scribe tool
- Food gel or paste colouring in white, yellow, black, and red, for painting
- Fine food-only paintbrush
- Gingerbread or chocolate cookie dough
- Fine grater or microplaner (optional)
- White petal dust (or cornflour) and black or brown petal dust
- Light brown soft, fine sugar
- Black edible marker
First, we'll be making the royal icing transfer seagulls and life preserver. I always make several more than I need as they break so easily. Secure your acetate or wax paper over the printout of seagulls and circles. Using the white thick flood consistency icing, pipe the rough outlines and fill them in; then use the scribe tool to tease out the beak and the sharp points on the tail feathers, and to gently "swirl" each circle into as uniform a shape as possible.
Once the transfers are fully dry (at least 24 hours, longer if it's humid), you can add touches of colour. A little yellow on the beaks, a little grey for the wing, some darker streaks on the tail feathers, and dots for the eyes. Keep it simple. For the life preserver, I deliberately thinned down the red colour until it was very faint to evoke a sun-bleached look, and simply brushed on four equal sections.
Put the transfers to the side until you're ready to use them.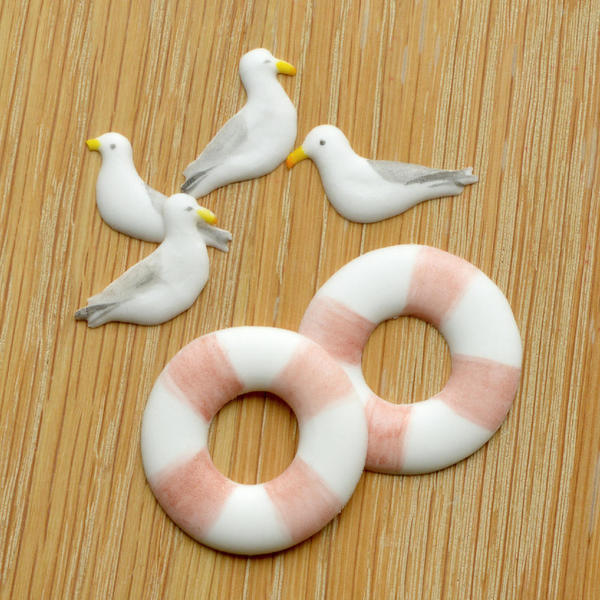
Now we're ready to make the hut itself:
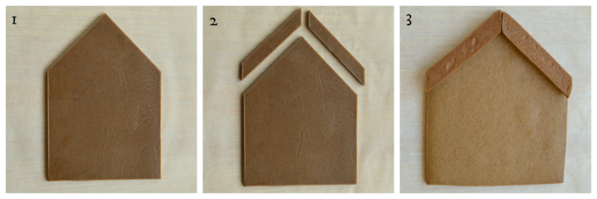
1. Roll your dough to about 0.5 cm thick and cut out a rectangle 15 cm tall by 10 cm wide. Mark the midpoint (5 cm) across the top, and 5 cm down from the top on each side. Cut off these triangles and eat discard.
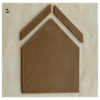
2. To create the gables, mark 1.5 cm down from the apex, and 1.5 cm down the two sides. Cut vertically from the apex to the 1.5 cm mark; then cut down to the side points.
3. Bake all of your pieces; then check how the gables fit on top of the main cookie, in case they've spread. In this case, I found that when I flipped them upside down, they fit much better. If you need to, file them down a bit with a fine grater or microplaner.
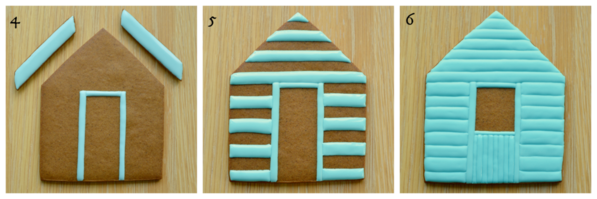
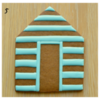
4. Using your blue thick flood icing, cover the gable pieces and set to dry in front of a fan or dehydrator. Pipe up the sides and over the top of the doorway. (I made my door about 7.5 cm tall by 4 cm wide, placed centrally). Pipe the sides and top separately, allowing a little drying time in between to create the seams between the sections.
5. Mark 1 cm horizontal bands for "boards" (or do it by eye), and flood alternate boards to the top. Set this piece to dry in a dehydrator or in front of a fan to prevent cratering. But don't worry too much if you get some - this beach hut is old and well-loved; it's bound to have warped a bit in the sea air!
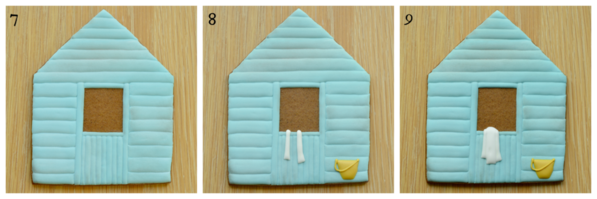
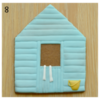
6. Complete the rest of the boards, as well as the vertical boards of the half-door.
7. Now add some "aging". I initially tried painting rough streaks of white gel colour, but it really didn't show up well. So while the gel colour was still wet, I dusted over it with a little cornflour to create a matte bleached look, and used a tiny hint of dark petal dust here and there to add to the old and faded impression.
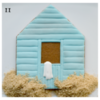
8. Pipe the yellow bucket and the outer folds of the towel, and when the crust has set up on the bucket, pipe the handle.
9. Fill in the centre of the towel.
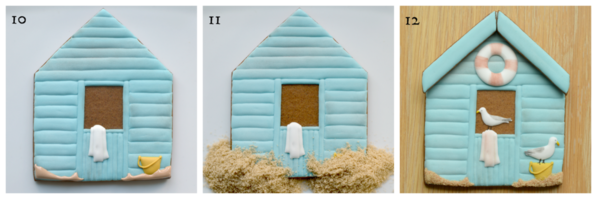
10. When the bucket is fully dry, use the beige flood icing to pipe little "drifts" on either side of the door, around the base of the bucket, and, slightly raised, at the sides of the building.
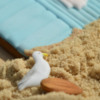
11. Immediately cover the wet beige icing with soft brown sugar, and leave for a few minutes before shaking off the excess.
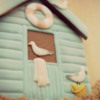
12. Using a little white icing, "glue" the life preserver and two of the gulls in place. Using the edible marker, draw in the legs and feet of the gulls.
Let all of the "glue" and "sand" dry in place and there you have it - a large beach hut cookie, waiting to be eaten as soon as you've finished your swim, or alternatively, after your rest on the beach that lasts until the sun finally goes down . . .
Cookie and photo credits: Lucy Samuels


Photo credit: Lucy Samuels
Note: What's New, Honeycat? is a bimonthly Cookie Connection blog feature written by Lucy Samuels, which pushes the cookie envelope every other month with innovative cookie design ideas and tutorials. Its content expresses the views of the author and not necessarily those of this site, its owners, its administrators, or its employees. To catch up on all of Lucy's past posts, click here.





Comments (19)