
There is something about painting on a cookie that I can’t resist. People say it's a great stress release and outlet for self-expression and creativity.
For me, painting is not only a very accessible and enjoyable activity, but also a beautiful way to get into a calmer and more focused state of awareness. Time doesn't exist when I start to paint my cookies, although sometimes my puppy Bruno acts like a clock when lunchtime is coming. ![]()
So, could you imagine what I thought when Julia invited me to write a tutorial about this fun and relaxing technique?!
Yes! I said a huge YES! ![]()
So here I am - a bundle of nerves about my very first cookie tutorial on Cookie Connection, but so excited about the idea that you can read me!
What you'll need:
- Cookie flooded with white royal icing
- A rose illustration (For this cookie, I modified an illustration originally by Carolyn Shores Wright, found here on the Internet. Her flowers, birds, and nature scenes are just adorable.
 )
) - Parchment paper
- Non-toxic pencil (I used a pencil for kids. Staedtler is a good choice.)
- Assorted gel colors and dusting powders (see image below)
- Paint brushes and palette
- Vodka, alcohol rejuvenator spirit (such as this brand), or alcohol-based extract
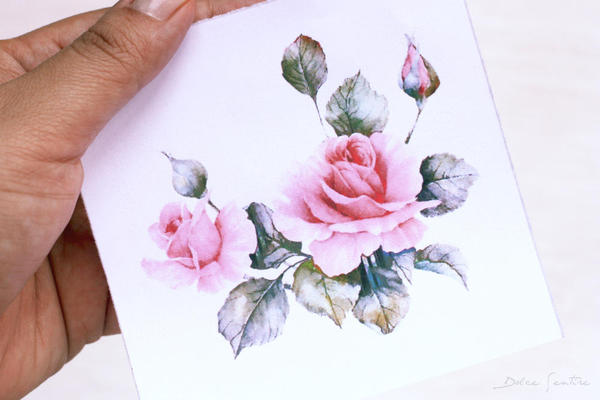
Colors:
I used four shades of burgundy for the rose, and another four of green for the leaves. Color formulas and brands are indicated below.
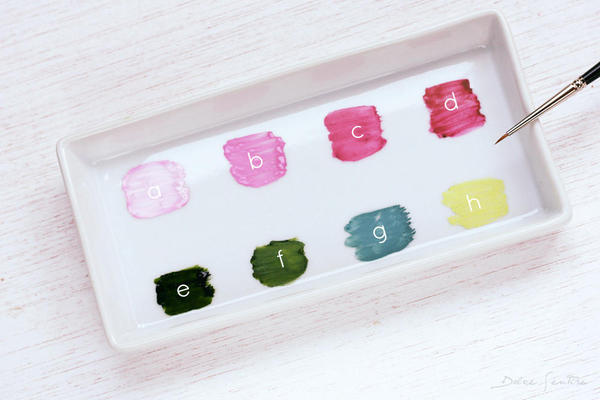
a. 1 part AmeriColor Burgundy + 3 parts Sugarflair White Dust
b. 1 part AmeriColor Burgundy + 2 parts Sugarflair White Dust
c. 1 part AmeriColor Burgundy + 1 part Sugarflair White Dust
d. AmeriColor Burgundy
e. Wilton Moss Green
f. 1 part Wilton Moss Green + 1 part Sugarflair White Dust
g. 1 part Sugarflair Eucalyptus + 1 part Sugarflair White Dust
h. Rainbow Dust Citrus Green
Before you start, there are a few things I've learned about painting on royal icing that you should consider:
1. The royal icing on your cookie should be dried rock-hard. Too much moisture on your brushes can quickly dissolve the icing, so please use a not-too-thin icing that hardens fully.
2. I prefer mixing colors with vodka rather than water. Colors dry with a matte finish, but the high alcohol content in vodka (or alcohol-based substitutes) makes it evaporate quickly.
3. I also prefer matte dusting powders and gel colors. Mix them with vodka, making sure colors have a paste-like consistency. Not too dry, not too wet.
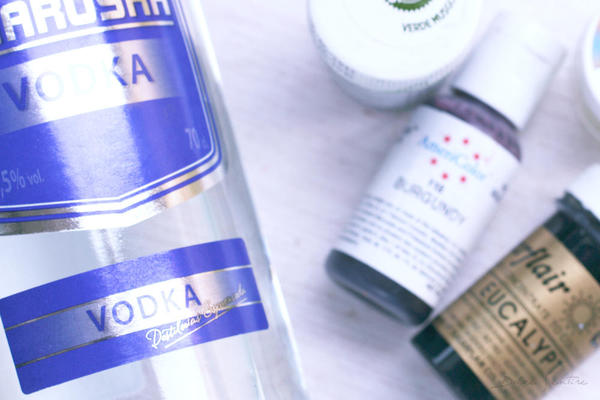
4. Please, only use quality brushes. You don’t need to spend too much, but if you buy inferior ones, they quickly lose their shape and you can be disappointed with their results. And what makes a high quality brush?
- Lacquered or enameled hardwood handles (to prevent deterioration)
- Soft-bristled tuft (the actual brush)
- Seamless and gold-plated brass ferrule (the part of the brush that connects the handle to the tuft)
- Maintains its shape after each use
Sable hair brushes (i.e., red sable aka Kolinsky "sable") make the best choice for cookie painting and, if you properly care for them, will maintain their shape and texture for years. If price is an issue, some high quality synthetics (nylon or polyester) can also do a great job.
My brushes are Rembrandt: 100% red sable with a resilient tuft and short, black-lacquered handle.
Round brushes (#0 in the image below) are preferred: they are versatile insofar as they are quite well-suited to detail work (i.e., small accents and delicate lines), but also good for broader strokes. My favorite ones are the spotter brushes (#4/0, #5/0, and #10/0 in the image below), which are small round brushes with shorter bristles for extra control.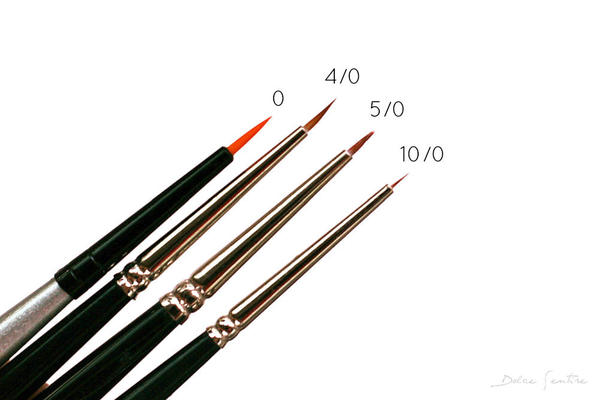
OK. I’m ready! And you? ![]()
Let’s start!
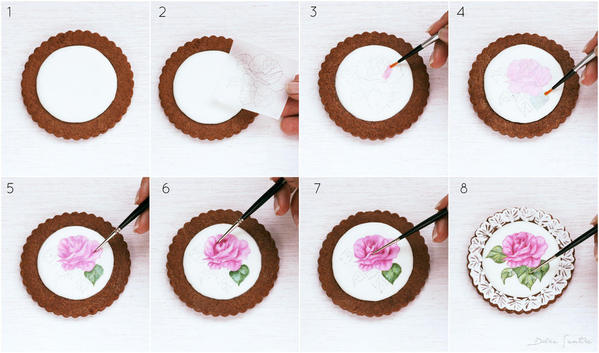
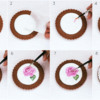
Steps 1 and 2: Begin by tracing the illustration on a cookie flooded with white icing (image 1). Again, the icing should be completely dry. Use a Kopykake, the Camera Lucida app, or . . . a simple (and inexpensive ![]() ) little piece of parchment paper where the rose was previously traced (image 2).
) little piece of parchment paper where the rose was previously traced (image 2).
For the paper transfer technique, first print the reverse image (using a photo editor program like Paint, Photoshop, or PicMonkey, a very intuitive online editor) and trace it with pencil on parchment paper. Then place the pencil-side down on the cookie, and trace over the image again to transfer the pencil marks to the cookie. Be sure to use a non-toxic pencil, as noted above.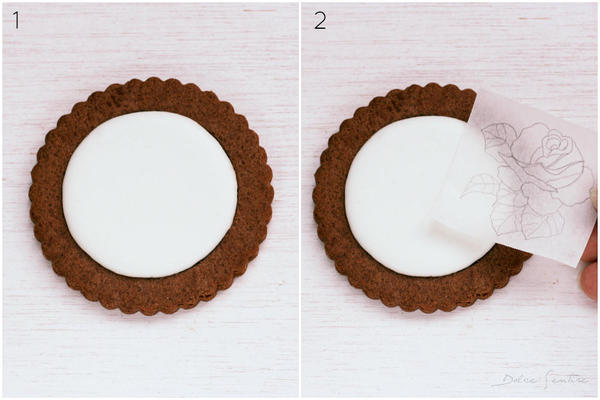
Steps 3 and 4: Once you have traced the rose on the cookie, put the colors on the palette and mix them with a few drops of vodka (just for painting, okay? ![]() ). Remember: too much vodka on the brush can create a crater in the underlying icing, and you don’t want to start over on a new cookie, right?
). Remember: too much vodka on the brush can create a crater in the underlying icing, and you don’t want to start over on a new cookie, right? ![]() Make sure to dab off any excess alcohol on a paper towel.
Make sure to dab off any excess alcohol on a paper towel.
Now, you can start to base-coat the rose with the lightest color (image 3, color a). You don’t need to be concerned with coloring the entire rose or shading yet. You can even leave a few areas white; you’ll do enough blending later!
Leaves: Base-coat them using a mid-tone green (image 4, color g). If you wish, you can leave some white spaces as highlights. (Please, keep in mind that I‘ve just painted a single leaf of the bouquet as an example.)
Steps 5 and 6: It’s important for you to learn to "read" the illustration with your eyes before painting your cookie, because it will give you an idea of where the mid-tone and darker colors and shading should go. Once you've identified those areas, color them appropriately, i.e., with a mid-tone burgundy (image 5, color b) or with a deeper tone of the same color (image 6, color c).

Leaves: Add depth on the lower half of the leaves and on leaves that are toward the back of the rose using a deep green (image 5, color f). Add some points of light with the lightest color (h) and then go back with the mid-tone color (g), blending the three colors together.
Steps 7 and 8: This is the “crucial” moment when your rose becomes more life-like by adding final touches, such as blending, texture, and lighting effects (as we started to do with the leaves in Step 6). So go back with the first color (a), the lightest one, and blend the colors (a, b, and c) together with small, circular motions in order to create a fade effect. Add some points of light on the petals too (image 7).
Then, using the darkest tone of burgundy (color d), color the areas that are toward the back or bottom of the rose, the deepest recesses of the rose, and the parts where petals cast shadows on other petals (image 7, color d). Finally, blend and fade again with the mid-tone color (b), and then add delicate borders with a fine brush (I’ve used #10/0) and the deepest tone of your palette (color d).
Leaves: Now, with the darkest green (e), keep on adding depth where some leaves (or petals) cast shadows on leaves below them and then blend/fade the dark green tone with the mid-tone green (g) (image 7). Finally, add delicate borders and veins with the fine brush and the deepest tone of your palette (image 8, color e).
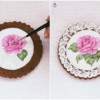
Complete your project with a brush embroidery frame (image 8) or another border of your choice.

Of course, the coloring, blending, and shading techniques that you have learned today can be applied to other flowers like sunflowers, iris, poppies, or carnations. So get creative!
Quick photo recap:
I hope you found this tutorial useful!
Now, excuse me, but I'm hearing Bruno barking. ![]()
![]()
Cookie and photo credits: Aixa Zunino

 Aixa Zunino is the soul of Dolce Sentire, a virtual corner of sweetness and creativity dedicated to cookie decorating. On her site, this garden engineer, self-taught decorator, and lover of flowers and animals lets her imagination fly, sharing everything she has learned since discovering the world of cookies in early 2012. She combines this activity with courses around Spain (her current home) where she teaches all the secrets to getting dreamy cookies. Meet her on Facebook or her website, and email her your cookie decorating questions or concerns at dolcesentiredolci@gmail.com.
Photo credit: Aixa Zunino
Note: This article expresses the views of the author, and not necessarily those of this site, its owners, its administrators, or its employees. To read more Cookie Connection tutorials, click here.







Comments (50)