 With winter now in full effect, I've been thrilled to catch a rare glimpse of snow on the far hills across the valley. Snow angels are an iconic and joyful celebration of the winter season. I imagine happy children thrashing in fresh powder with huge grins on their faces, uncaring of the cold snow that is probably working its way beneath their layers of warm clothing. And when they’re satisfied with the angel-like indentations they’ve left in the snow, maybe they go back inside for a warm mug of cocoa. It sounds pretty fun to me.
Supplies:
- Snow Angel Design Template (See “Files” in “Attachments” at the end of this post.)
- Parchment paper
- Royal icing (I used AmeriColor gel paste coloring to tint the icing.):
- Stiff-consistency orange (Electric Orange)
- Stiff-consistency pink (1 part Burgundy/1 part Electric Pink)
- Stiff-consistency dark gray (Super Black)
- Stiff-consistency peach (1 part Dusty Rose/1 part Ivory)
- Stiff-consistency reddish-orange (2 parts Electric Orange/1 part Super Red)
- Stiff-consistency white
- Tips:
- Flat paint brush
- Large (4-in/10.2-cm) round cookie
- Offset spatula
- Powdered sugar
- Fine mesh strainer
- Extra small (1/2-in/1.3-cm diameter) silicone hemisphere mold (optional)
Step 1: Pipe pants of child royal icing transfer
Note: The entirety of the child will be piped as a royal icing transfer, meaning it will be piped separately on parchment paper, dried, and then transferred to the cookie.
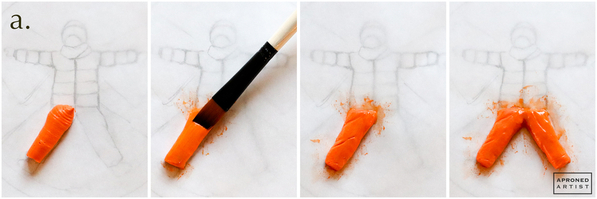
a. Print out the Snow Angel Design Template (located in “Files” at the end of this post), and place the image beneath a piece of parchment paper. Using stiff-consistency orange royal icing and a Wilton #12 tip (or equivalent), pipe icing to fill one leg of the pants section of the design. Use the flat side of a damp flat paint brush to smooth the icing. Add a few indentations with the tip of the brush. Repeat with the other pant leg, using the brush to meld the legs together at the top. Allow the pants to dry completely (I waited overnight).
Step 2: Pipe pant creases and jacket of child royal icing transfer
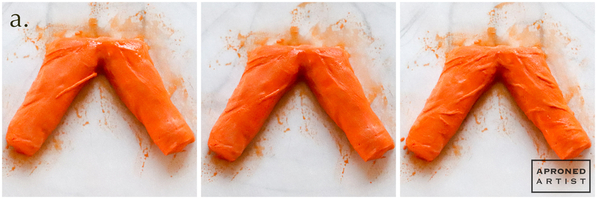
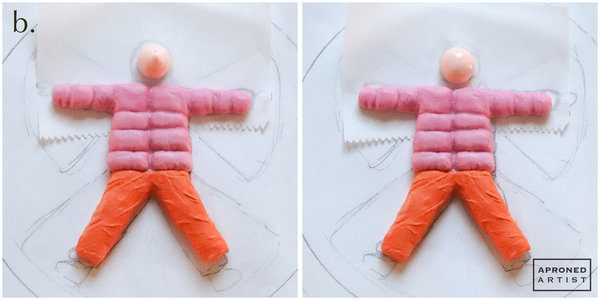
a. To create a crease in the pants, use a PME #1 tip (or equivalent) to pipe an angled line on top of the pants with the same icing used in Step 1. Use a damp paint brush to smooth the edges of the crease into the pants so that it looks like bunched fabric. Repeat, adding several creases on each pant leg.
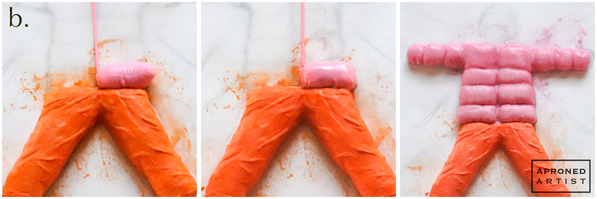
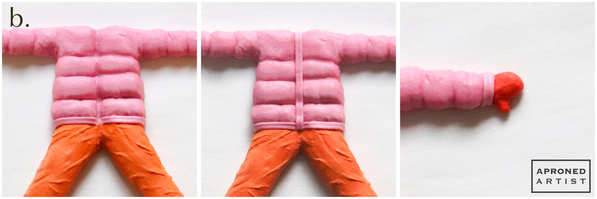
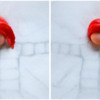
b. Using stiff-consistency pink royal icing and a PME #1 tip (or equivalent), pipe the center seam of the jacket (where the zipper would be). This line just serves as a guide and will ultimately be covered. With the same icing and a Wilton #8 tip (or equivalent), fill one of the bottom sections of the down jacket with icing (see leftmost picture below). Shape the icing with a damp paint brush (see middle picture below). Repeat with the opposite bottom section of the jacket. Once the first section has crusted slightly, pipe the adjacent section and its opposite. Continue until you’ve piped and shaped all of the sections of the jacket (see rightmost picture below). Allow the jacket to dry completely. Once dry, carefully peel the parchment paper away from the royal icing transfer.
Step 3: Pipe shoe and head royal icing transfers
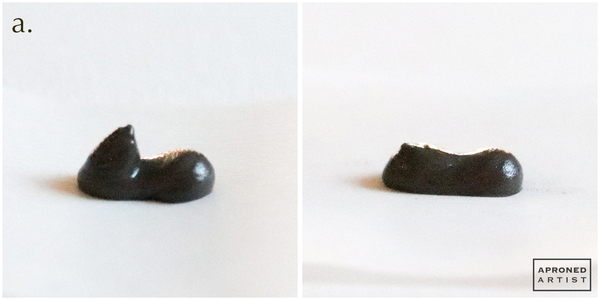
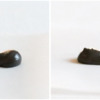
a. Meanwhile, place a small square of parchment paper over the shoes on the design template. Using stiff-consistency dark gray royal icing and a Wilton #8 tip (or equivalent), fill a shoe section. Pipe the shoe just like a bead border, but pull upward at the end rather than trailing into a tail as you release pressure (see leftmost picture below). Shape the icing with a damp paint brush, flattening the peak at the ankle (see rightmost picture below). Repeat to create a second shoe.
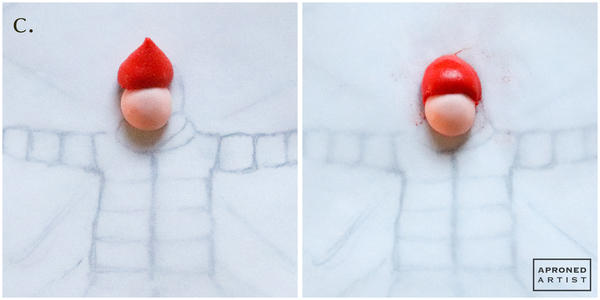
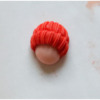
b. Place a clean square of parchment paper over the snow angel design template. Use stiff-consistency peach royal icing and a Wilton #12 tip (or equivalent) to fill the face section of the template. Shape and smooth the icing with a damp paint brush. (The face should not touch the body at this point; I kept the body close to evaluate the proportions, but it can be removed from your workspace for the moment.) Allow the face to dry.
c. Using stiff-consistency reddish-orange royal icing and a Wilton #12 tip (or equivalent), fill in the hat section of the design, overlapping the top of the face slightly. Shape the icing with a damp paint brush. Allow the hat to crust for a few minutes before proceeding.
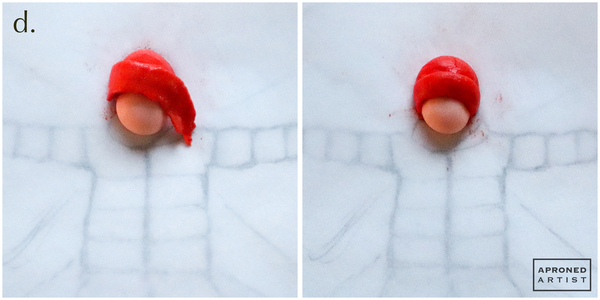
d. With the same reddish-orange icing and a Wilton #44 tip (or equivalent), pipe a band across the bottom of the hat. Shape the band with a damp paint brush, tucking the ends beneath the sides of the face. Allow the head transfer to dry completely.
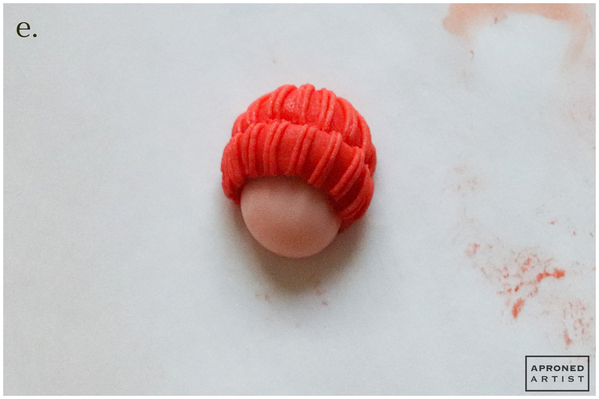
e. Once dry, pipe two adjacent vertical lines on the rim of the hat with reddish-orange icing and a PME #0 tip (or equivalent). Leave a small gap before piping two more vertical lines. Repeat until the rim is covered with sets of double lines. Add the same effect on the top of the hat.
Step 4: Add mittens, cuff details, scarf, and shoes
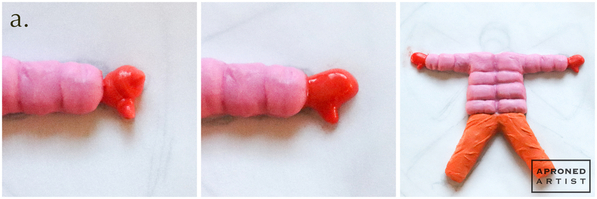
a. Place the child transfer on a clean piece of parchment paper on top of the snow angel design template. Using stiff-consistency reddish-orange royal icing and a Wilton #4 tip (or equivalent), fill one mitten section with icing. Shape the mitten with a damp paint brush. Repeat for the other mitten.
b. Add the finishing details to the jacket with stiff-consistency pink royal icing and a PME #25 tip (or equivalent). Pipe a band across the bottom of the jacket where it meets the pants. Use the tip of a damp paint brush to separate the band in the center. Use the same icing and tip to add a vertical band where the zipper would be. Finally, add a cuff where each arm meets the mitten.
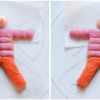
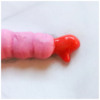
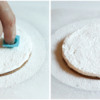
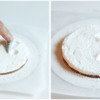
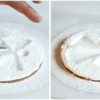
c. Before piping the scarf, place the head transfer (created in Step 3) above the neck. Using stiff-consistency orange royal icing and a Wilton #4 tip (or equivalent), pipe a line of icing that starts from above the right shoulder, covers the neckline of the jacket, and trails off before the left shoulder (see first picture below). Shape the icing with a damp paint brush, flattening it slightly (see second picture below). Allow the icing to crust for a few minutes before proceeding. Using the same orange icing and a Wilton #8 tip (or equivalent), pipe a line of icing that starts from above the left shoulder, slightly overlaps the lower scarf section, and trails off before the right shoulder (see third picture below). Shape the icing with a damp paint brush (see fourth picture below).
d. Attach the ankles of the shoes to the bottom of the pant legs with a dab of stiff-consistency orange royal icing. The flat side of each transfer (the sole of the shoe), which was in contact with the parchment paper when piped, should now stand vertically facing away from the body. With the same icing and a PME #25 tip (or equivalent), pipe a cuff covering the bottom edge of each pant leg. Once the icing has dried completely, carefully peel the parchment paper away from the finished royal icing transfer.
Step 5: Decorate cookie with snow angel indentation
a. Using a Wilton #12 tip (or equivalent), cover a 4-inch (10.2-centimeter) round cookie with stiff-consistency white royal icing. Use an offset spatula to smooth the icing. Sprinkle the top of the wet icing with powdered sugar using a fine mesh strainer.
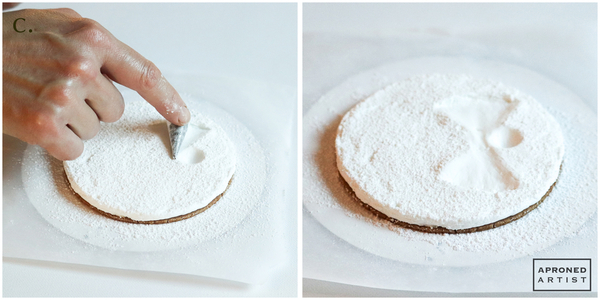
b. Immediately use one cavity of an extra small (1/2-inch/1.3-centimeter) silicone hemisphere mold to create an indentation for the head of the snow angel. (Don’t fret if you do not have this particular silicone mold; any rounded object, such as a 1/4-teaspoon measuring spoon or even a fingertip, will work just as well.)
c. Use a small round tip (such as a PME #1 tip) to create the indentation for the snow angel’s wing. Orient the tip so that the small opening is at the neck and the wide opening is at roughly a 45° angle to the head. Keeping the small opening of the tip fixed at the neck, roll the wide opening downward to create the arc of the wing. Repeat on the opposite side to create the indentation for the other wing.
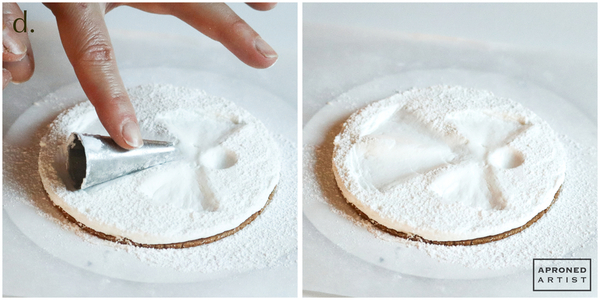
d. Use a large 2-inch (5-centimeter) tall tip (I used an Ateco #822 tip) to create the indentation for the snow angel’s skirt. Orient the tip so that the small opening sits at the waist of the snow angel and the wide opening is at one edge of the angel’s skirt. Keeping the small opening of the tip fixed at the waist, roll the wide opening toward the center of the bottom edge of the cookie. For the opposite side, pick up the tip and reorient it at the opposite edge of the skirt. Again, roll the wide opening of the tip toward the center of the bottom edge of the cookie. This will leave a thin triangle in the center of the skirt that is still raised (just as you’d have in real life if you were to sweep your legs back and forth in the snow).
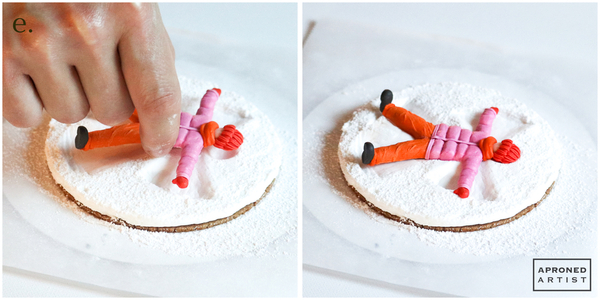
e. Place the child royal icing transfer in the snow angel indentation, nestling it gently into the soft icing.
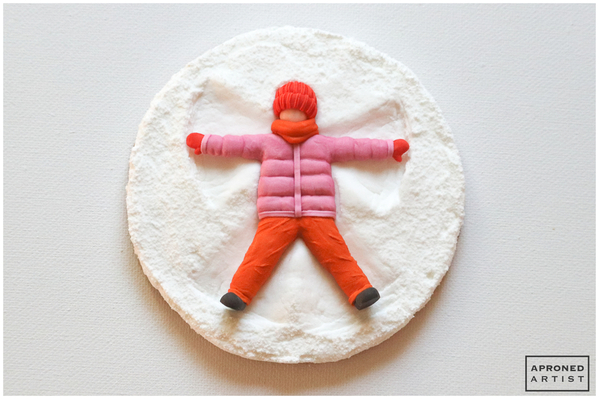
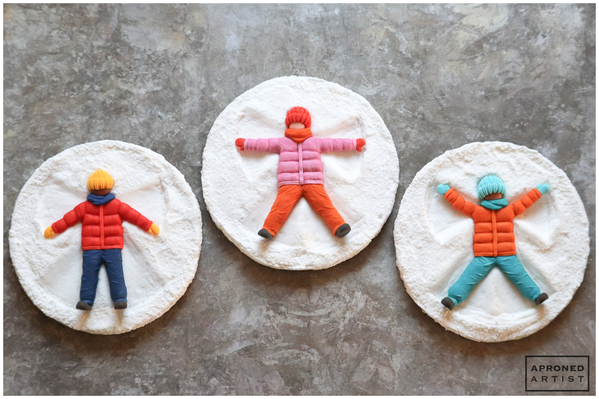
Our little snow angel is finished (and just about ready for her cocoa)!


Samantha Yacovetta began cookie decorating in 2013. While working at a local bakery, Samantha became captivated by cookie art when a customer requested princess-themed cookies. Attracted initially to the precision of cookie decorating, Samantha soon found that the limitless design opportunities turned it into her artistic passion. Samantha began regularly stocking the bakery case with decorated cookies and for several years sold cookies through her own company, Aproned Artist, a cottage food operation. Having retired from the business life, Samantha now enjoys making cookies just for fun from her home in San Jose, California, USA. To learn more about Samantha, please check out her Cookie Connection portfolio, her Facebook page, and her past Every Little Detail tutorials here.
Photo and cookie credits: Samantha Yacovetta
Note: Every Little Detail with Aproned Artist is a monthly Cookie Connection blog feature written by Samantha Yacovetta focused on the special little details that make big statements in cookie design. This article expresses the views of the author, and not necessarily those of this site, its owners, its administrators, or its employees. To read all of Samantha's past Every Little Detail tutorials, click here. And to see all of Cookie Connection's tutorials, click here.














Comments (36)