Whether you attended CookieCon this year or simply read about the happenings here on Cookie Connection, cookiers near and far have gone through some form of withdrawal since its ending! This month, I hope to ease the withdrawal symptoms and rekindle a bit of the CookieCon excitement with a special installment of How DID You Do That?
After scouring the CookieCon Sugar Show entries, I thought I'd pick a few cookies and ask their creators about them! It wasn't easy, but I've narrowed down my choices to six entries, each with its own style and techniques. There's quite a bit of ground to cover, so let's get started!
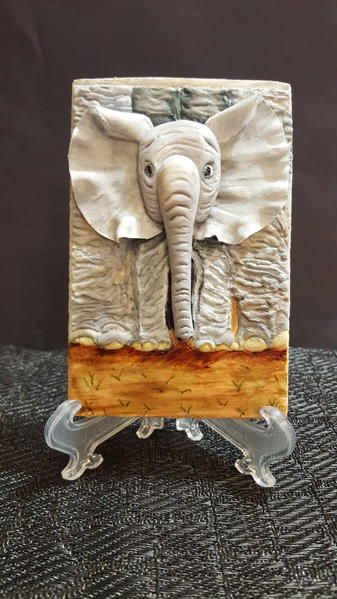
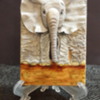
First up is My Elephants by Rachael Murray of Sassy Divine Cookie Couture.
Melissa Joy: This cookie tugged at my heartstrings, Rachael! I really loved the perspective you chose to use in this design. Starting with the base layer, can you tell us what you used for the legs and how you created their texture?
Rachael Murray: The base layer is just a thin layer of white royal icing painted on with a brush and left to dry.
The legs of both elephants are made of royal icing! I took a 15-second icing and piped random little sections. I moved around, allowing them to dry before putting on more icing, all in white. Next, when the icing was totally dry, I painted the legs with AmeriColor food colors, mostly black and white. I mix the food color into very thinned out royal icing [to make the paint]. On Mom's legs, I added a smidge of brown, using darker shades in deeper areas and lighter ones on the higher parts to create dimension. Elephant skin is not smooth, right? ![]()
The great part was that I didn't have to be overly careful. Making sure the shadowing was right was the trickiest part. Always start with less paint! You can add more later.
MJ: What are the little elephant’s head and trunk made of? And what about those adorable ears? The ears really make the whole piece for me!
RM: The head and ears are fondant. Again, white; then painted. The ears were done just like flower petals by placing rolled fondant (Satin Ice) on a piece of foam and using a ball tool to ruffle the edge. Corn starch helped to keep them from tearing, because they are very thin! His face and trunk were added after the ears. Once the fondant was dry enough, I finished painting. On fondant as thin as this was, my brush could not be very wet. I didn't want to dissolve the sugar and then have the ears tear. Slow and steady! His little eyes get me every time I see him!
He was inspired by a picture that hangs in my son's room. My son LOVES elephants!
MJ: Thanks so much, Rachael! He is SO sweet!
More of Rachael's work can be seen on her Facebook page, Sassy Divine Cookie Couture.
Cookie and photo credits: Rachael Murray
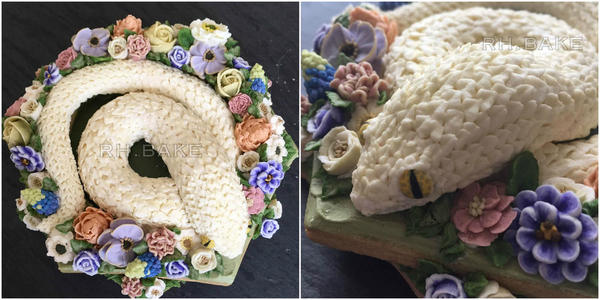
Next up, White Snake by Risa Hirashima of RH. BAKE.
Melissa Joy: Risa, you made two stunning entries for the Sugar Show, but I thought I’d ask you about your white snake in the Wildlife category. Is there a reason you chose this particular subject?
Risa Hirashima: Thank you very much, Melissa! Well, at first, I did not even think to make more than one cookie for the Sugar Show, because I was traveling to the United States from Japan. I just wanted to carry less luggage! (And I knew that I wanted to make a botanical-themed cookie for the Anything Goes category.) But I happened to have some time to play around with cookies a few days before I left for CookieCon. I made a hippo, but I did not like it, and so I played around with making a snake, and it turned out that I liked it!
I chose to decorate it in white because a white snake represents good luck in Japan; it's even worshipped as a holy animal. It was my very first CookieCon, so I hoped to get to know new, good people and to be inspired, and I wanted to have some luck! That's why I chose the white snake.
MJ: What is the snake made of, or is it all royal icing? I’d love to know how you went about building it!
RH: Cookie is inside the snake. I rolled the cookie dough around with my hands, shaped it as curved as I wanted, and then baked it. I covered it with a runny consistency of royal icing first, and made creepy eyes with royal icing transfers on parchment paper. After the snake's base icing was dry, I piped scales and put on the eyes. I did not use a tip for the scales. I wanted to use a leaf tip, but the one I had was too big for this snake, so I used a handmade piping bag as I usually do for my cookies. (My piping bags are like the parchment cones that Julia uses, but I use a different material - a very thin plastic.) I cut the end of the piping bag like the shape of a leaf tip.
MJ: I adore your little flower details. So much variety! Are they made from molds or did you pipe them all with royal icing?
RH: Thank you!! I do not use any molds for my flowers. I always hand-pipe them with thick royal icing. I mainly use #101S, #101, and #102 tips, at the biggest. I don't care which brand. I often use them upside down to create different looks, and I love mixing several colors in one piping bag.
MJ: Well, the outcome is fabulous, Risa! I'm a big fan . . . thanks so much for sharing your work with us!
You can find Risa on Facebook at rh.bake, Instagram @rh.bake, and her blog, Sweeter Life. The blog is in Japanese, FYI! ![]()
Cookie and photo credits: Risa Hirashima
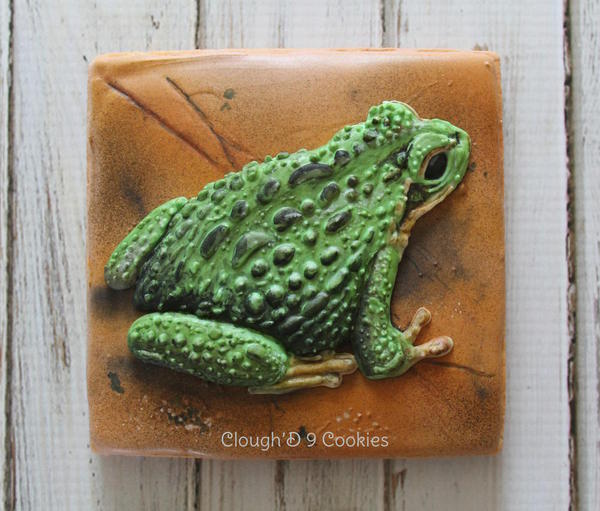
My third pick for you to admire is Frog by Amy Clough of Clough'D 9 Cookies!
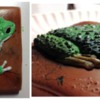
Melissa Joy: This cookie caught my attention because it was SO REALISTIC. I studied it for a long time at CookieCon! I’m not sure what makes it so . . . maybe the dimension or the detailing, or both? Or basically your genius and talent! Amy, how did you go about making this frog, from beginning to end? Did you use a photo as a guide? It is really fabulous!
Amy Clough: Thank you for inquiring about my frog cookie! I absolutely love how it turned out! When I read about the Sugar Show categories for CookieCon 2015, I knew I did not want something cute and furry for the Animal category. I wanted something a little on the grosser side - insects, reptiles, amphibians, etc. I wanted to mimic the textures those creatures have. A Google image search of those animals ensued, and I looked for something that struck my eye.
I found a photograph of a frog that became my guide for creating this piece. I started by baking a square cookie, and used a zester tool [aka Microplaner] to make the edges clean and straight. Next, tan royal icing became the base of the cookie. Before the base dried, I added additional dots and dabs of royal icing and used a scribe tool to create the textures of the leaf upon which the frog sits. Airbrushed ivory and warm brown coloring and dry-brushed petal dusts added color variations to the leaf.
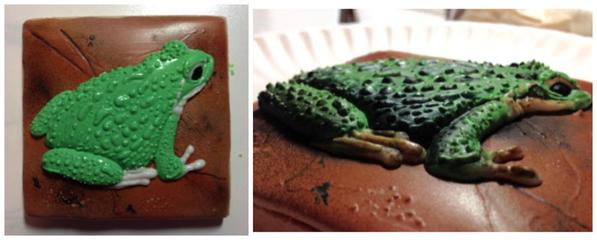
Once the leaf was complete and dry, I started on the frog. I created a drawing of the frog using the photograph as a guide. I projected my drawing with my Kopykake to ensure that placement and proportions stayed accurate. The frog was piped in four sections, with some drying time in between each section. Light green and light ivory royal icing were used for the frog, and the eye was piped in black royal icing. The first sections that I piped were the head and main body, followed by the front leg. The back legs were added after the main body section had crusted.
The royal icing was on the thicker side, around a 20- to 25-second consistency. As each section was piped, I continued to add dabs of icing to create the bumpy texture of the frog’s skin.
After the frog had dried completely, I painted all of the additional details using gel food colors and petal dusts mixed with vodka. Finally, thinned corn syrup added a tiny bit of shine to the frog’s bumps. The entire project took about two hours to create, not including baking and drying time.
MJ: It turned out amazing, Amy! Thanks for sharing with us!
You can find more of Amy's work on Facebook at Clough'D 9 Cookies & Sweets, Instagram @amycloughd9, and her website, cloughd9cookies.com.
Cookie and photo credits: Amy Clough
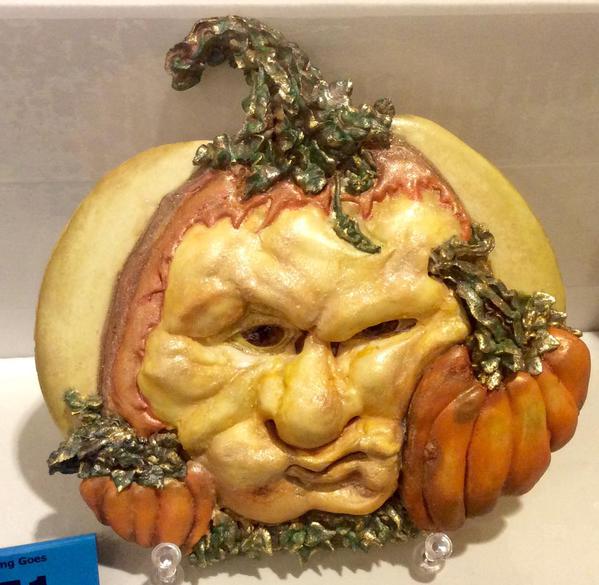
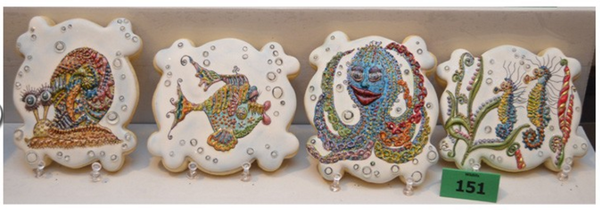
I couldn't decide which of the cookies made by the next entrant to feature, so I selected TWO: The Pumpkin and Sea Creatures by Teri Lewis of tweets...cookie connection!
Melissa Joy: Teri, you pretty much cleaned up with your Sugar Show entries, and well deserved! Congrats on all of your wins! I decided to ask you about two of your winners, because I think they include several techniques that would be of interest to our readers.
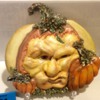
With regard to The Pumpkin (a third place winner in the Anything Goes category), can you tell us how you gave him such fantastic dimension, like his facial features, for example?
Teri Lewis: The Pumpkin actually took the most time to decorate due to the drying time needed between steps for building up dimension with the icing. Generally, I always flood my baked cookies with white frankenfrosting (I use Sweet Hope Cookies' recipe) and let the icing dry for at least 12 hours before I sketch any designs on it. I never use regular royal icing, as it dries too quickly where I live (in Colorado, a very arid state) and becomes difficult to work with as a result. Since I paint all of my cookies, frankenfrosting is a great canvas because the icing dries hard on the surface, yet stays soft on the inside, which is nice when biting into the icing. [EDITOR'S NOTE: So-called frankenfrosting is a mixture of glaze, aka confectioners' icing, and royal icing.]
To draw the design on a cookie, I typically use either a non-toxic pencil made by Ticonderoga or a black Rainbow Dust edible marker. I will often use my Kopykake projector if I am making several of the same design.
To create the dimension in this case, I used two different consistencies of frankenfrosting: a 20-second and a toothpaste consistency for creating the "botox" look in the cheeks, nose, mouth, forehead, and eyes. I used bottles with PME #0 and #1.5 tips and literally injected the toothpaste consistency icing into the 20-second icing where I wanted added dimension. A fine scribe tool was my best friend for removing all air bubbles and moving the icing around into small spaces to create specific areas of depth. When the icing didn't dry as smooth as I liked, I used a barely damp filbert paint brush to smooth it out. I don't like the brush to be too wet, as pits and craters will occur in the frosting. And so I proceeded, basically building up the different sections of the face with 20-second and toothpaste-consistency frankenfrosting and smoothing, as needed, with the damp brush until the face was as I wanted it.
MJ: What did you use to get that sheen on the entire piece? Anything specific used for the gold detailing on the foliage?
TL: The dimension on the pumpkin stem and foliage was created with a PME #ST52 leaf tip and stiff consistency frankenfrosting. Once the icing was completely dry (8 to 12 hours), I painted with luster and petal dusts from CK Products, Crystal Colors, and Wilton. I typically mix a 50-50 ratio of luster dust to Everclear alcohol, as the alcohol dries very quickly. The luster dust paints are what created the wonderful sheen.
The gold highlighter dust (used on the edges of the foliage) is from Divine Specialties, and was also mixed in a 50-50 ratio of dust to alcohol. I highlighted the edges with a small liner brush.
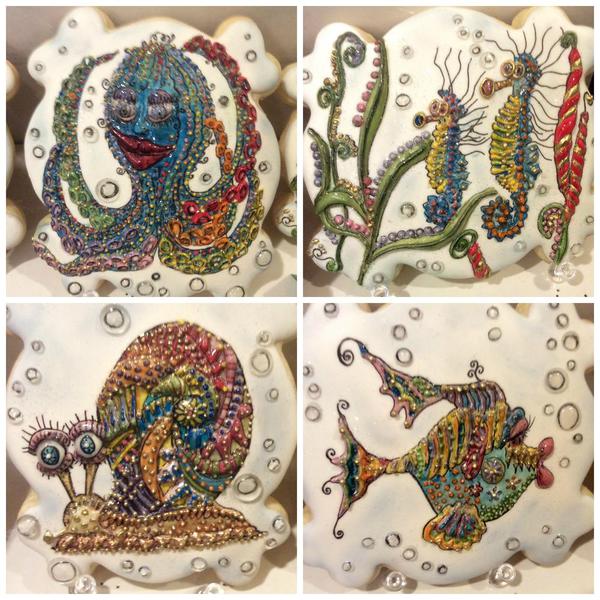
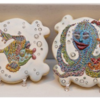
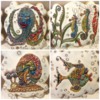
MJ: Another great winner - this time, first place - was your Sea Creatures set in the Wildlife category. The vibrant colors were what stood out most to me in this set. (The pictures below don’t do them justice!) Were these colors achieved with tinted royal icing or were they painted on with food coloring? If painted, what brand did you use? Each cookie had a wonderful shine to it as well - the details almost looked like tiny jewels. How did you attain that result?
TL: My Sea Creatures set in the Wildlife Category was so much fun to create! I love animated art and very bright colors . . . the more shimmer, sparkle, glitter, and shine, the happier I am decorating! I used a combination of luster dusts from Crystal Colors (Peacock, Carrot, Candy Lime, Violet, Red, Pink, Yellow, Copper, Bronze, and Gold Highlighter), extended into paints, to create the vibrant colors.
Some of my favorite plaque cutters are from Truly Mad Plastics, so for this project, I used their large #28 plaque cutter. After flooding with 16-second frankenfrosting and drying for 12 hours, I drew the sea creature designs on each cookie with a fine-tipped black Rainbow Dust edible marker.
Then I piped circles, dots, triangles, eyes, lips, and lines with a PME #1 tip and 20-second frankenfrosting. Once the dimensional piping was dry, I painted with luster dust and gold highlighter colors; then re-outlined the areas with the black Rainbow Dust marker. And once the painted colors were dry, I applied a light coat of corn syrup and water (50-50 ratio) to the areas that had dimensional piping, i.e., the eyes, lips, dots, circles, etc. The colors really popped with the shine of the corn syrup, especially the eyes and lips.
To create the bubbles, I boiled a mixture of 1/2 cup fine sugar, 1/3 cup corn syrup, and 2 tablespoons water for about 3 to 4 minutes. (You don't want the mixture to overcook or to start to turn golden!) Next, I poured the very hot mixture into a doubled-up parchment cone, filling it about one-third full. (Be sure to hold the cone with thermal baking mitts!) I then rolled down the parchment cone and snipped a very teeny opening in the tip. Quickly, I piped different size dots on a wax paper-lined baking sheet, and let them set about 2 hours before removing them from the paper. (This mixture will not set as hard as isomalt, which makes it much easier on the teeth.)
Prior to placing the bubbles on the cookie with a little dab of corn syrup, I drew circles on the cookie with the black Rainbow Dust marker to give a little depth and dimension to the bubbles.
To finish the cookie, I used a small filbert paint brush to rub the edges with a tiny amount of dry Fairy Blue luster dust (CK Products), and to apply a little Baby Blue disco dust (CK Products) to give the "water" around the creatures a subtle shimmer.
MJ: Thanks for sharing your process with us, Teri, and congrats on your many wins at CookieCon!
You can follow Teri's work on Facebook at tweets cookie connection.
Cookie and photo credits: Teri Lewis
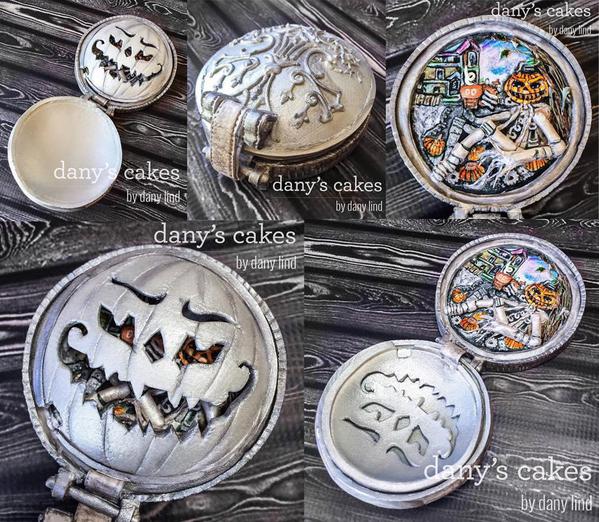
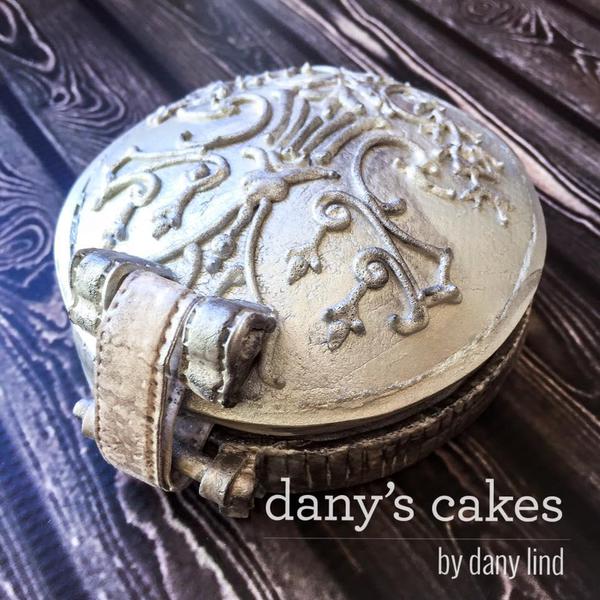
And finally, readers, I chose Halloween Pocket Watch by Dany Lind of Dany's Cakes. I've interviewed Dany in the past for this column, but I couldn’t help it . . . I had to ask her about this cookie. You’re not disappointed, right? Talk about an incredible piece of cookie art! I mean, it has several layers, opens and closes, and is entirely edible. I don’t think it merely sitting on the Sugar Show table did it justice, which is why I asked Dany to break down the elements of her entry for us!
Melissa Joy: Dany, can you tell us the inspiration for this piece, the different materials you used to make it, and how you put it all together? People need to know more!
Dany Lind: This piece is based on the unique metal art of Sue Beatrice of All Natural Arts. As soon as I saw it, I was fascinated by the idea of making her amazing metal compact into a cookie. But I didn't want to do just the inside with the pumpkin-head character . . . I wanted to do all of the interlocking pieces WITH a hinge, AND make it all edible. AND travel with it on a plane to Salt Lake City. Go big or go home, right?
I started out with the cookie base by using edible marker to sketch in some details and then piping royal icing for depth. This is the point where I usually say, "This might suck," but I kept going.
Then I created even more dimension by adding a gumpaste leg and hand. I then started painting in the details and adding wafer paper grass and branches, and SugarVeil claws and body details. I strayed from the original artwork in some of the details, but tried to be true to the feeling of the piece. The outer edge of the cookie was scored gumpaste, which I needed to let dry very hard to withstand the pieces that would close over the top of this base.
The next part, the jack-o-lantern face layer, proved to be the most difficult. I ended up hand-shaping it out of gumpaste by placing a gumpaste circle on an overturned bowl and supporting the center of the circle with cling wrap to give it a more pronounced curve. (It was very scientific. ![]() ) I realized after it had hardened that the pumpkin-head guy's leg underneath was too high, and this piece would not fit. And the whole thing was a little too small. So I cut out a notch for the leg, added a layer of gumpaste as an edge, and moved on to the lid and hinge.
) I realized after it had hardened that the pumpkin-head guy's leg underneath was too high, and this piece would not fit. And the whole thing was a little too small. So I cut out a notch for the leg, added a layer of gumpaste as an edge, and moved on to the lid and hinge.
The gumpaste lid was shaped pretty much like the middle jack-o-lantern face piece, with care taken to make sure that face would fit snugly inside the lid. The hinge was made out of gumpaste-covered spaghetti (desperate measures in desperate times) and SugarVeil "leather" strapping. I had to figure out a way to make an edible hinge that was sturdy enough to travel; my vision was to have it stable enough so that people at the Sugar Show could open and close the watch.
Once I was done constructing all of the pieces, I dusted the surfaces with silver luster dust, and then airbrushed it silver for a super-metallic sheen. By the time I got this piece to the Sugar Show, the SugarVeil strapping - which had worked well for days at my house in Maine - had dried out and broken in the desert air of Salt Lake City. I repaired it, but when I set it up at the show, my hands were shaking so badly that I couldn't even push a pin into cardboard. I also realized very quickly that I had no idea how to display this piece. Without the strapping holding the hinge securely together, my interactive piece had to be displayed to show each part in a static display. I repaired the strapping every day at the Sugar Show, but I'm still disappointed that it didn't display as perfectly as I had planned.
Thanks for asking me about my cookie, Melissa!
MJ: Thank you for breaking it down for us, Dany! Amazing work!
Follow all of Dany's creations on Facebook at Dany's Cakes and on Instagram @danyscakesbydanylind.
Cookie and photo credits: Dany Lind
WHEW! Thank you for sharing your processes with us, ladies, and kudos to ALL who participated in the Sugar Show at CookieCon this year. The 2015 entries did not disappoint!
A Note from Melissa Joy: I'm sorry to say, this will be my last How DID You Do That? post for Cookie Connection, but what a way to go out! I will still be baking and creating, but wanted to focus on things here at home more . . . something had to give! Thank you, Julia, for allowing me to be a part of the Cookie Connection team over the past year. It was great fun to interview such wonderful cookie artists who were generous enough to share their secrets, and to have all of your sweet members follow along. Thanks, guys, and continue making beautiful things!
[EDITOR'S NOTE: Thank YOU, Melissa, for being such a fabulous contributor. You will sorely be missed on our team, but I wish you all the best in your future endeavors, and, of course, hope to continue to see your lovely cookies posted on Cookie Connection!]

 Melissa Joy Lacasse has always had a passion for baking just about anything, but something clicked once she received a cookie decorating kit years ago. This pastime that started as holiday cookies for family and friends eventually turned into Melissa Joy Fanciful Cookies, a Facebook page, and most recently, the blog melissajoycookies.com. While Melissa enjoys the creative outlet that cookie decorating brings, she finds that sharing with others, whether via bakery box or virtually, is always the most rewarding part of her cookie journey.
Photo credit: Melissa Lacasse
Note: How DID You Do That? is a regular Cookie Connection blog feature, written by Melissa Lacasse, which reveals through in-depth interviews the inside scoop behind cookiers' unique designs and technique innovations. Its content expresses the views of the author and interviewee, and not necessarily those of this site, its owners, its administrators, or its employees. To catch up on all of Melissa's past posts, click here.





Comments (6)