[EDITOR'S NOTE: I've got a great surprise for you! As of this post, @Aproned Artist, aka Samantha Yacovetta, has officially joined our team of Cookie Connection contributors! As you probably know from seeing her work on this site, she's made a name for herself in the cookie world with her precise work, elegant designs, and keen attention to showstopping details. So it only makes sense then that her bimonthly cookie tutorials will focus on the special little details that make big statements in cookie design. Please join me in congratulating Samantha on her new position. I am sure you will love her inaugural Every Little Detail post! It comes just in time for summer wedding season too! ~JMU]
 When I used to work in a bakery, I spent most of my days making pastries and pies. It was relatively rare that I was asked to make a wedding cake - thankfully, because I dreaded those occasions. I felt all of a customer’s bridal dreams riding on the perfection of that one cake. Whether real or self-imposed, the stress was beyond bearable.
Wedding cake cookies are a completely different story. Perhaps it’s their diminutive size that relieves some of the pressure, or maybe the abundance of them or the lack of expectations. Whatever the reason, in comparison to making wedding cakes, decorating these cookies feels as joyous as the event they honor.
- 1 large plaque cookie (I used something similar to this cutter)
- Icing:
- Flooding-consistency navy (four parts Violet, three parts Royal Blue, and one part Super Black, all AmeriColor colors)
- Stiff peach (Wilton Creamy Peach)
- Stiff light peach (add uncolored/white icing to a portion of the peach)
- Stiff uncolored/white
- Stiff dusty teal (three parts Teal, one part Super Black, and one part Ivory, all AmeriColor colors)
- Stiff light dusty teal (add uncolored/white icing to a portion of the dusty teal)
- Thick flooding-consistency (about 25-second) white
- Thick flooding-consistency (about 25-second) light dusty teal
- Stiff dark green (four parts Leaf Green, one part Royal Blue, and one part Super Black, all AmeriColor colors)
- Stiff light green (add uncolored/white icing to a portion of the dark green)
- Flower nail
- Small squares of parchment paper, for creating transfers
- Tips:
- Wilton #59s, 349
- PME #1.5, 0, 2, 00, 1
Step 1 - Flood Plaque and Make Flower Transfers
Start by flooding your plaque cookie with navy icing. Set the cookie aside to dry.
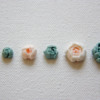
Meanwhile, create your flower transfers. Using the flower nail, parchment squares, and Wilton #59s tip, pipe peach rose transfers. (Reference Julia’s video tutorial for detailed instructions.) Use stiff peach, stiff light peach, and stiff uncolored/white icing to create an ombre effect. Begin some flowers with peach icing, and transition to light peach for the outer petals. Begin others with light peach, and transition to uncolored/white icing. Use all three colors for larger roses. Make buds, small roses with only a few layers of petals, and large roses with many layers of petals. The subtle variety of colors and sizes will add a sense of realism to the flowers.
Create the succulent-style transfers with a Wilton #59s tip, the stiff dusty teal icing, and the stiff light dusty teal icing. The technique is very similar to that for the rose, except you want your petals to be as narrow as possible. They should also sit next to each other rather than overlap, as best pictured in the first two buds to the left in the image below. Start the centers with dusty teal, and transition to light dusty teal for the outer petals. Again, create various sizes with multiple layers of petals.
Allow the cookie and flowers to dry overnight. Once the flower transfers are dry, carefully remove them from their parchment paper squares.
Step 2 - Pipe Cake Tiers and Stand
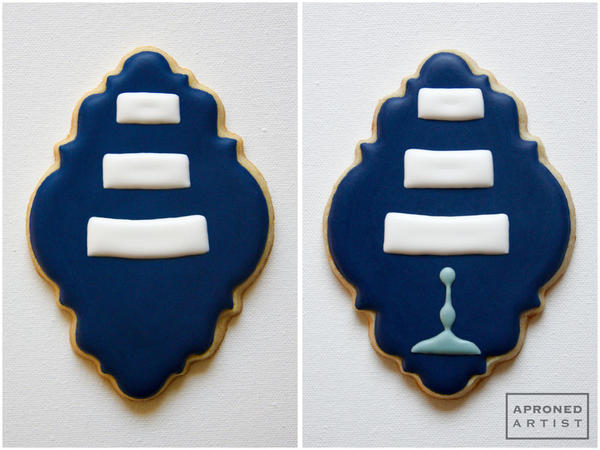
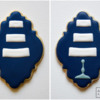
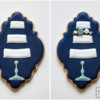
Now that your flooded cookie is dry, use thick flooding-consistency white icing and a PME #1.5 tip to pipe three rectangles with slightly rounded corners for the cake tiers. The rectangles should gradually decrease in size from bottom to top like a typical wedding cake. Leave a fair amount of space (about 1/2 inch) between the tiers.
Using thick flooding-consistency light dusty teal icing and a PME #0 tip, pipe the basic shape of the cake stand with areas that widen and narrow like a candlestick.
Let the cake tiers and cake stand dry for 30 minutes.
Step 3 - Pipe Line Details on Cake and Stand
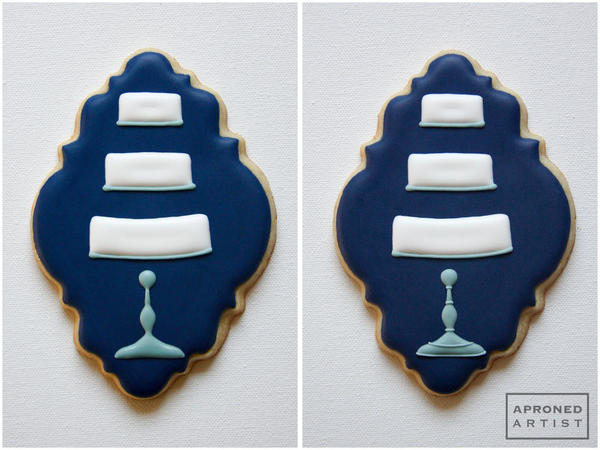
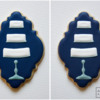
When the cake tiers are dry, use thick flooding-consistency light dusty teal icing and a PME #2 tip to pipe a line directly beneath each tier, as shown below.
Then, using the same icing and a PME #0 tip, pipe details to add dimension to the stand. Pipe a line at each section where the cake stand narrows. Pipe a curved line around the middle of the base section and another line along the bottom edge of the cake stand base. Allow everything to dry for 30 minutes.
Step 4 - Pipe Dot Details and Add Flowers
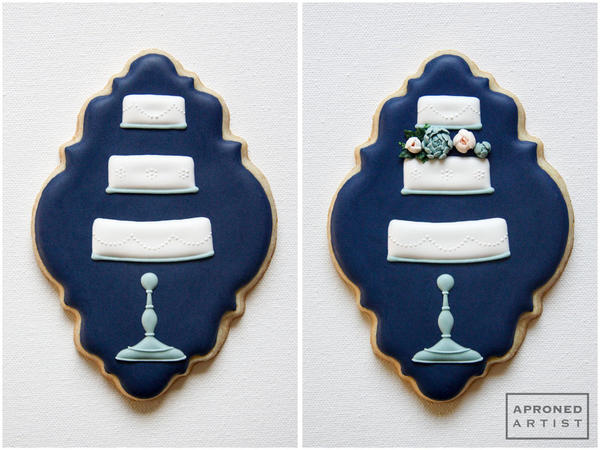
Using stiff flooding-consistency white icing and a PME #00 tip, pipe a small dot design on each of the cake tiers. (I piped swags on the top and bottom tiers and a seven-dot pattern on the middle tier.) These little dots not only add dimension, but can also camouflage any sunken areas or other imperfections in the cake tiers.
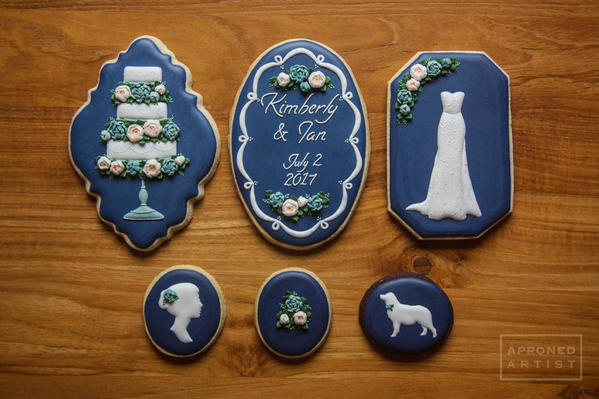
Attach the flower transfers to the areas beneath each of the cake tiers with stiff dark green icing. To fill gaps between the flowers and to add interest, pipe leaves with the same green icing and a Wilton #349 tip.
Add fern accents with stiff light green icing and a PME #0 tip. To make the ferns, pipe a dot, and drag it to a point with your tip to create a small teardrop shape, aka the central stem of the fern. Then pipe smaller leaves (teardrops) in pairs that point in opposite directions on each side of the central stem. Finish the fern frond with a single teardrop in the center of the last pair of leaves. Repeat, piping several fronds peeking out from the foliage.
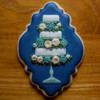
Finished! A stress-free wedding cake (cookie) as lovely as the real thing.
Source: Julia M Usher, royal icing rose tutorial

Samantha Yacovetta, the decorator behind Aproned Artist, began cookie decorating in 2013. While working at a local bakery, Samantha became captivated by cookie art when a customer requested princess-themed cookies. Attracted initially to the precision of cookie decorating, Samantha soon found that the limitless design opportunities turned it into her artistic passion. Samantha began regularly stocking the bakery case with decorated cookies and has since transitioned to running her own company, Aproned Artist, a cottage food operation. She enjoys the challenge and inspiration of creating designs that feel personal and unique to each customer. Samantha lives in San Jose, California, USA. To learn more about Samantha, please check out her Cookie Connection portfolio and her site.
Photo and cookie credits: Samantha Yacovetta
Note: Every Little Detail with Aproned Artist is a bimonthly Cookie Connection blog feature written by Samantha Yacovetta focused on the special little details that make big statements in cookie design. This article expresses the views of the author, and not necessarily those of this site, its owners, its administrators, or its employees. To read all of Samantha's past Every Little Detail tutorials, click here. And to see all of Cookie Connection's tutorials, click here.



Comments (17)