 [EDITOR'S NOTE: Many thanks to @Gingerland, aka Berni Solti, for once again so generously donating content to the site. She's been a prolific contributor of cookie art for our site banner and backdrop, but, this time, she's gone all out with this adorable guest tutorial! Enjoy! Much gratitude to Berni! ~JMU]
----------------------------------
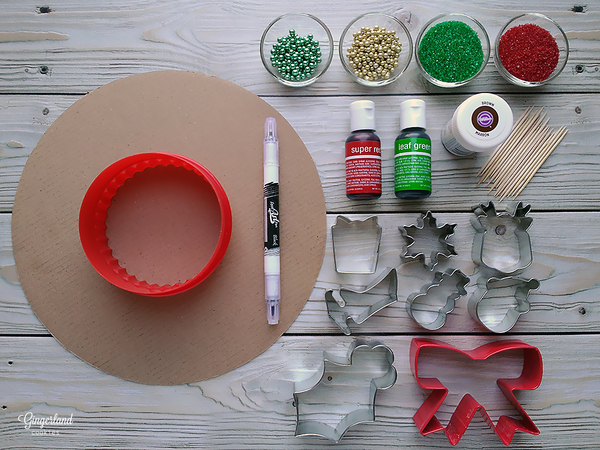
What you’ll need for this project:
- About 1 lb (500 g) honey gingerbread dough or another dough of your choice (My recipe for the former can be found here. I used a half-batch for this project, and also cut the baking soda in half to make a sturdier dough for the wreath base.)
- Rolling pin
- 1 (9-in/23-cm) round cake cardboard
- Paring knife
- 1 (4-in/10-cm) round cookie cutter
- Assorted (2 1/2- to 3 1/2-in/6.5- to 9-cm) bow and holly cookie cutters
- Assorted mini cookie cutters (i.e., gift box, snowflake, reindeer, ice skate, snowman, and/or Santa)
- About 1 lb (500 g) royal icing (I added 2 large egg whites to 500 g powdered sugar for a relatively thick icing. I then added water gradually to achieve flooding consistency.)
- Gel food coloring (green, red, and brown)
- 8 or more pastry bags
- Assorted round pastry tips (equivalent to PME #1, #2, #3, and #5) and couplers
- Toothpick (or scribe tool)
- Red and green sanding sugar
- Black edible food coloring pen
- Assorted dragées (sugar beads)
Step 1: Cut out wreath base
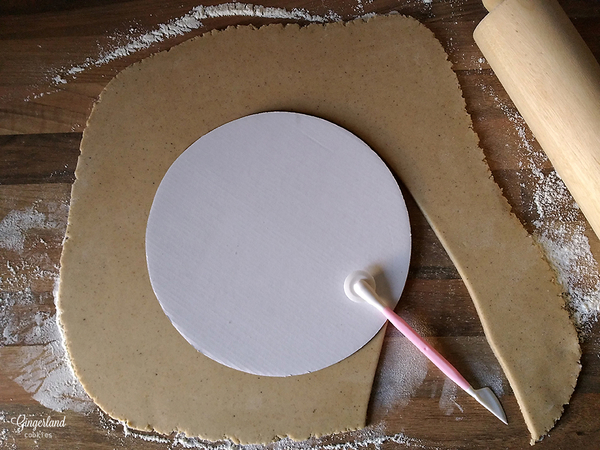
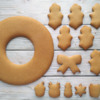
Roll out honey gingerbread dough (or another dough of your choice) to about a 3/16-inch (5-millimeter) thickness. Place the cake cardboard on top, and cut around it with sharp paring knife to create the large (9-inch/23-centimeter) base of the wreath. Use the round cookie cutter to cut a (4-inch/10-centimeter) hole in the center of the base. (Save the dough cut from the center for the shapes to be cut in Step 2.)
Note: I cut the large round on a lightly floured work surface and then moved it to the cookie sheet before cutting out the small central round. My dough was well chilled and supported by the cake cardboard when I moved it. But, as a more certain safeguard against misshaping the dough, it would be even better to cut everything directly on a silicone mat and then transfer the mat (with dough on top) to the cookie sheet.
Step 2: Cut out smaller cookies to decorate wreath base
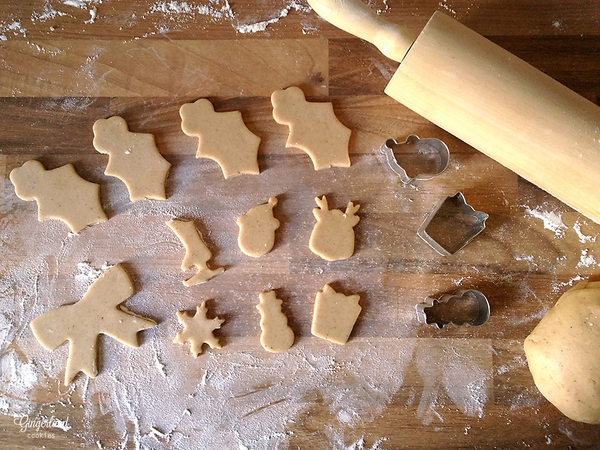
Roll the leftover dough slightly thinner (i.e., 3 to 4 millimeters, or between 1/8 and 3/16 inch, thick). Cut out 1 bow, 7 holly leaves, and about 6 assorted mini shapes using the cutters mentioned in the list above.
Step 3: Bake and cool cookies
Preheat your oven to 350°F (180°C), and bake the base of the wreath, the bow, and the holly leaves for about 8 to 10 minutes, and the mini shapes for about 5 to 6 minutes. It's best to place like-size shapes on the same cookie sheet to ensure that all cookies bake at the same rate. Cool the cookies completely before icing them in the next step.
Step 4: Prepare royal icing
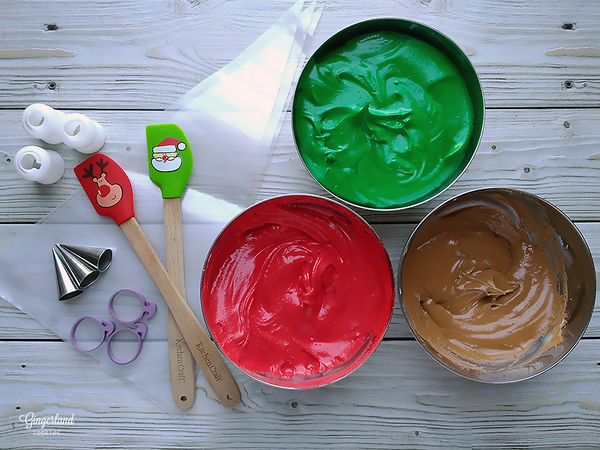
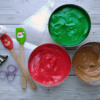
Prepare about 1 pound (500 grams) royal icing according to your recipe. Portion off about two-thirds of it, and tint it with green gel coloring. Split the remainder of the icing into three (roughly) equal portions. Leave one portion white, tint the second one with red gel coloring, and tint the last portion with brown gel coloring.
Now, portion off a small amount of each color (including the white), and adjust it to outlining consistency. (Outlining consistency should be just thin enough that a line piped with it holds its shape with little spreading.) Adjust the remaining icing (of each color) to flooding consistency. (Flooding consistency should be sufficiently loose that any "tracks" in it settle into a flat plane within seconds.)
Place the white, red, and brown icings of outlining consistency into pastry bags fitted with PME #1 round tips (or the equivalent). Place the same colors of flooding-consistency icing into bags fitted with larger PME #2 tips. Put the green outlining-consistency icing (used for the bigger wreath base) into a bag with a PME #3 tip, and its corresponding flooding icing into a bag with a PME #5 tip (or equivalent).
You're now ready to outline and flood!
Step 5: Outline and flood cookies in stages
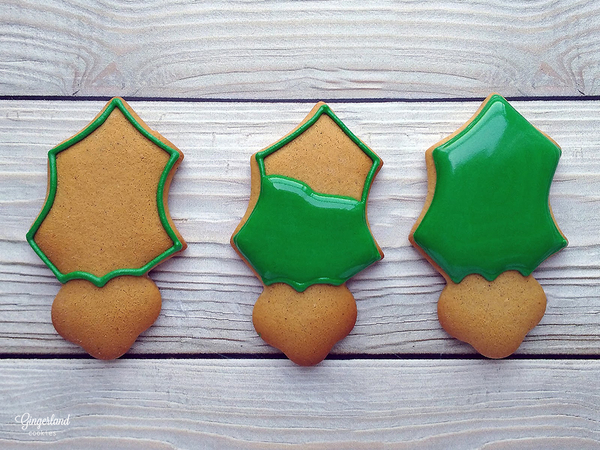
Working on one cookie at a time, outline it (or a portion of it) with the appropriate color of outlining-consistency icing; then immediately fill the interior with the looser flooding-consistency icing of the same color. (See the holly leaf example below.) Use a toothpick (or scribe tool) to correct any mistakes or to "tease" icing into tight corners.
Notes: For designs that involve two or more adjacent colors (such as the green holly leaves next to red berries, or the bow next to the box on the gift package), allow a little drying time between colors so that they don't merge together. I also coated (or "sanded") the red bow and holly berries with red sanding sugar. Just be sure to do so right after the red flooding-consistency icing has been applied, so that the sanding sugar sticks to the icing. If you plan to "sand" the red holly berries, let the green leaves dry even longer. They should be completely dry to the touch, or the red sanding sugar is likely to stick to them too.
Using flooding-consistency green icing, now with a smaller round tip (i.e., a #2 or #3), pipe a beaded border around the inner and outer perimeters of the wreath base.
Finish outlining and flooding any remaining open areas on the cookies, again allowing some drying time between adjacent sections so their colors don't merge together.
Step 7: Detail smaller cookies
Once the base cookie icings have dried, pipe or draw (with the black edible food coloring pen) additional details on the mini cookies using the next two pictures as guidelines. Be sure to pipe any line details with outlining-consistency icing (so the lines remain clean and sharp), and any dots (like Rudolph's nose) with flooding-consistency icing. Again, sand any details you want; just be sure all surrounding icing is completely dry if you don't also want sugar on it. (For instance, I outlined the edges and veins on the holly leaves and sanded them with green sugar, but only after all else on those cookies was dry.) Dragées can also be placed onto wet icing for added interest (i.e., snowman's buttons).
Step 8: Assemble wreath
Once all of the cookie details have dried, attach the holly leaves, one by one, to the wreath base. Leave an empty area for the bow at the bottom, but otherwise space the leaves evenly around the base. Use a bit of green outlining-consistency icing on the back of each cookie as "glue". Once the larger "anchor" leaves and bow are attached, arrange the mini cookies in between so that colors and shapes are nicely balanced across the wreath.

 Bernadett Solti (aka Berni to her friends and family) is owner of @Gingerland and lives in Budapest, the capital of Hungary. Formerly employed by McDaniel College, a private American college, Berni is now a stay-at-home mom to a four-year-old boy who, by the way, is the best cookie decorator ever (or so says his mom).
 ![]()
Berni grew up with a love for creating, doing everything from drawing to sewing, but she didn’t discover cookie decorating until 2012. What started as a simple free-time Christmas activity soon became a major obsession. Berni primarily works with honey gingerbread dough, as this type of cookie (perníčky) is traditional in Hungary. Berni’s favorite cookie themes are weddings and baby showers, because she’s drawn to their soft pastel hues. She also enjoys arranging cookies in artful ways and photographing them creatively so they "tell a story”. Berni recently discovered airbrushing and is now happily exploring that technique. A hobbyist decorator, Berni makes cookies and conducts workshops for friends while pursuing her larger mission of helping people understand that cookies aren’t just for Christmas! They can and should be savored throughout the entire year!
To learn more about Berni, please visit her website and Facebook and Instagram pages.
Cookie and photo credits: Berni Solti
Note: This article expresses the views of the author, and not necessarily those of this site, its owners, its administrators, or its employees. To read all of Cookie Connection's tutorials, click here.











Comments (12)