Get Inspired with Dolce Sentire: Creepy Cracked Tombstone Cookie


Halloween is quickly approaching, so it’s time to get planning for it!

The big question is . . . do you have the coolest, most scary costume of the night picked out?

And what about your Halloween cookies? They are always a hit this season. Furthermore, baking and decorating them are the perfect opportunities to get fun and crazy with our sweets and treats.

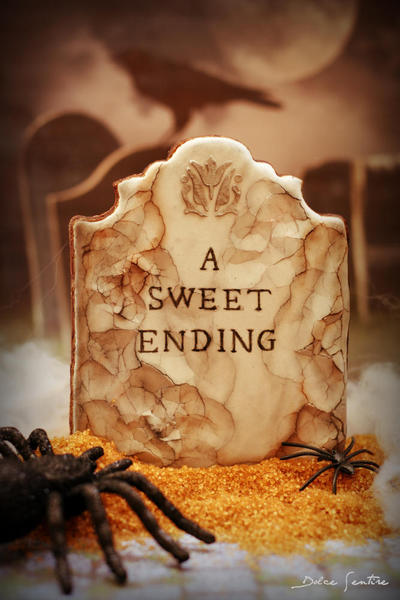
Do you want to know one of my favorite Halloween cookie suggestions? Creep out your Halloween party guests with cracked tombstone cookies!

Creepy Cracked Tombstone Cookie - Where We're Headed!

Come on!  

For this spooky project, you will need:
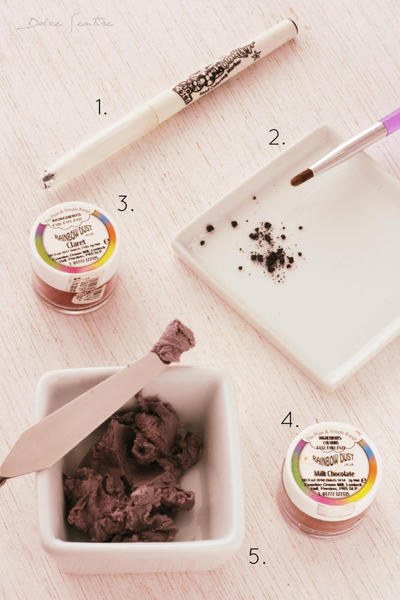
  • Pale grey flooding consistency royal icing
  • Tombstone-shaped cookie
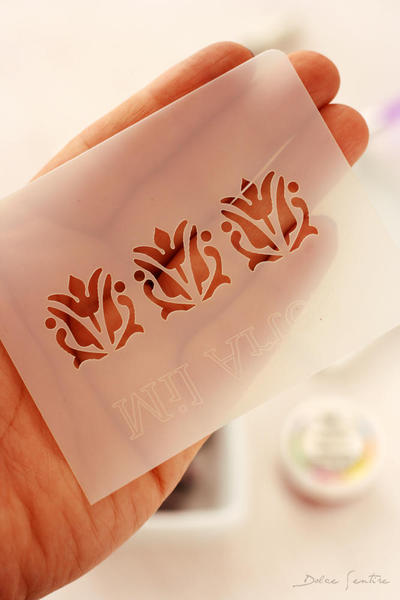
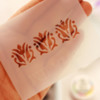
  • Damask stencil (The one I used below is from Mil Artes.)
  • Small offset spatula
  • Dark grey medium consistency royal icing (item 5, photo)
  • Black Rainbow Dust edible powder, matte (item 2, photo)
  • Dusting brush (I used a Wilton one.)
  • Claret Rainbow Dust edible powder (item 3, photo)
  • Milk Chocolate Rainbow Dust edible powder (item 4, photo)
  • Black FooDoodler fine edible marker (item 1, photo)

What you nedd for this project:Colors and Tools - Photo by Dolce Sentire

Unlike the adhesive stencil that I used in my last tutorial, I'll use a normal plastic one this time.

What you nedd for this project: A damask stencil - Photo by Dolce Sentire

Let’s get started! 

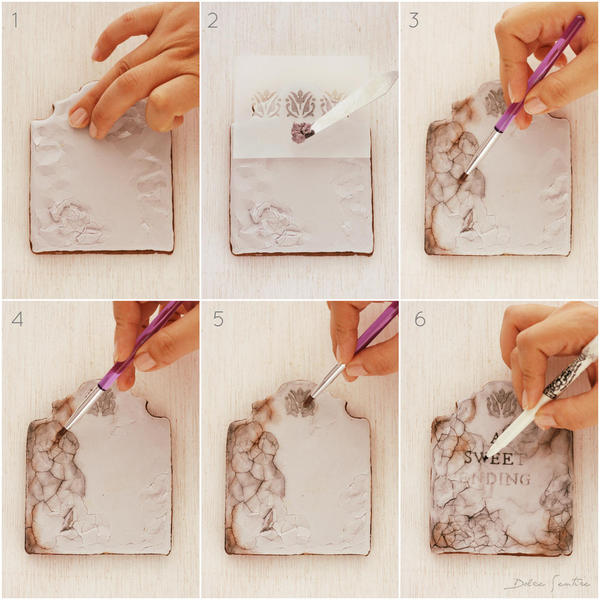
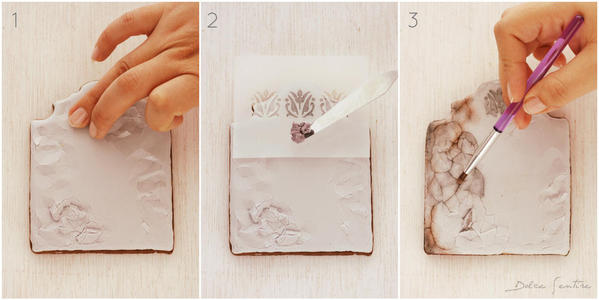
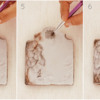
Steps 1, 2, and 3: Begin by flooding the cookie with pale grey royal icing, and let it dry for about an hour and a half (if you use a dehydrator) or four to five hours on your kitchen table (if you don’t dehydrate to dry). Please, don’t let the royal icing dry completely, because partially dry icing is important to achieving the cracked effect. After this time, gently press the royal icing with your fingers in order to break the outer, dried icing layer - and get cracking! Be careful: the underlying royal icing is probably still a little bit wet (image 1). Once you have cracked as much of the cookie as you want, let the icing dry completely.

Then, place the damask stencil at the top of the cookie, making sure it lies flat across the icing surface to ensure a crisp stenciled pattern. Using the small offset spatula, spread a thin layer of the medium consistency dark grey royal icing over the top of the stencil (image 2). Carefully remove the stencil, and let the icing dry. (Note: I only stenciled one element within the larger stencil.)

Now, dust the surface cracks with the black matte powder (image 3).

Steps 1, 2, and 3: Cookies and Photos by Dolce Sentire

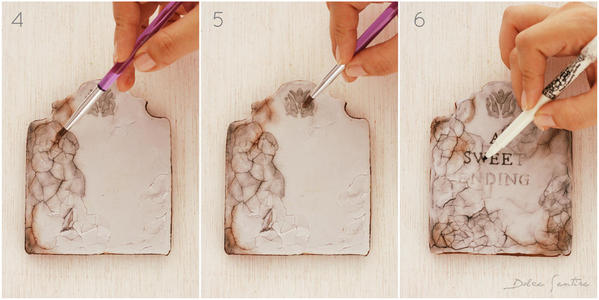
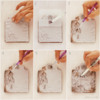
Steps 4, 5, and 6: Continue dusting the tombstone crevasses, this time with the claret and milk chocolate powders (image 4) for more depth and interest. Repeat this process by dusting over the stenciled damask element (image 5).

Finally, write the tombstone saying with the black edible marker. I first drew the letters freehand with a non-toxic pencil (I always use Staedler ones) and then drew over each letter with the fine food marker.

If you don’t feel you can draw freehand or want to use a very challenging font, you can always use the paper transfer technique. Just put your saying in that font, print it out in reverse, and trace it with pencil on parchment paper; then place the pencil-side down on the cookie, and trace over the image again to transfer the pencil marks to the cookie.

Steps 4, 5, and 6: Cookies and Photos by Dolce Sentire

Quick photo recap:

All Steps in One Spot!: Cookies and Photos by Dolce Sentire

Get creative with your sayings! On the Internet, you can find a lot of funny epitaphs, names, or quotes to customize your own tombstones.

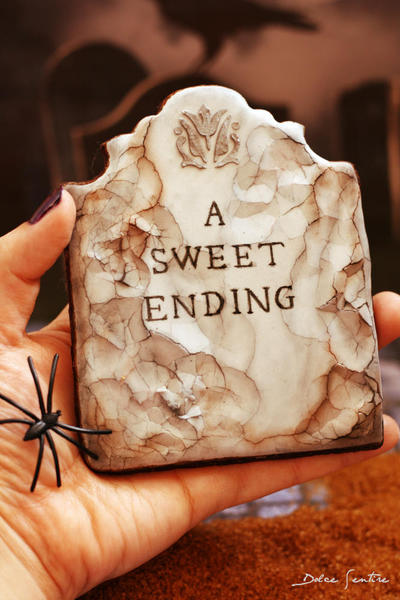
Finished!: Cookies and Photo by Dolce Sentire

Boo! Have a sweet and spook-tacular Halloween! 

Cookie and photo credits: Aixa Zunino

Aixa Zunino is the soul of Dolce Sentire, a virtual corner of sweetness and creativity dedicated to cookie decorating. On her site, this garden engineer, self-taught decorator, and lover of flowers and animals lets her imagination fly, sharing everything she has learned since discovering the world of cookies in early 2012. She combines this activity with courses around Spain (her current home) where she teaches all the secrets to getting dreamy cookies. Meet her on Facebook or her website, and email her your cookie decorating questions or concerns at dolcesentiredolci@gmail.com.

Photo credit:  Aixa Zunino

Note: This article expresses the views of the author, and not necessarily those of this site, its owners, its administrators, or its employees. To read more Cookie Connection tutorials, click here.

 

Attachments

Images (7)
  • Creepy Cracked Tombstone Cookie - Where We're Headed!: Cookie and Photo by Dolce Sentire
  • What You'll Need for This Project - Colors and Tools: Photo by Dolce Sentire
  • What You'll Need for This Project - Damask Stencil: Photo by Dolce Sentire
  • Steps 1, 2, and 3: Cookies and Photos by Dolce Sentire
  • Steps 4, 5, and 6: Cookies and Photos by Dolce Sentire
  • All Steps in One Spot!: Cookies and Photos by Dolce Sentire
  • Finished!: Cookie and Photo by Dolce Sentire

Add Comment

Comments (40)

Newest · Oldest · Popular

Wherever do you get your ideas from? That's so cool! I'm normally not someone to copy designs, but I have desperate need for cookies for the little monsters at Halloween, and this is just it! Thanks a bunch for this awesome tutorial!

smiling at Laegwen   this is so unique    and  imagonagiveitatry   hahahahaaaa   i have cookies here  walked away after flooding   wished i had not flooded   and now wondering what to do with them       looked at my stencils etc  and just guffawed       they don't work  i can't do it  lol  

sentire  you are absolutely wonderful   bravoooooo   imagonadothis yep yep yep

i'll re-coat my cookies and go from there   if it doesn't work   i can start anew    love this designnnnnnnnnnnnnnn       bravooooooooooooooo

i've cracked many a cookie icing but never intentionally     today will be intentional    lol    yep yep  imatryit   lol   as noted i have 3 cookies   plaques to be exact    already flooded in grey     so   i made a flood consistency light grey and piped on a rounded topped headstone    may not be exact   but it's what i did   lol    they are drying    no dehydrator so i'll have to wait to continue     my icing may have been too loose       what i wanted to do   was a background then the headstone    woe is me    eager as heck    i did the headstones    not sure i can pull off a background now    maybe i'll try   i can always cover it up     smirk   hahahhaaaa

i'll post my results    good or bad     hmphhhhhhhh

Originally Posted by donaharrisburg:

i've cracked many a cookie icing but never intentionally     today will be intentional    lol    yep yep  imatryit   lol   as noted i have 3 cookies   plaques to be exact    already flooded in grey     so   i made a flood consistency light grey and piped on a rounded topped headstone    may not be exact   but it's what i did   lol    they are drying    no dehydrator so i'll have to wait to continue     my icing may have been too loose       what i wanted to do   was a background then the headstone    woe is me    eager as heck    i did the headstones    not sure i can pull off a background now    maybe i'll try   i can always cover it up     smirk   hahahhaaaa

i'll post my results    good or bad     hmphhhhhhhh

this is my second reading of how to       i'll come back and read again

little steps      imabigbutug;ybaby     always worried i'll mess up     lol

Originally Posted by Adriana Lora:
Divino como siempre Aixa! Terrorificamente hermosa... a proposito... traes una araña en la mano

Gracias Adriana! siii puajjj una raña, menos mal que me avisas! <3

Originally Posted by Maria ~ Dolcelicious Bake Shoppe:

What an awesome effect! Thank you for sharing that with us...from one Dolce to another!

Thank you Dolce! (From now you'll be my Dolce twin <3)

Originally Posted by El Atelier de la Reposteria:

Estupendo tutorial Aixa, tu Trabajo como siempre impecable y hermoso, Haber si hago Una galleta con tu Técnica ,un beso guapa !! ^^

Claro que si! quiero verla, eh Muchas gracias por estar siempre ahi! un abrazo!

Originally Posted by Laegwen:

Wherever do you get your ideas from? That's so cool! I'm normally not someone to copy designs, but I have desperate need for cookies for the little monsters at Halloween, and this is just it! Thanks a bunch for this awesome tutorial!

Hmmm, I don't knoW! Hhaha, I Think it's just because I love to experiment a lot  

Let me know if your little monsters enjoyed their cracked treats! Thank you boooo!

Originally Posted by donaharrisburg:

smiling at Laegwen   this is so unique    and  imagonagiveitatry   hahahahaaaa   i have cookies here  walked away after flooding   wished i had not flooded   and now wondering what to do with them       looked at my stencils etc  and just guffawed       they don't work  i can't do it  lol  

sentire  you are absolutely wonderful   bravoooooo   imagonadothis yep yep yep

i'll re-coat my cookies and go from there   if it doesn't work   i can start anew    love this designnnnnnnnnnnnnnn       bravooooooooooooooo

Hahah, Thanks!!! every time I read you, dear Donna I have a lot of fun!! Thank you very much for your sweet words, you energy and simpathy! I wonder if you finally get the effect that you were looking for Let me know it! <3

Originally Posted by donaharrisburg:

i've cracked many a cookie icing but never intentionally     today will be intentional    lol    yep yep  imatryit   lol   as noted i have 3 cookies   plaques to be exact    already flooded in grey     so   i made a flood consistency light grey and piped on a rounded topped headstone    may not be exact   but it's what i did   lol    they are drying    no dehydrator so i'll have to wait to continue     my icing may have been too loose       what i wanted to do   was a background then the headstone    woe is me    eager as heck    i did the headstones    not sure i can pull off a background now    maybe i'll try   i can always cover it up     smirk   hahahhaaaa

i'll post my results    good or bad     hmphhhhhhhh

this is my second reading of how to       i'll come back and read again

little steps      imabigbutug;ybaby     always worried i'll mess up     lol


Great!!! I love the little changes you have done with the technique! Being creative and cool sweet experiments are the keys! I'm sure you will get a fantastic results. I'm looking foward to see your cookies Donna! 


Originally Posted by Dolce Sentire:
Originally Posted by Laegwen:

Wherever do you get your ideas from? That's so cool! I'm normally not someone to copy designs, but I have desperate need for cookies for the little monsters at Halloween, and this is just it! Thanks a bunch for this awesome tutorial!

Hmmm, I don't knoW! Hhaha, I Think it's just because I love to experiment a lot  

Let me know if your little monsters enjoyed their cracked treats! Thank you boooo!

I hope they enjoyed them, but with kids you can never be sure. I got the most feedback from the mothers, though, and they were very impressed

Hola Aixa!

Espectaculares galletas como siempre! 

Quería preguntarte si este tutorial está disponible en español, para no perderme ni un solo detalle. Quisiera saber también por favor qué marca de pinturas usas. ¡Muchas gracias!

Amore García Lorca posted:

Hola Aixa!

Espectaculares galletas como siempre! 

Quería preguntarte si este tutorial está disponible en español, para no perderme ni un solo detalle. Quisiera saber también por favor qué marca de pinturas usas. ¡Muchas gracias!

Hola Amore!

de  momento solo esta disponible en ingles, lo siento

Has probado con el traductor de Google? Funciona bastante bien.

Normalmente uso Rainbow Dust , Fratello o Sugarflair en Polvo, y Wilton, Americolor en gel/pasta


Un abrazo!

Post
×
×
×
×
Link copied to your clipboard.
×