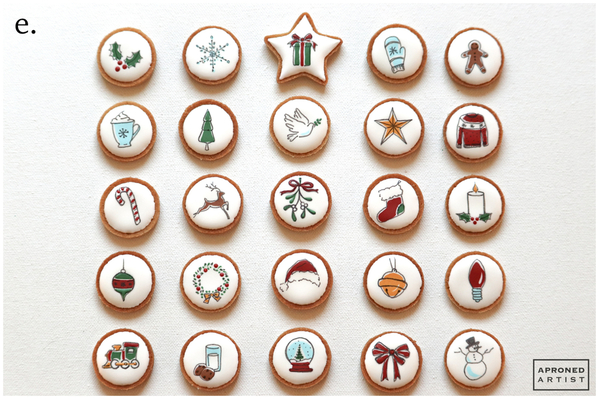
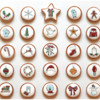
 When my kids were little, they loved advent calendars, especially ones with hidden chocolates. They’d start hounding me to buy them in the beginning of October, long before I wanted to think about the winter holiday frenzy. I assumed it was the (subpar) chocolate that appealed to them. But when I discovered a little stash of graying chocolate shapes one January, I realized that wasn’t it. Every day they would open the little numbered compartment with glee, excitedly announce their discovery (“It’s a train today, mom!”), and then toss the chocolate to the side. It was the anticipation that they loved - the countdown as we neared the big day and the little surprise behind each numbered box. Eventually, I stopped buying the chocolate advent calendars altogether. Instead, it became a tradition to make our own calendar with chained links of decorated construction paper. And yes, we’d start that calendar in the beginning of October. It spanned Halloween, Thanksgiving, both my kids’ birthdays, Christmas, and ended with New Year’s - a garland of colored paper that stretched around the perimeter of our living room and heralded the best time of the year. Like any good advent calendar, this cookie platter celebrates the countdown to Christmas with 24 little ornament cookies, each revealing a tiny holiday surprise.
- Christmas tree templates (See “Files” in “Attachments” at the end of this post.)
- Cardstock
- Cookie dough that bakes with minimal spreading*
- Small, sharp knife, for hand-cutting dough
- AmeriColor gel paste (diluted with alcohol or water), for painting: Leaf Green and Super Black
- Old, bristly round paintbrush (one you don’t mind mashing a bit)
- Royal icing (AmeriColor gel paste was used to color the icing):
- Stiff-consistency dark brown (Chocolate Brown)
- Stiff-consistency dark green (4 parts Leaf Green/1 part Super Black)
- Stiff-consistency medium green (6 parts Leaf Green/1 part Super Black)
- Stiff-consistency light brown (3 parts Chocolate Brown/1 part Gold)
- Stiff-consistency green (8 parts Leaf Green/2 parts Gold/1 part Super Black)
- Stiff-consistency light green (2 parts Gold/1 part Leaf Green)
- Flooding-consistency white
- Flooding-consistency Christmas colors (such as red, green, gold, brown, and icy blue)
- Thick flooding-consistency dark red (3 parts Super Red/1 part Electric Purple)
- Thick flooding-consistency blue (1 part Regal Purple/1 part Electric Blue)
- Thick flooding-consistency gray-green (5 parts Gold/3 parts Leaf Green/1 part Royal Blue/1 part Super Black)
- Stiff-consistency dark red (same formula as dark red above)
- Stiff-consistency blue (same formula as blue above)
- Stiff-consistency gray-green (same formula as gray-green above)
- Thick flooding-consistency taupe (2 parts Chocolate Brown/2 parts Gold/1 part Leaf Green)
- Stiff-consistency taupe (same formula as taupe above)
- Tips:
- 24 (1-in/2.5 cm) round cookies, for ornaments
- 1 (1-in/2.5 cm) star cookie, for tree topper
- Black food-safe marker
- Gold luster dust mixed with alcohol
- Large, flat paint brush
- Large sheet of acetate (I used an 11 x 14-in/28 x 35.6-cm sheet.)
- Medium, flat paint brush
*Estimate of dough quantity: This project spans roughly 12 x 17 inches (30.5 x 43 centimeters) with 25 (1-in/2.5 cm) cookies on top, so make at least enough dough for about 2 dozen (3-in/7.6-cm) cookies.
Step 1: Cut and bake tree cookies
a. Print the two Christmas tree templates, found in “Files” at the end of this post, onto pieces of cardstock. (There is one file for the treetop pieces and another file for the bottom pieces.) Cut out the tree sections (there are six of them), place them on top of your rolled cookie dough as a guide, and cut around the shapes with a small, sharp knife. If you have a large enough piece of cookie dough, cut the cookies directly adjacent to each other to help ensure that the baked pieces fit together as tightly as possible.
b. Bake your cookies according to your recipe, and let them cool completely. If you did not have a large enough piece of dough to cut the pieces next to each other, or if your cookie dough spread when baking, you may have some gaps in between the baked tree sections. Don’t worry, we'll camouflage these seams later.
Step 2: Decorate tree sections
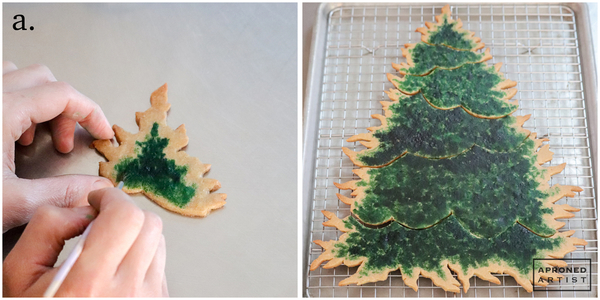
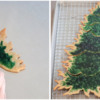
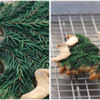
a. Add a few drops of Leaf Green gel paste and one drop of Super Black gel paste to a small dish, but don’t mix them together. Dilute the pastes with a small amount of alcohol or water. Load your old bristly brush with some green and a small amount of black, and dab the paint onto the center of an un-iced cookie section. Work your way toward the outer, irregular edges of the cookie, leaving a 1/4-inch (0.6-centimeter) border on the edges unpainted. (However, paint all the way to the bottom edge where the piece meets the next section).
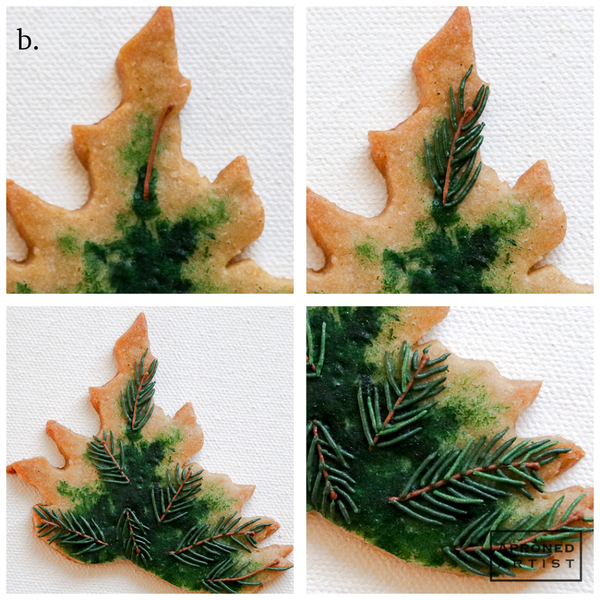
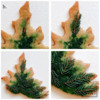
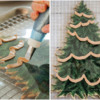
b. Next, pipe the pine needles of the tree that sit in the background. Using the stiff-consistency dark brown royal icing and a PME #0 tip (or equivalent), pipe a small teardrop that leads into a thin stem (see top left picture below). Using the stiff-consistency dark green royal icing and a PME #0 tip (or equivalent), add some short lines extending from the stem at an angle (see top right picture below). For a more organic look, pipe the short lines at slightly different angles, leaving a few gaps between the lines. Continue this process, creating dark pine branches at various spots on the painted background (see bottom left picture below). Add a few more short lines to the dark pine needles with the stiff-consistency medium green royal icing and a PME #0 tip or equivalent (see bottom right picture). Place these lighter lines in the gaps you left earlier, overlapping some of the previous needles.
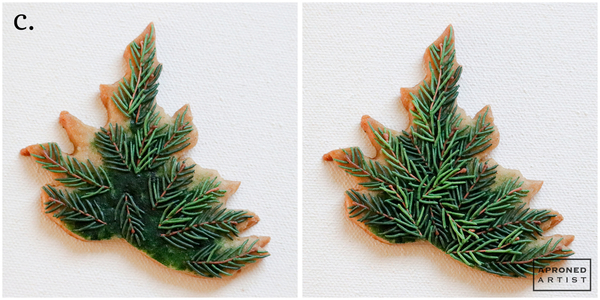
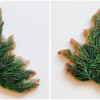
c. Now, pipe the pine needles in the foreground using the same technique used in Step 2b, but with lighter colors. Use the stiff-consistency light brown royal icing and a PME #0 tip (or equivalent) to pipe the stems. Add the short, angled lines extending from the stems with the stiff-consistency green and light green royal icing and a PME #0 tip (or equivalent). Don’t be afraid to go back and add some of the darker colors if you decide you need to fill more space; just try to keep the darker colors in the background and the lighter colors in the foreground. Continue to build up the layers of pine needles, extending them to the cookie edges, until your tree section has the depth and fullness you desire.
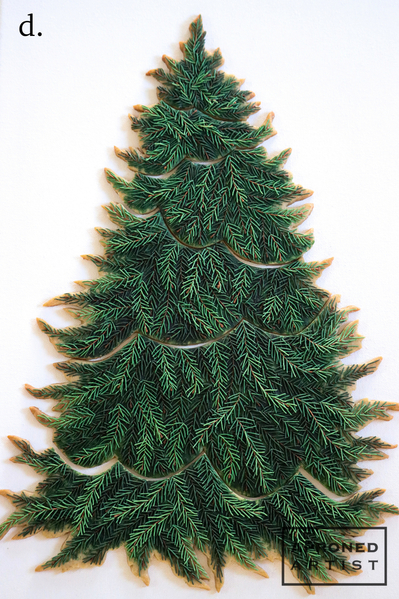
d. Repeat Steps 2b and 2c with the five remaining tree sections. As you pipe, also keep in mind the orientation of the piece in the final tree to ensure that the branches on it point mostly downward, toward the bottom of the tree.
Step 3: Decorate underside of ornament cookies and star topper cookie
Decorate the underside of the 24 (1-inch/2.5-centimeter) round cookies and the star cookie with wet-on-wet Christmas illustrations using the flooding-consistency white and Christmas colors. As an example:
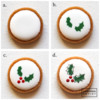
a. Flood the underside of a round cookie with flooding-consistency white royal icing, leaving a small border around the edge.
b. Immediately add some blobs of green royal icing with a PME #0 tip (or equivalent), shaping them roughly into two holly leaves.
c. Immediately add three dots of red royal icing between the bottom of the leaves using a PME #0 tip (or equivalent). Let the icing dry completely.
d. Once dry, use a black food-safe marker to draw the outline of the holly leaves and a dot on each berry. For a more illustrated look, leave some white space between the blobs of color and the black outlines.
e. Now, decorate the other 23 round cookies and the star cookie using the same method. Get creative with your Christmas designs! Let the icing dry completely before proceeding to the next step.
Step 4: Decorate top of ornament cookies
a. Divide the (1-inch/2.5-centimeter) round cookies into three piles (of eight each). Flood the top sides of one group of cookies with thick flooding-consistency dark red royal icing, flooding right to the edge of the cookie. Repeat with the next group of eight cookies using thick flooding-consistency blue royal icing. Flood the final set of eight cookies with thick flooding-consistency gray-green royal icing. Let the icing dry completely.
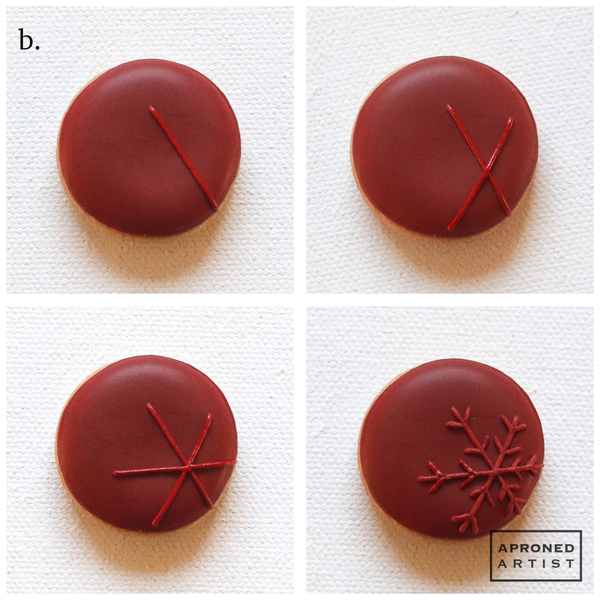
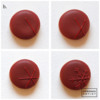
b. Pipe a snowflake design on the edge of a dark red-flooded cookie with stiff-consistency dark red royal icing and a PME #0 tip (or equivalent). Begin by piping a diagonal line wrapping over the lower right edge of the cookie (see top left picture below). Pipe another diagonal line beginning to the right and slightly below the line you just piped, creating an “x” (see top right picture below). Pipe a third line bisecting the “x” and wrapping around the right edge of the cookie (see bottom left picture below). To finish the design, pipe two little “v”s with a small gap between them on each arm of the snowflake.
c. Repeat Step 4b with the remaining round cookies, matching the snowflake color to the color of the flooded icing.
Step 5: Decorate top of star cookie
a. Flood the top side of the star cookie with thick flooding-consistency taupe royal icing, flooding right to the edge. Let the icing dry completely.
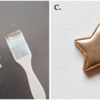
b. Once dry, paint the star with gold luster dust mixed with alcohol, using a large, flat paint brush. It's best to use a paint brush as wide as your cookie, so you can paint the star in a single pass and minimize brush strokes. If you missed some areas, rotate the cookie, and paint the star again in a single pass.
c. Using stiff-consistency taupe royal icing and a PME #0 tip (or equivalent), pipe a line around the perimeter of the star. Allow the border to dry before painting it gold.
Step 6: Pipe garlands
a. Position your tree cookie sections directly adjacent to one another, and carefully cover them with a sheet of acetate large enough to cover all of the seams. Using stiff-consistency taupe royal icing and an Ateco #150 tip (or equivalent), pipe a garland over the seam between each section. Hold your piping bag so that the long opening of the tip is parallel to the cookie surface, with the top of the tip oriented toward the top of the tree.
b. Allow the garland transfers to dry before painting them with gold luster dust mixed with alcohol. A medium, flat paint brush is best for this task. (Do not remove the transfers from the acetate before painting them, as they can otherwise move around and be difficult to paint.)
Step 7: Assemble advent calendar
a. Carefully peel the acetate away from the garland transfers. Using small dots of stiff-consistency dark green royal icing, attach the appropriate garland piece to the top edge of the tree section, such that it extends over the seam to cover the bottom edge of the tree section above it (and to hide any gap between the cookies). The garland will only visually (but not physically) connect the tree sections so that guests can easily slide the cookie pieces apart for consumption.
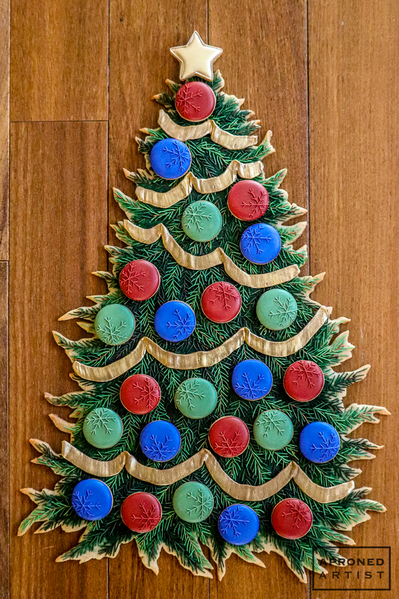
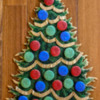
b. Gently place the ornament cookies (snowflake side up) on top of the tree sections. Finally, place the star cookie at the top of the highest section to complete the Christmas tree!
This cookie platter is the perfect way to celebrate the anticipation of the upcoming holiday. Each day of December through Christmas, flip over an ornament and enjoy the little surprise beneath!


Samantha Yacovetta began cookie decorating in 2013. While working at a local bakery, Samantha became captivated by cookie art when a customer requested princess-themed cookies. Attracted initially to the precision of cookie decorating, Samantha soon found that the limitless design opportunities turned it into her artistic passion. Samantha began regularly stocking the bakery case with decorated cookies and for several years sold cookies through her own company, Aproned Artist, a cottage food operation. Having retired from the business life, Samantha now enjoys making cookies just for fun from her home in San Jose, California, USA. To learn more about Samantha, please check out her Cookie Connection portfolio, her Facebook page, and her past Every Little Detail tutorials here.
Photo and cookie credits: Samantha Yacovetta
Note: Every Little Detail with Aproned Artist is a monthly Cookie Connection blog feature written by Samantha Yacovetta focused on the special little details that make big statements in cookie design. This article expresses the views of the author, and not necessarily those of this site, its owners, its administrators, or its employees. To read all of Samantha's past Every Little Detail tutorials, click here. And to see all of Cookie Connection's tutorials, click here.









Comments (28)