 I love the idea of stained glass cookies; the shine and transparency are so striking and delicate. I’m not too crazy about any of the mediums I’ve used for the effect, however. I tried corn syrup, which looked beautiful but was comically horrifying to eat. The strings of corn syrup ran down our chins like melted mozzarella. I tried isomalt, but aside from its digestive drawbacks, I found it finicky and difficult to use. So, this time I’m giving gelatin a try. A few simple ingredients combine to create a transparent sheet, similar in appearance to poured isomalt. In the right application, however, gelatin “plastic” has some distinct advantages: 1) it’s made from inexpensive ingredients that can be found in any grocery store; 2) it can be made well in advance and is seemingly unaffected by humidity; 3) it's pliable (similar to a sheet of acetate); and 4) it’s super lightweight, so it can be suspended vertically in this project without tempting gravity. All considered, it’s really a fun medium and perfect for this autumn suncatcher cookie!
Supplies:
- 4 (1/4-oz/7-g) packages powdered unflavored gelatin (like Knox Gelatin)
- 6 fluid oz/177 g (or 12 tbsp) clear soda (I used ginger ale which was slightly colored; lemon-lime soda would probably work better if you’re going for super clear plastic.)
- Small saucepan
- 3 small heatproof bowls
- Cake pan large enough to hold above bowls
- Hot water
- AmeriColor gel paste colors for dying gelatin: Gold, Electric Orange, and Tulip Red
- Large sheet(s) of acetate
- Cookie dough that bakes rigid and firm
- Two large, nesting oval cookie cutters (I used the second and third largest cutters from this set.)
- Silicone baking mat or parchment paper
- 2-inch (5-cm) round cookie cutter
- Kitchen shears
- Food-safe marker
- Royal icing*:
- Flooding-consistency cream (AmeriColor Ivory)
- Thick flooding-consistency dark brown (4 parts AmeriColor Chocolate Brown/1 part AmeriColor Super Black)
- Stiff-consistency cream
- Tips:
- PME #0 and 1.5 (or equivalents)
- Various flat kitchen objects
- Box with straight sides
- Large offset spatula
Flat paint brush
*Notes on consistency: For flooding-consistency, aim for about 15 seconds, meaning the "tracks" left by the icing when dropped into the icing bowl should disappear in about 15 seconds. Thick flooding-consistency icing should be about 25 seconds.
Step 1: Prepare gelatin plastic
a. Combine the powdered gelatin and soda in a small saucepan. (The listed quantities will make several sheets of gelatin plastic, but the recipe can easily be halved or multiplied; just keep a ratio of one package gelatin to three tablespoons soda.)
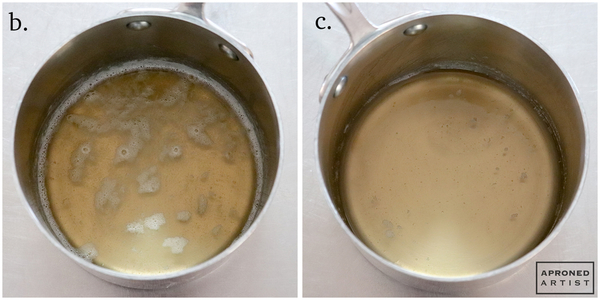
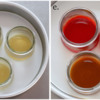
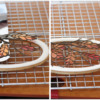
b. Heat the mixture over low heat, stirring occasionally until the gelatin has dissolved. The mixture will start out thick, lumpy, and frothy. After a few minutes, it should become more watery in consistency with foam on the surface but no remaining clumps of gelatin (see left picture below). The gelatin will smell really terrible; rest assured that this smell will dissipate as the gelatin dries and won’t ultimately affect the gelatin’s taste.
c. Remove the pan from the heat, and use a spoon to skim the majority of the foam off the top of the gelatin mixture.
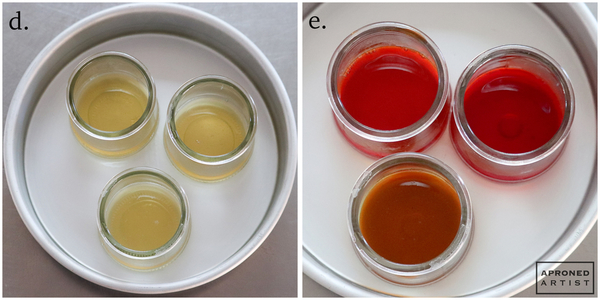
d. Divide the hot gelatin evenly across three small bowls. Place the small bowls inside a cake pan, and fill the pan with hot water to create a water bath. The temperature of the water bath will keep the gelatin from setting while you color it.
e. Color the gelatin in each bowl, stirring with a spoon until the dye is completely distributed. For yellow gelatin, add two drops of Gold gel paste. For orange gelatin, add three drops of Electric Orange, one drop of Gold, and one drop of Tulip Red gel paste. For red gelatin, add three drops of Tulip Red gel paste.
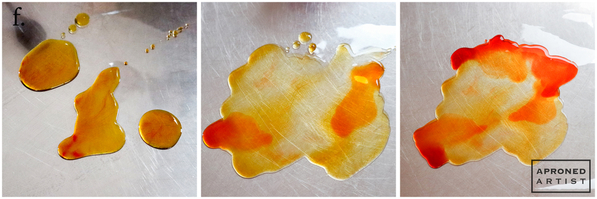
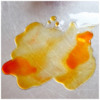
f. Use a spoon to place some of the yellow gelatin on top of an acetate sheet. The gelatin should naturally spread into a thin layer. Use the back of your spoon to spread it out if necessary, but be careful not to make the gelatin too thin, or it will be difficult to remove from the acetate once dried. Immediately add some spoonfuls of orange and red gelatin. Try not to mix the colors too much so that your gelatin has distinct areas of each color.
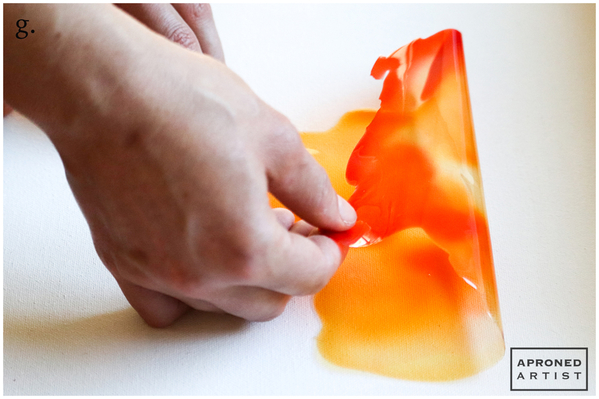
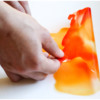
g. Let the gelatin plastic dry uncovered for one to three days. Drying time will depend on the thickness of your gelatin sheet and ambient humidity. When it is sufficiently dry, it should no longer feel sticky or gelatinous; it will feel just like plastic. Carefully, peel the gelatin plastic from the acetate.
Step 2: Create cookie frame and base
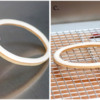
a. Using the larger of the two nesting oval cutters, cut out your cookie dough directly on a silicone baking mat or piece of parchment paper. Then, without moving the cut oval, use the smaller oval cookie cutter to remove the center of the large oval (reserve this scrap for the next step). You will be left with an oval frame.
b. Cut a small circle from the oval dough scrap (left over from Step 2a) with the 2-inch (5-cm) round cookie cutter. This small circle cookie will be the base of the suncatcher once it is mounted. Now, without handling the cut cookies directly, lift the baking mat (or parchment paper) and place it and the cookies on a baking sheet. (If you handle the cookies directly, you will certainly misshape them, especially the frame.) Bake the cookies as directed in your recipe, reducing the baking time of the frame cookie by a few minutes, if it seems to be browning faster than usual.
c. Flood the cookie frame and base with flooding-consistency cream royal icing. Set the cookies aside until the icing is completely dry.
Step 3: Pipe suncatcher transfer
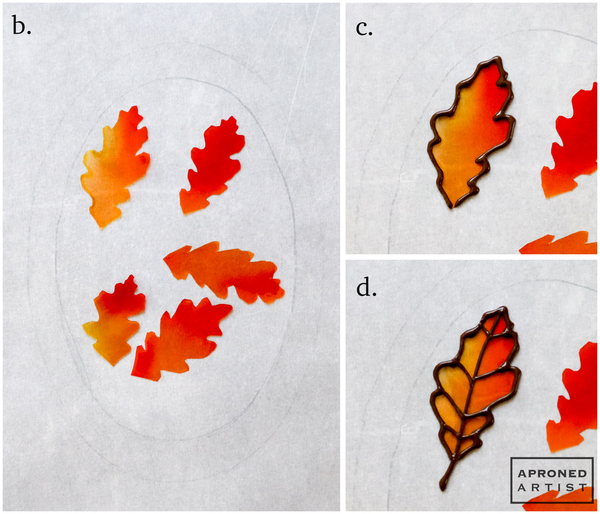
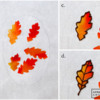
a. Using kitchen shears, cut several leaf shapes (measuring about 1 1/2 inches or 3.8 centimeters in length) out of the dried gelatin plastic. I cut my leaves from the areas of the gelatin where the different colors merged.
b. Trace the outline of your cookie frame onto a sheet of parchment paper with a food-safe marker, and secure the parchment paper to the back of a cookie sheet with tape. Arrange the gelatin leaves within the traced frame.
c. Using thick flooding-consistency dark brown royal icing and a PME #0 tip (or equivalent), pipe an outline on the edge of a leaf.
d. With the same icing, pipe a center vein and stem extending from the leaf. Add diagonal veins that connect the narrow points of the leaf to the center vein.
Repeat Steps 3c and 3d with the remaining leaves.
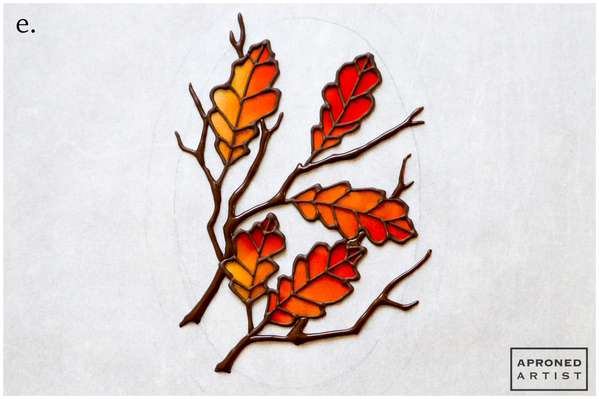
e. With the same dark brown icing and tip, add branches connecting the leaves. The branches should extend into the cookie frame so that you can use them later as anchor points to attach the transfer to the frame. (This combo icing-gelatin piece is called a transfer, because it will later be transferred from the parchment paper to the cookie once the icing has dried.) Pipe enough branches to give the transfer some structure, but leave a significant amount of empty space. Set the transfer aside to dry completely. Once dry, carefully peel the parchment paper from the transfer. The transfer will be very fragile. (If the fragility terrifies you, try a more zoomed-in version with only a couple of larger leaves and thicker branches.)
Step 4: Mount cookie frame on cookie base
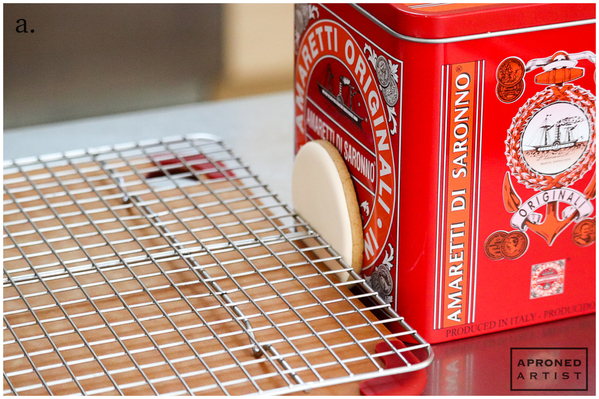
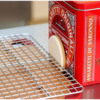
a. Find some flat kitchen objects that will raise your cookie frame (when lying horizontally) up to the center of your small round cookie base (when standing vertically). For me, two stacked cutting boards and a cooling rack put my frame at the perfect height. Hold your small round cookie base vertically, and sandwich it gently between the end of your stacked objects and a box with straight sides.
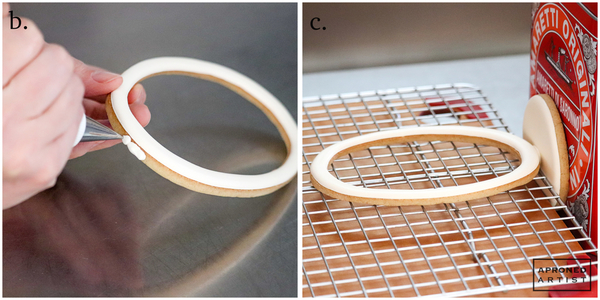
b. Using stiff-consistency cream royal icing and a PME #1.5 tip (or equivalent), apply some icing to the bottom edge of your frame cookie.
c. Position your frame cookie on top of the stacked objects, and gently press the bottom edge (with icing "glue") onto the center of the small round base cookie. Set the cookies aside until the icing is completely dry.
Step 5: Attach suncatcher transfer to cookie frame
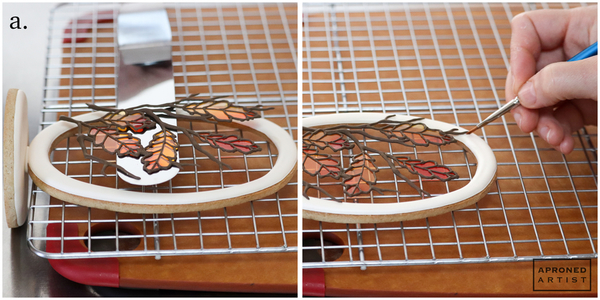
a. Carefully slide a large offset spatula beneath the transfer. Balance the transfer on the spatula a few inches above your work surface, and pipe small dots of icing on the underside of the thick ends of the branches (where they will make contact with the frame). Use stiff-consistency cream royal icing and a PME #0 tip (or equivalent) for this task. Gently position the transfer on the cookie frame, and carefully slide out the spatula. Alternatively, place the transfer directly on the cookie with the offset spatula; then gently lift the tip of each branch with your paint brush, and pipe dots of icing underneath on the frame. Or you can hover the transfer over the cookie, and pipe icing on the frame before setting the transfer down on the icing. (I tried all of these techniques while shaking like a leaf, no pun intended, and couldn’t decide which I liked best.) Using a damp paint brush, wipe away any excess icing that may have squeezed out from under the branch tips, and set the cookie aside until the icing is completely dry.
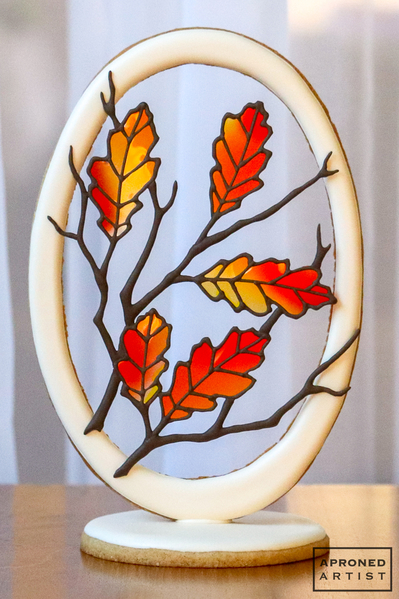
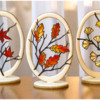
b. Once dry, carefully stand your suncatcher cookie upright, and admire how the light streams through those transparent leaves!
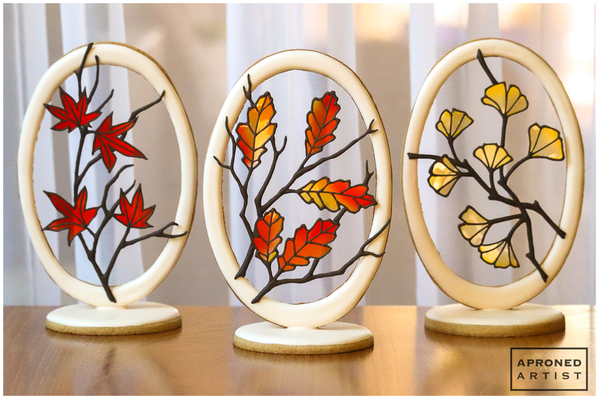
As I mentioned, you will have a lot of leftover gelatin. Use the large areas of a single color to make leaves from other tree species. The red areas make lovely maple leaves, and the yellow gelatin is perfect for the autumn leaves of a ginkgo tree.
P.S. Is your mind spinning with ideas of how you might use gelatin on your cookies? One note of caution: do not pour the warm, liquid gelatin onto an iced cookie. When I tried this, it looked beautiful at first - just like stained glass. But, within five minutes, the gelatin started to curl. Then, the added heat and moisture must have dissolved the royal icing. Thirty minutes later, my beautiful stained glass had turned into a terrifying fleshy-looking, curled glob sitting in a cloudy puddle of liquid. Not pretty.
Additional Resource
Editor's Note: Kimberly Chapman literally wrote the book (well, ebook) on edible, flexible stained glass. It's called Flexible, Edible Stained Glass (natch!), and can be found here. Enjoy! ~JMU


Samantha Yacovetta began cookie decorating in 2013. While working at a local bakery, Samantha became captivated by cookie art when a customer requested princess-themed cookies. Attracted initially to the precision of cookie decorating, Samantha soon found that the limitless design opportunities turned it into her artistic passion. Samantha began regularly stocking the bakery case with decorated cookies and for several years sold cookies through her own company, Aproned Artist, a cottage food operation. Having retired from the business life, Samantha now enjoys making cookies just for fun from her home in San Jose, California, USA. To learn more about Samantha, please check out her Cookie Connection portfolio, her Facebook page, and her past Every Little Detail tutorials here.
Photo and cookie credits: Samantha Yacovetta
Note: Every Little Detail with Aproned Artist is a monthly Cookie Connection blog feature written by Samantha Yacovetta focused on the special little details that make big statements in cookie design. This article expresses the views of the author, and not necessarily those of this site, its owners, its administrators, or its employees. To read all of Samantha's past Every Little Detail tutorials, click here. And to see all of Cookie Connection's tutorials, click here.










Comments (28)