 The summer of 1989 was one of my favorites. I spent my days with friends by the pool and my nights camping in the backyard. We watched scary movies, giggled about boys, and crimped each others’ hair. And all the while, my hands worked mindlessly, but furiously, to create a stockpile of friendship bracelets. In my first entrepreneurial venture, I’d made a deal with my elementary school to sell my bracelets at the Back-to-School Fair in September. Friendship bracelets were all the rage back then, and I was a master of the craft. By the end of the summer, I had bags stuffed to bursting with vibrantly patterned bracelets. And when the fair finally came, I sold every one.
Supplies:
- 2 x 9-inch (5 x 23-cm) rectangular cookie
- Royal icing (I used AmeriColor gel paste to color the icing)*:
- Stiff-consistency white
- Stiff-consistency yellow (5 parts Electric Yellow/1 part Orange)
- Stiff-consistency teal (add a small amount of the dark teal icing below to uncolored icing)
- Stiff-consistency dark teal (2 parts Forest Green/1 part Teal)
- Stiff-consistency dark red (5 parts Super Red, 1 part Maroon, 1 part Electric Purple)
- Stiff-consistency light teal (add a small amount of the teal icing above to uncolored icing)
- Stiff-consistency red (5 parts Super Red/2 parts Orange)
- Stiff-consistency orange (5 parts Orange/1 part Super Red)
- Tips:
- Small paint brush
- Scribe tool (or equivalent)
Step 1: Pipe bracelet loop
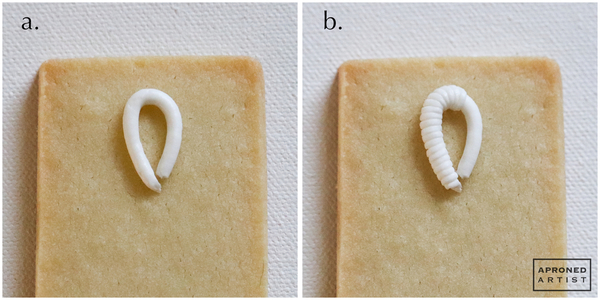
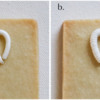
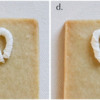
a. Using stiff-consistency white royal icing and a Wilton #5 tip (or equivalent), pipe a 1-inch (2.5-cm) loop at the top of the cookie.
b. With the same icing and a PME #24 tip or equivalent (a PME #1.5 tip would work well as a substitute), pipe a thin band across the width of the loop, tucking the ends under the loop with a damp paint brush. Continue piping thin bands adjacent to one another until the entire loop is covered.
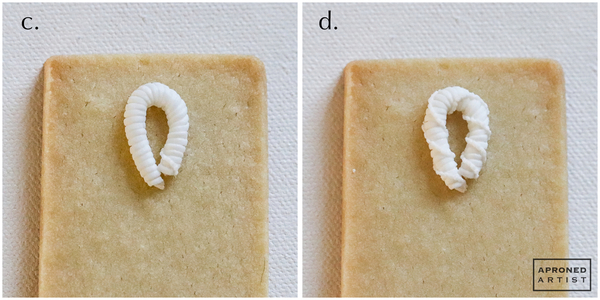
c. Using the same stiff-consistency white royal icing and a PME #1 tip (or equivalent), pipe a line of small beads that curves over the width of the loop in a stretched “s” shape. If you start on the right side of the loop, the beads should begin on the inside of the loop about 1/4 inch (.6 cm) from the base of the loop and end on the outside of the loop right above its base.
d. Pipe a parallel line of beads about 1/4 inch (.6 cm) from the first. Continue piping lines of beads about 1/4 inch (.6 cm) apart until the entire loop is covered. The end effect should appear as though a continuous line of beads is wrapping around the loop. In friendship bracelet terminology, this style of knots is called a Chinese Staircase.
Step 2: Pipe large knot
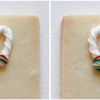
a. Using stiff-consistency white royal icing and a Wilton #5 tip (or equivalent), pipe a dot at the base of the loop.
b. Fit piping bags with all of the remaining icing colors (including the white icing) and PME #1.5 tips (or equivalents). Beginning at the top of the dot piped in Step 2a, cover it with “strings” of the colored icing to create a large knot. (Use a damp paint brush to tuck the ends of the strings underneath the large white dot.) The order of the colors should be random.
Step 3: Pipe pattern of small knots
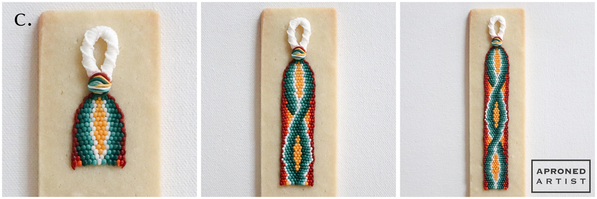
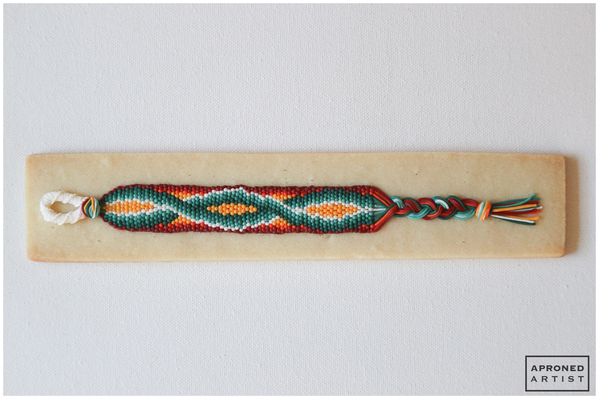
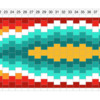
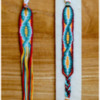
The “knots” of the friendship bracelet are represented by small beads of icing made with PME #1.5 tips (or equivalents). Create the beads one row at a time, working from the center outward. Reference the diagram below for the knot pattern.
a. For the first row, pipe a small bead of stiff-consistency yellow royal icing directly below the center of the large knot. Add a bead of stiff-consistency teal royal icing to either side of the yellow bead. Then, add a bead of stiff-consistency dark teal royal icing to the exposed sides of the teal beads. To finish the first row, add a bead of stiff-consistency dark red royal icing to the exposed sides of the dark teal beads.
b. For the second row, pipe two yellow beads directly below the spaces between the yellow and teal beads in the first row. Next, pipe two beads of stiff-consistency white royal icing directly below the spaces between the teal and dark teal beads in the first row. Then, pipe a teal bead next to each white bead, and a dark teal bead adjacent to each teal bead. Finally, pipe two vertical lines of dark red icing. Each line should start from the bead of dark red in the first row and end at the bottom of the dark teal beads in the second row. Note: This line of icing (as opposed to a bead or “knot”) is represented in the diagram by a skinny rectangle.
c. Continue piping the rows represented in the diagram, introducing light teal, red, and orange icing dots as called for. Depending on the size of your knots, you may repeat the design multiple times. After you finish Row 56 on the diagram, simply start back again at Row 5, and continue piping the subsequent rows. Stop piping knots when you get about 4 inches (10 cm) from the bottom edge of the cookie. Omit the dark red skinny rectangles if you end on a row that has them.
Step 4: Pipe braid
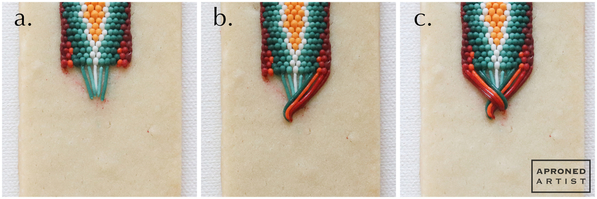
Each knot of the last row will have a string of the same color that extends from it into the braid. Additionally, if you end on a row that has skinny rectangles, a dark red string will also extend from the dark red knot in the row above. Mentally, group the strings into three sections (left, center, and right). Because I ended on a row with skinny rectangles, I had 13 strings and divided them into a left section of four strings (the dark red, red, orange, and dark teal), a center section of five strings (the teal, light teal, white, light teal, and teal), and a right section of four strings (the dark teal, orange, red, and dark red). The colors of the strings will depend on the row on which you ended, but they all continue to use the same icing and tips from Step 3.
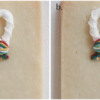
(You may notice some smudges of red in the pictures below. In my infinite grace, I managed to drop my piping bag right onto the braid I was piping. Know that if you are as clumsy as I am, you can easily scrape off the icing to start again, and no one will be the wiser!)
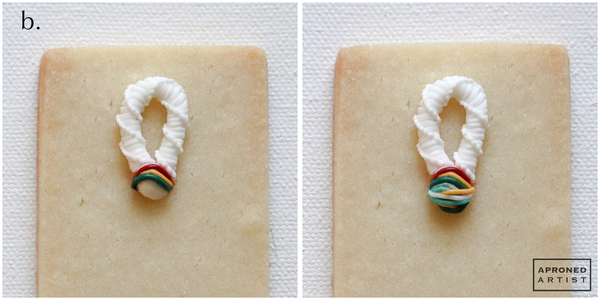
a. Start with the center section of strings. Draw a line from each of the center four or five knots (depending on whether you ended on a skinny rectangle-row) to meet about 1/2 inch (1.3 cm) below the knots.
b. Draw a line from each of the right four knots (or three knots and the dark red knot in the line above if you ended on a skinny rectangle-row), crossing over the bottom of the lines piped in Step 4a.
c. Similarly, draw a line from each of the left four knots (or three knots and the dark red knot in the line above if you ended on a skinny rectangle-row), crossing over the bottom of the lines piped in Step 4b.
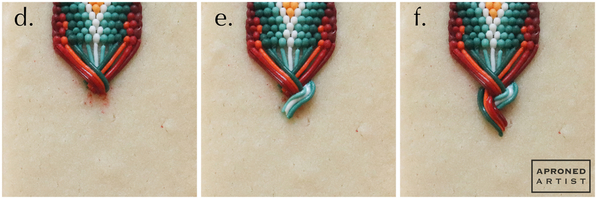
d. Use a scribe tool (or equivalent) to cut off any icing that extends from beneath the strings that have crossed over it.
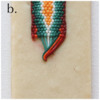
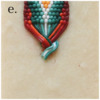
e. Five strings of icing look a bit bulky, so, moving forward, I omitted the two outside teal strings of the center section. Tuck the icing tip beneath the right side of the intersection of the strings piped in Step 4c. Pipe the three strings of the center section so that they cross over from the right and end below and left of the intersection of strings.
f. In a similar fashion, tuck the icing tip beneath the left side of the intersection of strings (where the excess was cut off with the scribe tool), and pipe the right section of strings so that they cross over from the left and end below and right of the intersection of strings. Make sure you pipe the strings in the appropriate order; if the dark red string is on the bottom at the intersection, it should be piped first so that it looks continuous. Continue piping the braid in this fashion, stopping when you get about 2.5 inches (6.4 cm) above the bottom edge of the cookie.
Step 5: Pipe knot and tail
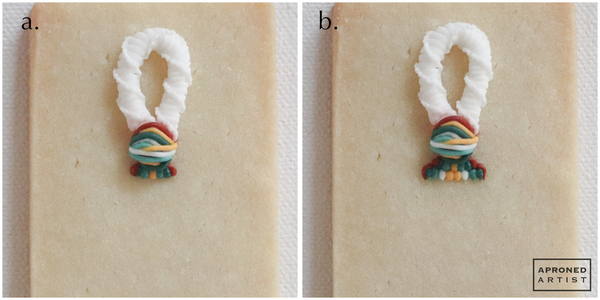
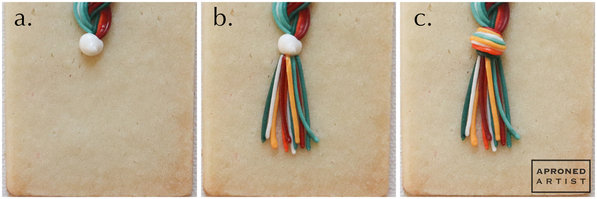
a. Pipe a dot of stiff-consistency white royal icing with a Wilton #5 tip (or equivalent) at the base of the braid.
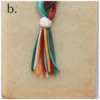
b. Using a random assortment of the colored royal icing and PME #1.5 tips (or equivalents), pipe strings about 1.5 inches (3.8 cm) in length extending down from the white dot. Layer the strings on top of one another, curving some slightly.
c. Cover the white dot with strings of colored icing (just like we did in Step 2b), tucking the ends under the dot with a damp paint brush.
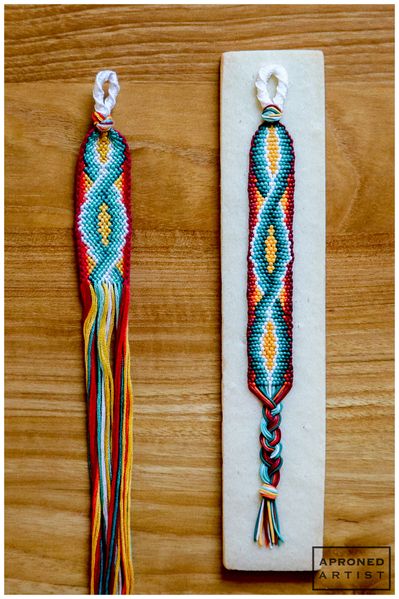
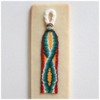
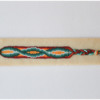
Our friendship bracelet cookie is complete!
Here’s a little confession: even now as an adult, I still make friendship bracelets. When my hands are feeling restless and I don’t have the time or the patience for cookies, friendship bracelets are the next best thing. Whether they’re real bracelets or a cookie version, they’ll always be a nostalgic way to remind my friends that I love them.


Samantha Yacovetta began cookie decorating in 2013. While working at a local bakery, Samantha became captivated by cookie art when a customer requested princess-themed cookies. Attracted initially to the precision of cookie decorating, Samantha soon found that the limitless design opportunities turned it into her artistic passion. Samantha began regularly stocking the bakery case with decorated cookies and for several years sold cookies through her own company, Aproned Artist, a cottage food operation. Having retired from the business life, Samantha now enjoys making cookies just for fun from her home in San Jose, California, USA. To learn more about Samantha, please check out her Cookie Connection portfolio, her Facebook page, and her past Every Little Detail tutorials here.
Photo and cookie credits: Samantha Yacovetta
Note: Every Little Detail with Aproned Artist is a monthly Cookie Connection blog feature written by Samantha Yacovetta focused on the special little details that make big statements in cookie design. This article expresses the views of the author, and not necessarily those of this site, its owners, its administrators, or its employees. To read all of Samantha's past Every Little Detail tutorials, click here. And to see all of Cookie Connection's tutorials, click here.


Comments (36)