 I’m really terrible at piping people. I give them a try every once in a while when I’m inspired by some tutorial or image, but my people never look right. Their eyes might be uneven, their noses too large, or their hands so full of fingers that they look more like sunflower sea stars. Needless to say, I try to avoid piping people at all costs. So, when my sister asked me to make mermaid cookies for my niece’s eleventh birthday, I was both excited (because who doesn’t love mermaids?) and terrified (because mermaids share all of the characteristics that make people challenging). After some quick deliberation, I decided to go small - so small that facial features (and fingers) weren’t even necessary. And it worked! I think I might even add (really small) people to my repertoire.
Supplies:
- 4 x 2 3/4-inch (10.2 x 6.9-cm) oval cookie cutter (I used the third smallest oval from this set.)
- 4 1/2 x 3-inch (11.4 x 7.6-cm) rectangular cookie
- Food-safe marker (optional)
- Dental vibrator (optional)
- Royal icing (AmeriColor gel paste was used to color the icing)*:
- Thick flooding-consistency gray (Super Black)
- Thick flooding-consistency aqua (9 parts Teal/3 parts Electric Blue/1 part Regal Purple)
- Medium stiff-consistency pale peach (3 parts Ivory/1 part Deep Pink)
- Medium stiff-consistency dark brown (7 parts Chocolate Brown/2 parts Electric Green/1 part Super Black)
- Medium stiff-consistency green (2 parts Leaf Green/1 part Gold)
- Stiff-consistency dark brown (7 parts Chocolate Brown/2 parts Electric Green/1 part Super Black)
- Medium stiff-consistency purple (Regal Purple)
- Stiff-consistency green (2 parts Leaf Green/1 part Gold)
- Medium stiff-consistency yellow-orange (2 parts Lemon Yellow/1 part Orange/1 part Gold)
- Medium stiff-consistency pink (6 parts Deep Pink/1 part Maroon)
- Tips:
- Scribe tool (or equivalent)
- Mermaid template (See "Files" in "Attachments" at the end of this post.)
*Notes on consistencies: For thick flooding-consistency, aim for about 20 seconds, meaning the "tracks" left by the icing when dropped into the icing bowl should disappear in about 20 seconds. For medium stiff-consistency, the icing should be thick enough that it won’t settle without some help from your scribe tool.
Step 1: Flood cookie
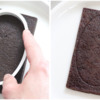
a. Use the oval cookie cutter to create a shallow impression on the surface of your baked cookie. Alternatively, trace around the oval cookie cutter with a food-safe marker.
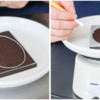
b. Flooding this cookie is a little more challenging than most for a few reasons: (1) it’s a pretty big cookie; (2) we’re flooding right to the edge so there’s no room to shake the cookie without dunking your fingers in the icing; and (3) we’re using multiple colors to create a wet-on-wet effect. To make things a little easier, I use a dental vibrator similar to this one. I flood the cookie on top of a small plate that can easily be transferred to the top of the dental vibrator. The device vibrates gently, smoothing the icing and bringing any air bubbles to the surface. The dental vibrator is by no means necessary, but it is a helpful tool that I use regularly.
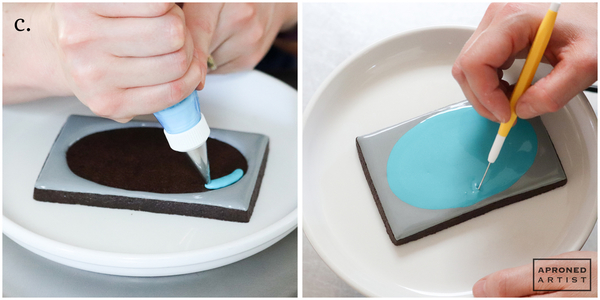
Using thick flooding-consistency gray royal icing and a PME #1.5 tip (or equivalent), outline the edge of the rectangle and the edge of the oval. Immediately fill the outlined section with the same gray icing. (If using the dental vibrator, move the plate to the flat top of the device once you’ve filled this section. Let the vibrator gently shake the cookie while you pop any air bubbles with a scribe tool.)
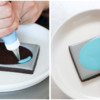
c. Immediately fill the oval with thick flooding-consistency aqua royal icing using a Wilton #3 tip (or equivalent). Smooth the aqua icing with your scribe tool. (If using the dental vibrator, transfer the cookie back to the dental vibrator to help distribute the icing and bring any air bubbles to the surface.) Allow the flooded cookie to dry until completely crusted, ideally overnight.
Step 2: Pipe mermaid
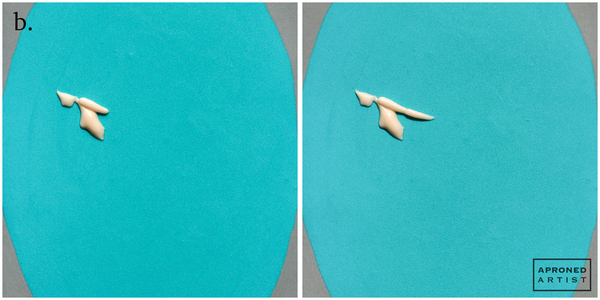
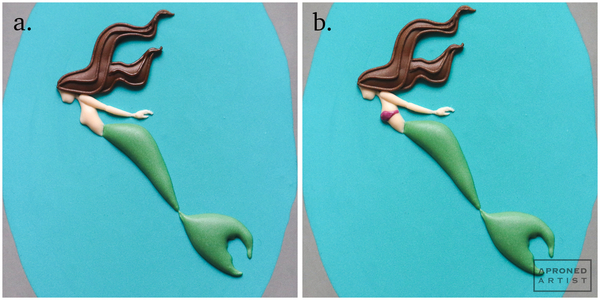
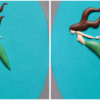
a. Transfer the mermaid design onto the cookie using a projector, the paper transfer method, or another method of your choice. (Again, my design template can be found in "Files" at the end of this post. You may need to resize it, especially if you use a cookie of a different size or shape.) Using medium stiff-consistency pale peach royal icing and a PME #0 tip (or equivalent), pipe the face and then the torso of the mermaid. Make sure you leave a space where the arm will overlap the torso. I find it easiest to pipe an appropriately sized blob of icing in the approximate area and then to shape it into the right body part using my scribe tool.
b. With the same pale peach royal icing and tip, pipe the upper arm (above the elbow), using more pressure initially at the shoulder and less pressure as you near the elbow. Then, immediately pipe the lower arm in a similar fashion, applying slightly more pressure at the elbow and significantly less pressure at the wrist.
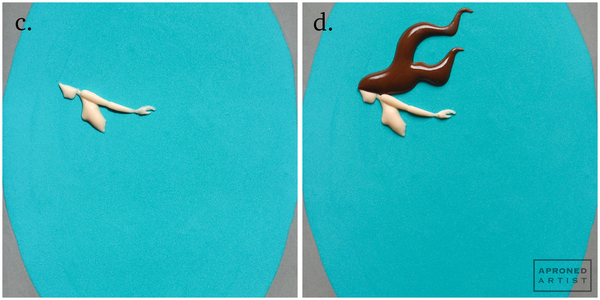
c. Use the same pale peach royal icing and tip to pipe the hand, dragging out the icing with a scribe tool to create fingers.
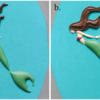
d. Using medium stiff-consistency dark brown royal icing and a PME #1 tip (or equivalent), pipe the hair right against the edge of the mermaid's face so it appears as though the hair flows over her ear and the back of her head.
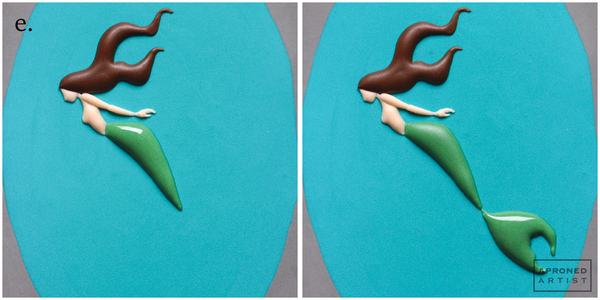
e. Pipe the tail with medium stiff-consistency green royal icing and a PME #1.5 tip (or equivalent). Then, pipe the fins. Set the cookie aside to dry for about 15 minutes.
Step 3: Add mermaid details
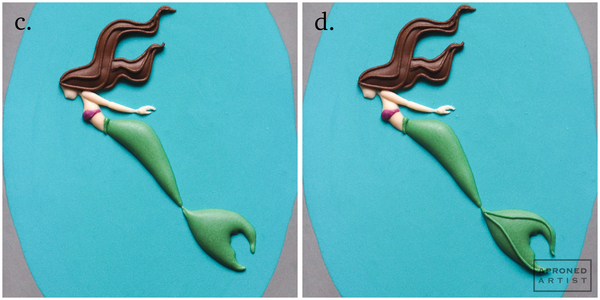
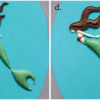
a. Pipe some wavy lines to add definition to the hair with stiff-consistency dark brown royal icing and a PME #00 tip (or equivalent).
b. Using medium stiff-consistency purple royal icing and a PME #1.5 tip (or equivalent), pipe the bikini top over the mermaid's chest.
c. Using stiff-consistency green royal icing and a PME #00 tip (or equivalent), pipe the waist detail, applying more pressure where the tail meets the mermaid's back and less pressure as you move toward the front of her body.
d. With the same green royal icing and tip, pipe a wavy line through the middle of each fin.
Step 4: Add underwater creatures
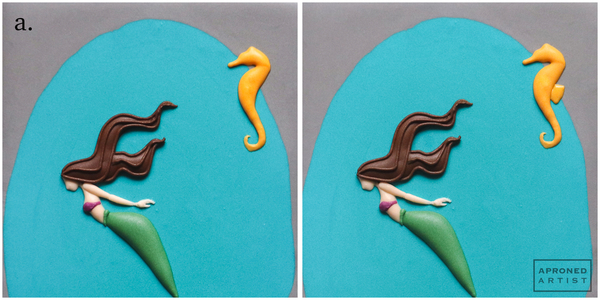
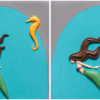
a. Using medium stiff-consistency yellow-orange royal icing and a PME #0 tip (or equivalent), pipe the body of the seahorse, shaping the small details with a scribe tool. Then, add the small fin on its back.
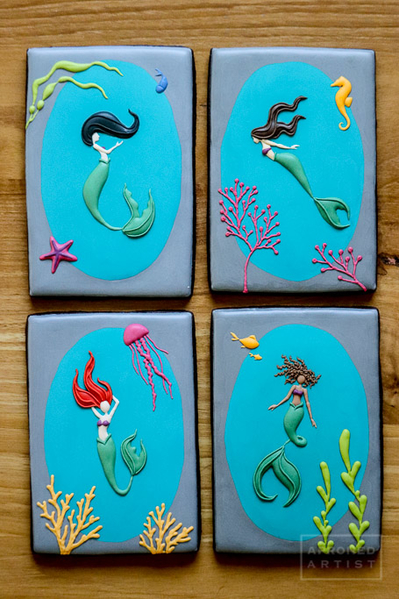
b. Pipe the coral at the base of the cookie with medium stiff-consistency pink royal icing and a PME #0 tip (or equivalent). Begin with the "stems" of the coral by dragging the tip along the surface of the cookie as you apply gentle pressure. Dragging gives the coral a bumpy texture. Then, add teardrops at the end of each stem.
That’s all there is to it! Of course, feel free to get creative by varying mermaid positions and underwater creatures!
- @Dolce Sentire - Aixa Zunino, Handpainted Rose Cookie: A Tutorial (for paper transfer technique)


Samantha Yacovetta began cookie decorating in 2013. While working at a local bakery, Samantha became captivated by cookie art when a customer requested princess-themed cookies. Attracted initially to the precision of cookie decorating, Samantha soon found that the limitless design opportunities turned it into her artistic passion. Samantha began regularly stocking the bakery case with decorated cookies and for several years sold cookies through her own company, Aproned Artist, a cottage food operation. Having retired from the business life, Samantha now enjoys making cookies just for fun from her home in San Jose, California, USA. To learn more about Samantha, please check out her Cookie Connection portfolio, her Facebook page, and her past Every Little Detail tutorials here.
Photo and cookie credits: Samantha Yacovetta
Note: Every Little Detail with Aproned Artist is a bimonthly Cookie Connection blog feature written by Samantha Yacovetta focused on the special little details that make big statements in cookie design. This article expresses the views of the author, and not necessarily those of this site, its owners, its administrators, or its employees. To read all of Samantha's past Every Little Detail tutorials, click here. And to see all of Cookie Connection's tutorials, click here.









Comments (20)