 [EDITOR'S NOTE: So sorry for the delayed tutorial posting this month - completely my fault. With CookieCon just ending and some other personal obligations kicking in, life has gone haywire here! Please be patient; "haywire" may remain my status quo for a couple of months. ~JMU]
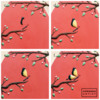
The internet is such a treasure trove of cookie design material. Across all of the different social media platforms, we have an unending stream of art right at our fingertips. Years ago, while scrolling through some images on Pinterest, I came across these beauties:
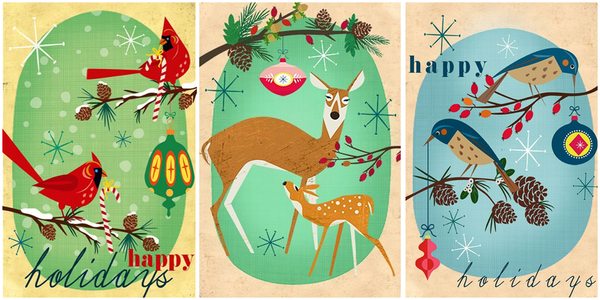
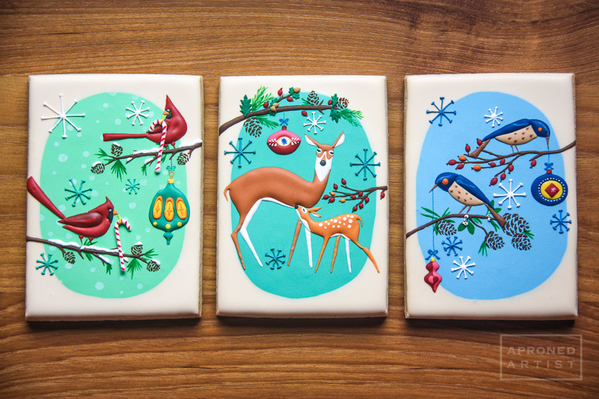
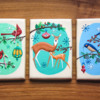
I was instantly enchanted and determined to recreate these images as cookies. After some minor sleuthing, I tracked down the artist, Elisandra Sevenstar, a graphic artist from Berlin. I sent her a message through Etsy, introducing myself and explaining how I wanted to use her images. Elisandra turned out to be a lovely person, and she was wholly supportive of my idea. With her permission, I copied her artwork in this set of cookies:
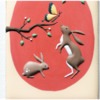
Fast-forward more than two years later, and I’m still in love with Elisandra’s artwork. With Easter nearing, I decided to create a companion set - one inspired by her art but of my own design. To maintain consistency across the two sets, I used the composition of Elisandra’s original digital images as a framework. Each of the original images shared a colored oval within the background, a pair of cute animals, and tree branches creeping in from either side. I incorporated these elements in my design, however, I changed the oval to an egg shape, the more wintry woodland creatures to little bunnies, and the pine trees to budding apple blossoms. (I also streamlined the designs a bit to make them more appropriate for cookie decorating; I had no desire to make 20 icing bags again!) I did my best to emulate Elisandra’s mid-century style with slightly geometric shapes and earthy colors. My hope was to create a unique set that still captured the feel of the original.
Supplies:
- 4 1/2 x 3-inch (11.4 x 7.6-cm) rectangular cookie
- Egg-shaped cookie cutter that fits within the rectangular cookie (to use as a tracing guide)
- Black fine-tipped, food-safe marker
- Royal icing (I used AmeriColor gel paste to color the icing)*:
- Flooding-consistency ivory (Ivory)
- Flooding-consistency pink (5 parts Electric Pink/2 parts Gold/1 part Maroon/1 part Tulip Red)
- Thick flooding-consistency dark brown (Chocolate Brown)
- Thick flooding-consistency green (8 parts Gold/5 parts Leaf Green/2 parts Royal Blue/1 part Super Black)
- Thick flooding-consistency white
- Thick flooding-consistency dark gray (Super Black)
- Thick flooding-consistency yellow (2 parts Gold/1 part Lemon Yellow)
- Thick flooding-consistency light brown (1 part Chocolate Brown/1 part Regal Purple)
- Thick flooding-consistency brown (1 part Chocolate Brown/1 part Regal Purple)
- Tips:
- Design template (see the second photo in "Attachments" at the end of this post)
- Scribe tool (or equivalent)
* Notes on consistencies: For thick flooding-consistency, I aim for about 20 seconds, meaning the "tracks" left by the icing when dropped into the icing bowl should disappear in about 20 seconds. For flooding-consistency, it is really personal preference; I usually aim for about 15 seconds.
Step 1: Flood cookie
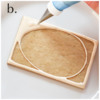
a. Place your baked, cooled rectangle cookie on your work surface, and center the egg-shaped cookie cutter on top of it. Trace around its perimeter with the food-safe marker to give yourself a guide for piping.
b. Using flooding-consistency ivory royal icing and a PME #1.5 tip (or equivalent), outline and flood the areas outside the egg shape you just traced in Step 1a.
c. Immediately flood the center egg shape with flooding-consistency pink royal icing, using a Wilton #2 tip (or equivalent). Let the icing dry completely.
Step 2: Pipe tree branches
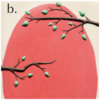
a. Transfer the egg design onto the cookie using a projector, the paper transfer method, or another method of your choice. (Again, the design template can be found in the second photo at the end of this post.) Using thick flooding-consistency dark brown royal icing and a PME #1 tip (or equivalent), pipe the two branches. Use a scribe tool (or equivalent) to pull the icing away from the main branches to form the smaller branches.
b. Pipe teardrop-shaped leaves on the ends of some of the branches using thick flooding-consistency green royal icing and a PME #2 tip (or equivalent). Leave some of the branches empty for the buds we will pipe next.
c. Finally, add some small buds to the ends of most of the remaining branches using thick flooding-consistency white royal icing and a PME #0 tip (or equivalent).
Step 3: Pipe wet-on-wet butterfly
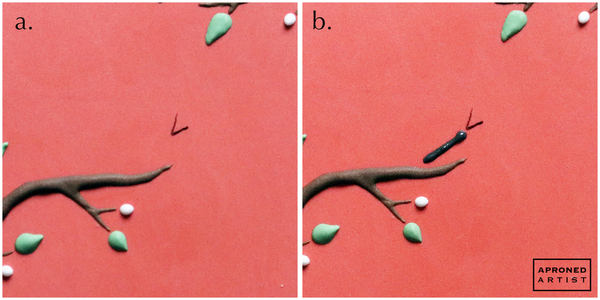
a. Draw the antennae of the butterfly with the food-safe marker.
b. Pipe the head and body of the butterfly with thick flooding-consistency dark gray royal icing and a PME #00 tip (or equivalent).
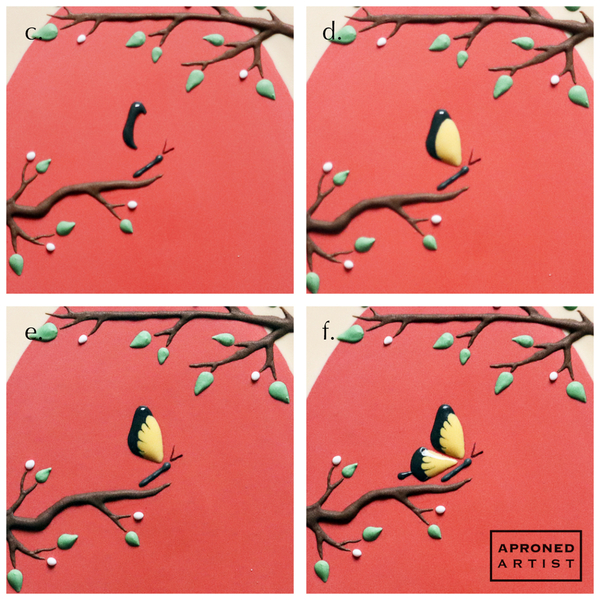
c. Use the same icing and tip to pipe the dark edge of the butterfly’s top wing.
d. Immediately pipe the rest of the top wing with thick flooding-consistency yellow royal icing and a PME #0 tip (or equivalent).
e. While the icing is still wet, use a scribe tool (or equivalent) to drag lines from the dark gray edge into the yellow section of the wing.
f. Repeat Steps 3c through 3e to pipe the bottom wing of the butterfly.
Step 4: Pipe bunnies
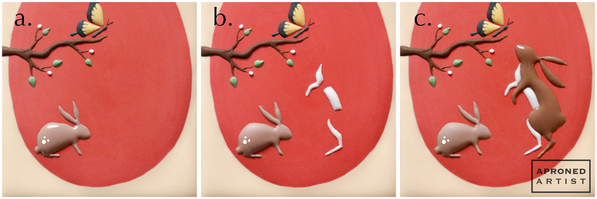
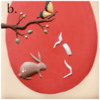
a. Pipe the smaller bunny on the left using thick flooding-consistency light brown royal icing and a PME #0 tip (or equivalent). Immediately add a few white dots on his rear with thick flooding-consistency white royal icing and a PME #0 tip (or equivalent).
b. Using thick flooding-consistency white royal icing and a PME #0 tip (or equivalent), pipe the white sections of the larger bunny on the right. Begin with the arm section and end with the upper chest section (to allow enough time for the icing in the arm to crust and to leave a slight seam between the two sections). Let the white sections dry for a few minutes before proceeding.
c. Using thick flooding-consistency brown royal icing and a PME #0 tip (or equivalent), pipe the remainder of the large bunny’s body. Allow the icing to dry completely.
d. To complete the cookie, add small, round eyes and triangle-shaped noses to the bunnies with thick flooding-consistency dark gray royal icing and a PME #00 tip (or equivalent).
Finished! If you’d like to recreate the other pictured cookies, the template includes all of the designs for this mid-century-inspired Easter set:
Many thanks to Elisandra for her support! If you’re interested in seeing more of Elisandra Sevenstar’s work, check out her Etsy store and Tumbler and Instagram pages.
Source:
- @Dolce Sentire, Handpainted Rose Cookie: A Tutorial (for paper transfer technique)


Samantha Yacovetta began cookie decorating in 2013. While working at a local bakery, Samantha became captivated by cookie art when a customer requested princess-themed cookies. Attracted initially to the precision of cookie decorating, Samantha soon found that the limitless design opportunities turned it into her artistic passion. Samantha began regularly stocking the bakery case with decorated cookies and for several years sold cookies through her own company, Aproned Artist, a cottage food operation. Having retired from the business life, Samantha now enjoys making cookies just for fun from her home in San Jose, California, USA. To learn more about Samantha, please check out her Cookie Connection portfolio, her Facebook page, and her past Every Little Detail tutorials here.
Photo and cookie credits: Samantha Yacovetta
Note: Every Little Detail with Aproned Artist is a monthly Cookie Connection blog feature written by Samantha Yacovetta focused on the special little details that make big statements in cookie design. This article expresses the views of the author, and not necessarily those of this site, its owners, its administrators, or its employees. To read all of Samantha's past Every Little Detail tutorials, click here. And to see all of Cookie Connection's tutorials, click here.







Comments (32)