 My husband’s birthday is coming up, and I know exactly what he wants. He’d love for us to take scuba diving lessons together. I can understand the appeal. Who doesn’t enjoy underwater landscapes and interesting sea creatures? There’s only one problem: the mere idea of putting all that gear on my face and burying myself beneath a ton of water makes me feel intensely claustrophobic. Will these fish cookies be the motivation I need to swallow my fear and give scuba a try? Probably not, but they’ll make a nice consolation prize for my husband.
- 1 (3 1/2-in/8.9-cm) circle cookie flooded with dark blue icing
- Fish design template (See "Files" under “Attachments” at the end of this post.)
- Royal icing (I used AmeriColor gel paste to color the icing.):
- Flooding-consistency reddish-orange (4 parts Tulip Red/1 part Orange)
- Flooding-consistency orange (Add a few drops of Electric Yellow to a small amount of the reddish-orange icing above.)
- Flooding-consistency Yellow (Electric Yellow)
- Tips:
- PME #0 (or equivalent)
- Scribe tool (or equivalent)
Step 1: Pipe fish scales
a. Transfer the fish design (located in “Files” at the end of this post) onto the cookie using a projector or the method of your choice. Note: The fish on my particular cookie is about 3 inches (7.6 centimeters) wide by 2 inches (5.1 centimeters) tall.
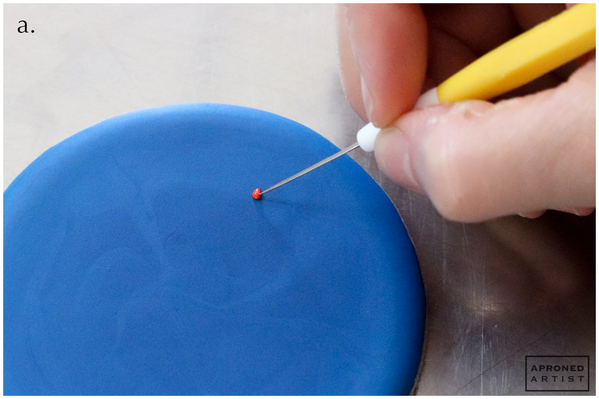
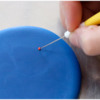
Using flooding-consistency reddish-orange royal icing and a PME #0 tip (or equivalent), pipe a small dot of icing in the center of the scale at the top of the fish’s neck. Use a scribe tool (or equivalent) to shape the dot into a scale. The impact of this design relies on the use of negative space (the areas between the piped sections where the dark flood icing is visible), so be vigilant about using only a small dot of icing for each scale to ensure that the scales don’t run together.
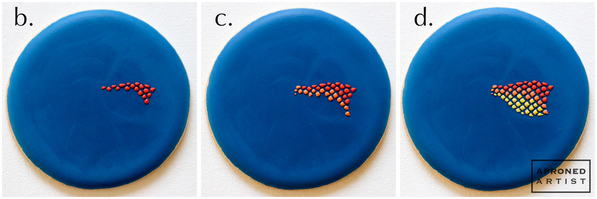
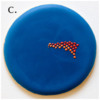
b. With the same icing and tip, continue to pipe and shape reddish-orange scales along the top of the fish’s back, leaving a noticeable amount of space between each scale.
c. Using flooding-consistency orange royal icing and a PME #0 tip (or equivalent), pipe and shape a strip of orange scales beneath the reddish-orange scales.
d. Finally, pipe and shape yellow scales along the belly of the fish with flooding-consistency yellow royal icing and a PME #0 tip (or equivalent).
Step 2: Pipe tail
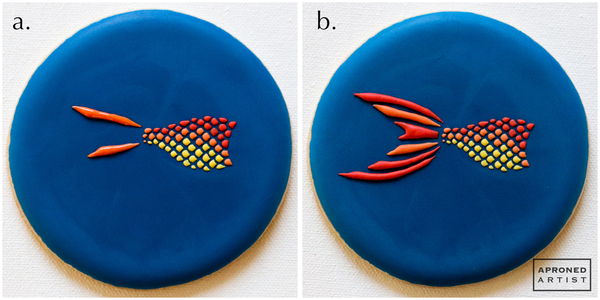
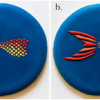
a. Using flooding-consistency orange royal icing and a PME #0 tip (or equivalent), pipe the second and fourth tail fins, drawing out the pointed ends with a scribe tool (or equivalent).
b. Pipe the remaining tail fins with flooding-consistency reddish-orange royal icing and a PME #0 tip (or equivalent). Again, draw out the pointed ends with a scribe tool.
Step 3: Pipe fins and head
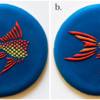
a. Pipe the fins along the body of the fish with flooding-consistency reddish-orange royal icing and a PME #0 tip (or equivalent).
b. To complete the fish, use flooding-consistency orange royal icing and a PME #0 tip (or equivalent) to outline a small circle for the eye before piping the head.
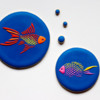
Apply the same concepts of contrast and negative space to make lots of fun sea creatures!
Maybe I can convince my husband to try sky diving instead.


Samantha Yacovetta began cookie decorating in 2013. While working at a local bakery, Samantha became captivated by cookie art when a customer requested princess-themed cookies. Attracted initially to the precision of cookie decorating, Samantha soon found that the limitless design opportunities turned it into her artistic passion. Samantha began regularly stocking the bakery case with decorated cookies and for several years sold cookies through her own company, Aproned Artist, a cottage food operation. Having retired from the business life, Samantha now enjoys making cookies just for fun from her home in San Jose, California, USA. To learn more about Samantha, please check out her Cookie Connection portfolio, her Facebook page, and her past Every Little Detail tutorials here.
Photo and cookie credits: Samantha Yacovetta
Note: Every Little Detail with Aproned Artist is a monthly Cookie Connection blog feature written by Samantha Yacovetta focused on the special little details that make big statements in cookie design. This article expresses the views of the author, and not necessarily those of this site, its owners, its administrators, or its employees. To read all of Samantha's past Every Little Detail tutorials, click here. And to see all of Cookie Connection's tutorials, click here.




Comments (23)