
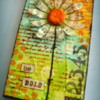
I'm sad to announce that this will be my final blog post as a tutorial contributor on Cookie Connection. I've got some personal matters that need my undivided attention and therefore I've decided to take a break from writing tutorials, at least for the time being. Some of you've shown a lot of interest in my previous mixed media cookie tutorial. And since it's my farewell, I thought I'd put together another mixed media cookie as my final post. [EDITOR'S NOTE: Thanks to Pamoda for all of her fine work here on Cookie Connection! She's certainly lived up to her column's name by inspiring us each month with fabulous cookies - and this month is no exception. Wow, what a way to go . . . she's destined for decorator stardom once the Internet gets its hands on this cookie!]
Daisies are some of my favorite flowers and for that reason I picked a daisy as my subject. My inspiration was these mixed media daisy canvases I found on Kath's Blog.
- One (3 1/2 x 6-inch) rectangle cookie
- Spreading consistency royal icing, white
- Small spatula
- Blue, yellow, and green gel food coloring
- Clear alcohol (I used vodka)
- Food use-only paint brush
- Various rubber/clear stamps (I used musical notes, a love letter, mini letters, and numbers)
- Brown gel food coloring
- White gel food coloring
- Mini circle cutters in two different sizes (or a round tip with a larger opening like Wilton tip #12)
- Wafer paper
- Black food writer/marker
- Edible glue/piping gel/corn syrup (as an adhesive)
- Tiny amount 20-second royal icing, tinted yellow (in a small sandwich bag)
- Toothpick
- Small dowel rod or end of a paint brush
I first covered the cookie with a layer of spreading consistency royal icing and set it aside to dry.
After watching several mixed media artists use the alcohol watercolor texture technique, I wanted to try it myself. I painted the canvas with yellow, blue, and green food coloring diluted with water. While the paint was still quite wet, I dripped alcohol in small drops using a paint brush. The result: these splats which kind of resemble the shadows of daisies in the background (or at least that's how I'm interpreting them). You can read more about alcohol watercolor texture painting at www.watercolorpainting.com.
When the paint was dry, I did some stamping. I used a love letter stamp with brown food coloring for the background. You can find more info about stamping on cookies in this tutorial. And, just as in another of my tutorials, I used a large round tip and white food coloring to print random circles all over the canvas.
I cut daisy petals out of wafer paper. I could have used plain wafer paper for this, but I decided to stamp the wafer paper with a musical note stamp before cutting out the petals. To make the petals stand out from the background, I ran a black food writer around the edge of the petals.
I arranged the petals on the cookie in the shape of a daisy, and then used a touch of edible glue (sparingly) to adhere the petals in place. I piped the center with yellow 20-second icing using a small sandwich bag. When the icing formed a crust, I poked some holes with a toothpick to create texture.
To add more texture, I mixed a bit of yellow and brown food coloring with white food coloring (this makes a mixture that has some body, sort of like the texture of acrylic paint), and used the end of a dowel rod (or paint brush) to apply some dots. I just love dots!
I drew the stem with the black food writer, and ran the food writer along the edge of the cookie for definition.
I also painted the center of the daisy with a little yellow and brown food coloring, and used a toothpick to add more white dots to the background. What? Did I say dots again? ![]()
I gave some movement to the petals by applying just the smallest amount of water to the back of the petals. Don't apply too much; it can dissolve the wafer paper. Take caution!
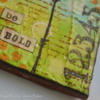
I did a bit more stamping and finished off with a sentiment stamped on wafer paper.
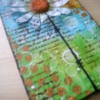
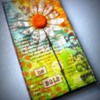
Here's another look at the finished piece!
I hope you enjoyed this tutorial. Even though I had a short journey on Cookie Connection, I had a blast putting together these tutorials for you. I truly appreciate all the love and support you've shown me with your responses. I thank you with all my heart!
Be creative! Let your inspiration guide you, and let your imagination run wild!
[EDITOR'S NOTE: Such a dazzling daisy! Thanks again to Pamoda! It's been a joy having her as a contributor on Cookie Connection, and I wish her the best in tending to her personal matters. (First things first, of course!)]

 Pamoda Vanderwert is a hobbyist cookie decorator who found her passion for decorating cookies while being a cake decorator. She started decorating cookies in early 2013 and hasn’t looked back since. She launched her Facebook page Sugar Pearls Cakes & Bakes around the same time as a way to connect with other cookiers, and also to share her creativity with the rest of the world. When she is not decorating cookies, she keeps herself busy as a mother of two young children.
Photo credit: Pamoda Vanderwert
Note: Get Inspired with Sugar Pearls is a monthly Cookie Connection blog feature written by Pamoda Vanderwert, which explores how to go from source inspiration to artful cookie design through creative cookie tutorials. Its content expresses the views of the author and not necessarily those of this site, its owners, its administrators, or its employees. To catch up on all of Pamoda's past posts, click here.





Comments (25)