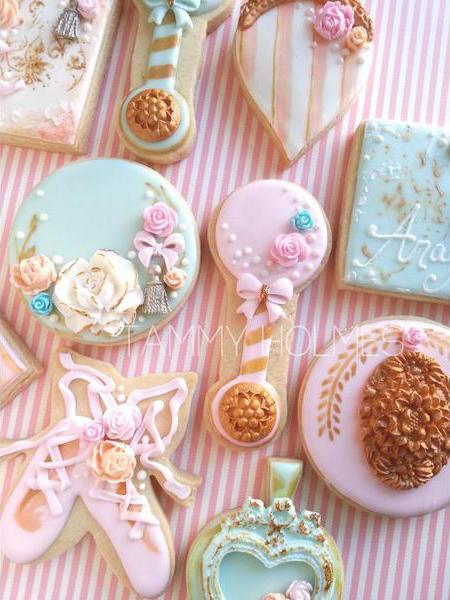
We can all pretty much agree that decorated cookies can be as much about art as they are about being edible. With a blend of painted color and layered elements, the work of Tammy Holmes is no exception. Her creations are worthy of display, in my opinion! I decided to ask her about her design process and techniques to further understand how her style of cookie decorating comes to fruition. Please welcome, Tammy Holmes!
Melissa Joy: Tammy, thank you so much for accepting my invitation to an interview! Much of your work feels so glamorous and has a vintage vibe that I just love. I am sure some aspects of your creations are dictated by the requests of your customers, but much of it seems very distinctive. Where do you get your inspiration when designing a cookie set?
Tammy Holmes: Thank you so much! I would say most of my inspiration comes from decorative objects and Pinterest. I don't typically translate an exact design from something directly to a cookie; it's probably more of a cumulative effect from consistently looking at photos of things I'm drawn to. I'm definitely attracted to things glam and vintage, so all of those hoarded images floating in my brain somehow work themselves into my decorating.
MJ: I thought I would ask you about a set posted on Cookie Connection last May entitled “Autumn Dreams in Spring” because it has many of the elements that consistently make their way into much of your work.
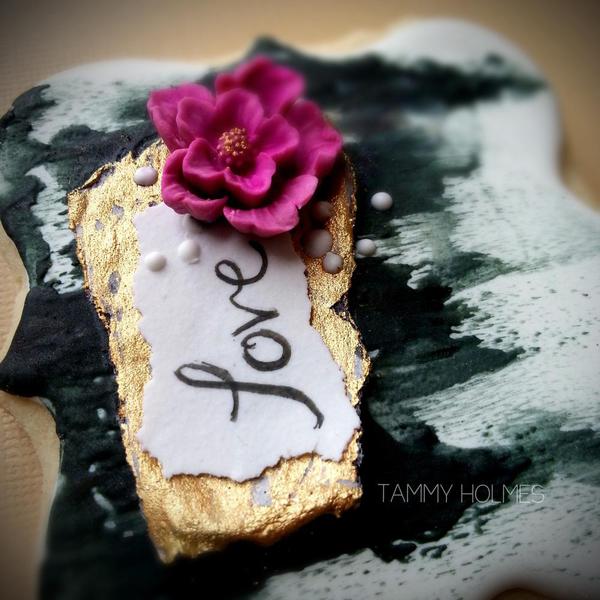
Starting with the simple, yet elegant black plaque in the close-up photo below, what did you use to achieve the gold layer and how did you execute it?
TH: I did the base in black royal icing and let it dry completely. Then, I did what I call a "rough coat", by using the same colored icing and dabbing a few little globs of it sporadically on the base coat and smearing the icing with a brush. After the rough coat dried, I dipped a brush in a liquefied edible gold dust and dragged it over the top of the icing, so only the rough coat would catch the gold. This can be done using any color for the base, rough coat, or dust, depending on the look one wants to achieve.
MJ: What a great effect! With the plaque shown below, how did you create the “Love” detailing? It looks like layered paper! Could you tell us your process?
TH: Yes, layered paper! The bottom gold layer was a torn piece of wafer paper, saturated in a liquefied edible gold dust. It was so saturated that it caused the paper to start to deteriorate, which gave it a cool effect. And the top layer was just a torn piece of icing sheet. Then, I painted the word "love" on it with food coloring.
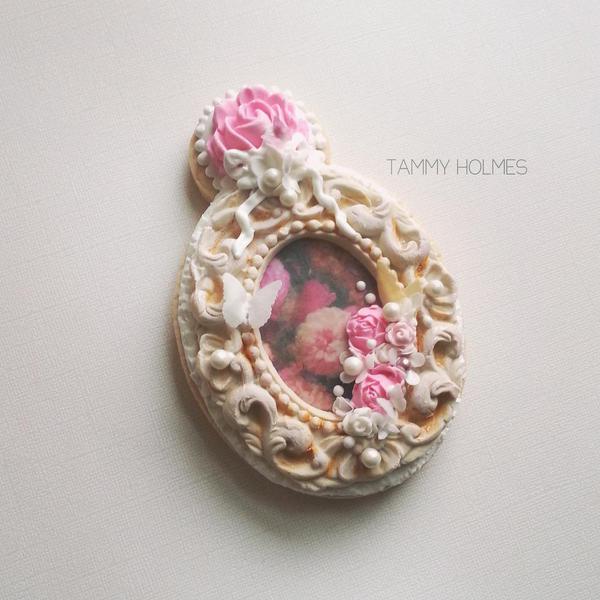
MJ: This particular cookie has a lovely molded frame and flower accents. What materials did you use and how did you make them?
TH: The frame is fondant and the flowers are a mix of fondant and royal icing. I definitely like to use various mediums for floral arrangements, as it gives them a bit more dimension. Even if it's a simple blob of royal icing here and there or just dots - which, if you've seen enough of my work, you can see I often use alongside florals! Just simple little dots can give a cookie that extra oomph. As I did in this design, I typically use molds for fondant frames and florals.
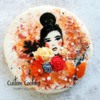
MJ: I have to ask you about one of your more recent creations, this AMAZING cookie you posted on Facebook last December. My gosh, if a cookie could be romantic, this would be IT. Feminine, fancy, and fabulous! Did you have a plan with this design, or did you let the layers grow organically? How did you go about constructing it and how many different mediums did you use? There is a lot of wonderfulness going on!
TH: Oh, wow, thank you! The result was half from plan and, like many of my more popular pieces, half by mistake! This was originally intended to be a framed ornament . . . but, not as it turned out. The cookie was handcut, which I think was part of the problem. I just couldn't get the icing even on the top part, so I covered it with a big pink rose. Then, the frame was supposed to be a shabby chic white. But, I accidentally colored the fondant too dark, so it ended up looking like stone. I painted it to look more like a painted piece of ceramic, instead of shadowing to make it look realistic, so I could keep in line with the shabby chic vibe. I almost wanted it to look slightly messy.
Sometimes, I just love a simple, pretty iced cookie. But clearly, this wasn't the case for this one! I used royal icing, fondant, custom printed wafer paper, dragÉes and, of course, edible confetti.
MJ: So gorgeous! And finally, what is your can’t-live-without baking or decorating tool?
TH: Your most simple question is the one that's hardest for me to answer! Hmmm, my first thought is the Jnternet. But, as far as an actual "tool", I would say silicone molds. There are a surprising amount of tools available that I have not yet tried, but molds were the thing that brought my work to the next level, not only design-wise, but creatively as well.
When I first used molds, they really opened up my eyes to more than just royal icing, which I had been getting bored with. It never occurred to me that maybe designing with royal icing just wasn't my thing. Don't get me wrong, royal icing is still a must-have for my designs, and I love seeing it in others' work and the amazing things they do with it, but I like to create with lots of different mediums and, often times, all at once. So, while I can improvise with bags, brushes, stencils, etc., it would be hard to replicate that immediate, detailed, and perfect design that I can get from a mold. Man, for all the floral work I like to do, if I had to make each little flower and petal out of rolled fondant . . . most of my work would not exist!
MJ: Thank you so much for our interview, Tammy! It was great fun to deconstruct a bit of your work and learn your techniques. Your stand-out style will have many inspired, I’m sure. Thank you for sharing your talents with us!
You can find more of Tammy's work on Facebook, Instagram, Twitter, Etsy, and her profile right here on Cookie Connection.
Photo and cookie credits: Tammy Holmes

 Melissa Joy Lacasse has always had a passion for baking just about anything, but something clicked once she received a cookie decorating kit years ago. This pastime that started as holiday cookies for family and friends eventually turned into Melissa Joy Fanciful Cookies, a Facebook page, and most recently, the blog melissajoycookies.com. While Melissa enjoys the creative outlet that cookie decorating brings, she finds that sharing with others, whether via bakery box or virtually, is always the most rewarding part of her cookie journey.
Photo credit: Melissa Lacasse
Note: How DID You Do That? is a regular Cookie Connection blog feature, written by Melissa Lacasse, which reveals through in-depth interviews the inside scoop behind cookiers' unique designs and technique innovations. Its content expresses the views of the author and interviewee, and not necessarily those of this site, its owners, its administrators, or its employees. To catch up on all of Melissa's past posts, click here.






Comments (7)