
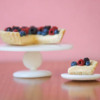
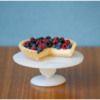
The fruit tart is an iconic summer dessert. A barely sweet, buttery crust filled with silky smooth pastry cream and topped with an abundance of perfectly ripe berries - it’s everything I want on a hot summer’s day (or any day really). This miniature version is my tribute to summer. Truthfully, it’s not my favorite season, but fruit tart is definitely one of my favorite desserts.
Supplies:
- Royal icing (I used AmeriColor gel paste coloring to tint the icing):
- Stiff-consistency blue (Midnight)
- Stiff-consistency red (2 parts Super Red/2 parts Deep Pink/1 part Regal Purple)
- Stiff-consistency dark purple (2 parts Plum/1 part Super Black)
- Stiff-consistency cream (Ivory)
- Tips: PME #3, 0, 1 (or equivalents)
- Parchment paper
- Tiny liner paint brush
- Medium flat paint brush
- 2-in (5-cm) round cookie cutter
- Light-colored cookie dough
- Silicone cupcake mold
- 1 3/8-in (3.3-cm) silicone disc mold (or equivalent), optional for isomalt cake stand
- Small, sharp knife
- Culinary tweezers
- 1 tsp corn syrup
- 1/4 tsp alcohol
- 1 oz (28.3 g) white isomalt
- 2 1/2-in (6.1-cm) silicone circle mold, optional for isomalt cake stand
- 1/2-in (1.5-cm) silicone hemisphere mold, optional for isomalt cake stand
- Toothpick (or equivalent)
Step 1: Pipe berry transfers
As usual, Cookie Connection has no shortage of inspiration for every project. For these fruit transfers, I found Manu’s "Cream (Cookie) Tart" and PUDING FARM’s "Splash" particularly instructive.
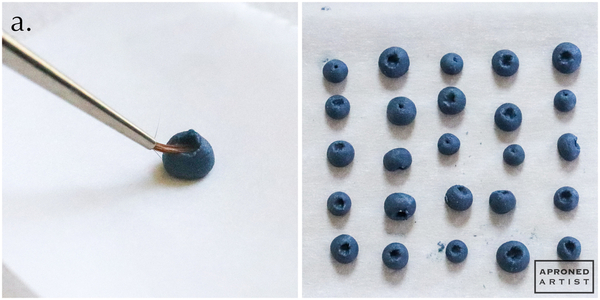
a. Using stiff-consistency blue royal icing and a PME #3 tip (or equivalent), pipe a small bead of icing (slightly smaller than the size of a peppercorn) on a small piece of parchment paper. Insert a tiny liner paint brush into the center of the bead just below the surface. Drag a small amount of the icing from this center depression toward the outside of the bead. Repeat on the remaining three sides of the depression to create a shallow crater. To create blueberries that are sitting on their sides, create the crater on the side of the bead rather than the top. To create blueberries that are upside down, simply insert the tip of the brush into the center of the bead to make a single dot for the bottom of the blueberry. Create about 25 blueberries, varying the sizes slightly. Let them dry completely before removing them from the parchment paper.
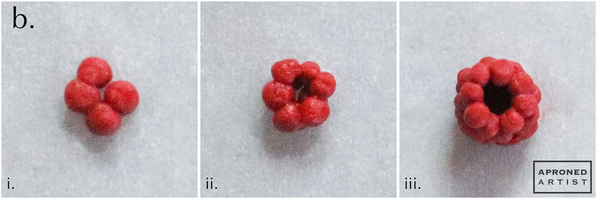
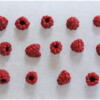
b. For the raspberry royal icing transfers, you will need stiff-consistency red royal icing, a PME #0 tip (or equivalent), and another small piece of parchment paper. The raspberries should be slightly larger than the blueberries. To create raspberries that are upside down (hole side up), pipe four small dots in a diamond pattern on the parchment paper, and then flatten them slightly with a flat paint brush (i). Pipe six small dots in a ring on top of the outer edge of the four flattened dots, leaving empty space in the center. Flatten the dots slightly with the flat paint brush (ii). Continue stacking rings of dots until you’ve piped five rings high, making each ring consecutively larger and flattening each ring of dots before adding the next (iii).
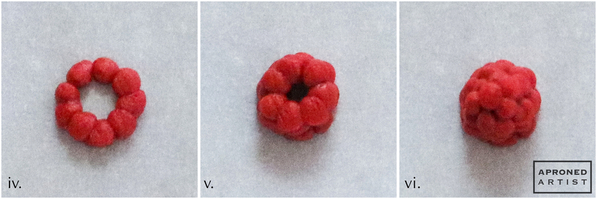
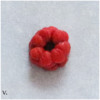
To create raspberries that are facing up, use the same process above just in reverse. Begin by piping and flattening the large ring of dots (iv). Make each consecutive ring slightly narrower (v), closing off the top with just a few dots after the fifth ring (vi).
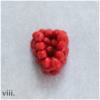
To make raspberries on their side, pipe dots in a “u” shape, fill in the center of the “u” with additional dots, and flatten the dots with a flat paint brush (vii). Each consecutive “u” tier should be slightly narrower and not filled in, so as to create the center cavity of the raspberry (viii). After a few tiers, fill in the remaining gap with just a few dots to close off the top (ix).
Create about 15 raspberries in varying orientations. Again, let the berries dry completely before removing them from the parchment paper.
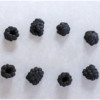
c. For the blackberry royal icing transfers, you will need stiff-consistency dark purple royal icing, a PME #1 tip (or equivalent), and a clean piece of parchment paper. Use the same techniques described in Step 1b for the raspberry transfers, however, make the blackberries slightly larger by using larger dots. Pipe about eight blackberry transfers in different orientations.
Step 2: Bake cookie crust and assemble tart
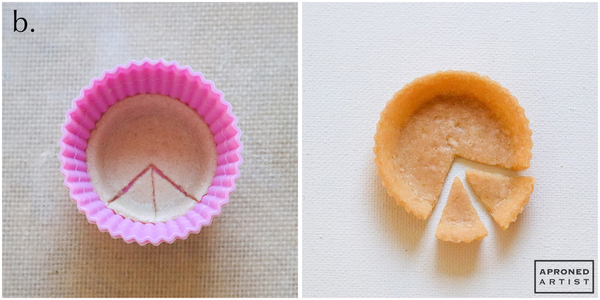
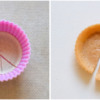
a. Molding and baking the cookie tart crust is very similar to making a real tart crust. Roll a light-colored dough about 1/8 inch (0.3 centimeter) thick. Use a 2-inch (5-centimeter) round cookie cutter to cut out a circle. Gently press the dough into the bottom of a silicone cupcake mold. Insert a silicone disc mold (that has been cut away from the larger mold) into the cupcake mold, and gently press it into the bottom and sides of the dough to further mold it into a tart shape. (Alternatively, use some other smooth-bottomed ovenproof object, like a mini tart pan.)
b. Leave the silicone disc mold inside of the molded cookie dough to help maintain the shape as the cookie bakes (just like you would use pie weights for a real crust), and parbake the cookie for five minutes. Remove the disc mold from the cookie, and score two pie slices with a small, sharp knife. Return the cookie to the oven without the disc mold, and continue baking. Check the cookie every few minutes, and smooth any air bubbles by reinserting the disc mold and pressing it gently against the cookie. Repeat until the cookie is golden brown. Allow the cookie to cool before carefully breaking away the scored slices.
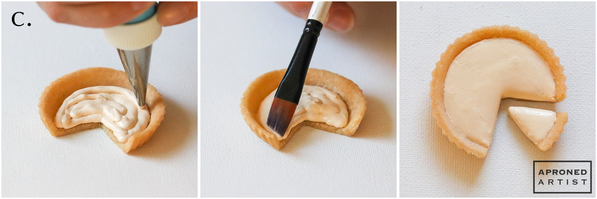
c. Using stiff-consistency cream-colored royal icing and a PME #3 tip (or equivalent), fill the crust with icing halfway up the sides. Use a damp flat paint brush to smooth and shape the icing. If desired, repeat this process with the pie slices. Allow the icing to dry completely.
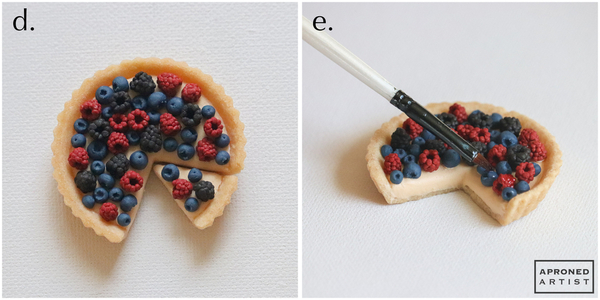
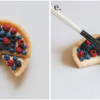
d. Using culinary tweezers to hold a berry transfer, apply a small dab of stiff-consistency cream-colored royal icing with a PME #1 tip (or equivalent) to the bottom of the transfer, and press the icing into the pastry cream layer to adhere. Repeat with the other fruit transfers until the tart seems sufficiently filled.
e. Mix 1 teaspoon corn syrup with 1/4 teaspoon alcohol. Dab the fruit with a very thin layer of the corn syrup mixture to give the tart a glazed finish.
Step 3: Mold and assemble cake stand
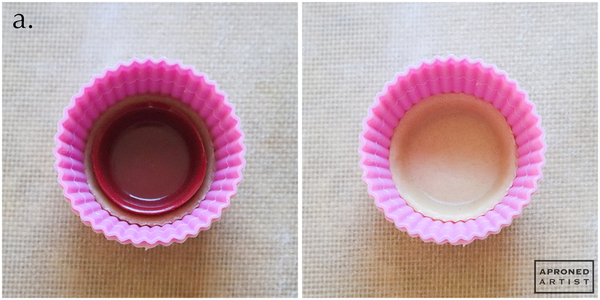
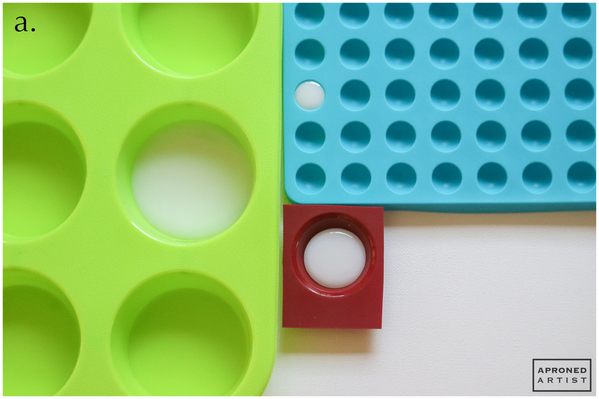
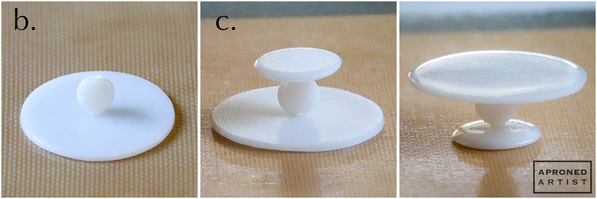
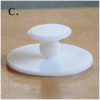
a. Prepare isomalt according to the product instructions. (Note: I used a pre-formulated white isomalt, not the normal clear variety, so that my cake stand would look like milk glass.) To create the top of the cake stand, pour a thin layer of isomalt into the base of the 2 1/2-inch (6.1-centimeter) circle mold. For the base of the cake stand, pour a thin layer of isomalt into the disc mold used to mold the tart crust in Step 2a. (Create an extra isomalt disc of this size if you’d like to have a small plate for a slice of the tart.) For the center of the cake stand, pour isomalt to fill one cavity of the small hemisphere mold. If you don’t wish to use molds, pour a 2 1/2-inch (6.1-centimeter) circle, a 1 3/8-inch (3.3-centimeter) circle, and a 1/2-inch (1.5-centimeter) circle of isomalt directly onto a silicone mat. However, it will be more difficult to control the shape and spread of the isomalt without using molds.
b. The three pieces of the cake stand will be adhered together with additional isomalt. It’s important to work quickly so that the isomalt doesn’t harden before you’ve connected the pieces. Place the top of the cake stand (the largest circle) upside down on your work surface. Using a toothpick (or equivalent), transfer a small drop of isomalt to the center of the large isomalt circle. Holding the isomalt hemisphere vertically (with the flat side pointing toward the rear), quickly press the hemisphere into the drop of hot isomalt to connect the two sections.
c. Transfer another drop of isomalt to the center of the base of the cake stand. Quickly flip over the base, and attach the drop of hot isomalt to the top of the hemisphere. Do your best to make the base as level as possible. Once the isomalt has hardened, flip over the cake stand, and attach the tart to the top with a small dab of icing. If you’re including a slice of tart, attach it to the isomalt plate molded in Step 3a with a small dab of icing.
Finished! This miniature fruit tart has definitely put me in a summertime mood. I’m off to make a real tart to celebrate.


Samantha Yacovetta began cookie decorating in 2013. While working at a local bakery, Samantha became captivated by cookie art when a customer requested princess-themed cookies. Attracted initially to the precision of cookie decorating, Samantha soon found that the limitless design opportunities turned it into her artistic passion. Samantha began regularly stocking the bakery case with decorated cookies and for several years sold cookies through her own company, Aproned Artist, a cottage food operation. Having retired from the business life, Samantha now enjoys making cookies just for fun from her home in San Jose, California, USA. To learn more about Samantha, please check out her Cookie Connection portfolio, her Facebook page, and her past Every Little Detail tutorials here.
Photo and cookie credits: Samantha Yacovetta
Note: Every Little Detail with Aproned Artist is a monthly Cookie Connection blog feature written by Samantha Yacovetta focused on the special little details that make big statements in cookie design. This article expresses the views of the author, and not necessarily those of this site, its owners, its administrators, or its employees. To read all of Samantha's past Every Little Detail tutorials, click here. And to see all of Cookie Connection's tutorials, click here.









Comments (23)