[EDITOR'S NOTE: It takes a small community to keep a large community like Cookie Connection alive with content, which is why I'm so completely thrilled to be adding another regular contributor to the site. I'm sure many of you already know our newest featured blogger - Kari Arroyo aka Yankee Girl Yummies - for her amazing cookie work posted here on Cookie Connection and elsewhere online. She's a top-flight decorator with a strong grasp of many techniques and an amazing sense of color and design, which make her ideally suited to author this column.
While her debut post, below, is a departure from what will be her standard question-and-answer format about decorating techniques, I think it provides a great intro to Kari and her talents. Plus, it's perfectly Valentines-y! Enjoy. ~JMU]

Here it is. My very first blog post on Cookie Connection. It's exciting, right?!
My goal for this blog is to have it be a place where you can ask technique questions and get focused, in-depth help with decorating cookies. For example, say you are struggling with the wet-on-wet technique. Shoot me a message, and I'll do a tutorial on it. Think of it as a "Dear Abby" column - we'll just call it "Dear Yankee Girl"! You can have all of my cookie secrets. The catch being that you have to put up with my corny jokes.
So, you've made it this far. Might as well keep reading about my ombre heart technique. ![]()

Once upon a time, I was inspired by Pinterest . . .
OK. Maybe not once upon a time. Maybe, just maybe, it's a daily occurrence.
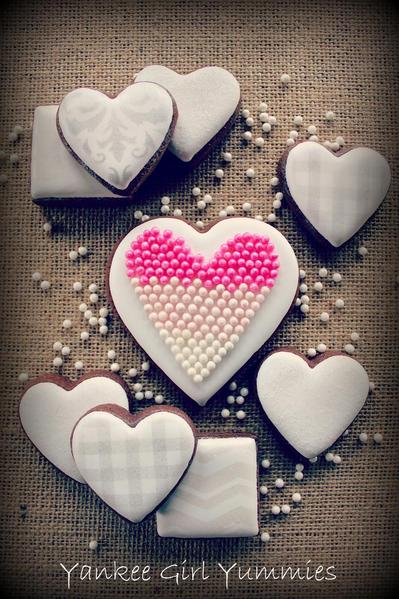
Regardless of the numerous hours that I may or may not spend on Pinterest, I saw a heart made from old wine corks painted in various shades of pink. I'd like to think that it somewhat resembled the heart cookie above! I loved that cork heart and immediately knew that it needed to be "cookied". Here's how I decided to go about it.
The setup: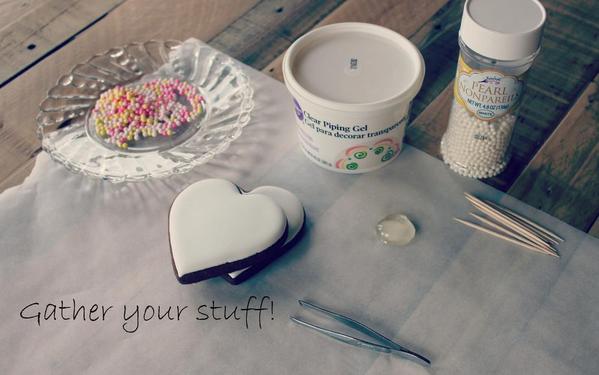
What you're going to need:
- iced and dry cookie
- nonpareils (aka dragÉes, the 3-mm size) in various shades. I chose white, light pink, and pink for mine.
- clear piping gel OR colored royal icing
- toothpick
- tweezers
A few disclaimers to get out in the open before we get started:
- This is a tedious cookie design. That being said, when I was deciding on the design for the remainder of the set, I went simple. Very simple. Think of it as keeping the focus on the "main attraction".
- You can buy nonpareils in just about any color imaginable. I colored them myself because I have limited access to cool things like colored nonpareils. If you have questions about how I color them, that would be a GREAT topic for you to ask me about!
- I used clear piping gel to attach the nonpareils to the cookie. You only need a teeny, tiny, little bit. Too much = bad thing! Bleeding of colors, not drying, etc. I also put the completed cookies in front of my countertop heater to expedite the drying. You may also use royal icing but I would color it to match the nonpareils. Otherwise, it just looks messy.
Let's get started!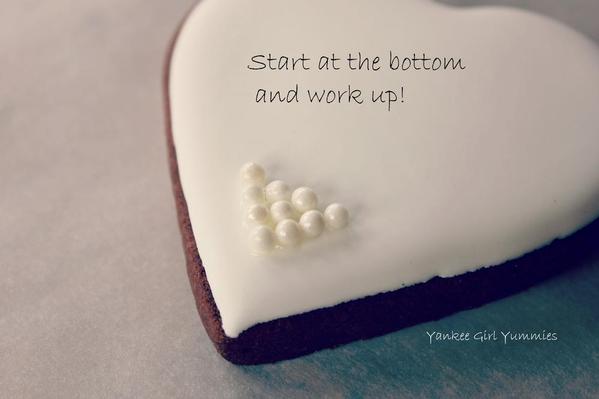
Start at the bottom of the cookie and work up. I used the tweezers to pick up the nonpareil and dip the bottom into the piping gel. Use a toothpick as needed for sticky situations, 'cause it's going to get sticky! It's easiest to work in rows and follow the edge of the cookie. Once you get about one third of the way up, start to integrate the next color.
I alternated the colors to give the appearance that the colors were slowly changing as they went up the cookie.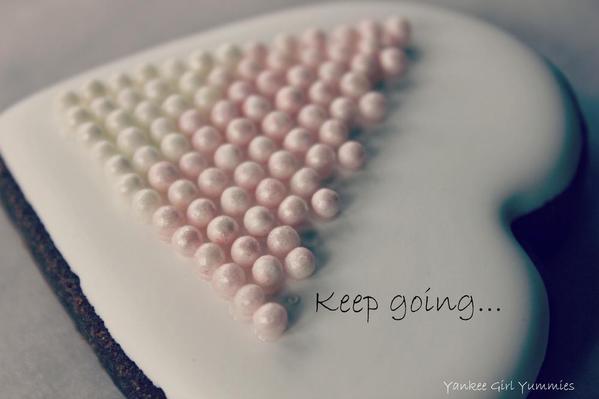
Keep working that second color up the cookie! Remember to alternate colored nonpareils when starting to work in that third color.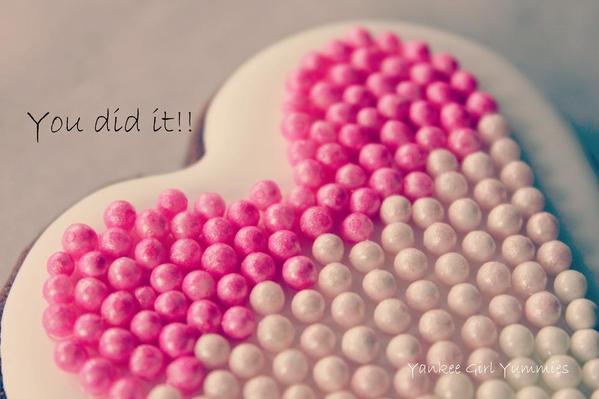
As you work on the rounded part of the heart, it gets more difficult to maintain straight lines. Just try to keep the beads tight and to maintain the shape of the heart. Allow the piping gel to dry and then you are ready to wow people with your skill!
For my next post, I want to hear from you! There are so many decorating options, so send me (Dear Yankee Girl) your questions! You can contact me through email at yankeegirlyummies@gmail.com or Facebook at www.facebook.com/YankeeGirlYummies. Or comment on this post or message me here on Cookie Connection!
Thanks for reading!
Cookie photo credits: Kari Arroyo

 Kari Arroyo started decorating cookies in 2011 after deciding to take a break from nursing, and learned the ways of royal icing by reading tutorials and LOTS of trial and error. When she’s not decorating cookies, you can find her chasing after two busy boys! Check her out on Facebook or her site, and email her your cookie questions at yankeegirlyummies@gmail.com.
Photo credit: Kari Arroyo
Note: Dear Yankee Girl is a regular Cookie Connection blog feature, written by Kari Arroyo, which allows you to get all your critical cookie technique questions answered, Dear Abby-style! Its content expresses the views of the author and not necessarily those of this site, its owners, its administrators, or its employees. To catch up on all of Kari's past posts, click here.








Comments (17)