 [EDITOR'S NOTE: Wheeeee! I am elated to announce that @Lucy (Honeycat Cookies) is back after a way-too-long-for-me hiatus to start a new nursing job. All I can say is: I'm thrilled she found time around the edges of her hectic work schedule to return to Cookie Connection to decorate with us. Today, Lucy picks up right where she left off with another lovely tutorial in her popular bimonthly What's New, Honeycat? series. If you're not familiar with her series, you can read all of her past tutorials here. ~JMU]
The sun is shining; the birds are singing; it’s a warm, wonderful spring that's quickly turning into summer. It's a time for new beginnings! I’ve missed all things cookie while I’ve been away, and so it’s with great pleasure that I return (thank you, Julia, for the opportunity), brimming with ideas and inspiration from all of you in the cookie world and beyond!
You will need:
- Acetate-lined cookie sheet or tray
- White 20-second royal icing
- Pastry bags with PME #2 and #1.5 tips, or equivalents
- Scribe tool or toothpick
- White AmeriColor food colouring
- Gel food colouring in blue, brown, red, orange, and green (I used Sugarflair.)
- Food-use-only paint brushes: flat broad brushes (I used two widths: 0.3 cm/1/8 in and 0.5 cm/1/5 in); fine-pointed brush for tiny details
- Black metallic edible paint (I used Rainbow Dust.)
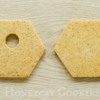
- 2 baked (8-cm/3-in) hexagon cookies, one with a small (2-cm/3/4-in) hole cut out of the top-center (See photo in Step 2, below.)
- Cornflour (aka cornstarch)
- Dark brown stiff royal icing
- Assorted small props
I wanted to create simple, impressionistic birds for this project. My inspiration for these birds was the lovely 17th century painting "The Goldfinch" by Carel Fabritius, with its broad quick brush strokes and (deceptively) easy, but effective style. (So sorry, but, due to copyright law, I cannot cut and paste the image into this post. However, you can see it on wikipedia.org, here.)
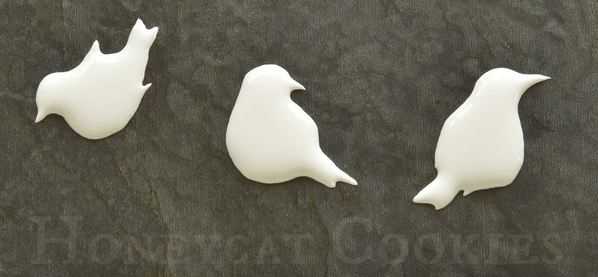
First, we need to create royal icing transfers of birds in a range of poses. You can see a few examples here . . .
Remember: Royal icing transfers are nothing more than royal icing shapes that get piped onto acetate or parchment paper. Once they set, they are transferred from the acetate or parchment paper directly onto cookies - hence the name "transfer."
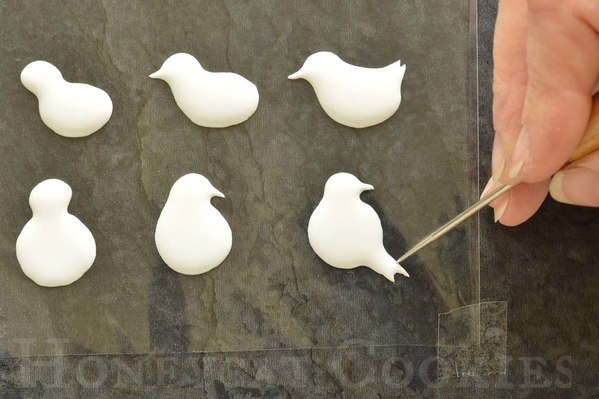
These transfers are quite easy to create. Simply line a cookie sheet or other tray with acetate, and tape the acetate into place. (Alternatively, you can line with parchment paper, but it tends to buckle more than acetate as the icing dries, which can put cracks or waves into your transfers.) Using white 20-second royal icing and a PME #2 tip (or equivalent), pipe a large oval (approximately 2 cm/3/4 in long) on the acetate. This oval will be the bird's body. Then, for the head, pipe a smaller oval anywhere next to the body. Using a scribe tool, smooth the head into the body, and gently pull out a beak, tail feathers, and wings. Repeat to make as many birds as desired, altering the direction of the beaks and tails, so as to alter the birds' poses. (I made four birds for my house.) Allow the transfers to dry thoroughly, ideally overnight or longer, depending on the size of the transfers.
Now we can move onto the painting. To create the paint, don't use water as the base or extender; instead use white AmeriColor food colouring. It creates more of an "acrylic" or "oil" paint texture. (Water is only to be used in this project to clean brushes between colours.)
Pour a small pool of white colouring onto a dish, and add spots of the blue, brown, red, and orange gel colouring around the white to create a palette from which you can mix the colours you need.
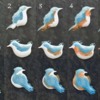
1. Mixing touches of blue with white, use a small broad brush (I used one that was approximately 0.3 cm/1/8 in wide), and quickly dab a few dashes on the head and back of the birds. Don't overthink or plan this step too much, and don't overwork the strokes. Just work quickly with a few colouring dabs.
2. Follow the blue with a darker blue at the bottom of the wing.
3. Add a few strokes of brown beneath the blue.
4. Add smaller streaks of reddish orange on the throat and beneath the wing.
5. Last, finish the white areas with a very light version of the orange; paint dark brown onto the beak; and, when these colours are dry, use a fine-pointed paint brush to apply a dot of black metallic food paint for the eye.
Repeat Steps 1 to 5, directly above, to paint all of your birds.

Step 2: The birdhouse parts
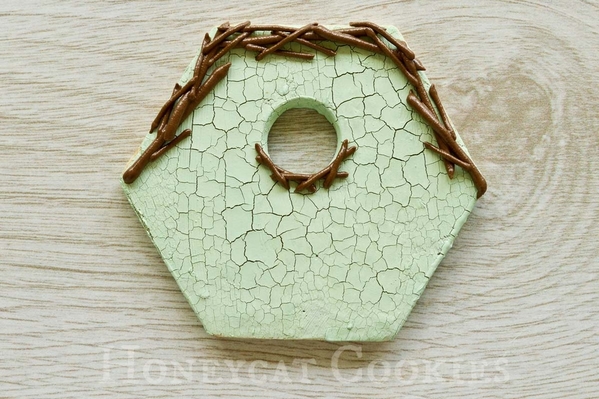
I simply baked two (8-cm/3-in) hexagons, and used a small (2-cm/3/4-in) round cutter to cut out a hole in one of them. (The hole was cut into the dough before it was baked.)
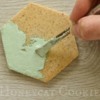
I used @Dolce Sentire - Aixa Zunino's tutorial for the painted crackle effect, as it's so simple and effective. My only departure from the tutorial was to add a tiny amount of green food colouring to the white cornstarch mixture she uses. Paint the cornstarch mixture onto both hexagon cookies, applying it thickly with a very broad (about 0.5-cm/1/5-in wide) brush. Make sure to coat the inside of the hole, as well as the sides of the hexagon with the hole. Leave the iced cookies to dry and, as they do, the icing will magically crackle!
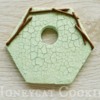
As the crackle layer doesn't take long to dry at all (especially if you use a food dehydrator), you can move straight on to piping the twig roof on the hexagon with the hole. For the first step, pipe a few basic lines with stiff dark brown royal icing and a PME #2 tip (or equivalent).
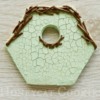
Replace the PME #2 tip with a PME #1.5 tip (or equivalent). On top of the twigs you just piped and beneath the hole, pipe finer dark brown twigs to form a dense mesh. We'll be adding more twigs to the top and sides of the roof after construction. Let the twigs dry thoroughly, so the cookies can be handled safely without messing up the icing in the next step.
Step 3: 3-D construction
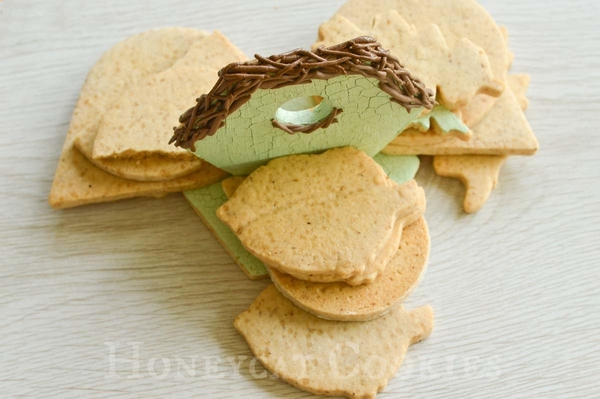
Place the hexagon with the hole on top of the other hexagon, and hold it in an upright position. Using the same stiff dark brown royal icing used for the twigs, spread a thick layer of icing behind the base of the upright cookie.
To hold the upright cookie in place while the royal icing is drying, use other cookies (or whatever suitable props you have on hand) to support the cookie from both the front and the back.
Once the construction is stable, pipe the remaining twigs on the top edge of the upright hexagon to complete the roof.
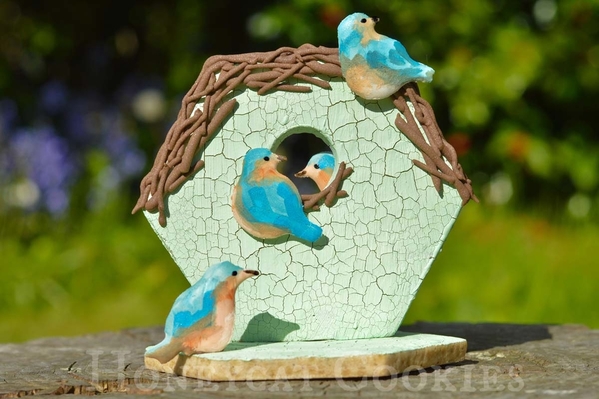
The final step is to "glue" the birds in place, using more stiff royal icing. Make sure the birds have thoroughly dried after painting. (Use a dehydrator, if necessary, to speed the drying process.) Carefully peel the acetate (or parchment paper) away from the bird transfers, taking extra care around the tails, wings, and beaks, which can be more fragile. Avoid tugging on the transfers, as you're more likely to break them that way. Position the birds around the birdhouse, making sure to stick one on the back of the hexagon so you can see its head through the hole. As the birds are quite light and delicate, you will only need a small blob of royal icing "glue" behind each one.
And that's it! A sweet little construction for spring and summer! I hope you're all having as good weather as we have here in England. I look forward to creating many more tutorials for you all. It's really good to be back!
[EDITOR'S NOTE: Hear, hear! I echo that sentiment. Having Lucy back feels like a member of my family has finally come home! ![]() ]
]

 Lucy Samuels is the owner of UK-based Honeycat Cookies. Originally with an art-based career in mind, Lucy attended art college for a year after school but switched to nursing where she spent twenty years specializing in cardiology. After becoming a stay-at-home mom to her daughter Jess, Lucy experimented with a range of crafts, alighting upon decorative cookies almost by accident. In late 2011, she was persuaded to start her business Honeycat Cookies following several requests to place orders. She set about learning the craft from books, the internet, and trial and error. Lucy has a YouTube channel and a blog, Honeycat Cookies, that document some of her wider adventures in confectionery.
Photo credit: Lucy Samuels
Note: What's New, Honeycat? is a bimonthly Cookie Connection blog feature written by Lucy Samuels, which pushes the cookie envelope every other month with innovative cookie design ideas and tutorials. Its content expresses the views of the author and not necessarily those of this site, its owners, its administrators, or its employees. To catch up on all of Lucy's past posts, click here.







Comments (12)