
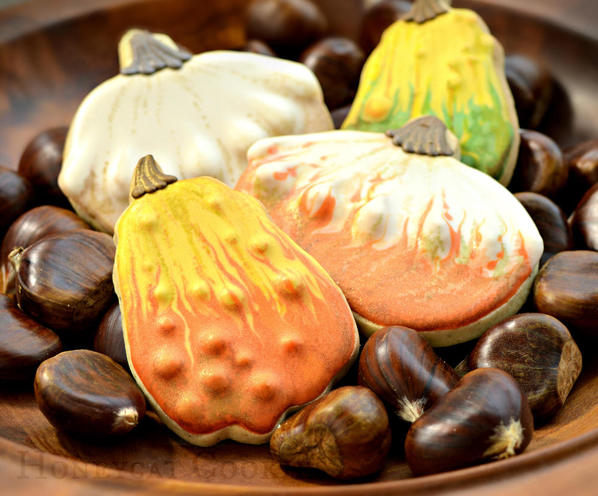
Well no one's ordered any autumn cookies from me this year, and I do love a collection of pumpkins and gourds. I always have a few in the window where I work. I particularly love the quirkily shaped, knobbly gourds, both beautiful and funny! Though where I live, it seems difficult to get hold of them. So I tried growing some myself once. I managed to produce a single one-inch diameter pumpkin. I was very proud.
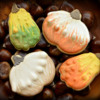
It seems that I would have a better chance of getting myself a knobbly gourd if I just made one out of cookie and icing. So that's what I set out to do here.
To make these you will need:
- Gourd shaped cookies (both of my cookies are made from pumpkin cutters; the narrow gourd is simply a standard metal pumpkin shape that was squished)
- Stiff white royal icing with number 3 tip
- Scribe tool
- Flood icing in pumpkin colours (I used yellow, green, orange, and off-white) with number 2 tips
- Stiff dark brown royal icing with number 2 tip
- Fine food-use-only paint brush
- Food colouring for painting (orange, brown, green, yellow, and white)
- A little water to mix the paint
- Gold lustre dust and a soft dry brush (if you can't help yourself)
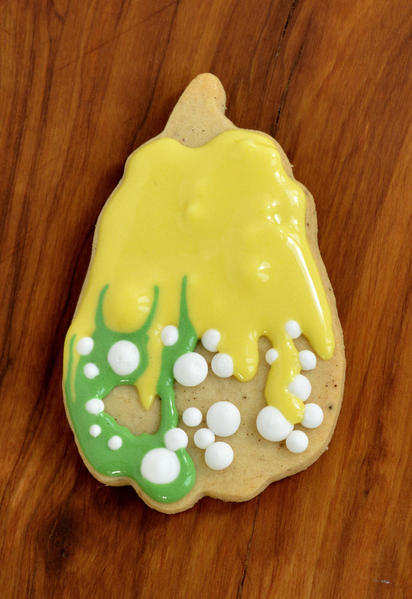
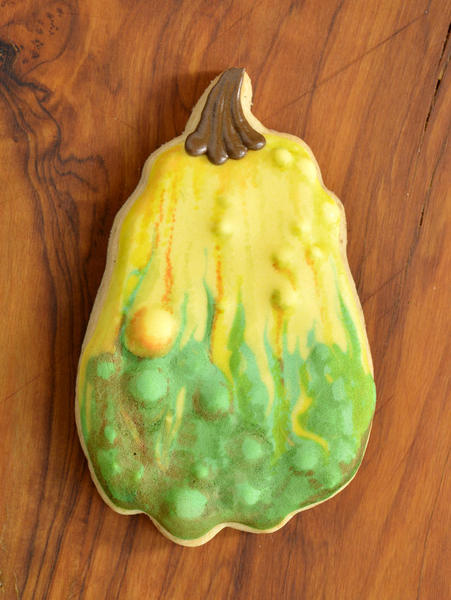
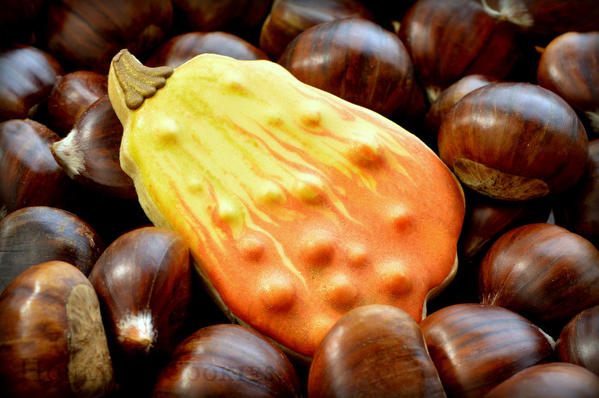
1. I tried two types of knobbles: the all-over blob kind and the regular ring of elbows that some pumpkins have. (Yes, blobs and elbows are official knobbly gourd classification terms!) The blobs were pretty straightforward: just pipe large and small blobs irregularly over the surface of the cookie in stiff white icing with a number 3 tip. I wanted the blobs to be stiff for strength and to avoid craters, but of course this leaves peaks, which I simply tapped down with the scribe tool.
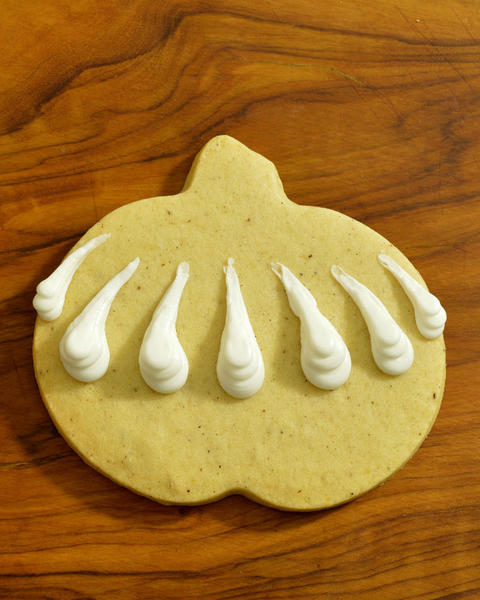
The ring of "elbows" was made using the same stiff icing and a number 3 tip. First I piped thick blobs which I then swiped up to form a tail. After allowing these to crust over a little, I piped another row on top, and then a third. I really wanted to build up the height here.
I did try immediately piping the flood over the elbows, but found that the weight of wet icing caused some of the "elbows" to slump off the side of the cookie. So, Let the elbows dry thoroughly before flooding.
2. Using one of your flood icing colours and a number 2 tip, start to pipe around and over the knobbles. After a bit of fiddling, I found it easiest to pipe around them first; then to lay a rope of icing round and round the knobble until the rope reached the top. This process ensured that the knobble was covered all the way around. (The first time I tried piping, I was very pleased with myself, until I turned the cookie around and realised there were little gaps everywhere!)
I flooded around the elbow-y pumpkin in a similar fashion, using off-white icing.
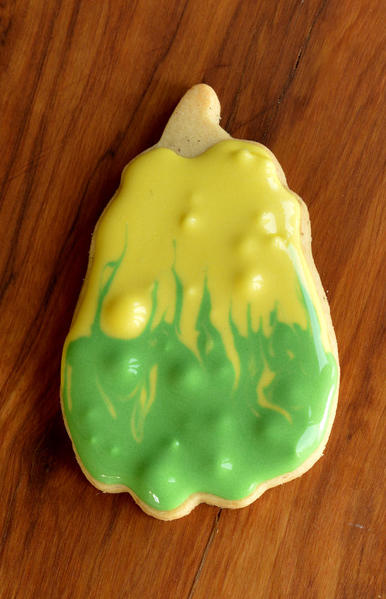
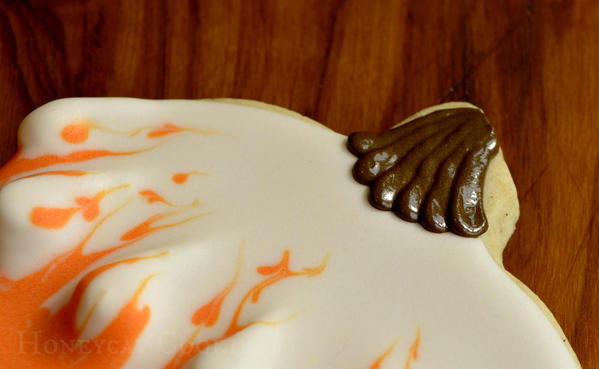
Flood the first colour over roughly half of the cookie, leaving an uneven edge; then flood the second colour up to the edge.
3. Immediately use the scribe tool to drag the two colours up and down into each other. Let the icing dry thoroughly.
4. Using the stiff brown icing and a number 2 tip, pipe a stalk onto each gourd. (I piped mine in lines, to create a little more texture.)
5. These cookies look quite neat and bright as they are, but I can't leave well alone, and decided to paint mine. First, I used a darker version of the bottom colour mixed with a little brown, and shaded unevenly around the base, trailing the shading upwards, and around the undersides of the knobbles. Then I used other shades of similar autumnal colours to trail dots and lines up and down the gourds, using the palest colours for the upper half and around the base of the stalk.
They seemed to be nicely done at this stage, but I couldn't help wondering whether a little white on top would help. Usually I have to make myself stop before I go too far, but sometimes it's interesting to find out just how far I'm going to go.
So after the paint had dried, I added gold lustre dust. (Of course I did!)
Just a quick dry dusting - the ridges of the stalk picked it up nicely. I'm thinking of dusting my real pumpkins with gold now . . .
Cookie and photo credits: Lucy Samuels


Photo credit: Lucy Samuels
Note: What's New, Honeycat? is a bimonthly Cookie Connection blog feature written by Lucy Samuels, which pushes the cookie envelope every other month with innovative cookie design ideas and tutorials. Its content expresses the views of the author and not necessarily those of this site, its owners, its administrators, or its employees. To catch up on all of Lucy's past posts, click here.







Comments (22)