
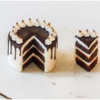
My husband and I have birthdays just three days apart. While we would be content to share the occasion, my children have always insisted that we each have our separate day to be celebrated. With our own unique cake. If you were thinking to yourself, that’s a lot of cake - just wait. To honor such a special occasion, it has to be a new recipe, usually with multiple components and decorations to raise the fancy factor. I feel strongly that the easiest way to ruin a good birthday is with bad cake, so I always make a practice cake. For each cake. We’re not complete gluttons; we eat just a sample of the practice cakes, and then I freeze the rest for my children to munch on throughout the year. But the fact remains: we eat some practice cakes before we eat the real cakes. If the practice cakes aren’t up to snuff, then new recipes must be formulated and sampled. More cake must be eaten. Needless to say, I have cake on the brain (and everywhere else for that matter) which is how this bite-size version came to be.
Supplies:
- 1 3/4-in (4.4-cm) round cookie cutter
- Chocolate cookie dough rolled 3/8 in (1 cm) thick
- Sharp paring knife
- Royal icing (I used AmeriColor gel paste coloring to tint the icing.):
- Toothpaste-consistency caramel (2 parts Warm Brown/1 part Ivory)
- Toothpaste-consistency cream (Ivory)
- Flooding-consistency dark brown (Chocolate Brown plus a touch of Super Black)
- Stiff-consistency white
- Stiff-consistency light brown (Espresso plus a touch of Taupe)
- Flooding-consistency dark green (3 parts Silver Spruce/1 part Cypress/1 part Midnight)
- Tips:
- Paint brushes:
- Medium flat angled paint brush
- Tiny liner paint brush
- AmeriColor (or equivalent) gel paste colorings for painting: Ivory, Espresso, Bright White, Chocolate Brown
- Small trowel (or equivalent)
- Cardstock
- Confectionary glaze (or make glaze of 2 parts corn syrup to 1 part alcohol)
- Parchment paper
- Baked gingerbread cookies rolled 1/8 in (0.3 cm) thick:
- 1 (1 1/8-in/2.9-cm) circle
- 1 (1 3/8-in/3.5-cm) circle
- 3 (1/2-in/1.3-cm) circles
- 1 (9/16-in/1.4-cm) circle
- 1 (5/8-in/1.6-cm) circle
- 1 (2 3/8-in/6-cm) circle
- Acetate
Step 1: Make cake
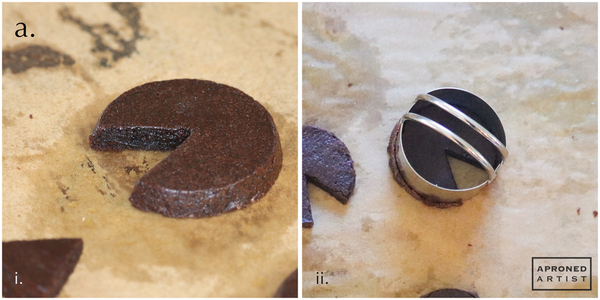
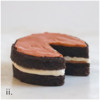
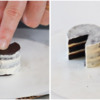
a. Use a 1 3/4-inch (4.4-centimeter) round cookie cutter to cut three circles out of your chocolate cookie dough. Bake the circles until they are slightly underdone, like a brownie. They should be set around the edges but still shiny in the center. (I baked my cookies at 375°F/191°C for four minutes.) Underbaking the cookies will give the interior a moist crumb that looks more like cake (and they’ll taste deliciously fudgy). While the cookies are still warm, use a sharp paring knife to cut out a slice, about one-sixth of the circle, from each cookie (i). Try to make the slices as uniform as possible. The cookies will be very soft and fragile, so handle them with care. Use the (cleaned) round cookie cutter to trim the edges if the cookies spread during baking (ii). Allow the cookies to cool completely; they’ll set up and become much more sturdy once cool.
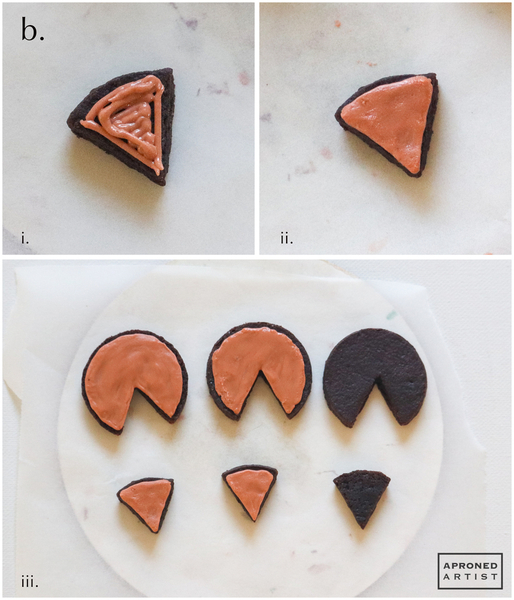
b. Using toothpaste-consistency caramel royal icing and a PME #2 tip (or equivalent), roughly pipe icing on the top surface of one slice (i). Use a medium damp flat paint brush to smooth the icing and push it to the cut edges of the slice. Leave a slight border uncovered at the rounded end (ii). Repeat this process with one more slice and two of the cake layers (iii). One slice and one cake layer should not get any caramel filling; these cookies will be the top layer of the cake and cake slice. Allow the icing to dry completely.
c. Using a tiny liner paint brush, paint the side edges of the caramel layers (on both the slices and the cake layers) with undiluted Ivory gel paste coloring (or equivalent). This step will lend the caramel a more realistic, glossy appearance.
d. Using toothpaste-consistency cream royal icing and a PME #3 tip (or equivalent), pipe a layer of icing on top of the caramel layer for the frosting. The frosting layer should be slightly deeper than the caramel layer, and it should also be piped to the edge of the cake layer. Use a medium damp flat paint brush to smooth the icing (i). Gently place the other middle cake layer (the one with a caramel layer) on top of the wet icing (ii). In the same fashion, add another layer of cream icing on top of the caramel, and attach the top layer of the cake (iii). Repeat this entire process with the slices. Allow the icing to dry completely.
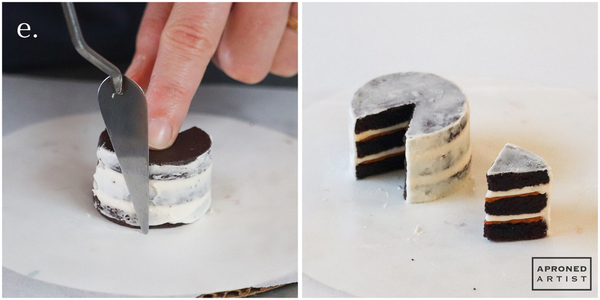
e. Apply a thin layer of icing to the top and sides of the cake, removing the excess with a small trowel or offset spatula, just as you would apply a crumb coat to a real cake. Leave the cut sides (where the slice has been removed) bare. Repeat on the top and side of the slice. The cake layers will still be visible through the icing, however, this thin layer of icing will add structure to the cake and seal in the crumbs so they don’t come off into the frosting. Allow the icing to dry completely.
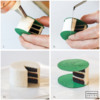
f. Cut two identical circles of cardstock that are slightly larger than your cake (my circles were just under 2 inches/5.1 centimeters in diameter). Sandwich the cake between the two circles of cardstock, making sure their edges line up. Holding the stack tightly, use toothpaste-consistency cream royal icing and a Wilton #44 tip (or equivalent) to apply bands of icing along a portion of the cake’s side (i). Use a small trowel (or equivalent) to scrape off the excess icing; the cardstock will act as guides to give you a smooth, straight edge (ii). Use the trowel to remove any icing that extends beyond the cut edge of the cake. Still holding the stack tightly, rotate the cake to expose another section of the crumb coat, and repeat to smoothly apply the frosting. Continue until the entire cake is covered. Allow the icing to set for a few minutes until no longer tacky, and carefully run the trowel beneath the cardstock to separate the paper from the cake. Allow the icing to dry completely. Once dry, apply icing to the top surface of the cake, spreading and smoothing the icing with the trowel (or equivalent) (iii). Stack the slice of cake between the same two cardstock circles used for the whole cake, lining up the tip of the slice with the center of the circles. Use the same process to apply a smooth layer of frosting to the slice of cake (iv). Allow the icing to dry completely.
Step 2: Add cake decorations
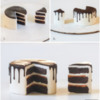
a. For the chocolate drip, use flooding-consistency dark brown royal icing and a PME #2 tip (or equivalent) to flood the top surface of the cake and slice all the way to the edges (i). Try to keep the layer of icing relatively thin so that it looks like a chocolate glaze. Allow the icing to dry completely. Use a PME #0 tip (or equivalent) to pipe drips of varying length around the side of the cake and slice. Use a damp flat paint brush to blend the wet icing of the drips into the dried icing of the top (ii). Allow the icing to dry completely. Brush the drips and top with confectionary glaze (or equivalent) to give the chocolate drip a nice shine (iii). It may take several coats of confectionary glaze to achieve a uniformly glossy surface. Allow the glaze to dry completely.
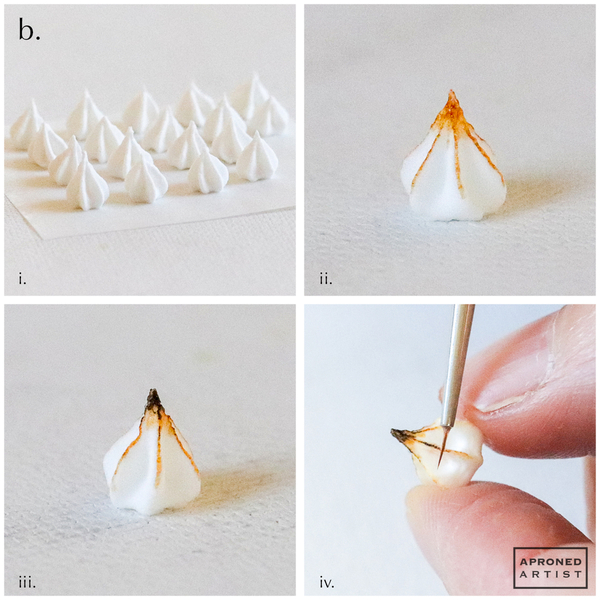
b. For the toasted meringue kisses, use stiff-consistency white royal icing and a Wilton #16 tip (or equivalent) to pipe about 20 little kisses onto a square of parchment paper (i). Allow the meringue transfers to dry completely. Using undiluted Ivory gel paste coloring (or equivalent) and a tiny liner paint brush, paint a thin line on each ridge of the kiss, starting at the tip and ending about three-quarters of the way down. Add a little bit of extra paint at the tip in between the ridges (ii). In the same fashion, paint undiluted Espresso gel paste coloring (or equivalent) on each ridge, starting at the tip and ending about one-third of the way down. Again, add a little extra paint between the ridges of the tip but not enough to completely cover the ivory paint (iii). Tip: To achieve the thinnest, straightest lines, run the side of the paint brush against the ridge of the meringue rather than the tip of the paint brush (iv).
Attach each meringue around the perimeter of the cake and the rounded edge of the slice with a small dab of icing (v). You may not need all of the meringues; I used 17.
Step 3: Make cake stand
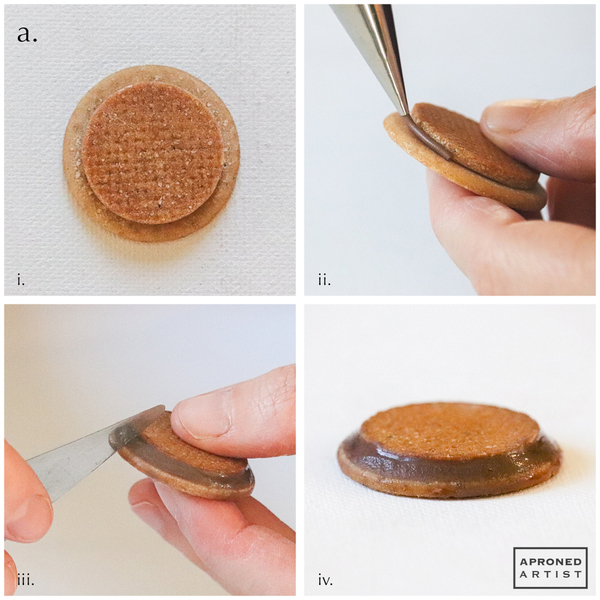
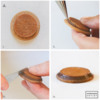
a. To create the base of the cake stand, attach a 1 1/8-inch (2.9-centimeter) round cookie to the center of a 1 3/8-inch (3.5-centimeter) round cookie with a dab of stiff-consistency light brown royal icing (i). Use a PME #2 tip (or equivalent) to pipe icing around the perimeter where the two cookies meet (ii). Add a few rings of icing to sufficiently fill the space between the two cookies. Use a damp paint brush to smooth the icing and help the icing adhere to the cookies. Rest the edge of a small trowel (or equivalent) flush against the edges of the two cookies, and scrape around the edges to remove the excess icing (iii). The result should look like a smooth, tapered base for the cake stand (iv).
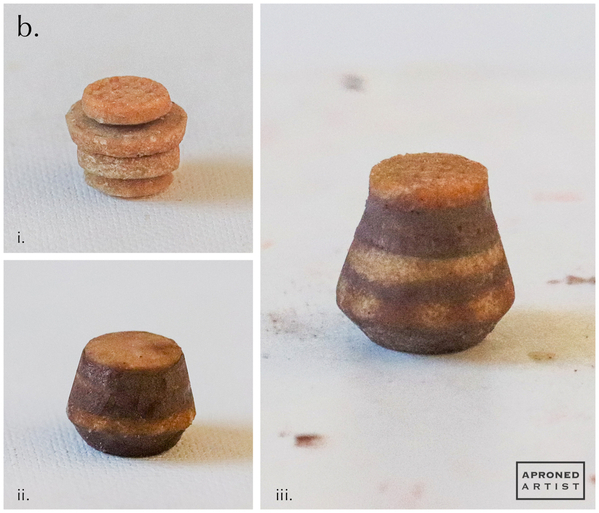
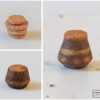
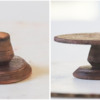
b. For the neck of the cake stand, use the same icing and tip to sandwich together four round gingerbread cookies in the following order of size (depicted from bottom to top in the top left photo below): 1/2 inch (1.3 centimeters), 9/16 inch (1.4 centimeters), 5/8 inch (1.6 centimeters), and 1/2 inch (1.3 centimeters). Use the same technique described in Step 3a to pipe icing around the layers and scrape off the excess with a small trowel (or equivalent) (ii). Note: the connected cookies have been flipped over in the bottom left picture. This orientation is the one that will be used in the final cake stand. Attach one more 1/2-inch (1.3-centimeter) cookie to the top of the neck, and smooth the seam with additional icing (iii).
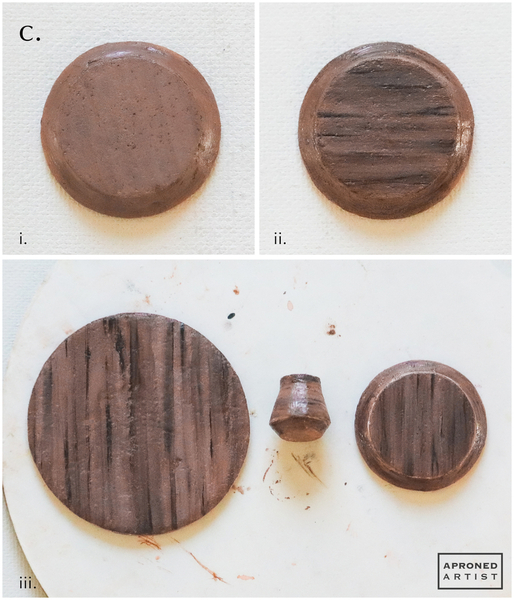
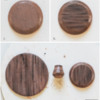
c. Mix together equal parts Bright White and Chocolate Brown gel paste colorings (or equivalents). Use a medium flat angled paint brush to paint the top and sides of the cake stand base (i). Dip just the tip of the damp angled paint brush into undiluted Chocolate Brown gel paste coloring (or equivalent), and paint thin, irregular stripes of darker brown on the top surface of the cake stand base. Blend as desired with a clean damp paint brush (ii). Add some dark stripes to the angled sides of the cake stand base in the same fashion. Repeat this process to paint the neck of the cake stand as well as the top and sides of the 2 3/8-inch (6-centimeter) round gingerbread cookie which will be the cake stand’s top (iii). Allow the paint to dry completely.
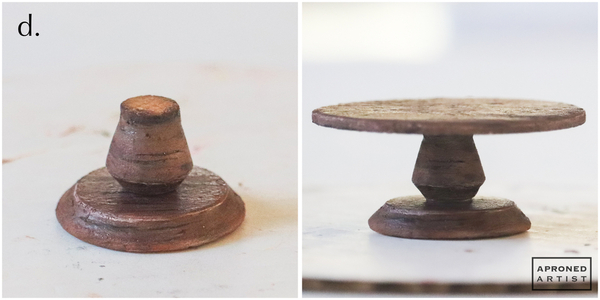
d. Attach the neck of the cake stand to the center of the base with a dab of stiff-consistency light brown royal icing. Pipe a dab of icing on top of the neck, and center the top of the cake stand on the neck. Allow the icing to dry completely.
Step 4: Make plate transfer, and assemble scene
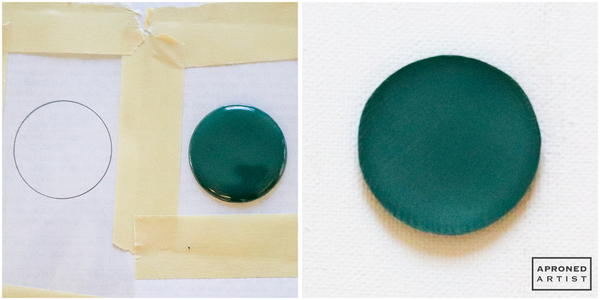
a. Draw a 1 1/2-inch (3.8-centimeter) circle on a piece of paper. Tape a piece of acetate over the circle. Using flooding-consistency dark green royal icing, pipe over the circle on the acetate. Allow the icing to dry completely (drying on acetate typically takes slightly longer than on parchment paper; I let my transfer dry overnight). Carefully peel away the acetate from the transfer, and flip over the circle so that the shiny side that was in contact with the acetate now faces up. Attach the slice of cake to the plate with a small dab of icing.
b. Attach the cake to the top of the cake stand with a few dots of icing.
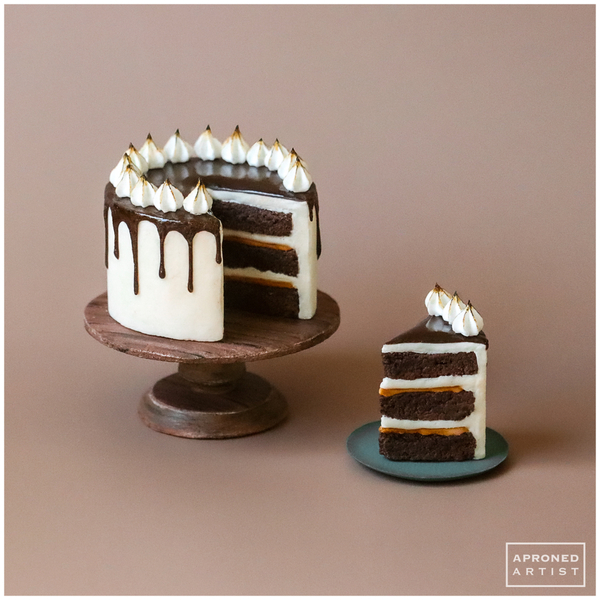
Finished!
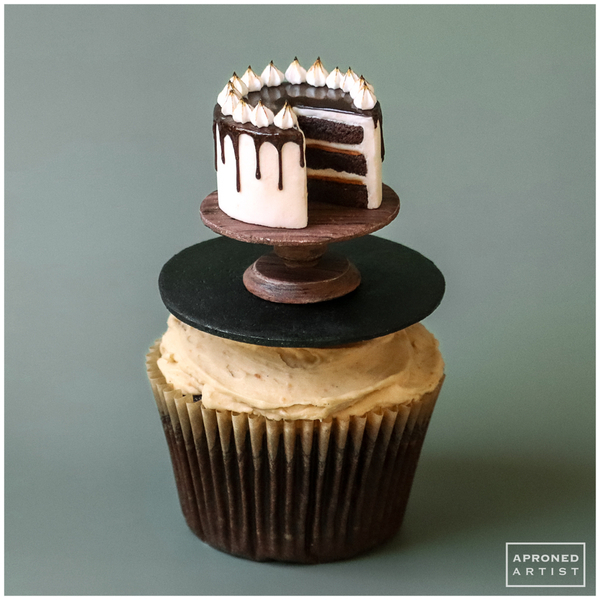
To really drive home the idea (and to show scale), here is the cake atop even more cake. I think I’ve had more than enough cake to last me until the next birthday.


Samantha Yacovetta began cookie decorating in 2013. While working at a local bakery, Samantha became captivated by cookie art when a customer requested princess-themed cookies. Attracted initially to the precision of cookie decorating, Samantha soon found that the limitless design opportunities turned it into her artistic passion. Samantha began regularly stocking the bakery case with decorated cookies and for several years sold cookies through her own company, Aproned Artist, a cottage food operation. Having retired from the business life, Samantha now enjoys making cookies just for fun from her home in San Jose, California, USA. To learn more about Samantha, please check out her Cookie Connection portfolio, her Facebook page, and her past Every Little Detail tutorials here.
Photo and cookie credits: Samantha Yacovetta
Note: Every Little Detail with Aproned Artist is a monthly Cookie Connection blog feature written by Samantha Yacovetta focused on the special little details that make big statements in cookie design. This article expresses the views of the author, and not necessarily those of this site, its owners, its administrators, or its employees. To read all of Samantha's past Every Little Detail tutorials, click here. And to see all of Cookie Connection's tutorials, click here.











Comments (15)