Hi, all! I’m back this month with another round of our CookieCon 2017 instructor interview series. Today, we’re joined by the talented Teri Lewis of tweets…cookie connection, who, back in March, wowed CookieCon-goers with her dimensional chocolate garnishes, and, more recently, revealed some of their secrets in a Cookie Connection live chat.
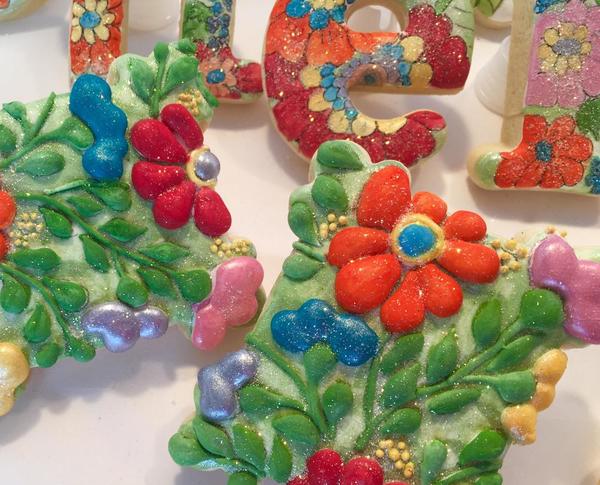
As brief background, Teri harks from Colorado, USA. After her two kids took off for college, she enrolled in what she calls the “YouTube University of Fancy Cookie Decorating” and, six months later in 2012, started her home-based cookie decorating business. She typically decorates and sells up to 10 to 12 dozen cookies per week, and conducts one to three home cookie decorating parties or classes each month. In addition to mastering both modeling chocolate and melted chocolate as cookie decorating mediums, Teri has a self-proclaimed love of sparkle, glitter, luster dust, and dots - which certainly shines through in her photos, below!
In this interview, we’ll expand upon our discussion of Teri’s chocolate techniques, started in our recent live chat, and also get behind some other aspects of her cookie designs and business.
![]()
JMU: Hi, Teri! Thanks for joining us again today! I’d like to kick off with some questions about your business, since we barely broached the topic of business in our chat. First, I often see you on social media and at events side-by-side with your mom. In fact, I met you both at the very first CookieCon. Is your mom a partner in your business, and, if so, how do you split up (or share) the various tasks involved with running your cookie business?
![]()
TL: Hi, Julia, thank you for having me and allowing me to share some more insight into my cookie world here in Lakewood, Colorado! Again, I am honored and humbled to share with you and the amazingly talented cookiers in your Cookie Connection community.
Yes, my Mom (Beverly) has always been my best friend and biggest supporter of my cookie decorating passion, from hobby to full-fledged business. She is my business partner, but has not actively been a part of baking or decorating since the second CookieCon. However, she is the brains behind, and designer of, all of our amazing and glitzy aprons worn at each CookieCon.
We will never forget meeting you at the very first CookieCon! Your books were our inspiration and the push to improve our icing consistency, dot-piping, and elegance in design! I was over-the-moon to get your autograph!
![]()
JMU: Well, I was equally thrilled to meet both of you! [BTW, everyone, Teri and Beverly are flanking Karen Summers, CookieCon founder and organizer, in the photo above.] When you started your business back in 2012, why did you decide to operate out of your home versus renting/buying a space outside of your house? What considerations went into making the decision about where to locate your business?
![]()
TL: I really wanted a brick-and-mortar location to host "cookie canvas" decorating parties. However, rent for the best and most up-and-coming neighborhood locations in Denver was outrageously expensive, parking was not in great supply, and I didn’t have years of experience and knowledge in the bakery or cookie world, so it seemed too risky to venture away from the low risk and low overhead costs of working from my home.
![]()
JMU: Understandable, for sure! I’m partial to your business name for perhaps obvious reasons ![]() , but, truth be told, it’s not the typical cookie business name. What was the genesis of “tweets…cookie connection”? Is there any story behind it?
, but, truth be told, it’s not the typical cookie business name. What was the genesis of “tweets…cookie connection”? Is there any story behind it?
![]()
TL: I wanted a simple name that a logo could easily brand . . . like the infamous Apple logo . . . and I love birds, so I knew a little golden, tweet bird would be a part of my logo design.
Yet I also wanted to make it about connecting art and people by using cookies as a canvas, much like the "cocktails and canvas” paint studios that were popping up around town. It was my desire to open up a cookie studio that was for painted cookie parties. So the name "tweets" (which is bird talk for "sweets") seemed pretty clever, and “cookie connection” related directly to the message in my tagline, “Cookies and happy hearts . . . it's where the connection starts.”
![]()
JMU: Can you tell us a bit about the Colorado Cottage Food Act and what it allows/disallows home bakery operators to do? When setting up your business, did you encounter any challenges in trying to comply with this act, and, if so, how did you overcome them?
![]()
TL: At the time I started making cookies, I really had no idea what cottage laws or the Colorado Cottage Food Act meant for my cookie business, until I learned more about them from other cookiers at the first CookieCon. The Colorado Cottage Food Act passed for home bakery operation in 2012. During the first six to twelve months of my business, I made cookies for family and friends at no charge, so I really wasn’t too concerned about the cottage law rules, and was confident no one would complain . . . yikes, I got lucky! I was more focused then on honing my skills, knowledge, experience, and design techniques.
In 2013, I contracted with a boutique candy shop for cookie orders. It was then that I learned the laws governing home bakery operations and met the guidelines under Colorado law. I enrolled in a food safety and handling class, and I now include labeling and expiration dates on all of my cookie packaging. Cottage food operations require no license or permit from the Colorado Department of Public Health and Environment and are not inspected by local government unless a complaint is filed. I have a great tax lawyer and, truthfully, he makes certain I meet all guidelines related to paying annual fees and taxes.
![]()
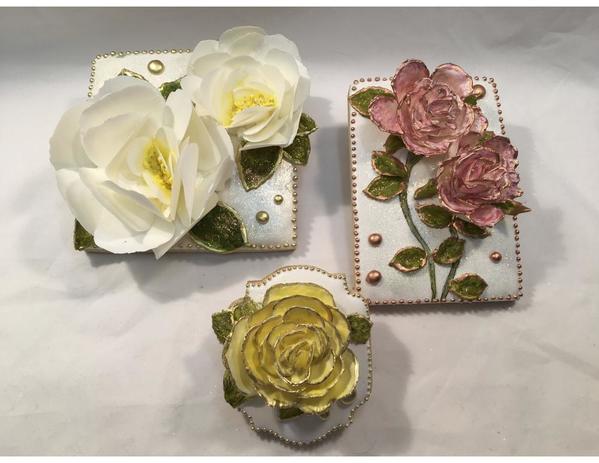
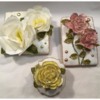
JMU: Thanks for that detailed explanation! In our chat, you mentioned that your “cookie prices start at $8 and can increase depending on the cookie size and/or the design”, and that your chocolate floral designs (like those posted above) average $15 to $20 each. I commended you on your pricing in the chat, and I’ll do so again! Congrats – I know few cookiers who are able (or daring enough) to command such prices. First, can you tell us how you go about setting price to ensure profitability? Do you have a program that you use, or do you rely on rules of thumb or other guidelines?
![]()
TL: Thank you. My starting cookie pricing is based on the actual costs of ingredients and baking supplies (i.e., paints, luster dust, disco dust, chocolate, wafer paper, special-order cutters, sprinkles, and/or other embellishments) used in the design. I double these materials costs to cover my labor associated with making/icing the cookies and utilities. Depending on the amount of additional decorating detail in each cookie, I then add $4 to $6 per cookie to cover my decorating time. Packaging costs are extra. I charge wholesale packaging costs, plus $.50 to $1 per cookie for my packaging time.
Since my designs are very detailed, I explain to my clients that I consider my work to be custom art on a large cookie canvas, ranging from four to six inches in size. Oftentimes, to stay within a client's cookie budget, I will offer alternative, simplified designs for $4 to $6 per cookie that will complement a handful of more expensive cookies.
![]()
JMU: And, for the second part of my pricing question . . . why do you think you’ve been so successful in commanding premium prices for cookies? Do you cater to a high-end clientele? Is there something about the Denver market that makes it less price sensitive than the average US city? Or something else? Do you ever meet pricing resistance, and how do you handle it?
![]()
TL: I’ve always been very candid with my clients in telling them that I charge more than the average cookier. However, I also explain that they are receiving a very customized novelty gift, I use the best ingredients, and I will guarantee my cookies and design. I have clientele from all socioeconomic backgrounds. I ask their budget up front and offer design alternatives from that point on. About 50 percent of my clientele for custom orders and in-home class parties is in a higher socioeconomic bracket in Denver. And about 50 to 70 percent of my clients are repeat-orderers for various holiday occasions and charity auction events. I also do a significant number of corporate orders. When I meet pricing resistance, I try to give alternative ideas, or refer those people to other cookiers in the area who are very talented.
![]()
JMU: Actually, I’ve got a third part to my pricing question! You also conduct instructional parties and classes as part of your business, and, in our chat, you mentioned that you charge $75 to $200 per person for these events, with the exact price depending on the nature of the event. What are the key variables that affect pricing of your events? For instance, what type(s) of events would fall on the lower end of the pricing spectrum, versus on the higher end?
![]()
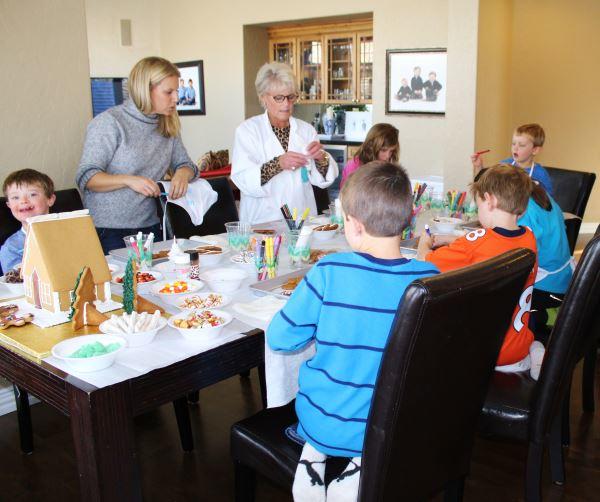
TL: Yes . . . I love the parties and corporate events! I bring everything that each participant will need to learn what is being taught in any given class. There is also a lot of prep work, and it generally takes two to four days to prepare all of the supplies, cookies, and embellishments for designs. So I do charge in accordance with the number of cookies to be decorated and the skill level/time required of the designs. A typical and relatively simple child’s birthday party with coloring book cookies and sprinkles sells for $40 to $50 per child, with a 12-guest and two-hour maximum. More complex adult ladies' or couple's parties, where we decorate four to six cookies using three to four different techniques (piping, handpainting, wafer paper, stenciling, and /or airbrushing), are $75 per guest. Adult parties are offered with a six- to eight-person and two- to three-hour maximum. Corporate team-building parties command a higher price per participant, ranging from $150 to $200. Again, I bring all of the supplies to these events. I generally allow six to eight hours for these events, and also hire support staff to help me.
I limit my class sizes mostly because of space limitations in my hosts' homes. Generally, if a space is too small, the guests are not able to spread out and create as freely because of the distraction of clutter. Also, with kids' parties, it proves impossible to structure them with too many participants, and the kids lose focus after 45 minutes.
![]()
JMU: Makes complete sense! And, which part of your business is most lucrative for you – the cookie decorating or the cookie functions? Do you have any plans to shift more of your business toward the most lucrative stuff, or are you happy with your business mix as it stands?
![]()
TL: The events are more lucrative, but a little more exhausting these days. However, it is the connection that we have at the events that is so rewarding! My custom-order clientele is always growing, and it seems their average order size is two to three dozen, at $8 per cookie, so that business segment is also doing well. Unfortunately, due to health issues, I am a little limited in both cookie operations. I am currently making changes to the business that involve some very exciting new directions. I can’t wait to share those plans this coming fall.
![]()
JMU: Oh, I am so sorry to hear of your health issues, but pleased to know you're tackling them with a positive outlook!
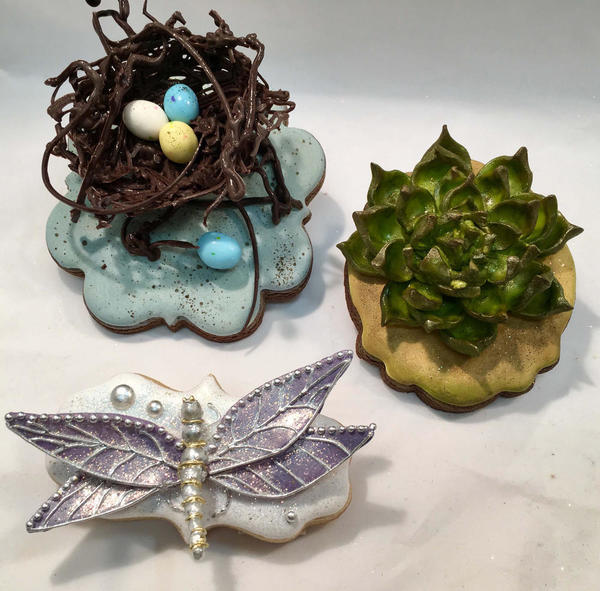
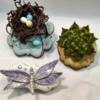
Let’s talk about some of your techniques for a bit, starting first with chocolate. While you covered both melted chocolate and modeling chocolate techniques at CookieCon, you mentioned in the chat that you use melted chocolate more often than modeling chocolate. Why is that? What are the pros and cons of each medium for cookie decorating? [Everyone, below is another set of Teri's gorgeous chocolate-topped cookies. They are adorned with modeling chocolate, just so you know!]
![]()
TL: I do work with melted "chocolate" more often - actually, candy melts, which are not real chocolate, though similar. But I really enjoy working equally with both mediums! You can definitely create some amazing designs with modeling chocolate. It's just like designing with fondant . . . the sky is the limit for imaginative designs.
I tend to get many more requests for floral cookies though. And, for these designs, which I like to give an impressionistic look, candy melts give me more flexibility during the assembly process when layering individual petals to create the flowers. Given the huge variety of available silk flowers and leaves, which I use as my molds with the candy melts, building different flower designs is so easy and limitless.
Most of the time, I draw my floral cookie designs and then handpaint on a royal icing cookie canvas prior to adding the "chocolate" flower petals. I like candy melts because they come in a variety of colors. Once the petals are assembled on the pre-decorated cookie, I just paint a little additional luster and metallic highlighter dusts onto the petals and edges for a finished look.
I sometimes pipe directly on a flooded base with melted chocolate, just like I would pipe with royal icing. Just as royal icing consistency is key to different icing techniques (flooding, lettering, flowers, etc.), mastering temperature is critical to working with chocolate.
![]()
JMU: Yes, I agree! You mentioned just now that you use candy melts rather than real chocolate - and, in your chat, you said you use candy melt brands such as Wilton, Chocomaker, and Merkins. Can you tell us why this is? Above, you alluded to the flexibility they afford, but what did you mean by this? Are they just easier to use because they don’t require tempering like real chocolate, or do they have other benefits? Do you feel there is any flavor or texture trade-off in not working with real chocolate? [Everyone, here's a great post that explains the difference between real and faux chocolate, like candy melts, and what tempering means.]
![]()
TL: Candy melts are certainly easy to work with, affordable, and readily available (at Michaels, Hobby Lobby, Wilton, etc.); they also come in a variety of colors. The flavor is great when mixed with a cookie, and decorations made with them are much more sturdy than those made with real chocolate. There is a trade-off in flavor, as real chocolate is much creamier and has a richer quality.
![]()
JMU: When it comes to melting candy melts, they can sometimes be temperamental. Sometimes they never really fully melt, and end up thick and clumpy, making them tough to spread and pipe evenly. I imagine having a very fluid melted “chocolate” is key to creating some of your very delicate flowers. What tips can you provide our readers for minimizing these issues and working successfully with candy melts?
![]()
TL: Candy melts are generally very easy to melt. The key is to not overheat them! Overheating will cause that clumpy, scorched, impossible-to-pipe mess. The best way to melt the candy discs is to heat for short (30-second) intervals on 50 percent power (defrost) in the microwave. I usually place about one-third cup of melts in a disposable candy piping bag, and knead the bag with my fingers between each heating interval to break down the discs until smooth. As long as the piping bag is still manageable to the touch (warm, not hot), and all the discs are creamy-smooth, the consistency for piping should be great. I do tie a knot in the end of the bag to ensure no leakage.
![]()
JMU: Great tips! For those who don't have microwaves (like me!), you can also melt candy melts or real chocolate with success over very low heat in the top of a double boiler.
I know from seeing your work at CookieCon and online (and also from the proclamations in your bio!) that you love cookie bling, especially in the form of glitter and luster dusts. Your cookies always sparkle! What’s your take, though, on the edibility of glitters and dusts? Many aren’t labelled as FDA-approved or are labelled simply as “nontoxic” or for “decorative use only”. Can you recommend any dusts/glitters that give high sheen or sparkle, and are also FDA-approved? Which are your favorites to use and why?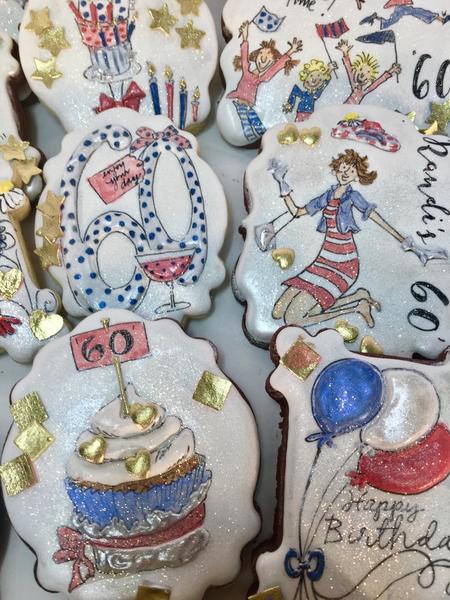
![]()
TL: Yes, I love sparkle and glitter . . . and until recently, there really haven’t been FDA-approved dusts and other metallic products available.
I sprinkle CK Products disco and glitter dusts on each cookie design as a final touch. I do realize that disco dusts are generally not edible . . . so I do use very sparse amounts . . . and yet still get tons of glitz and shimmer!
For painting on my cookies, I predominantly use luster and pearl dusts by Crystal Colors that are labeled as "US-certified food-safe". I prefer Crystal Colors, because of their great variety of colors and food-safe labeling. Other manufacturers that profess to have "US-certified food-safe", "FDA-approved", or "100 percent edible" luster and petal dusts include Pristine Powders, Roxy & Rich, The Sugar Art, TruColor, and Wilton. Wilton also makes Sparkle Gel, a translucent gel (in many colors) that I often paint on my designs.
For metallic highlighter dusts (which create super shiny effects and thick, even coverage), I use Rolkem and TMP's "Super" nontoxic colors. To my knowledge, they have been deemed food-safe in Europe, Canada, and Australia, but not here in the US.
![]()
JMU: All the luster, glitter, and dust terminology and labelling can be mind-boggling, can't it? As an aside, LilaLoa has an excellent post that compares the color and coverage of various gold luster and highlighter dusts, both FDA-approved and not. It's an interesting read, but I think the safest thing to do is to carefully read product labels.
Let’s turn to teaching for a bit – you’re clearly an expert on it as well, with all that you do each month and your CookieCon experience. What top three tips would you give to cookie decorators who are interested in becoming cookie decorating instructors?
![]()
TL: I absolutely love to share the techniques and tips that I have learned in the past six years of cookie decorating. The “connection” in tweets…cookie connection is really what drives my passion. I love playing, laughing, creating, and learning through connecting with people . . . so instruction is the best part of my journey in cookies, and it must always be fun and loving from the get-go! “Cookies and happy hearts . . . it’s where the connection starts”, as I like to say!
The first helpful tip: I am a certified Wilton instructor. This certification really gave me a great training guide and advanced me along the learning curve for teaching the importance of perfecting royal icing and buttercream consistency and piping techniques. I also learned the art of talking and demonstrating at the same time.
The second tip: Time management for a class is key. Do not try to teach several techniques in one class! Keep it simple and fun! Do not go beyond three to four hours per class, and offer an array of classes or parties: basic, advanced and expert, holiday, ladies' night out, birthdays, private instruction, and so on. If instructing a large group, make sure to have back-up help!
The third tip: Thorough planning, planning, and more planning are critical. Prepare for all of the designs to be taught; write lists of supplies and/or tools needed for all techniques to be demonstrated; and make or purchase special embellishments and tools (i.e., wafer paper, sprinkles, chocolate, royal icing transfers, stencils, stamps, etc.) in advance.
Bottom line . . . be prepared! Plan your work and work your plan, step-by-step with a light and happy heart!
![]()
JMU: More great tips! Thanks! What was your biggest lesson learned from teaching at CookieCon this year?
![]()
TL: Have fun, be honest, share from personal experience, and laugh. I found it very helpful to have a hand-out ready for everyone that highlighted my lesson plan. So if I missed sharing something in the class, students had my hand-out to reference techniques, recommended chocolate experts on the web, and basic dos and don’ts with chocolate.
![]()
JMU: And, for my usual parting question, where do you envision yourself in the cookie world in three years? What are your cookie dreams and aspirations?
![]()
TL: I still dream about a brick-and-mortar location for "cookie canvas" painting parties with a retail boutique section for specialty tweets…cookie connection design supplies, products, and tools.
God willing . . . this is my goal in the next three years . . . I just need to make some adjustments, and pay closer attention to working smarter and not necessarily any harder. As a typical cookier, I can be a bit obsessive in my passion for decorating. I tend to burn the midnight oil way too late, work at warp-speed far too often, and resist reaching out for help.
Fortunately, a recent diagnosis of scleroderma (rare connective tissue disease) with advanced pulmonary arterial hypertension has made me more aware of connecting my cookie art with people in a healthier and longer life-sustaining way!
![]()
JMU: Well, I certainly hope all of your cookie dreams come true, but, more importantly, that you take care of yourself and that your health improves! As author Etty Hillesum once said, "Sometimes the most important thing in a whole day is the rest we take between two deep breaths."
Thank you again for participating in this interview and our earlier chat. I really appreciate your thorough and candid responses, and I'm sure our members will too! The sparkle, both literal and figurative, in your cookie work shines through!
To learn more about Teri, visit her on Facebook, Instagram, or here on Cookie Connection.
All cookie and photo credits: Teri Lewis

Cookier Close-ups is the place on Cookie Connection where we celebrate the change-makers of the cookie decorating world. Whether forging new enterprises, inventing novel decorating techniques, or consistently charming us with their cookie decorating prowess, each of our featured thought leaders has redefined in his/her distinctive way how we interact, create, or otherwise do business here in cookie space!
If there are other cookiers you'd really like to get to know, please post requests in this forum. We'll do our best to round them up for an upcoming Cookier Close-up! Thanks!





Comments (7)