 [EDITOR'S NOTE: Kudos to Violet for taking the leap and making a guest blog post - and a wonderful one at that! Remember, any member of this site is welcome to contribute blog posts as long as s/he follows our blog posting guidelines. This post is an excellent example of what to do!
 ![]() ]
]
Hello, my name is Violet, and I love making needlepoint (aka cross stitch) pattern cookies.
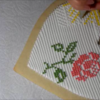
What you are looking at here is a large (8-inch) heart cookie decorated with a needlepoint rose pattern - my first cookie of this magnitude. I spent hours and hours searching online for an easy cross stitch pattern that would look nice on a cookie and wouldn't require me to count too many dots (aka stitches).
I decided to use the French Rose pattern pictured above, originally designed by Jill Nammar of Sew French Cross Stitch and Cooking, which I found here on Jill's lovely blog. However, the pattern was a little too small for my cookie, so I added more color by placing the sun in the upper left corner.
Here's my step-by-step process . . .
Step 1: I baked a large (8-inch) heart cookie, rolled 1/4 inch thick. To prevent the cookie from breaking, I let it cool completely on the cookie sheet rather than removing it while warm and flexible. Next, I used white flood-consistency royal icing to cover most of the cookie, leaving an ample (about 1/2-inch) un-iced border along the edge. Then, I let the cookie dry overnight.
Step 2: To make the needlepoint grid, I used white piping-consistency royal icing.
Because my cookie was fairly big, I found that the icing used for the grid had to be a little runnier than what I usually use for smaller cookies (the same can be said for the flooding icing used in Step 1).
Piping the grid is a lengthy process. It's important to pipe very straight lines running both vertically and horizontally, and that the vertical and horizontal lines be piped perpendicular to one another. (Crooked lines will only lead to a crooked end-design!) To aid this process and steady the piping bag, make sure the elbow of your piping arm is resting on the table and your other hand is guiding your piping bag, as shown below. Pipe one set of lines going in one direction first; then pipe the next set of perpendicular lines on top.
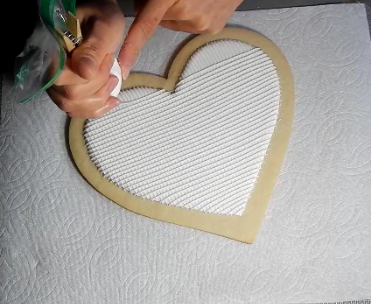
The grid requires lots of concentration. If you are piping the second set of lines on top and mess up, any errors will be super hard to fix. So, kick everyone out of the kitchen, get comfortable, and proceed. In the end, you will feel a great sense of accomplishment. [EDITOR'S NOTE: I agree with all stated, but, if you do break a line, have no fear! I've had success lifting broken lines with my trussing needle while the icing is still wet. I prefer this approach to piping another line to fill the break, as one long, connected line always lies flatter and looks a lot cleaner.]
Step 3: I used red piping-consistency royal icing to create the rose. It took me some time to figure out where to put the rose, since it is an oddly shaped pattern going on a heart. Pre-planning your design is highly recommended. By "pre-planning", I mean, draw the design on a piece of graph paper; don't wing it. I did the winging, and it took me a lot of time to get this cookie going, make the rose fit, and fill in the gaps.
Also, the key to beautiful dots is to have the right consistency of royal icing - not too soft, not too stiff. I typically mix my icing by "feel" without measuring the water that I add. But I do add the water gradually, about 1/4 teaspoon at a time, and look for any peaks formed by lifting the spoon in the bowl to start flopping over. Getting the right consistency will take some practice, but you will ultimately be able to create beautiful cookies.
Step 4: After the rose was done, I continued in the same fashion with green piping-consistency royal icing to create the stem and the leaves. This part was fairly easy and quick. 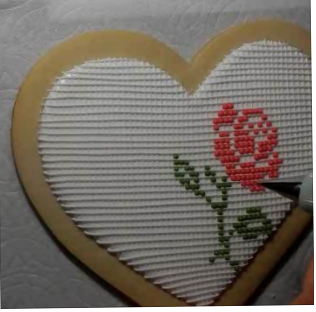
Step 5: This is the point at which I saw how naked my cookie looked. So, I doodled a bunch of stuff to see what would best fit in the empty space. I didn't want to make the cookie look too busy, since the grid and dots already create a certain amount of busy-ness. I settled on the sun, and I winged it too. But, hey, it turned out okay. Right?
Step 6: Now, for the big decision: Should I fill in the white grid openings or leave them alone? I jumped on the opportunity to see what the cookie would look like if I totally filled in the dots. Warning: if you have little patience, leave your cookie as is. Otherwise, proceed with filling the openings with white piping-consistency royal icing. To prevent the dots from running together and looking like a mess, it is very important to pipe every other dot, allow a little drying time, and then continue to pipe the remaining dots.
Lastly, I filled out the empty cookie border by piping red dots around the edge of the white heart, and trios of red dots closer to the cookie edge.
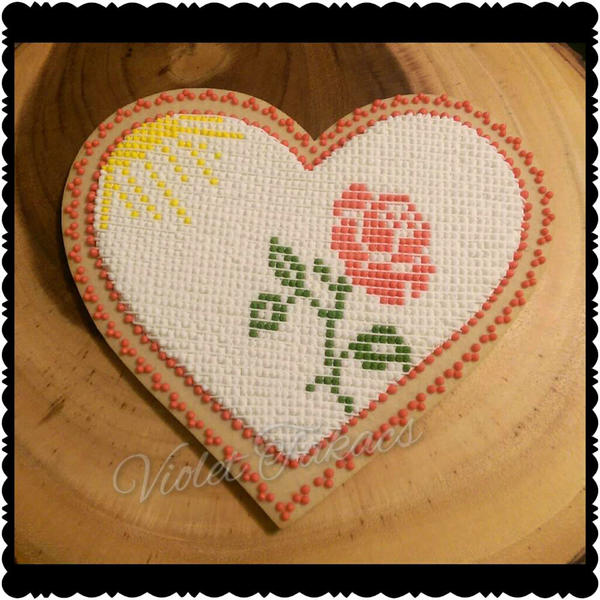
Even though I worked on this cookie over the course of three days, the actual work amounted to only three hours. I hope you will try making your own needlepoint cookie - if not for yourself, maybe for someone who needs a smile on his or her face! I appreciate you reading this blog post and wish you an awesome day!
For more information, please see my condensed video of the cookie-making process, below:

Note: This article expresses the views of the author, and not necessarily those of this site, its owners, its administrators, or its employees. To read more Cookie Connection tutorials, click here.




Comments (20)