
[EDITOR'S NOTE: Hi, all! Before we get into this incredible tutorial, I just wanted to let you know that Samantha will be posting every other month for the time being, to free up needed personal time. I eagerly look forward to her return to a monthly schedule when the timing is right for her. You'll be the first to know when that happens! ![]() ~JMU]
~JMU]
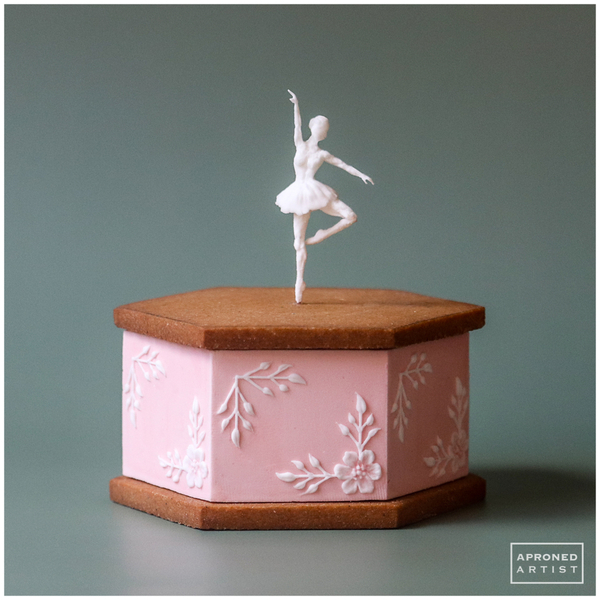
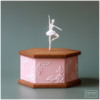
Judging by online searches and tutorials, the cookie community adores puffy royal icing. I, too, love that soft, pillowy look. But with puffy icing also comes sloped, rounded edges. Sometimes I don’t want puffy icing; sometimes I want flat icing with hard edges and clean, sharp corners. I’ve never had much success achieving it though. Until now . . . This ballerina music box cookie is the closest I’ve come to the perfectly flat, geometric precision of my royal icing fantasies.
Supplies:
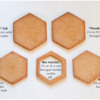
- Baked gingerbread cookies, rolled 1/4-in/0.6-cm thick (See photo in Step 1a.)
- 2 (3 1/4-in/8.3-cm) solid hexagon cookies
- 3 (3 1/4-in/8.3-cm) border hexagon cookies with smaller hexagon cut out of centers
- 1 (3 1/4-in/8.3-cm) hexagon cookie with tiny hole cut out of center (I used a Wilton #3 tip to cut the hole.)
- 2 (3 3/4-in/9.5-cm) solid hexagon cookies
- Food-safe file (I used a carbon steel wood filing tool similar to this one.)
- Royal icing (I used AmeriColor gel paste coloring to tint the icing.):
- Toothpaste-consistency pink (2 parts Dusty Rose/1 part Ivory)
- Toothpaste-consistency white
- Very stiff-consistency white
- Small offset spatula
- Cake scraper
- Large flat paint brush
- Tips:
- PME #00, 1.5, 0 (or equivalents)
- Wilton #101 (or equivalent)
- Tiny liner paint brush
- AmeriColor (or equivalent) Dusty Rose gel paste coloring for painting
- Scribe tool (or equivalent)
- Uncooked angel hair pasta
- Food-safe marker
- Sculpting tool (or equivalent)
- Thin prop such as a small desiccant pack or compacted piece of aluminum foil
- Parchment paper
Step 1: Assemble and ice box
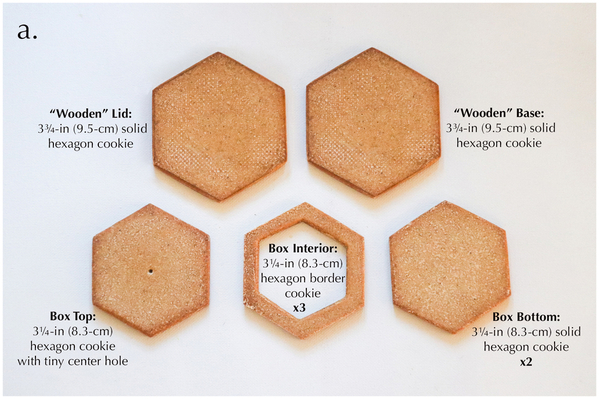
a. To construct the box, you will need two 3 1/4-inch (8.3-centimeter) solid hexagon cookies for the bottom of the box, three 3 1/4-inch (8.3-centimeter) hexagon border cookies for the interior of the box, one 3 1/4-inch (8.3-centimeter) hexagon cookie with a small hole in the center (to help secure the ballerina) for the top of the box, and two 3 3/4-inch (9.5-centimeter) solid hexagon cookies for the “wooden” base and lid of the box. File the edges, tops, and bottoms of the cookies so that they fit together as seamlessly as possible.
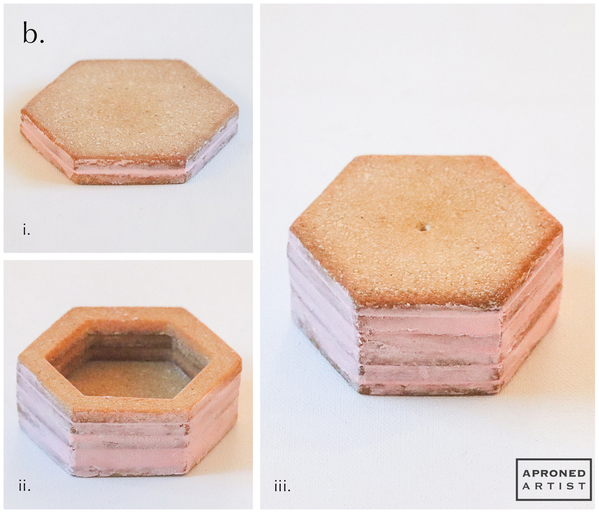
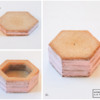
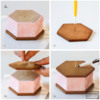
b. Sandwich two 3 1/4-inch (8.3-centimeter) solid hexagon cookies together with toothpaste-consistency pink royal icing. Use a small offset spatula to spread icing between the edges of the two cookies to fill in any gaps. Scrape away the excess icing (i). Repeat this process to stack three 3 1/4-inch (8.3-centimeter) border hexagon cookies on top of the two solid hexagons (i). The cavity created within the hexagon border cookies will be necessary to accommodate the ballerina’s anchoring pole. Finally, attach one 3 1/4-inch (8.3-centimeter) hexagon with the tiny center hole on top of the box (iii). The hole in the top of the cookie will secure the ballerina’s anchoring pole and help to keep her straight.
c. Use the offset spatula to spread toothpaste-consistency pink royal icing on one side of the box. Paddle the icing back and forth along the side of the box to remove as much air as possible.
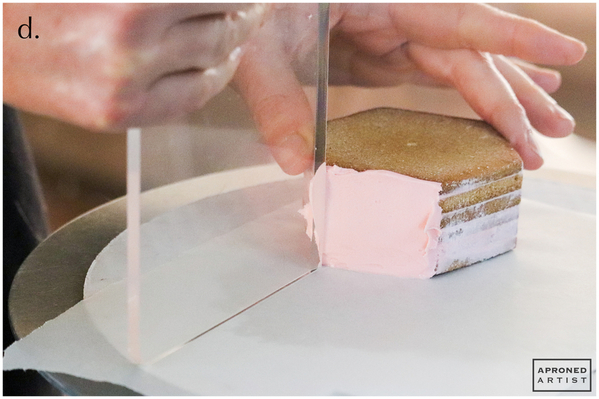
d. Position a cake scraper so that its bottom edge sits flush against your work surface, and drag the vertical edge across the icing to smooth it (just as you would if you were frosting a cake). The icing does not need to look perfectly smooth at this point, but try to get it as even as possible. Use the offset spatula to tidy the edges.
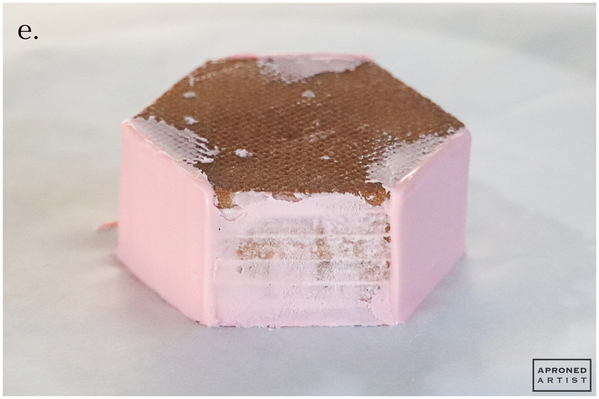
e. Repeat this process on every other side of the box to cover three sides in total. Allow the icing to dry completely.
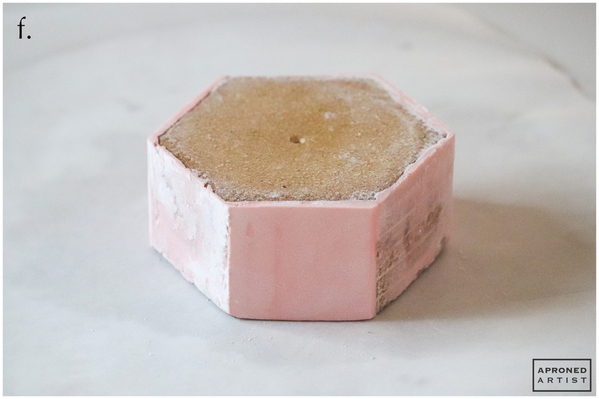
f. Use a food-safe file to smooth the icing of the covered sides even further. Again, I used a carbon steel wood filing tool similar to this one. It's only about an inch (2.5 centimeters) wide, but the sides of this piece are only about 1 1/2 inches (3.8 centimeters) tall. This file also has a very fine filing texture closer to sandpaper than a Microplane, though I think a Microplane would work. The icing surface doesn’t have to be perfect at this point; there may be air bubbles or gaps in the icing.
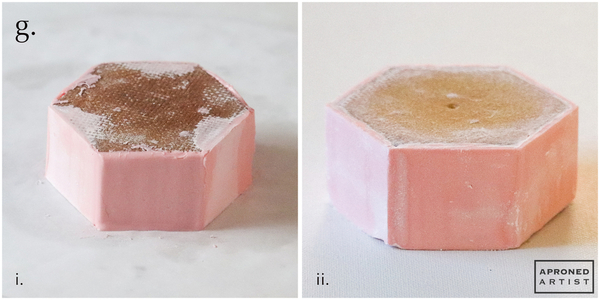
g. Repeat Step 1c to ice (i) and file (ii) the remaining three bare sides.
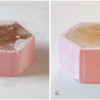
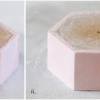
h. Use the offset spatula to spread a little icing to patch any air bubbles, low points, or gaps in the top and bottom edges (i). Allow the icing to dry completely. File all of the sides until they are completely smooth and even (ii). This is the final stage of filing, so continue until the icing is as smooth as possible. Use a damp flat paint brush to brush away the powdery residue.
Note: As you probably saw in the photos above, the icing color definitely lightened in areas when I filed the top surface. However, brushing the final surface with the damp paint brush in Step 1h brought it back to the original color (or very close to it). The harder part was correcting the color each day before I started icing the opposing sides or patching, because the source icing would darken while it sat during the drying times. To help with color matching, I keep a notebook where I spread a little bit of icing on the paper so that I always have a reference to the original color. Then I just add a small amount of uncolored icing until I achieve the same value. I also write the color formula next to the icing "swatch" in case I want to reuse a color in a future project.
Step 2: Decorate box with brush embroidery design
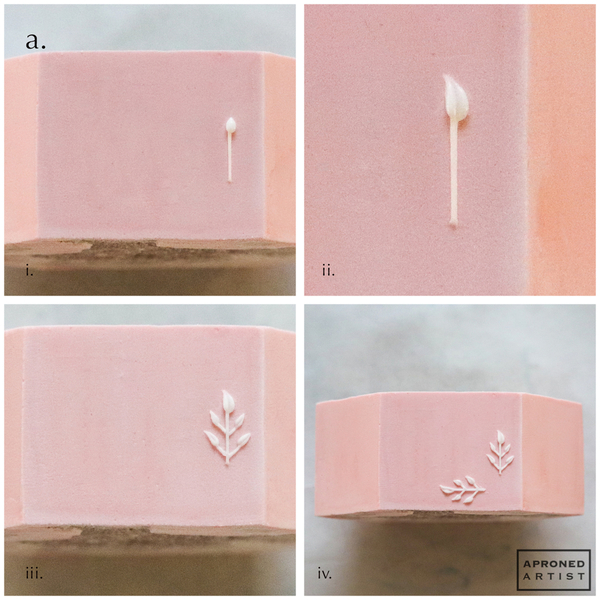
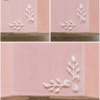
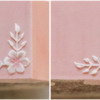
a. Using toothpaste-consistency white royal icing and a PME #00 tip (or equivalent), pipe a vertical line, starting about one third of the way from the top edge and about 1/4 inch (0.6 centimeters) away from the right edge. The length of the line (the primary stem) should span roughly the middle third of the box’s height. With the same icing and tip, add a teardrop of icing at the top of the stem with the tail pointing up (i). Using a damp tiny liner paint brush, drag through the teardrop icing, starting at the fat end of the teardrop and ending at the point to create a veined leaf shape (ii). Create two “v”s of smaller stems and leaves extending from the primary stem (iii). Recreate the entire design along the bottom edge so that the two sprigs of leaves frame the corner of the box’s face with enough space in between them to accommodate a flower (iv).
b. Use the same icing and tip to pipe the outline of a petal at the base of a primary stem. Make the icing thicker at the top of the petal (i). Use a wet tiny liner paint brush to dilute and soften the interior of the icing’s edge and to blend the extra icing at the top toward the center of the flower (ii). Repeat to pipe two more petals, spacing them a petal's width apart (iii).
c. Pipe the icing for the top of a petal in between two existing petals (i). Again, use a wet tiny liner paint brush to blend some of the icing toward the center of the flower (ii). Repeat to create the last two remaining petals (iii). Let the icing dry.
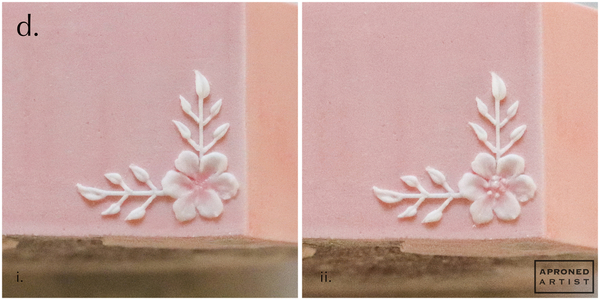
d. Dilute a drop of Dusty Rose gel paste coloring (or equivalent) until it is very watery and translucent. Dip the tiny liner paint brush in the watery paint, and then dab it on a towel so that the majority of the paint is removed. Paint the center of the flower to make it subtly darker, starting from the center and brushing toward the outer edges of the petals (i). Pipe a few dots of tooth paste-consistency white icing within the center of the flower using the same PME #00 tip (ii).
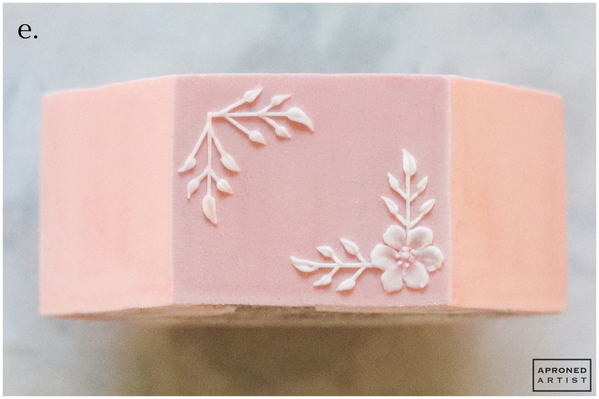
e. Create two more sprigs of leaves to frame the top left corner of the face. Repeat the design on each face of the box.
Step 3: Assemble box and create anchoring pole
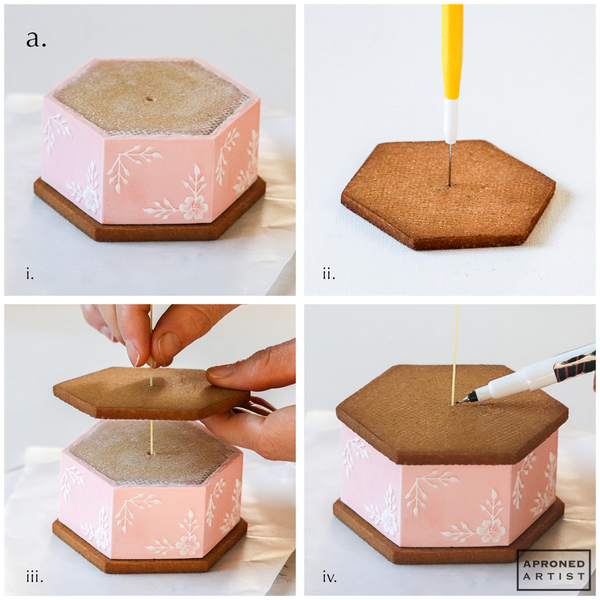
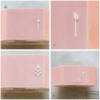
a. Center the decorated box on top of one 3 3/4-inch (9.5-centimeter) solid hexagon cookie, securing it in place with a few dabs of white icing used in Step 2 (i). Use a scribe tool (or equivalent) to poke a small hole in the center of the other 3 3/4-inch (9.5-centimeter) solid hexagon cookie (ii). Feed a piece of uncooked angel hair pasta through the hole you just pierced and then into the hole in the top of the box until it hits the bottom (iii). With a food-safe marker, mark the pasta where it emerges from the hole (iv). Before removing the pasta, lift up the top cookie just enough to squirt some icing underneath to attach the cookie while the holes are still aligned. Remove the pasta from the cookies. You may find it easier to manage the anchoring pole if you break off a few inches of excess pasta from the top; just make sure to keep at least 5 inches (12.7 centimeters) of length.
To give you a sense of scale, my box is about 2 inches (5.1 centimeters) tall including the base and lid; and, again, the iced sides are approximately 1 1/2 inches (3.8 centimeters) tall.
Step 4: Pipe and sculpt ballerina royal icing transfer
A few royal icing sculpting tips before you begin:
Gather lots of photos of ballerinas to use for reference. Continually refer back to them as you go, paying particular attention to proportions.
Use very stiff-consistency white royal icing. The icing I used for this project was just short of crumbly. It should be malleable and stiff like clay, not sticky or slumping. Be forewarned, it will take considerable effort to squeeze even the small amounts needed from the piping tip. (If you're not grunting, it's not thick enough.)
Add small amounts of icing, and shape small sections of the body at a time. It is much easier to add icing to bulk up the anatomy than to remove icing.
All of my photos are shown with the royal icing transfer laying flat on a piece of parchment paper, however, often it is easier to hold the pasta, which supports the ballerina, like a flower nail as you shape the icing.
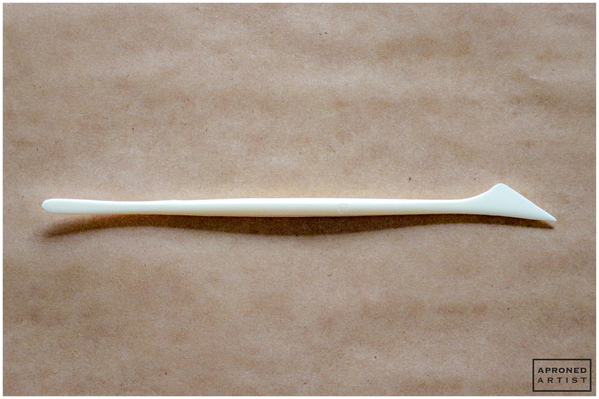
I used a sculpting tool meant for clay, but you can find similar tools designed for fondant. I primarily used the convex side of the rounded end of the sculpting tool because it gently pushes the icing without leaving unintentional indentations. The other (triangle) end of the tool can be used to create indentions where desired.
Allow each section to dry a bit before proceeding. Some drying will allow you to gently scrape off the new icing if you’re unhappy with its shape while maintaining the work you’ve already done. Because the icing is so stiff, it will dry sufficiently in just a few minutes.
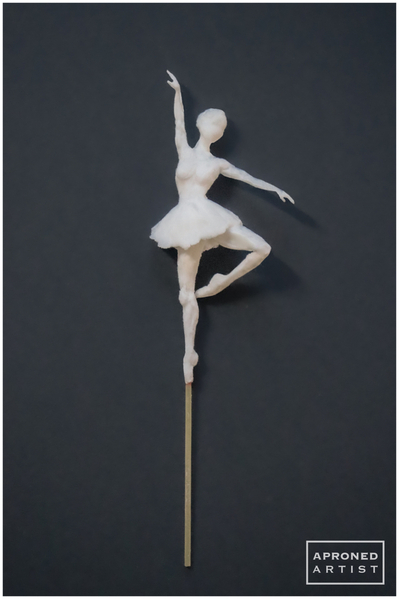
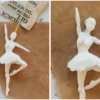
My completed ballerina measures 2 inches (5.1 centimeters) tall from toe to fingertip. Her standing leg is 1 inch (2.5 centimeters) long. Her torso is 1/2 inch (1.3 centimeters) long. Her arms are each 1/2 inch (1.3 centimeters) long. Her neck and head are 1/4 inch (0.6 centimeter) long.
____________________________
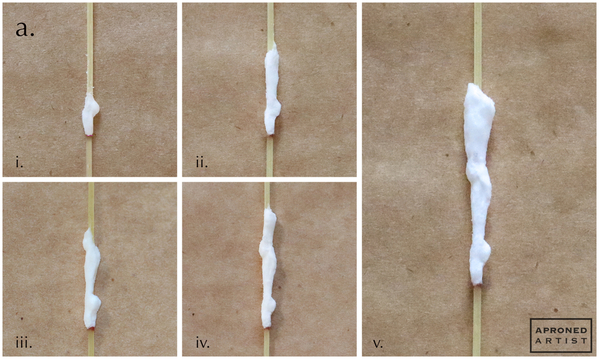
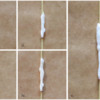
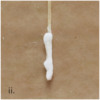
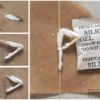
a. Begin by sculpting the standing leg of the ballerina on the anchoring pole. Using a PME #1.5 tip (or equivalent), pipe a small dab of very stiff-consistency white royal icing for the foot just above the line marked on the pasta in Step 3a. Let the icing sit for a few seconds or until no longer tacky, and shape it into a ballet slipper with your sculpting tool (i). The ballerina’s toe should end just above the line on the pasta. Add more icing to shape the lower leg (ii), then the knee (iii), the hamstring (iv), and finally the front of the thigh (v). Set the standing leg aside for now.
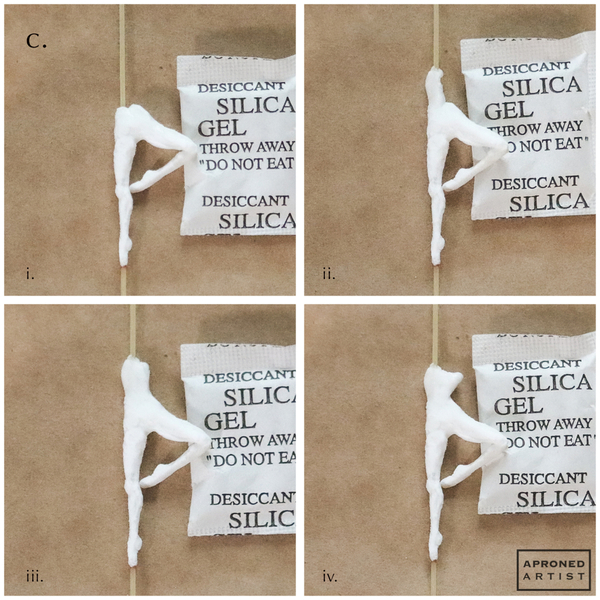
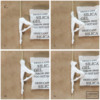
b. Next, sculpt the bent leg. Use a separate small piece of uncooked angel hair pasta to anchor the bent leg. Again, start with the ballet slipper (it should face the opposite direction of the first slipper). The toe of this slipper should end at the base of the pasta (i). Add more icing, and shape the lower leg (ii). Reference the standing leg piped in Step 3b to ensure the proportions of the two legs are the same. Use your fingertips to pinch off the remainder of the pasta right above the lower leg (iii).
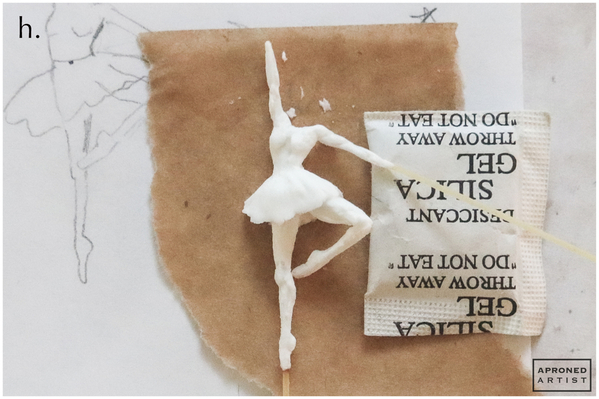
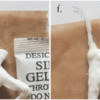
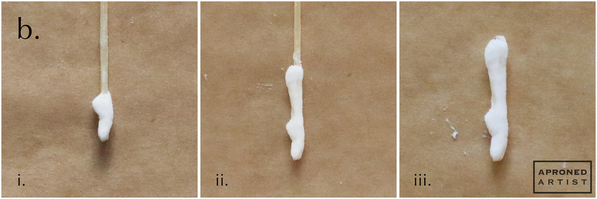 On a separate small piece of pasta, shape the thigh of the leg so that the narrow end stops at the base of the pasta (iv). Position the thigh at an an angle to the lower leg piped in the previous step, and attach the two pieces with some icing shaped to create the knee (v). Add a little more icing to refine the shape of the thigh, if necessary, and pinch off the pasta that extends from the top of the thigh (vi). Position the two legs so that the toe of the bent leg meets the knee of the standing leg. Prop the bent leg slightly at the knee. (I used a small desiccant pack as a prop, but a compacted piece of aluminum foil would work just as well.) Pipe icing between the top of the legs to attach the two transfers (vii).
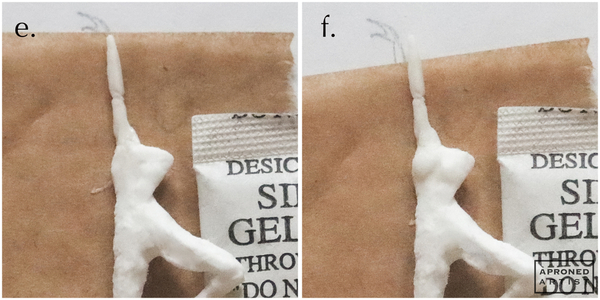
c. Now pipe the torso. Add a small amount of icing above the legs, and shape it to form the lower abdomen up to where the ballerina's waist narrows (i). Then shape the chest in three vertical sections (ii, iii, and iv). Finally, break off the pasta above the chest so that you will have better access to the upper body. Set the body aside for now.
d. On a separate piece of pasta, pipe a short line of icing and shape it into a forearm. I left a bit of pasta on both ends so that I would have a good handle on either side. Add more icing to create the upper arm. Repeat to create the opposite arm, checking to make sure the arms are similar in proportion.
e. Break off the excess pasta extending from both ends of one arm. On a small piece of parchment paper, position the arm so that it rises above the left side of the torso, angling to the left slightly. Attach the arm with a little bit of icing shaped to create the shoulder.
f. Add a bit of icing to the chest and shape the ballerina's bust.
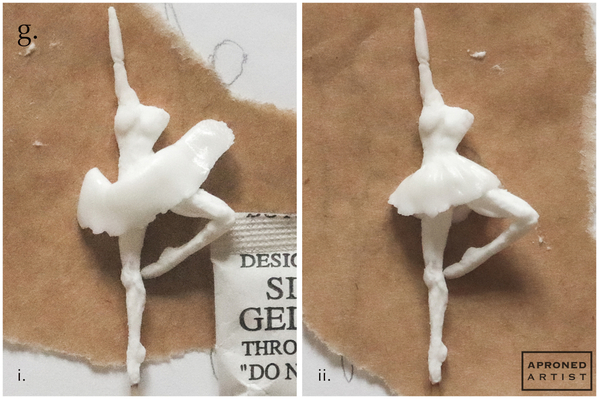
g. Switch to a Wilton #101 tip (or equivalent). Position the piping tip so that the fat end of the opening sits at the waist and the narrow end of the opening points downward. Pipe a ruffle for the skirt that extends a bit beyond the ballerina's body on either side (i). Pick up the transfer using the pasta, and wrap the ends of the icing around her backside so that they connect. Place the transfer back down on the parchment paper. Using the convex side of the rounded end of the sculpting tool, blend the icing at the top of the skirt into her waist. Use the long side of the triangle end of the sculpting tool to indent some pleats in the skirt (ii).
h. Break off the excess pasta from the shoulder end of the remaining unattached arm transfer. Set your prop beneath the bent leg again, and position the arm so that the extending pasta is elevated by the prop. Using a PME #1.5 tip (or equivalent), pipe some icing to attach the arm, and shape it to create the shoulder. Allow the icing to dry completely before pinching off the excess pasta. Set the body aside for now.
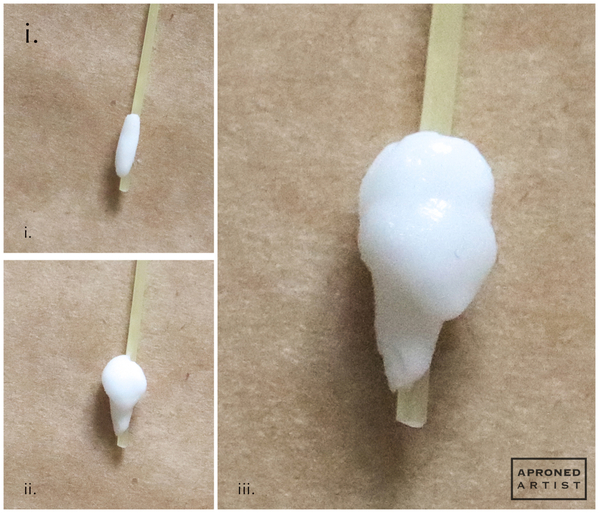
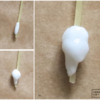
i. Next, pipe the head. Pipe some icing at the base of a separate piece of pasta, and shape it into a neck (i). Add a bit more icing above the neck, shaping it to create the lower half of the face with a slightly angled jawline (ii). Finally, add more icing on top to create the top of the head. Indent the icing slightly on the sides to give the impression of an ear and cheek (iii).
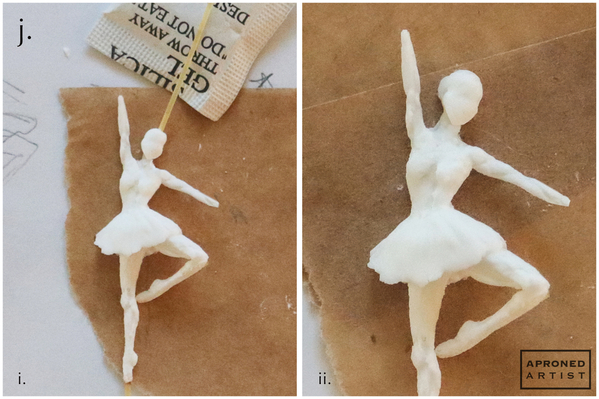
j. Position the head transfer above the chest of the ballerina so that the pasta is propped up slightly and angled to the right. Add icing to her neck, and shape it with a tiny liner paint brush (the sculpting tool is a bit large for this tight area) (i). Allow the icing to dry completely before breaking off the pasta so that it is flush with her head. Add icing to cover the tip of the pasta on the top of her head. Add icing to the left back side of her head, and shape it into a bun (ii).
k. Finally, switch to a PME #0 tip (or equivalent) to pipe the hands. At the end of the forearm, pipe one longer line for fingers and a shorter line for the thumb of her hand. Blend and sculpt the lines as best you can into a small wrist and a simple hand shape. Repeat to create the other hand.
Step 5: Insert ballerina transfer into box
a. Holding onto the remaining pasta, carefully insert the end into the hole in the top of the box. Gently hold the ballerina's waist to slide the pasta completely into the open cavity of the box until her toe sits at the top of the hole.
Finished - the crowning jewel on our perfectly geometric box!


Samantha Yacovetta began cookie decorating in 2013. While working at a local bakery, Samantha became captivated by cookie art when a customer requested princess-themed cookies. Attracted initially to the precision of cookie decorating, Samantha soon found that the limitless design opportunities turned it into her artistic passion. Samantha began regularly stocking the bakery case with decorated cookies and for several years sold cookies through her own company, Aproned Artist, a cottage food operation. Having retired from the business life, Samantha now enjoys making cookies just for fun from her home in San Jose, California, USA. To learn more about Samantha, please check out her Cookie Connection portfolio, her Facebook page, and her past Every Little Detail tutorials here.
Photo and cookie credits: Samantha Yacovetta
Note: Every Little Detail with Aproned Artist is a monthly Cookie Connection blog feature written by Samantha Yacovetta focused on the special little details that make big statements in cookie design. This article expresses the views of the author, and not necessarily those of this site, its owners, its administrators, or its employees. To read all of Samantha's past Every Little Detail tutorials, click here. And to see all of Cookie Connection's tutorials, click here.

















Comments (13)