 When I was a little girl, every morning my sister and I would hop into my mother’s bed. We would sit there beneath her cozy comforter and eagerly wait for her to return. After what felt like an interminable amount of time to a young, hungry child, she would reappear with steaming plates piled high with pancakes shaped like teddy bears. Eventually, probably when I deemed myself too old for bear-shaped pancakes, we switched roles. My mom would stay in bed, and I would bring her breakfast. A cup of coffee and a chocolate chip cookie was my mother’s breakfast of choice back then. For this Mothers' Day, however, I’ve miniaturized something a little more fancy to honor those childhood memories.
- Royal icing (AmeriColor gel paste was used to color the icing):
- Flooding-consistency white
- Stiff-consistency white
- Flooding-consistency coffee brown (1 part Warm Brown/1 part Ivory)
- Stiff-consistency honey brown (7 parts Chocolate Brown/2 parts Electric Purple/1 part Electric Green)
- Stiff-consistency ivory (Ivory)
- Flooding-consistency medium pink (Maroon)
- Flooding-consistency pale yellow (1 part Lemon Yellow/1 part Ivory/1 splash Bright White)
- Stiff-consistency green (1 part Leaf Green/1 part Electric Green/1 part Electric Purple)
- Stiff-consistency lavender (Regal Purple)
- Thick flooding-consistency (about 25-second) blue (4 parts Regal Purple/2 parts Royal Blue/1 part Super Black)
- Stiff-consistency blue
- Tips:
- Silicone mold with 1 1/4-inch (3.2-cm) round cavities
- Food-grade acetate or parchment paper
- Paint brushes: flat and tiny liner
- Scribe tool
- Metal or wooden spoon
- Wilton gel colorings (diluted with alcohol or water): Brown, Ivory, Leaf Green, Violet, Black, and No-Taste Red
- Powdered sugar
- Black sugar pearls (any size will work)
- Mallet or heavy pan
- Small piece of wafer paper
- 4-inch (10.2-cm) square cookie
Step 1: Create plate transfer
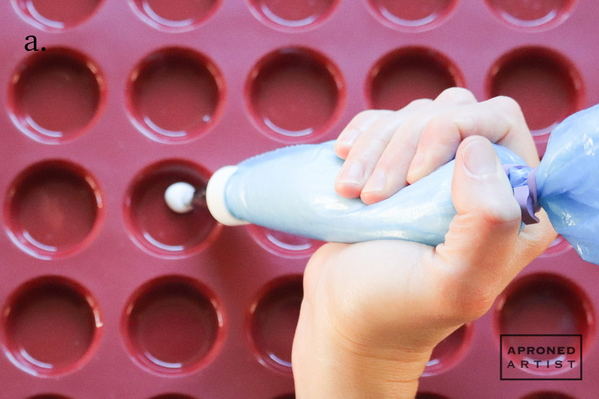
a. Using white flooding-consistency royal icing and a Wilton #3 tip (or equivalent), fill one or more cavities of the silicone mold to a depth of about 1/8 inch (3 mm). Note: You'll need just one plate transfer for each cookie.
b. Drop the mold on the counter from a height of a few inches to help distribute the icing and bring any air bubbles to the surface. Set the mold aside, and let the icing dry for a minimum of two days. (If you do not wish to use silicone molds, simply pipe circles of roughly the same diameter onto food-grade acetate or parchment paper.)
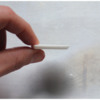
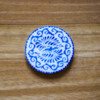
c. Once dry, carefully pop the icing circles out of the mold. Or, if you didn't use the mold, carefully peel the acetate or parchment paper off the transfers. Do not pull on the transfers, or you may break them. See below for the thickness of a typical circle.
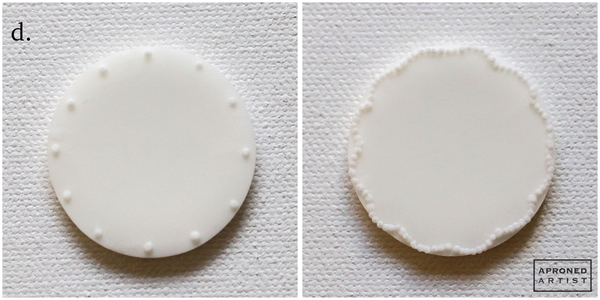
d. If desired, pipe a decorative pattern around the top rim of each dried plate. Using stiff-consistency white royal icing and a PME #00 tip (or equivalent), pipe twelve dots around the circle like the hour-markers on a clock, placing the dots about a millimeter from the inside of the rim. Add dots in between the initial dots, arcing them towards the outer rim to form a scalloped edge.
Step 2: Create coffee mug transfer
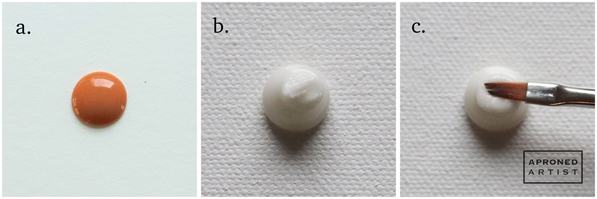
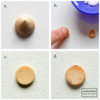
a. Using flooding-consistency coffee brown royal icing and a PME #2 tip (or equivalent), pipe a small circle measuring about 1/3 inch (0.8 cm) in diameter onto a piece of food-grade acetate. Allow the icing to dry completely before carefully peeling the acetate from the circle. The underside of icing dried on acetate becomes shiny with a beautiful, soft color gradient, ranging from dark on the outermost edges to light in the interior. (I don’t think parchment paper gives the same effect.) Alternatively, you can skip this step, and just paint the top of the mug with brown food coloring in place of Steps 2f through 2h.
b. On a separate area of the acetate (or parchment paper), use stiff-consistency white royal icing and a Wilton #12 tip (or equivalent) to pipe a mound slightly larger than the coffee circle you just piped.
c. Gently level the top of your mound with a damp, flat paint brush. Set aside to dry overnight.
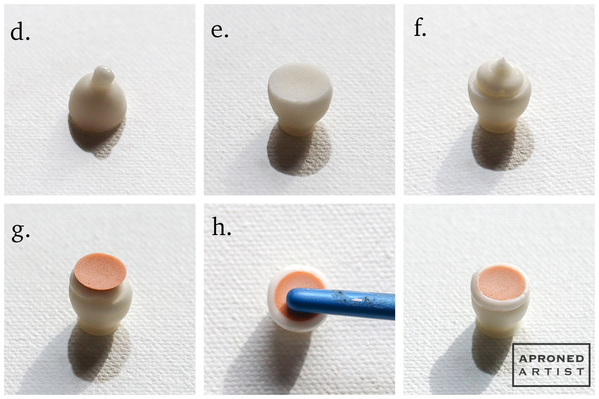
d. Once dry, gently peel the acetate (or parchment paper) from the transfer. Using a Wilton #6 tip (or equivalent), pipe a small dot of stiff-consistency white royal icing on top of the mound.
e. Immediately flip over the transfer, and reattach it to the acetate (or parchment paper), wiggling it gently until the the mug is centered on the icing "foot".
f. Using the same tip and icing, pipe a larger dot on top of the flat top of the mug.
g. Place one of the coffee circles on top of the icing dot with the flat side (the side that was attached to the acetate) facing up.
h. With the bottom end of a paint brush or scribe tool, gently push down on the coffee circle until it is submerged in the white icing. Set aside to dry for about 1 hour.
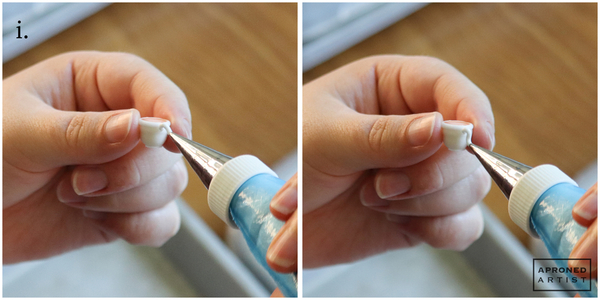
i. Once dry, use stiff-consistency white royal icing and a PME #2 tip (or equivalent) to pipe a handle. Attach your icing directly below the rim at the top. Apply gentle pressure as you pipe upwards, and then allow the icing to curve out and down as you bring your tip to the bottom of the cup. Set aside to dry.
Step 3: Create wicker tray transfer
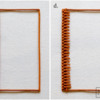
a. Using stiff-consistency honey brown royal icing and a PME #2 tip (or equivalent), pipe the outline of a rectangle measuring 1 3/4 inches (4.5 cm) by 3 1/4 inches (8.3 cm) onto a piece of acetate (or parchment paper).
b. Beginning at the top left corner, use the same icing and tip to pipe short (roughly 1/4-inch or 0.6-cm) horizontal lines down the length of the vertical edge, spacing them such that the area in between the lines is the same width as the line itself. If necessary, use a damp paint brush to cut off any icing that extends beyond the left edge of the rectangle.
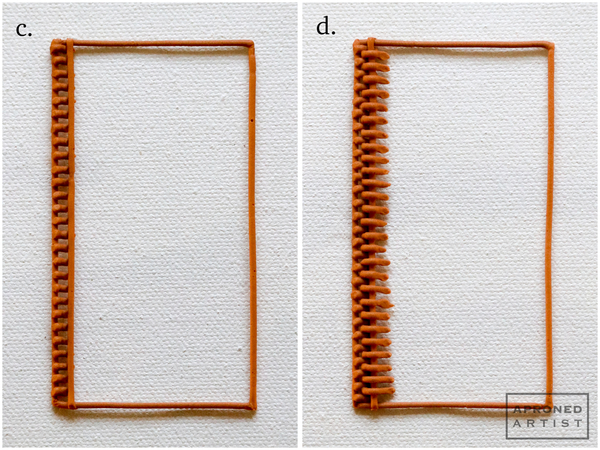
c. Pipe a continuous vertical line on top of the ends of the horizontal lines. Try to keep the spacing of the basketweave tight, leaving just enough space to fit your icing tip. The more solid the tray, the more strength it will have when it is removed from the acetate (or parchment paper).
d. Beginning at the top left corner of the rectangle, nestle your tip in between the first two horizontal lines. Pipe a short horizontal line (the same length as the short lines in Step 3b) from this point over the vertical line you just piped in the previous step. Continue piping horizontal lines down the length of the vertical line as in Step 3b.
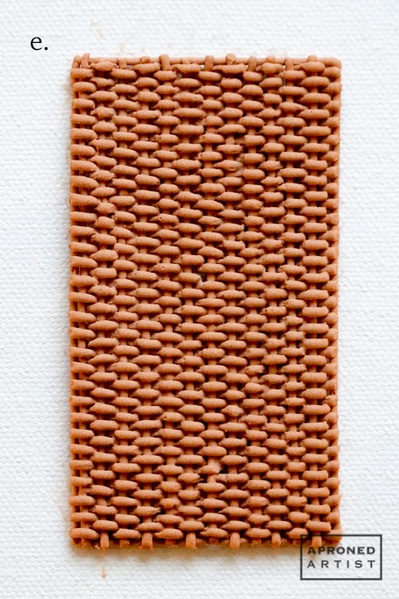
e. Repeat Steps 3c and 3d until you reach the right edge of the rectangle. Pipe the final set of horizontal lines, ending on top of the right vertical edge. If necessary, use a damp paint brush to cut off any icing that extends past the right edge. Allow the tray to dry overnight. Once dry, carefully peel the acetate (or parchment paper) from the tray. (For a more detailed description of the basketweave technique, check out SweetAmb’s tutorial.)
f. For the handles, wrap a metal or wooden spoon with parchment paper. Use stiff-consistency honey brown royal icing and a PME #2 tip (or equivalent) to pipe a curved rope. Begin your rope by piping a very loose “s” shape on the side of your spoon handle.
g. Tuck your tip under the top curve of the “s”, and pipe a reverse “s” shape.
h. Continue piping reverse “s” shapes, gradually curving the rope until you’ve completed the handle. While the icing is still wet, dip your tiny liner paint brush in diluted Brown gel coloring, and paint the creases in between the reverse “s” shapes.
Repeat Steps 3f to 3h to create a second handle. Let the handles dry for at least an hour. (For a more detailed description of the rope technique, check out Wilton’s tutorial.)
i. Carefully remove the handles from the parchment paper. Using more stiff-consistency honey brown royal icing, adhere the handles to the short sides of the tray at a 45-degree angle.
Step 4: Create eggs Benedict transfer
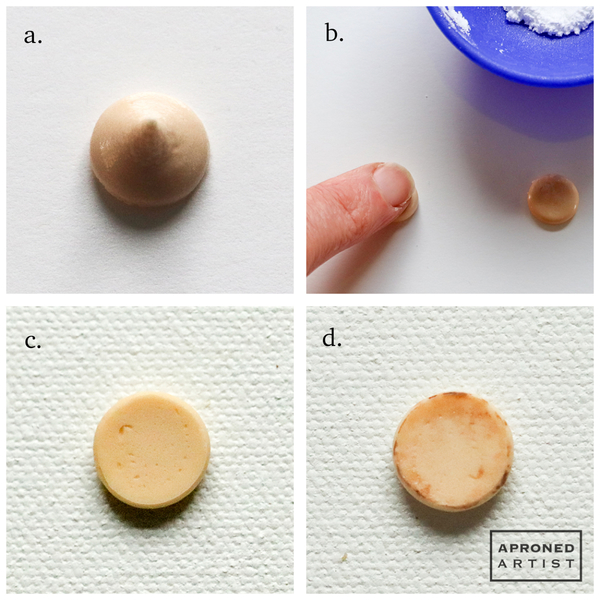
a. Using stiff-consistency ivory royal icing and a Wilton #12 tip (or equivalent), pipe a dot onto a piece of acetate (or parchment paper).
b. Dip your fingertip in powdered sugar, and gently flatten the dot until its height is about 1/16 inch (2 mm) or so. Don’t worry if some powdered sugar sticks to the icing; as the sugar absorbs the moisture from the icing, it will become indistinguishable. Let the flattened dot (aka English muffin) dry completely.
c. Gently peel the English muffin from the acetate (or parchment paper), and flip it over so that the flat side is facing up. Notice those lovely little air bubbles? For once, they’re working in our favor to give the impression of the open crumb of sliced bread.
d. If desired, paint the top of the English muffin with a tiny liner paint brush and Brown gel coloring diluted with alcohol or water. (You won’t see most of the English muffin, so this step is entirely optional.) Use a dabbing motion with the paint brush, concentrating most of the paint around the edges. Then, add some darker lines right on the edge.
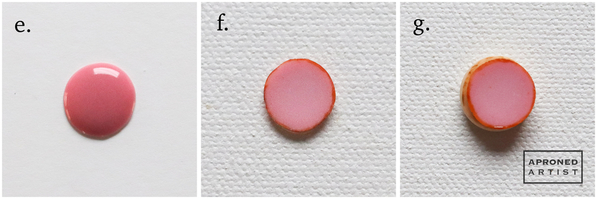
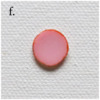
e. Use flooding-consistency medium pink royal icing and a PME #2 tip (or equivalent) to make the Canadian bacon. On a sheet of acetate (or parchment paper), pipe thin circles roughly the diameter of the English muffin. Let the icing dry overnight.
f. Once dry, remove the Canadian bacon from the acetate (or parchment paper), and flip it over so that the flat side (the side that was against the acetate) faces up. Paint the edges with diluted Ivory gel coloring.
g. Use a small dot of the pink icing to adhere the Canadian bacon to the English muffin. Attach the Canadian bacon slightly offset to the muffin, so you can see the crust of the English muffin from overhead.
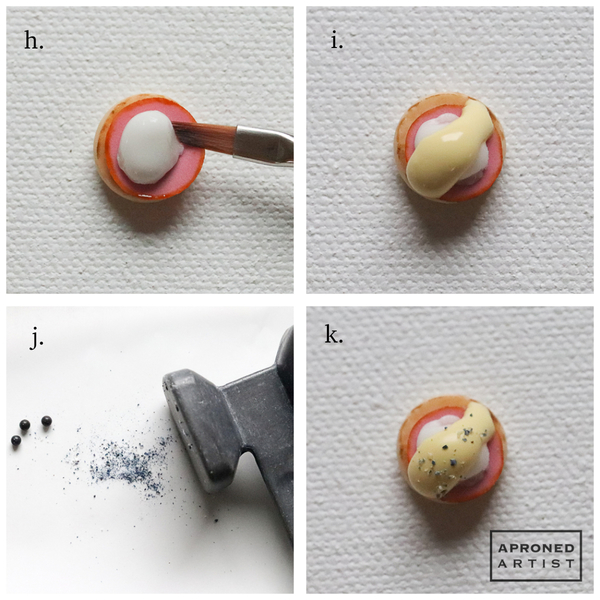
h. Using stiff-consistency white royal icing and a Wilton #6 tip (or equivalent), pipe an oval for the poached egg on top of the Canadian bacon. Then, use a flat brush to flatten some of the edges.
i. For the hollandaise sauce, use a PME #0 tip (or equivalent), and pipe flooding-consistency pale yellow royal icing over the top of the egg. Allow the sauce to naturally flow down over the poached egg, helping it along with your tip or a scribe tool if necessary.
j. Crush a black sugar pearl with a mallet or heavy pan until it resembles coarsely ground black pepper.
k. While the icing is still tacky, sprinkle some cracked pepper over the top of the hollandaise sauce. Set aside to dry.
Step 5: Create asparagus transfers
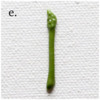
a. Using stiff-consistency green royal icing and a Wilton #2 tip (or equivalent), pipe a line onto acetate (or parchment paper). The line should be slightly shorter than the diameter of your plate made in Step 1.
b. Gently press the side of a damp, flat paint brush against the bottom of the line to thicken and angle the bottom of the asparagus stalk.
c. With the same icing and a PME #00 tip (or equivalent), pipe a small teardrop about 1/8 inch (3 mm) above the top of the stalk.
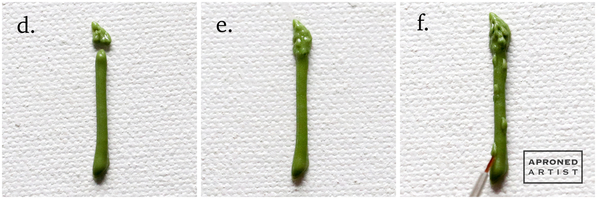
d. Continue adding rows of teardrops until you reach the neck of the asparagus.
e. Add more teardrops on top of the original layer until the head looks full.
f. Pipe a few small teardrops on the sides of the stalk, blending the bottom of each teardrop into the stalk with a tiny, damp liner paint brush. Set aside to dry.
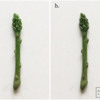
g. If desired, paint your asparagus with a tiny liner paint brush. First, add some diluted Leaf Green gel coloring to the head and stalk, leaving the bottom quarter bare.
h. Then, highlight the tip of the head, some of the teardrops on the head, and the little leaves on the stalk with diluted Violet gel coloring.
Step 6: Create flower and stem transfers
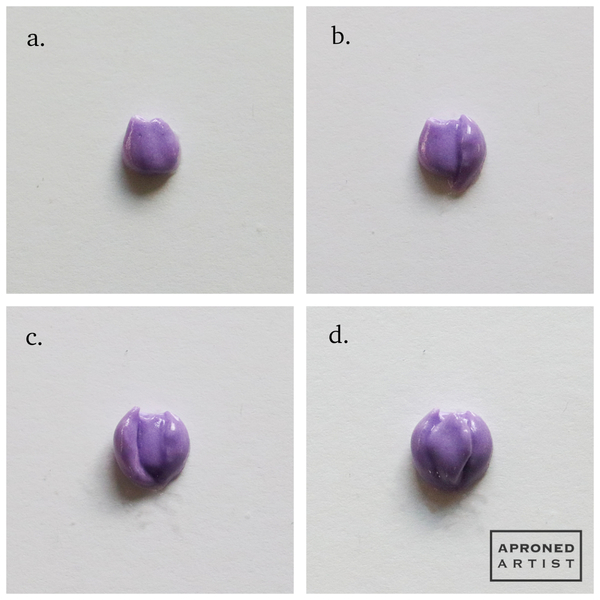
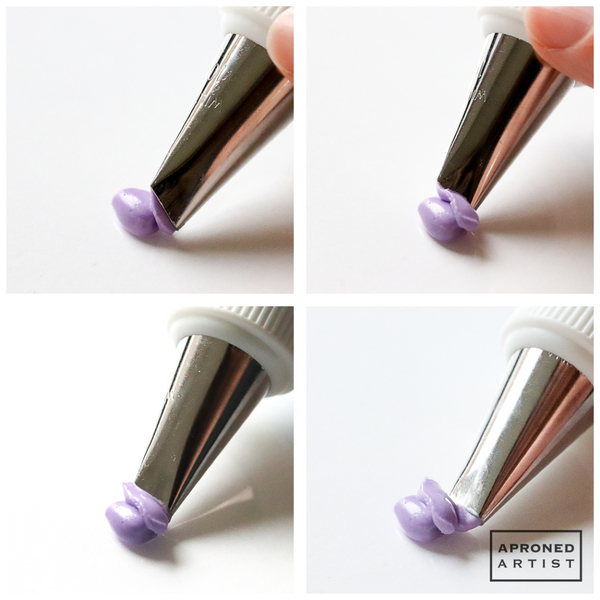
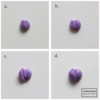
a. Use stiff-consistency lavender royal icing and a Wilton #101 tip (or equivalent) to pipe the profile of a flower on a piece of acetate (or parchment paper). With the tip opening resting directly on the acetate and the wide end of the tip closest to you (where the base of the flower will be), pipe a small mound of frosting. It doesn’t really matter what it looks like; its purpose is only to give the flower some height.
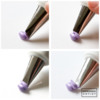
b. Pipe a horizontal petal on top of the right side of your mound. Begin by placing the wide end of the tip on the base (fat end) of the mound piped in the previous step. (For proper orientation of the tip, see the additional photos of this step below.) Apply gentle pressure as you pipe away from you, toward the top of the flower, in a crescent shape. Ease off the pressure when you reach the top of the flower to create a pointed petal. Then, mirror the crescent shape as you pipe back toward you, ending the petal at the fat base of the mound.
c. Pipe a similar petal on the left side of the mound.
d. Pipe another petal in between the right and left petals.
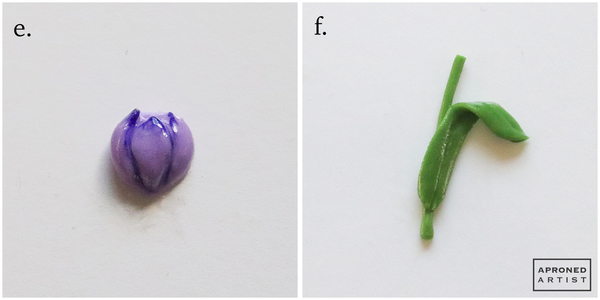
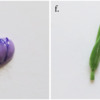
e. While the icing is still wet, paint the edges of the petals with diluted Violet gel coloring.
f. Using stiff-consistency green royal icing and a PME #2 tip (or equivalent), pipe a stem on a separate section of the acetate (or parchment paper). Add a leaf with a Wilton #66 tip (or equivalent). Allow the flower and stem to dry before gently peeling the acetate (or parchment paper) from the transfers.
Step 7: Create Mother’s Day card
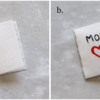
a. Cut out a piece of wafer paper measuring approximately 3/4 inch (1.9 cm) by 1 1/4 inches (3.2 cm). Fold the long side in half to create a card. (If your wafer paper breaks when you fold it, try placing the paper in an enclosed container with a small bowl of water for 24 hours before trying again.)
b. On the front of the card, paint “MOM” in Black gel coloring, and a heart shape in No-Taste Red gel coloring. (Alternatively, you can use food markers; however, the ink will bleed into the paper a bit more.)
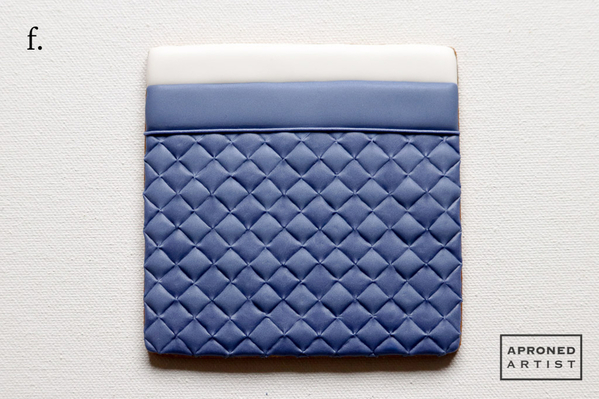
Step 8: Decorate base cookie to look like bedding
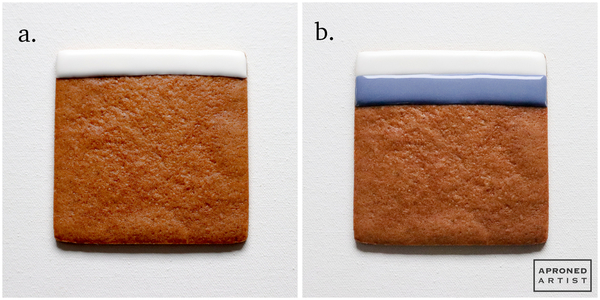
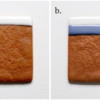
a. Using white flooding-consistency royal icing and a PME #2 tip (or equivalent), flood the top 1/2 inch (1.3 cm) of the square cookie. Let the icing dry about 15 minutes.
b. Using thick flooding-consistency blue royal icing and a PME #2 tip (or equivalent), flood the adjacent 1/2 inch (1.3 cm) of the cookie.
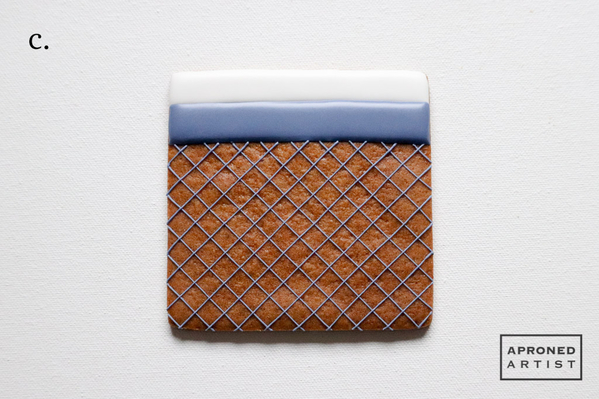
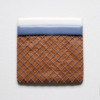
c. Pipe a small, diagonal square grid on the remainder of the cookie with the same blue icing and a PME #00 tip (or equivalent).
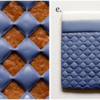
d. Using a PME #1.5 tip (or equivalent), fill every other diamond in the grid with more blue icing. For a more quilted look, use a scribe tool to drag out the icing at the corners of each diamond to meet on top of the intersecting lines.
e. Fill the remaining diamonds with the same icing, dragging the points to meet at the intersections.
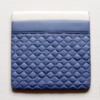
f. Again using stiff-consistency blue royal icing and a PME #1.5 tip (or equivalent), pipe a line along the seam between the blue flooded and quilted sections.
Step 9: Assemble
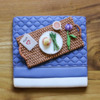
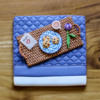
Flip your base cookie around so that the white sheet is on the bottom. (We’re looking at the cookie from mom’s perspective.) Have fun arranging all of your transfers on top to create a little scene.
Even better, customize the pieces to make them special for your mom. Here, I’ve painted the plate to look just like my mom’s favorite dishes . . .
. . . and paired it with her favorite breakfast!
- Amber Spiegel aka SweetAmbs, basketweave tutorial
- Wilton Brands, LLC, rope tutorial


Samantha Yacovetta began cookie decorating in 2013. While working at a local bakery, Samantha became captivated by cookie art when a customer requested princess-themed cookies. Attracted initially to the precision of cookie decorating, Samantha soon found that the limitless design opportunities turned it into her artistic passion. Samantha began regularly stocking the bakery case with decorated cookies and for several years sold cookies through her own company, Aproned Artist, a cottage food operation. Having retired from the business life, Samantha now enjoys making cookies just for fun from her home in San Jose, California, USA. To learn more about Samantha, please check out her Cookie Connection portfolio, her Facebook page, and her past Every Little Detail tutorials here.
Photo and cookie credits: Samantha Yacovetta
Note: Every Little Detail with Aproned Artist is a bimonthly Cookie Connection blog feature written by Samantha Yacovetta focused on the special little details that make big statements in cookie design. This article expresses the views of the author, and not necessarily those of this site, its owners, its administrators, or its employees. To read all of Samantha's past Every Little Detail tutorials, click here. And to see all of Cookie Connection's tutorials, click here.



















Comments (34)