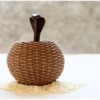
 I’ve had a hunk of modeling chocolate (left over from this Mother’s Day project) begging to be used up . . . or eaten. So in the interest of my waistline, I’ve been trying to come up with an idea that makes use of modeling chocolate’s unique capabilities. I’m not sure how this cobra concept popped into my head, but it slithered its way in there one night as I was drifting off to sleep. I knew it was a perfect use of my modeling chocolate - a dimensional shape that requires smoothness, strength, and resilience against the forces of gravity that would drag royal icing down into a droopy mound.
Supplies:
- 1 oz (28.3 g) modeling chocolate, store-bought or homemade
- Small paint brush
- Small silicone baking mat or parchment paper
- Gingerbread cookie dough suitable for contoured cookies
- Rolling pin, ideally with 1/8-in (0.3-cm) guides
- 4.5-in (11.4-cm) round cookie cutter
- 2.5-in (6.4-cm) silicone hemisphere mold
- Small knife
- 1.5-in (3.8-cm) round cookie cutter
- Royal icing (I used AmeriColor gel paste to color the icing):
- Stiff-consistency brown (Try to match the color of your gingerbread; I used 7 parts Chocolate Brown/3 parts Electric Green/2 parts Gold/2 parts Super Black)
- Tips:
- Large flat paint brush
- Parchment paper
- Kitchen twine
- Ruler
- Food-safe marker
- Small mason jar (or equivalent)
- Marshmallow(s)
Step 1: Sculpt modeling chocolate cobra
a. Knead the modeling chocolate until it is smooth and pliable. Roll it into a 10-inch (25.4-centimeter) long rope.
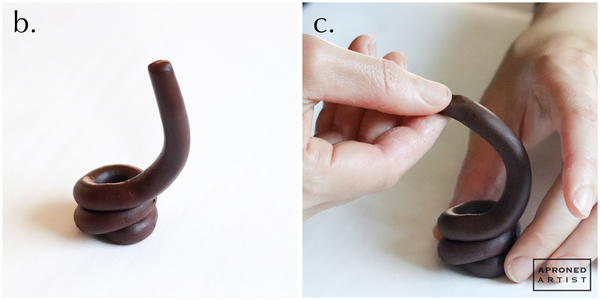
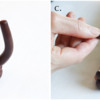
b. Tightly coil the lower half of the rope so that the width of its base is about 1 inch (2.5 centimeters). Extend the top half of the rope vertically. (If the modeling chocolate is too cold to coil without tearing, you can microwave it for five seconds to warm it.)
c. To form the head of the snake, gently pinch the top end of the rope between your fingers to flatten it slightly. A snake’s head is triangular, so use your fingers to bring the flattened tip (where the snake’s mouth would be) to a slight point.
d. Gently press the side of a small paint brush handle against the top of the snake’s head to create a shallow indentation in the center.
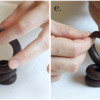
e. To create the snake’s hood, pinch the neck on both sides so that it flattens and flares out about 3/8 inch (1 centimeter) on each side. If your modeling chocolate becomes too hard to shape easily, try dipping your hands in hot water to warm them (just make sure to dry them off completely before touching the modeling chocolate). Once you’re happy with the shape of the cobra, set it aside to harden completely.
Step 2: Mold and bake basket cookie
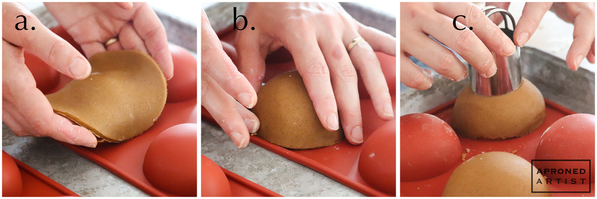
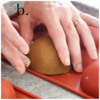
a. Generously flour a small silicone baking mat (or piece of parchment paper). Roll a small hunk of gingerbread dough on the prepared surface to a thickness of 1/8 inch (0.3 centimeter). Cut a circle out of the rolled dough using a 4.5-inch (11.4-centimeter) round cookie cutter. Transfer the cut dough to the convex side of a 2.5-inch (6.4-centimeter) silicone hemisphere mold. Center it on the mold.
b. Gently use your fingers to shape the dough around the mold. Try not to stretch or dent the dough while shaping to maintain an even thickness. Trim away any excess dough at the base of the mold with a small knife. Once baked, this cookie will be the bottom half of the basket.
c. Repeat Steps 2a and 2b to mold another hemisphere of dough. Use a 1.5-inch (3.8-centimeter) round cookie cutter to cut away a circle at the top of the hemisphere (an opening for the top of the basket).
d. Bake both cookies at 375°F (190°C) for five minutes. Remove the sheet pan from the oven, gently smooth any air bubbles, and trim away any cookie dough that has spread at the base. Continue baking until golden brown.
Note: To see a video demonstration of how to make a hemisphere cookie, and a hemisphere cookie with a round cutout, check out Julia’s cauldron tutorial.
Step 3: Attach cookie halves and apply base coat of icing
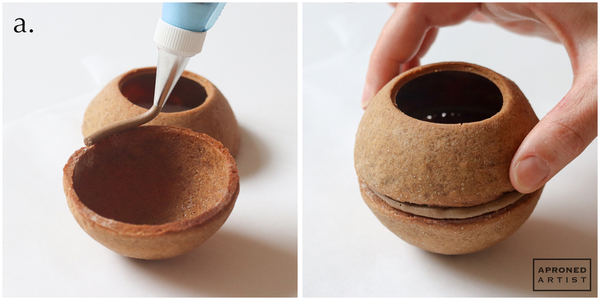
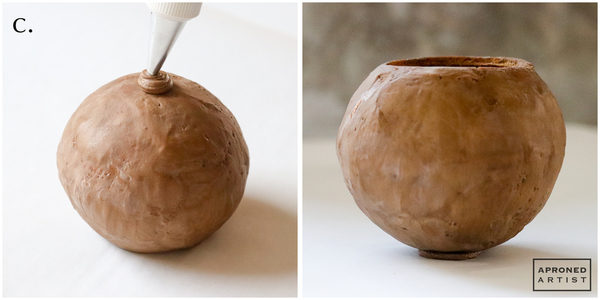
a. Using stiff-consistency brown royal icing and a Wilton #8 tip (or equivalent), pipe a ring of icing around the flat edge of one of the basket halves. Immediately place the other basket half on top of the icing ring, pressing gently to seal the two halves together.
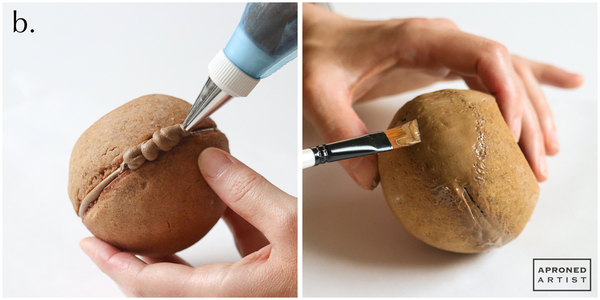
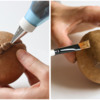
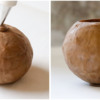
b. With the same icing and tip, pipe a few dabs of icing along a section of the seam where the two cookies join. Use a wet, large flat paint brush to gently smooth the icing upwards towards the top of the basket and down to the base. The goal is to use the icing to even out the seam between the two cookies. Continue piping icing in sections along the seam and smoothing them with the wet paint brush until the entire basket is covered. (Don’t worry if the overall appearance is messy; we just want a reasonably consistent base layer in case there are any holes in the basketweave texture applied in a later step.) Allow this thin layer of icing to dry completely.
c. Flip over the basket so that it rests on its opening. Pipe a dab of icing on the center top of the cookie. Immediately flip over the basket onto a piece of parchment paper, pressing gently to create a flat foot for the basket so it can stand upright without wobbling. Allow the icing to dry completely before peeling the parchment paper away from the basket.
Step 4: Pipe basketweave pattern
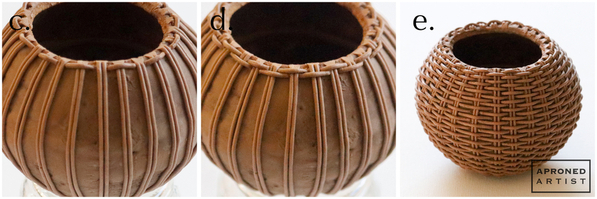
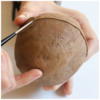
a. To make piping guides for the basket, cut a piece of kitchen twine equal to the perimeter of the basket opening. Divide the length of the string into 28 equal sections, using a food-safe marker to mark each section. The number of sections isn’t critical, although it does need to be an even number. Otherwise, your basketweave pattern won’t overlap correctly all the way around the basket. I made 28 sections because I wanted the distance between sections at the widest point of the basket to measure about 3/8 inch (1 centimeter). Wrap the string around the opening of the basket, and use the food-safe marker to transfer the section markers from the string to the opening of the cookie. These marks will be your piping guides.
b. Using stiff-consistency brown royal icing and a PME #2 tip (or equivalent), pipe a straight vertical line extending from a piping guide down to the foot of the basket. Using a small, damp paint brush, flatten the icing at the top basket edge and at the point of intersection with the foot (so that the cookie will still have a flat bottom). Repeat with another straight vertical line directly adjacent to the first. Continue piping two vertical lines at each piping guide (and flattening them at the basket top and base) until you’ve piped all the way around the cookie. Piping becomes difficult when you run out of room to hold the cookie. When this happens, my best advice is to set the basket cookie on top of something that is narrower than it (like a small mason jar). You won’t have quite as much access to the base, so use a small paint brush to drag the icing at the bottom as close to the foot of the basket as possible.
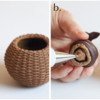
c. Use the same icing and tip to pipe the rest of the basketweave pattern. Pipe a horizontal line at the top of the basket beginning just after one set of vertical lines, crossing over the adjacent set of vertical lines, and ending just before the next set of vertical lines. If necessary, use a small paint brush to tuck the ends of the icing beneath the vertical lines. Repeat this pattern, starting on the other side of the vertical line where the previous horizontal line ended. Continue piping a row of horizontal lines in this fashion all the way around the perimeter.
d. The next row of horizontal lines should sit beneath the first, however, they should be staggered relative to those above, i.e., offset by one set of vertical lines. The horizontal line should start just after a set of vertical lines that was crossed over in the previous row.
e. Continue this pattern of offsetting rows of horizontal lines until you’ve covered the entire cookie. Piping becomes challenging as you near the foot of the basket, however, rest assured that little inconsistencies will ultimately blend into the overall pattern.
Step 5: Assemble cobra in basket
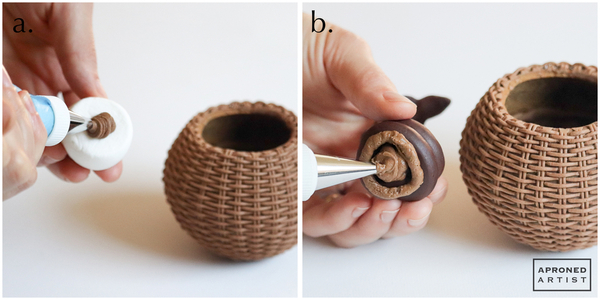
a. You will need to prop the snake so that it isn’t completely hidden within the basket. Insert a marshmallow in the bottom of the basket, and gently place the cobra on top to evaluate how much of the snake will peek out of the basket. Add more marshmallows for more height, or squash the marshmallow slightly if the snake is too high. Once you are satisfied with the height, carefully remove the marshmallow(s), and pipe a dab of stiff-consistency brown royal icing on one flat side. Insert the marshmallow into the basket, icing side down.
b. Pipe some brown royal icing on the bottom of the snake, and insert the snake into the basket so that it sits on top of the marshmallow.
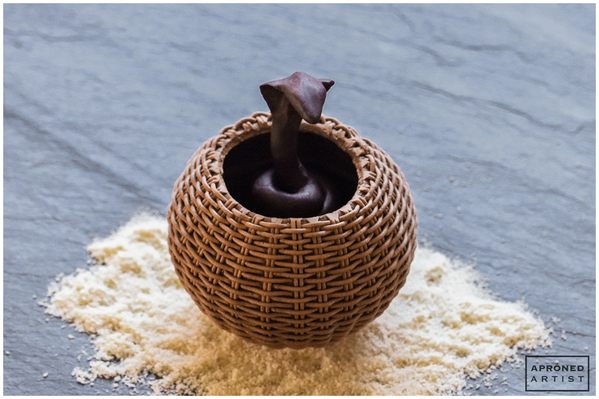
Finished!
If you’re looking to add more color or detail to this project, consider piping royal icing scales onto the cobra or painting the outline of scales with white gel paste. If you’re not a fan of snakes, you can fill your basket with flower transfers, miniature fruit, Easter eggs, or anything your heart desires.
Sources:
(1) Semisweet modeling chocolate and gingerbread recipes by Julia M. Usher
(2) Contouring and baking basket halves, Julia M. Usher's cauldron video or Julia's "How to Contour Cookie Dough" video


Samantha Yacovetta began cookie decorating in 2013. While working at a local bakery, Samantha became captivated by cookie art when a customer requested princess-themed cookies. Attracted initially to the precision of cookie decorating, Samantha soon found that the limitless design opportunities turned it into her artistic passion. Samantha began regularly stocking the bakery case with decorated cookies and for several years sold cookies through her own company, Aproned Artist, a cottage food operation. Having retired from the business life, Samantha now enjoys making cookies just for fun from her home in San Jose, California, USA. To learn more about Samantha, please check out her Cookie Connection portfolio, her Facebook page, and her past Every Little Detail tutorials here.
Photo and cookie credits: Samantha Yacovetta
Note: Every Little Detail with Aproned Artist is a monthly Cookie Connection blog feature written by Samantha Yacovetta focused on the special little details that make big statements in cookie design. This article expresses the views of the author, and not necessarily those of this site, its owners, its administrators, or its employees. To read all of Samantha's past Every Little Detail tutorials, click here. And to see all of Cookie Connection's tutorials, click here.








Comments (24)