
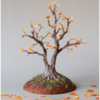
Oftentimes, working through the process of one cookie project will spur an idea for another. Last month when I was gluing loads of little pieces of wafer paper to my vulture, it inspired another project in which I could glue little pieces of wafer paper to a tree. After cutting, painting, and positioning over 800 wafer paper feathers last month, you’d have thought I’d be sick of the stuff. Not so! But I have learned some lessons. This time, I’m not hand-cutting every little piece - I have a craft punch to do the work for me. I’m not individually painting each piece either - I'm doing that en masse. And 800+ feathers have been pared down to a much more reasonable 70 leaves. So while this miniature autumn tree still has the impact of so many tiny little pieces of wafer paper, the process is dramatically streamlined.
Supplies:
- Kitchen shears
- Wafer paper
- AmeriColor (or equivalent) gel paste colorings for painting: Egg Yellow, Orange, Warm Brown, Gunmetal, Bright White, Moss, Electric Green, Espresso
- Clear alcohol (such as vodka or Everclear)
- Paint brushes:
- Medium flat angled paint brush
- Tiny liner paint brush
- Small round paint brush
- Parchment paper
- Oak leaf craft punch
- Royal icing (I used AmeriColor gel paste coloring to tint the icing):
- Stiff-consistency muddy gray (3 parts Stone/3 parts Espresso/2 parts Ivory/1 part Super Black)
- Stiff-consistency brown (2 parts Chocolate Brown/1 part Espresso)
- Tips:
- Props of varying sizes (small jars, silicone molds, etc.)
- Cookie dough that bakes with minimal spread, rolled 1/8 in (0.3 cm) thick (I used Julia’s gingerbread recipe)
- 3-in (7.6-cm) round cookie cutter
- 3-in (7.6-cm) silicone hemisphere mold
- Food-safe file
- Baked 2-in (5.1-cm) cookie of any shape
- Small trowel (or equivalent)
- Edible glue
- Food-safe tweezers
Step 1: Paint and cut wafer paper oak leaves
a. Using kitchen shears, cut a sheet of wafer paper into eight pieces. The pieces don’t have to be uniform or any particular size; it’s just easier to manage a smaller square than the large sheet. Mix a drop or two of Egg Yellow gel paste coloring (or equivalent) with about 1/4 cup alcohol to make a watercolor-consistency paint. Prepare a smaller amount of orange paint by mixing Orange gel paste coloring (or equivalent) with about 1 tablespoon alcohol. Repeat to make brown paint by mixing Warm Brown gel paste coloring (or equivalent) with about 1 tablespoon alcohol.
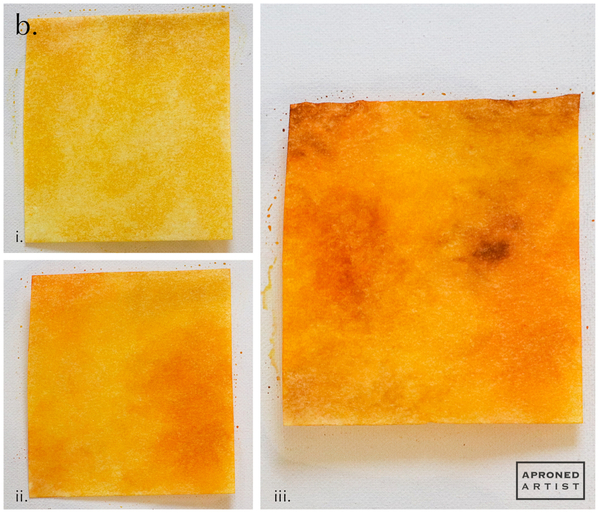
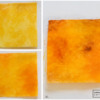
b. Use a medium flat paint brush to paint the yellow paint over the entire surface of a piece of wafer paper (i). Apply the paint generously (the wafer paper will become completely saturated), but be gentle with your brush strokes so that you don’t tear the wafer paper. Add a few splotches of orange paint (ii) and brown paint (iii). Carefully peel the wafer paper off of your work surface (it will be slightly stretchy now), and place it lightly on parchment paper to dry. (I found that if I allowed the wafer paper to dry on the work surface where it was painted, it was extremely difficult to remove without breaking). Repeat to paint the remaining pieces of wafer paper. Allow the wafer paper to dry completely (in my dry climate, this step took about 20 minutes).
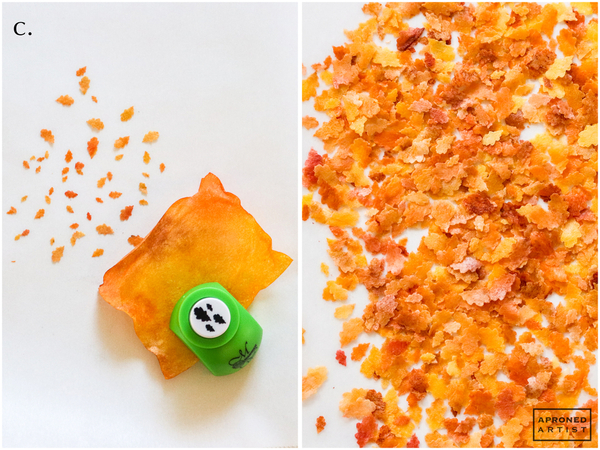
c. Place the painted wafer paper into the craft punch, and punch out the tiny leaves. For reference, the leaves range from 1/8 to 3/8 inch (0.3 to 1 centimeter) in length. Reposition the paper to cut the leaves as closely together as possible so that you get the most leaves out of each sheet. You may need to trim an already-punched section so that you can better access the middle of the (unpunched) wafer paper. Repeat to punch leaves out of each piece of painted wafer paper. Sort through the leaves to separate the 3/16-inch (0.5-centimeter) leaves (the second smallest leaves) from the pile (you’ll need about 70). We won’t be using the remainder of the leaves, but they make great autumn-themed confetti.
Step 2: Pipe and assemble tree trunk and branches
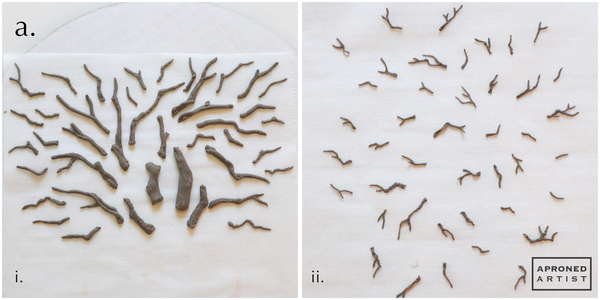
a. Using stiff-consistency muddy gray royal icing and a PME #2 tip (or equivalent), pipe individual branches on a sheet of parchment paper. The branches should range from 1/4 to 3/4 inch (0.6 to 1.9 centimeters) long, with some branches thicker than others. Make more than you think you’ll need with a good variety of shapes and sizes (i). Use a damp flat angled paint brush to smooth and shape the branches, if necessary. Switch to a PME #1 tip (or equivalent), and pipe many smaller branches, ranging from 1/8 to 1/4 inch (0.3 to 0.6 centimeter) long (ii). Again, make more than you think you’ll need; many of these smaller branches may break as you handle them. Allow the icing to dry completely before carefully peeling away the parchment paper from the transfers.
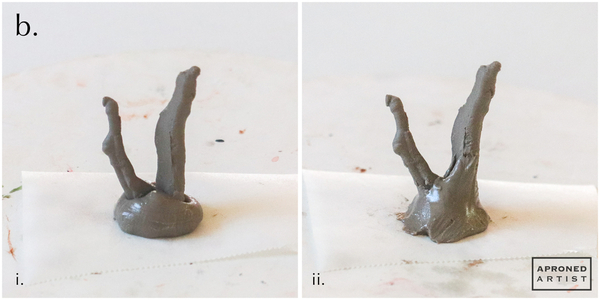
b. Using the same icing and a Wilton #8 tip (or equivalent), pipe a mound of icing on a small square of parchment paper. Insert one or more (I used two) of the thickest branch transfers to build up the trunk (i). Use a damp flat paint brush to smooth and shape the wet icing around the base of the transfers so that it looks like a connected trunk (ii). Allow the icing to set (I waited 15 minutes).
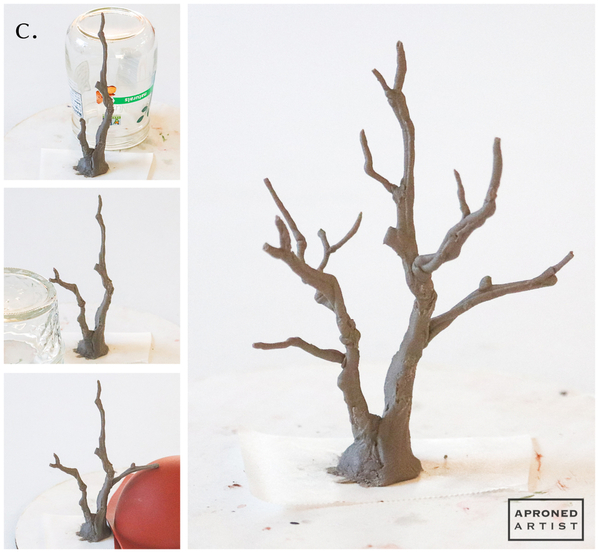
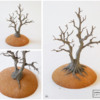
c. Using a PME #2 tip (or equivalent), add a dab of icing to the top of the trunk, and attach another longer branch from the set of branches piped in Step 2a(i). Use a small jar (or equivalent) to prop up the branch while it dries. I allowed the icing to set for 15 minutes after adding each branch. If necessary, add some icing to the seam between the transfers, and gently shape it with a damp flat paint brush. Try to keep some texture so that the bark looks knotted and twisting. Continue to add longer branches in a similar fashion, positioning them at different heights and angles and propping them on appropriately sized items while they set. Some shorter branches may not need props to stay in place.
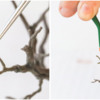
d. When you’re happy with the overall shape of your tree, begin adding the smaller branches from the set piped in Step 2a(ii). Use a PME #1 tip (or equivalent) to pipe a dab of icing on an existing large branch, and attach one of the small branches. These transfers are so small and light that they should not require props. (If your branches are not holding, try making your icing consistency thicker.) Continue adding small branches until the tree looks full.
Step 3: Bake hill cookie, and attach tree
a. Cut a circle of cookie dough with a 3-inch (7.6-centimeter) round cookie cutter (i), and drape the dough over the top of a silicone hemisphere mold of the same size. Again, it's best to use a dough that spreads minimally for this step (ii). Use the palms of your hands (as opposed to your fingers which may leave dimples in the dough) to gently contour the circle around the mold (iii). Bake until the cookie is lightly browned. Once the cookie has cooled, smooth any rough areas around the bottom with a food-safe file. (For more detailed instructions about how to contour cookies, reference Julia's Watch-Learn-Create Challenge videos. Julia shares her extensive expertise on the technique and thoroughly explains each step of the process.)
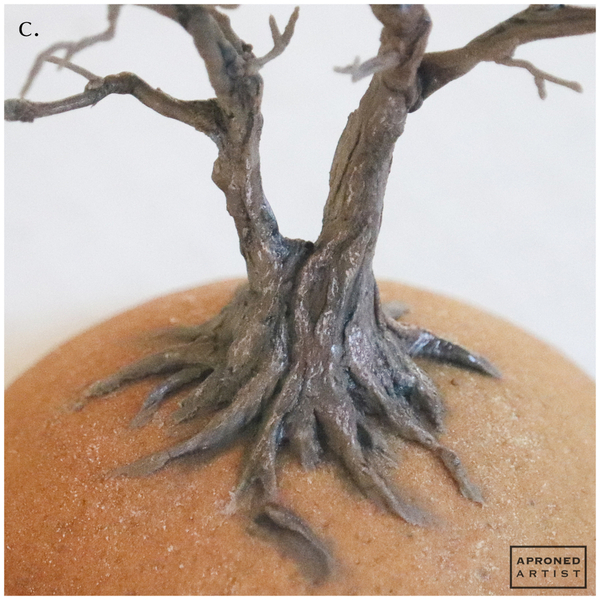
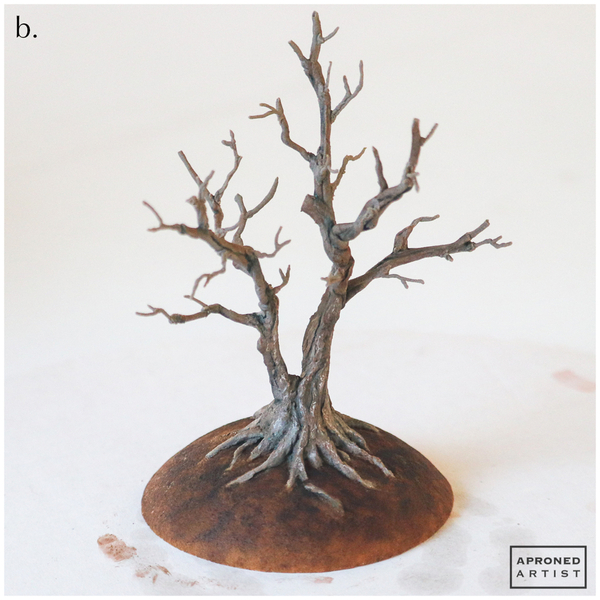
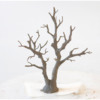
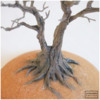
b. Using stiff-consistency muddy gray royal icing and a PME #2 tip (or equivalent), pipe a mound of icing on the center of the hill cookie. Place the tree transfer on the mound, pressing it down so that the bottom edges of the trunk are flush with the cookie (i). Pipe a tree root extending from the trunk. Shape the root with a flat angled paint brush, and blend the fresh icing into the dried icing of the trunk (ii). Continue to pipe tree roots, varying their length, shape, and position until the entire circumference of the trunk has been covered with roots (iii). Allow the icing to dry completely.
Step 4: Paint tree
a. Dilute a drop of Warm Brown gel paste coloring (or equivalent) until it is the consistency of watercolor paint. Use a flat paint brush to gently brush the trunk and larger branches with the watery paint. Don’t worry about painting the more delicate branches. This brown wash, while subtle, will add a lot of depth to the flat matte gray of the underlying icing.
b. Dilute a drop of Gunmetal gel paste coloring (or equivalent) slightly, and use a tiny liner paint brush to darken the crevices of the tree. Accent the recessed texture in the trunk and branches and the areas between the roots with this darker paint.
c. Mix a drop of Bright White gel paste coloring with a touch of Warm Brown gel paste coloring (or equivalents) to make a very light brown paint. Use a tiny liner paint brush and short brushstrokes (almost as if you were painting fur) to highlight the more raised sections of the tree.
Step 5: Make moss, and decorate hill cookie
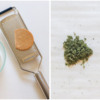
a. Use a food-safe file to grate the baked 2-inch (5.1-centimeter) cookie to yield about 1 tablespoon of very fine crumbs (you probably won’t need the entire cookie). Divide the crumbs between two small bowls. Add a dab of Moss gel paste coloring (or equivalent) to one bowl. Use the back of a spoon to mash the gel paste coloring into the crumbs to spread it. The coloring and crumbs won’t want to mix at first, but keep at it until the color is fairly uniform. If you want a darker green, add a tiny bit more gel paste coloring, and continue mashing. Repeat to dye the other bowl of crumbs with Electric Green gel paste coloring (or equivalent).
b. Dilute a drop of Espresso gel paste coloring (or equivalent) with water, and use a flat angled paint brush to paint the hill cookie using haphazard brush strokes. Concentrate the darkest paint near the base of the tree and gradually lessen the amount of paint as you move toward the edge of the cookie.
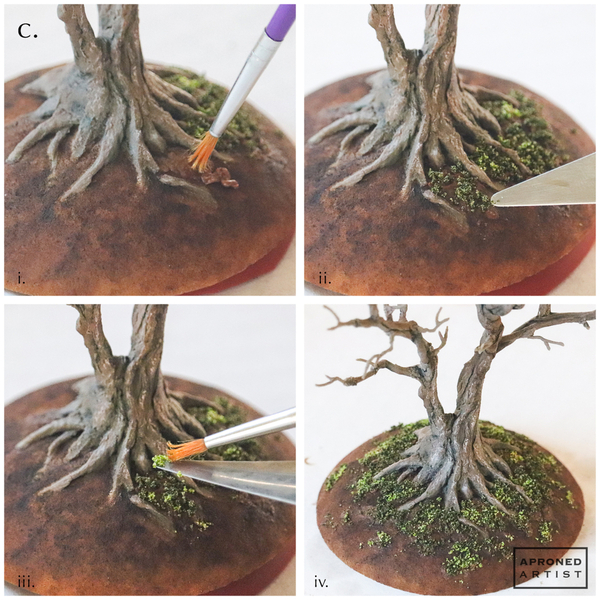
c. Use stiff-consistency brown royal icing and a PME #2 tip (or equivalent) to pipe a squiggle of icing near the roots of the tree. Use a small round paint brush to stipple (vertically dab) the icing to flatten it and give it a bumpy, dirt-like texture (i). Immediately, use a small trowel (or equivalent) to transfer some of the dark green moss to the wet icing (ii). Use the trowel to gently press the moss into the icing to help it adhere (ii). Use the trowel to add a smaller amount of light green moss to the same icing. If necessary, use a paint brush to push the moss off the trowel and onto the cookie (iii). Use the trowel to reposition the light moss into the areas of wet icing that do not have any moss, and press down gently with the trowel to help the moss adhere. Repeat to cover the areas around the roots of the tree with moss. Gradually make the moss patches more sparse as you move toward the edge of the cookie (iv).
Step 6: Attach wafer paper leaves
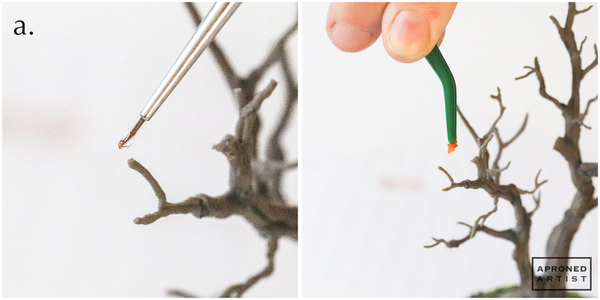
a. Use a tiny liner paint brush to transfer a tiny drop of edible glue to the end of a branch at the center of the tree. Pick up a leaf with food-safe tweezers, and insert the stem of the leaf into the glue. If necessary, use the tip of the trowel (or equivalent) to angle the leaf to your liking. Repeat to add more leaves to the tree, working from the inside of the tree outward so that you have as much access as possible. Feel free to add more than one leaf to a branch or to leave some branches bare.
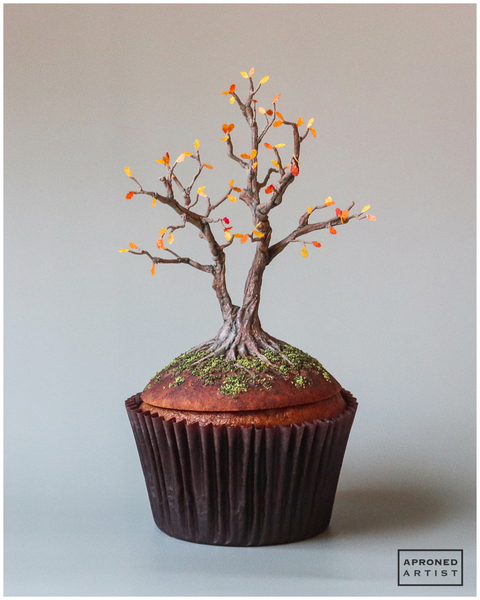
Finished! Final dimensions of my tree cookie were 5 inches tall by 3 inches wide (12.7 by 7.6 centimeters).
To celebrate, I crowned a pumpkin spice cupcake with my miniature tree cookie for the ultimate autumn treat.


Samantha Yacovetta began cookie decorating in 2013. While working at a local bakery, Samantha became captivated by cookie art when a customer requested princess-themed cookies. Attracted initially to the precision of cookie decorating, Samantha soon found that the limitless design opportunities turned it into her artistic passion. Samantha began regularly stocking the bakery case with decorated cookies and for several years sold cookies through her own company, Aproned Artist, a cottage food operation. Having retired from the business life, Samantha now enjoys making cookies just for fun from her home in San Jose, California, USA. To learn more about Samantha, please check out her Cookie Connection portfolio, her Facebook page, and her past Every Little Detail tutorials here.
Photo and cookie credits: Samantha Yacovetta
Note: Every Little Detail with Aproned Artist is a monthly Cookie Connection blog feature written by Samantha Yacovetta focused on the special little details that make big statements in cookie design. This article expresses the views of the author, and not necessarily those of this site, its owners, its administrators, or its employees. To read all of Samantha's past Every Little Detail tutorials, click here. And to see all of Cookie Connection's tutorials, click here.














Comments (14)