
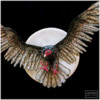
In 2018, I bought a pack of 100 sheets of wafer paper to make a teeny tiny greeting card for a Mother’s Day cookie. Since then, I’ve used wafer paper in one other project to make a couple of small oak leaves. Between the two projects, I’ve used about one-eighth of one sheet of wafer paper. Every time I open my drawer of decorating supplies, I see that thick pack of starchy paper staring back at me, shamefully untouched. So this month I was determined to come up with a concept that made better use of the medium. This vulture cookie definitely fits the bill.
Supplies:
- Royal icing (I used AmeriColor gel paste coloring to tint the icing.):
- Stiff-consistency pinkish red (3 Electric Pink/1 Burgundy/1 Tulip Red)
- Stiff-consistency white
- Stiff-consistency black (Super Black)
- Tips:
- Parchment paper
- Paint brushes:
- Medium flat angled
- Tiny liner
- AmeriColor (or equivalent) gel paste colorings for painting: Bright White, Chocolate Brown, Espresso, Super Black, Blush, Taupe
- Vulture Templates document (located in “Files” under “Attachments” at the end of this post)
- Props: Plastic wrap, 3/4-in (1.9-cm) tall cookie cutter, 1-in (2.5-cm) tall cookie cutter, small cookies, and 2 1/2-in (6.4-cm) hemisphere mold (or equivalents)
- 1-in (2.5-cm) round cookie, rolled 1/8 in (0.3 cm) thick
- Wafer paper
- Brown food-safe marker
- Kitchen shears
- Edible glue
- Large mixing bowl with a rounded bottom (or equivalent)
- 5-in (12.7-cm) round cookie flooded with cream-colored icing (2 parts Pumpkin/1 part Taupe)
- Artist’s sponge (optional)
Step 1: Create vulture head royal icing transfer
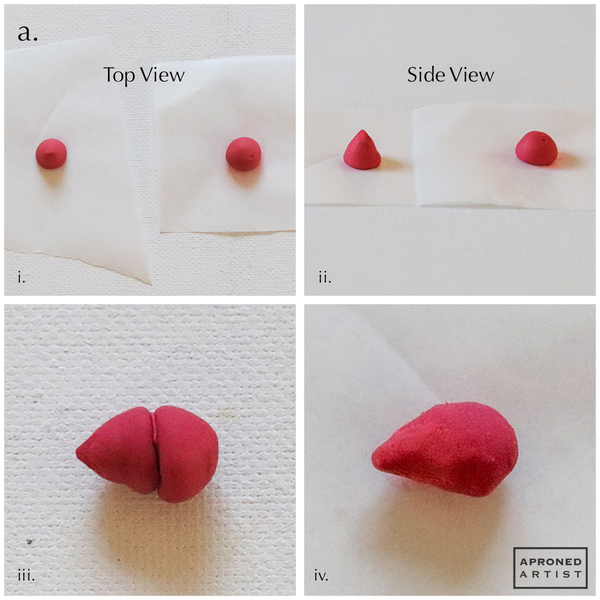
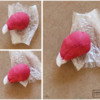
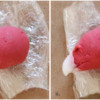
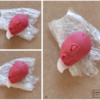
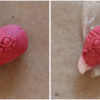
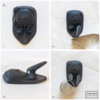
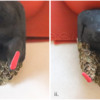
a. Using stiff-consistency pinkish red royal icing and a Wilton #8 tip (or equivalent), pipe two mounds of icing on small squares of parchment paper. One mound (shown on the left in the top two photos) should be about 3/8 inch (1 centimeter) wide with a pointed tip. The other mound (shown on the right in the top two photos) should be slightly larger with a rounded tip (i and ii). Allow the icing to dry completely before peeling the transfers away from the parchment paper. With a dab of icing, glue together the flat sides of the two mounds (iii). Using a PME #2 tip (or equivalent), pipe icing around the seam between the two transfers, and blend the wet icing into the dried icing with a damp flat paint brush to create a seamless head shape (iv).
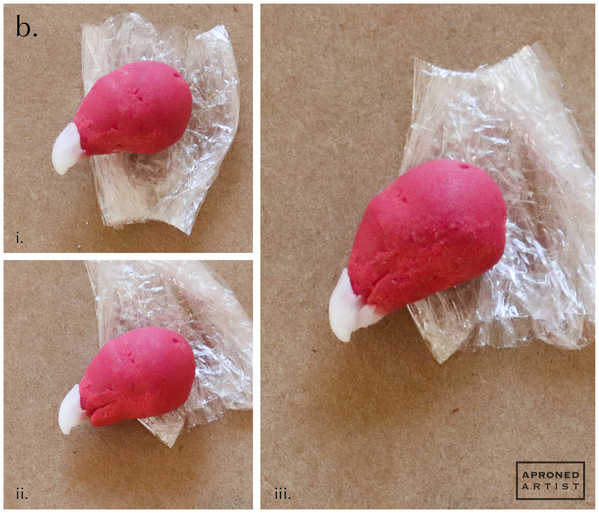
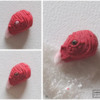
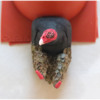
b. Using stiff-consistency white royal icing and a PME #2 tip (or equivalent), pipe a mound of icing on the pointed tip of the head. Allow the icing to set for a moment until no longer tacky. Use a dry flat paint brush to push and shape the icing into a curved beak (i). Use stiff-consistency pinkish red royal icing and a PME #2 tip (or equivalent) to pipe a small mound beneath the head where the lower jaw would be. Use the paint brush to blend the back of the mound toward the back of the head (ii). Pipe a smaller mound of white icing at the end of the lower jaw, and shape it into the lower beak. Use the tip of the paint brush to slightly indent the end of the lower beak so it looks as though it ends within the upper beak (iii).
c. Using stiff-consistency pinkish red royal icing and a PME #1 tip (or equivalent), pipe a small semicircle above and to the right of the upper beak (i). Use a tiny liner paint brush to blend the ends of the semicircle into the head to create a nostril (ii).
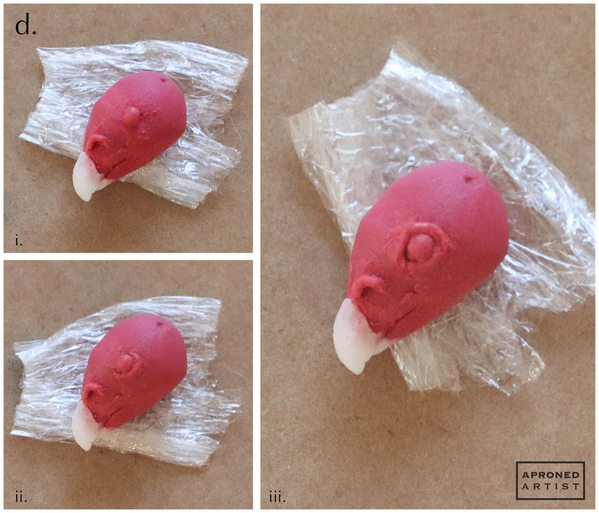
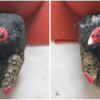
d. With the same icing and a PME #2 tip (or equivalent), add a bead of icing for the eyeball (i). Switch to a PME #1 tip (or equivalent) to add a semicircle of icing below the eyeball for the lower eyelid. Using a tiny liner paint brush, blend the ends of the semicircle into the dried icing of the head (ii). Add a semicircle of icing above the eyeball for the upper eyelid, and blend the ends into the lower eyelid (iii).
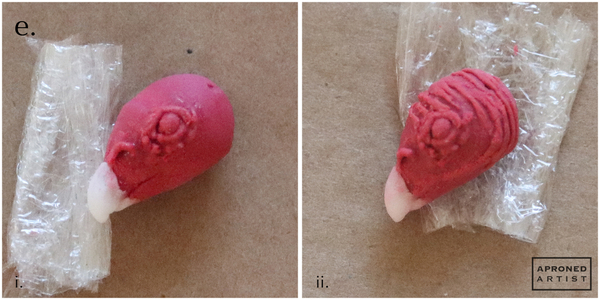
e. With the same icing and tip, add a few dots of icing below the lower eyelid (i). Add a few lines for wrinkles over the top of the head and extending down around the cheek (ii). Allow the head transfer to dry completely.
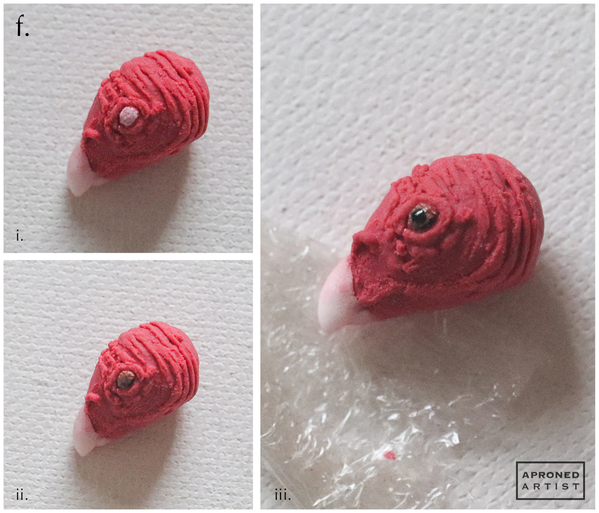
f. Paint the eyeball of the head transfer with Bright White gel paste coloring (or equivalent) and a tiny liner paint brush (i). Dilute a drop of Chocolate Brown gel paste coloring (or equivalent), and paint it over the white (ii). Add a dot of undiluted Espresso gel paste coloring (or equivalent) to the center of the eyeball for the pupil (iii).
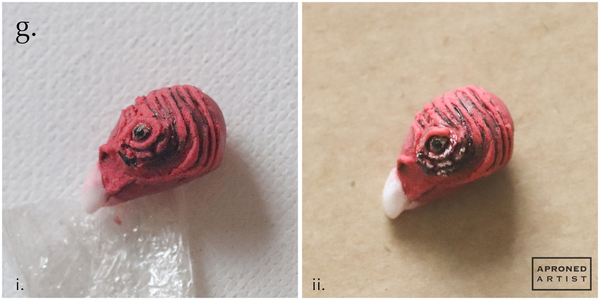
g. Paint undiluted Espresso gel paste coloring (or equivalent) in the nostril, in between the wrinkles on the forehead, and around the dots beneath the eye (i). Use a tiny liner paint brush to add undiluted Bright White gel paste coloring (or equivalent) on the lower eyelid and on the dots beneath the lower eyelid. Use a medium flat paint brush to paint the beak white as well (ii).
Step 2: Create feet royal icing transfers
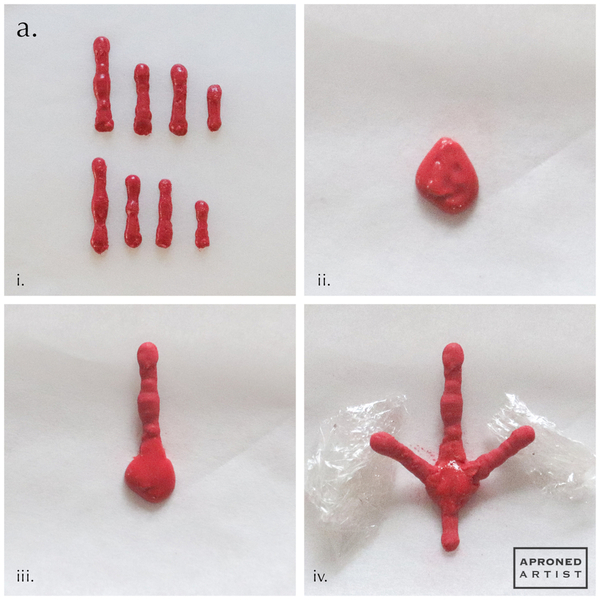
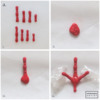
a. Print out the Vulture Templates document (located in “Files” under “Attachments” at the end of this post). Cover the “Toes” templates with a square of parchment paper. Using stiff-consistency pinkish red royal icing and a PME #2 tip (or equivalent), pipe bumpy lines over the toe templates. Use a damp flat paint brush to shape and smooth the toes, if necessary, but keep them pretty bumpy. Repeat to create toes for the other foot (i). Allow the toe transfers to dry completely before carefully peeling the parchment paper away from the transfers. Pipe a diamond-shaped mound of icing on a square of parchment paper (ii), and insert the longest toe into the top point of the diamond. Use a damp paint brush to smooth the icing around the toe (iii). Insert the two medium toes on either side of the long toe, propping the ends slightly on a crumpled piece of plastic wrap (or equivalent). Insert the smallest toe into the bottom point of the diamond (iv). Repeat to create the other foot transfer. Allow the transfers to dry completely.
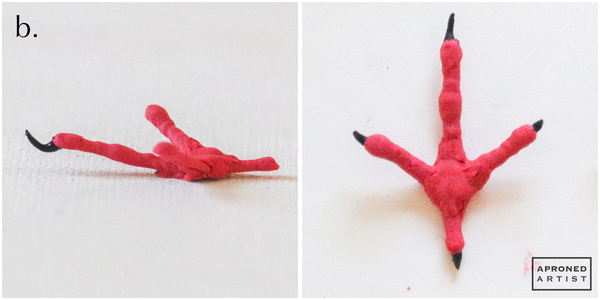
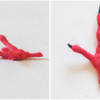
b. Using stiff-consistency black royal icing and a PME #1 tip (or equivalent), pipe little talons extending from the end of each toe. Use a dry paint brush to push the end of the talon upward to make it curve slightly.
c. Use a tiny liner paint brush and slightly diluted Bright White gel paste coloring (or equivalent) to highlight the more raised areas of the foot (i). Use diluted Espresso gel paste coloring (or equivalent) to darken the creases between the raised areas (ii).
Step 3: Pipe and assemble body
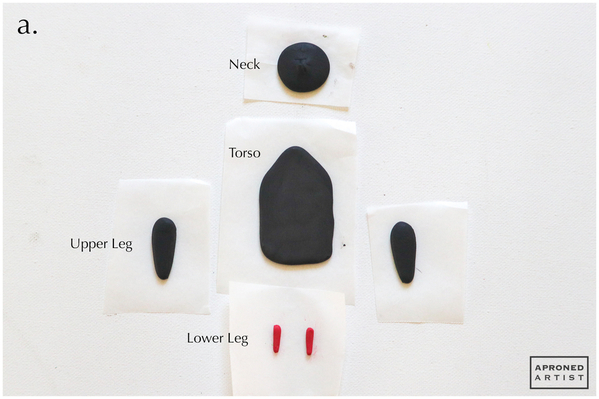
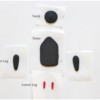
a. Place a square of parchment paper over the “Neck” template in the Vulture Templates document. Using stiff-consistency black royal icing and a Wilton #12 tip (or equivalent), pipe icing to fill the neck template. Use a damp flat paint brush to smooth the icing into a rounded mound. Similarly, pipe and smooth icing to cover the “Torso” template; then pipe and smooth two tapered lines, each to cover an “Upper Leg” template. Use stiff-consistency pinkish red royal icing and a Wilton #4 tip (or equivalent) to pipe two tapered lines, each to cover a “Lower Leg” template. Allow the icing to dry completely before carefully peeling the parchment paper away from the transfers.
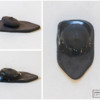
b. Using stiff-consistency black royal icing and a Wilton #8 tip (or equivalent), pipe a mound of icing on the top of the torso. Place the neck transfer on the mound of icing so that its bottom edge is flush with the torso transfer and its top edge is elevated (i). Pipe icing to fill the space between the torso and neck transfers, and smooth the icing with a damp flat paint brush (ii).
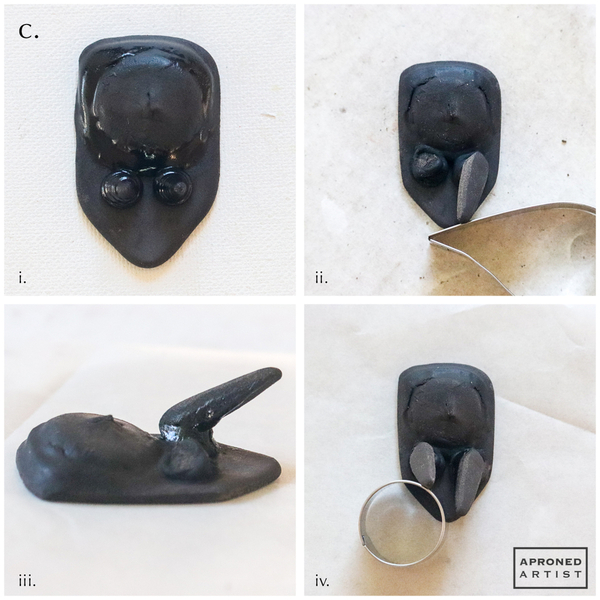
c. Pipe two small mounds of icing beneath the bottom of the neck transfer for the thighs (i). Allow them to set for a few minutes until no longer tacky. With a dab of icing, attach the wider end of an upper leg transfer to the top of the right mound, rotating it at a slight angle so that the flat bottom (the part that was attached to the parchment paper) faces inward to a small degree. Prop the thin end of the leg transfer on the edge of a 3/4-inch (1.9-centimeter) tall cookie cutter, or equivalent (ii). Allow the icing to set before removing the prop (in my dry climate, setting took about an hour). Using a PME #2 tip (or equivalent), pipe some icing to cover the seam between the thigh and upper leg transfer. Use a damp flat paint brush to smooth and shape the icing into a knee (iii). With a dab of icing, attach the other upper leg transfer to the top of the left mound, rotating it at a slight angle so that the flat bottom faces inward to a small degree. Prop the thin end of the leg transfer on the edge of a 1-inch (2.5-centimeter) tall cookie cutter, or equivalent (iv). Allow the icing to set before removing the prop. Pipe and shape icing around the seam to create the other knee.
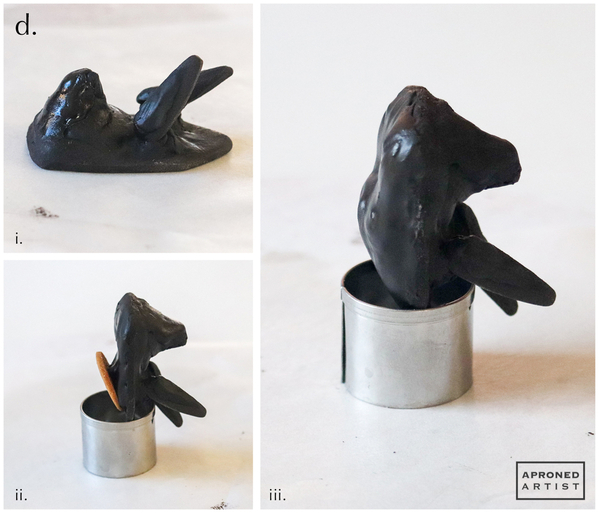
d. Using a Wilton #12 tip (or equivalent), pipe a mound of icing on the neck to extend it further (i). If your icing isn’t thick enough and slumps, you may need to do this step in tiers to get sufficient height. Attach a 1-inch (2.5- centimeter) round cookie to the lower back so that the bottom of the cookie is flush with the transfer and the top of the cookie extends away from the body (ii). Allow the icing to set for a few minutes before covering the back of the vulture and the attached cookie with icing. Smooth and shape the icing with a damp flat paint brush (iii). Allow the icing to dry completely.
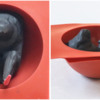
e. Use a PME #2 tip (or equivalent) to pipe a dab of black icing on the ends of the upper leg transfers. Attach the wider ends of the lower leg transfers so they are approximately perpendicular to the upper legs. They should point away from the body slightly so that you have sufficient room to attach the feet transfers in Step 8. (Tip: I placed the vulture’s body in the cavity of a silicone mold just to keep it steady.)
You may also want to attach the head transfer to the tip of the neck at this point. I chose to wait until I had applied some of the feathers (which we will cover in the next step).
Step 4: Make and attach body feathers
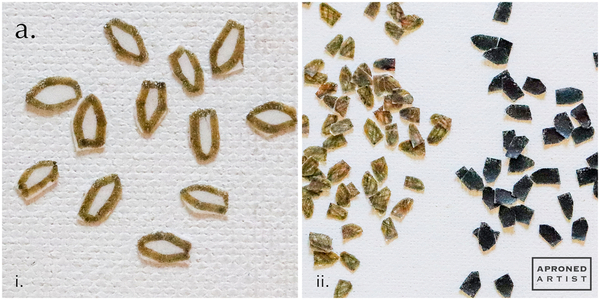
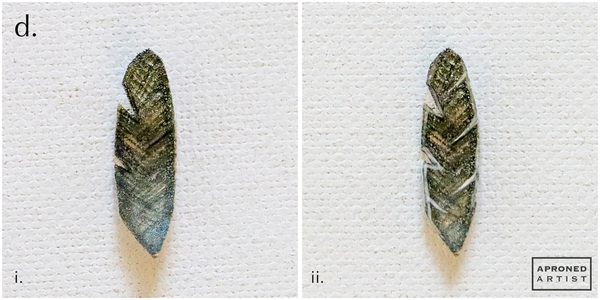
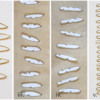
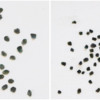
a. Place a piece of wafer paper, shiny side up, over the “Feather” templates in the Vulture Templates document. Use a brown food-safe marker to trace the shape labelled “Body”. Repeat a million times! ![]() (Actually, I needed approximately 600 feathers.) Cut out the feathers with kitchen shears (i). Using a damp angled flat paint brush, paint half of the feathers with undiluted Espresso gel paste coloring (or equivalent). Dip just the tip of the brush into the gel paste coloring, and brush it on your palette a few times to remove most of the paint. Paint the feather with cross-hatching strokes. Paint the other half of the feathers with undiluted Super Black gel paste coloring (or equivalent) so they are solid black. (ii)
(Actually, I needed approximately 600 feathers.) Cut out the feathers with kitchen shears (i). Using a damp angled flat paint brush, paint half of the feathers with undiluted Espresso gel paste coloring (or equivalent). Dip just the tip of the brush into the gel paste coloring, and brush it on your palette a few times to remove most of the paint. Paint the feather with cross-hatching strokes. Paint the other half of the feathers with undiluted Super Black gel paste coloring (or equivalent) so they are solid black. (ii)
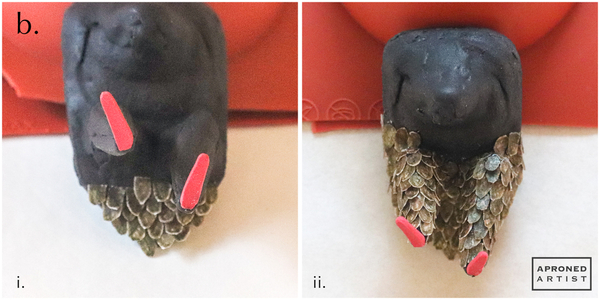
b. Begin attaching the brown feathers to the body transfer starting at the bottom tip of the torso. Using a tiny liner paint brush, add a dot of edible glue to the back of the flat top of the feather, and attach it to the bottom tip of the torso transfer. Add the next row above, offset by half a feather’s width, so that the side edge of each feather lines up with the middle of the feather below it to create a scalloped shingle effect (i). In the same manner, add feathers to cover the legs, starting at the ankles. You may need to cut some of the feathers in half to cover the nooks and crannies between the legs. Add a few feathers up the sides of the body so that the line of brown feathers at the waist roughly follows the bottom curve of the neck (ii).
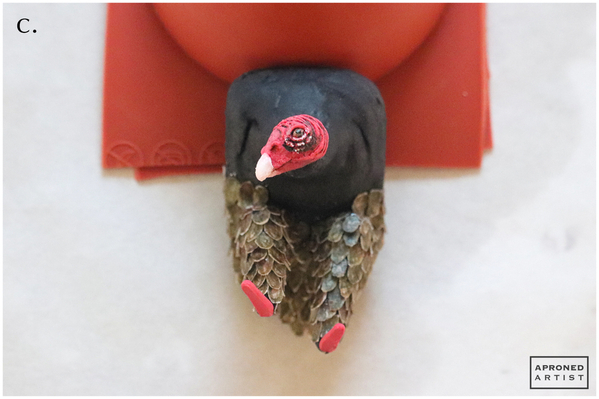
c. If you haven’t done so already, attach the head transfer to the tip of the neck with a dab of stiff-consistency black royal icing. Use a damp flat paint brush to meld the transfers together so the connection is smooth. Allow the icing to dry completely.
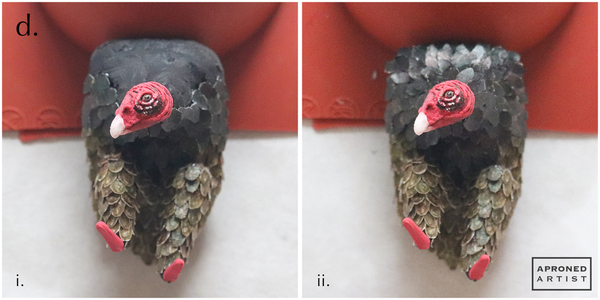
d. Add the black body feathers starting above the brown feathers in the same scalloped shingle pattern. As you attach more rows of feathers, begin to angle them slightly so that they collectively create a semicircle around the vulture’s neck. Continue this pattern until the lower neck is completely covered (i). Next, begin adding feathers at the top of the transfer (the rounded ends of these feathers should point away from the vulture’s head). Again, as you get closer to the head, angle the feathers to create another semicircle around the neck. Continue in this fashion until you have covered the remainder of the exposed upper neck (ii).
Step 5: Cut wing and tail feathers
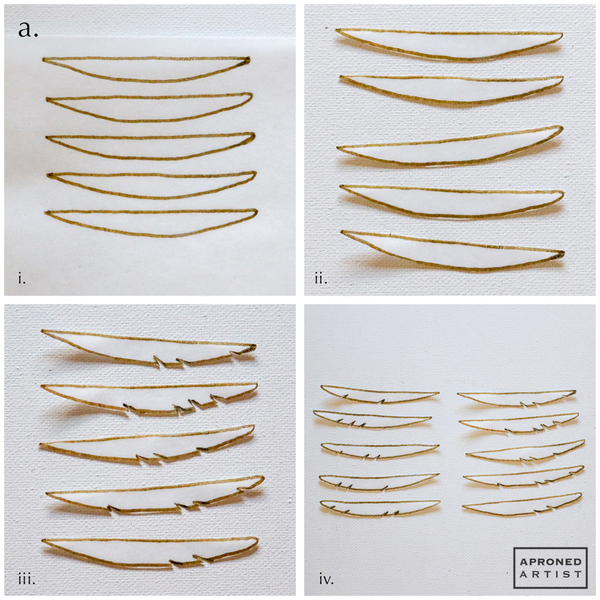
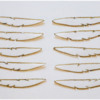
a. Place a piece of wafer paper, shiny side up, over the “Feather” templates in the Vulture Templates document. Use a brown food-safe marker to trace the shape labelled “A Left”. Repeat to trace four more of the same feather shape (i). Using kitchen shears, cut around the outside of the outlines to isolate the feathers (ii). Draw a few notches on the long, rounded edge of each feather, angling toward the pointed end of the feather (the end that will attach to the wing bone, as marked on the template). Try to make each feather slightly different. With kitchen shears, cut out the notches (iii). Repeat all of these steps to cut out and notch five “A Right” feathers (iv).
b. Trace and cut out five “B Left” and five “B Right” feathers (i). Cut out notches on both long edges of each feather. Again, try to make each feather slightly different.
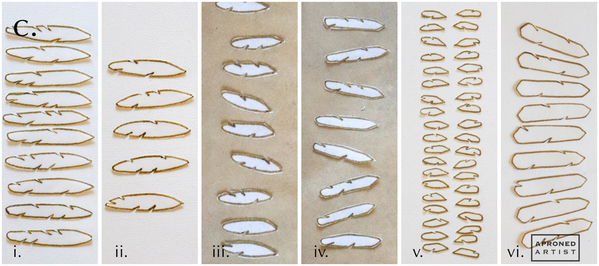
c. In the same fashion, trace, cut, and notch 20 “C” feathers (i), 10 “D” feathers (ii), 32 “E” feathers (iii), 16 “F” feathers (iv), 36 “G” feathers (v), and 9 “Tail” feathers (vi).
d. Use the scraps of wafer paper to cut out 40 “H” (i) feathers and 40 “I” (ii) feathers. No notches are necessary in these tiny feathers.
Step 6: Paint wing and tail feathers
a. To paint the “A” feathers, dip just the tip of a barely damp flat angled paint brush into undiluted Espresso gel paste coloring (or equivalent). Line up the longer side of the paint brush with the edge of the feather, and brush the paint around the outline of the feather (i). The dampness of the brush should help to blend the paint with the brown marker outline (ii). It’s important, however, to use as little water as possible. The wafer paper will begin to wrinkle if it gets too wet. Now, dip all of the bristles into the paint, and brush off almost all of the paint onto a paper towel so that the brush is quite dry. Line up the angled end of the bristles with the rounded edge of the feather (so that the bristles are parallel to the cut notches), and drag the brush away from the edge and toward the center of the feather (iii). Add a few more drag marks parallel to the first but with some space in between. Finally, use a tiny liner paint brush and the same coloring to outline the notches and to add a few darker lines parallel to the dragged marks (iv). Repeat to paint all of the “A” feathers.
b. The process to paint the “B”, “C”, and “D” feathers is identical except the drag marks should be made along both long edges, similar to the veins of a leaf.
c. Set aside four of the “E” feathers. Use the same steps above to paint the remainder of the “E” feathers plus the “F” and the “Tail” feathers, however, make the drag marks more dense (more drag marks with less space in between them). These feathers will appear a bit darker.
d. To paint the four reserved “E” feathers and the “G” feathers, make the drag marks darker and even more dense so that the feather appears almost black (i). Use a tiny liner paint brush and undiluted Bright White gel paste coloring (or equivalent) to paint an outline around the feather and the notches. Add a few additional white lines parallel to the notches (ii).
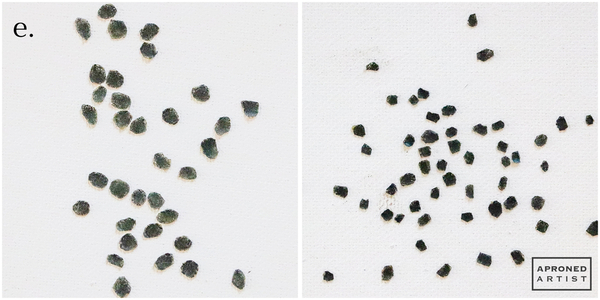
e. Paint the “H” and “I” feathers solid with undiluted Super Black gel paste coloring (or equivalent).
Step 7: Assemble wings
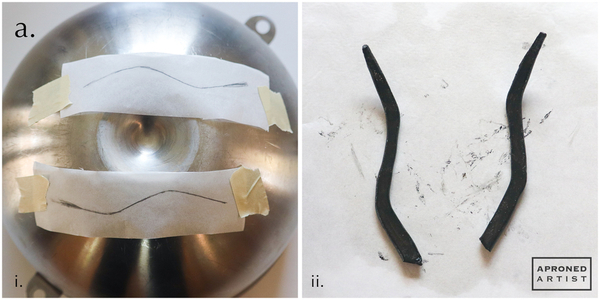
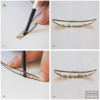
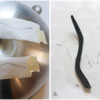
a. Place a long rectangle of parchment paper over the “Left Wing Bone” template. Using a pencil, trace the shape onto the parchment paper. Repeat to trace the “Right Wing Bone” template. Flip over the parchment paper pieces so that the pencil is on the underside, and tape them over the curved bottom of a large bowl (or equivalent) (i). Using stiff-consistency black royal icing and a Wilton #8 tip (or equivalent), pipe over the templates. Use a damp paint brush to smooth and shape the icing. Allow the icing to dry completely before removing the tape and peeling the parchment paper away from the transfers (ii). Set the transfers aside for now.
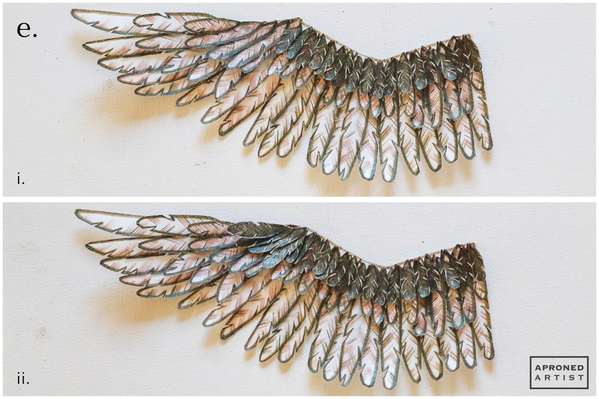
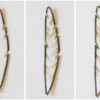
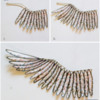
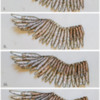
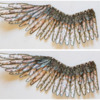
b. Place a piece of wafer paper over the wing bone templates and use a brown food-safe marker to trace both the left and right templates. Use kitchen shears to cut out the shapes. Use a tiny liner paint brush to add a dot of edible glue to the back of the top tip of a painted “C” feather, and attach it to the armpit end of the wafer paper left wing bone. Repeat to attach nine more “C” feathers, overlapping them slightly (i). Then, add five “B Left” feathers, starting to the left of the last “C” feather (ii). Add five “A left” feathers, starting to the left of the last “B Left” feather. The first layer of feathers on the left wing is now complete.
c. For the second layer of feathers, attach five “D” feathers, starting just after the last “B Left” feather. Overlap them as before so that the last “D” feather ends in line with the last feather of the first layer.
d. For the third layer of feathers, start from the armpit, and attach one lighter “E” feather (i), four “F” feathers (ii), ten lighter “E” feathers (iii), four “F” feathers, and one lighter “E” feather (iv).
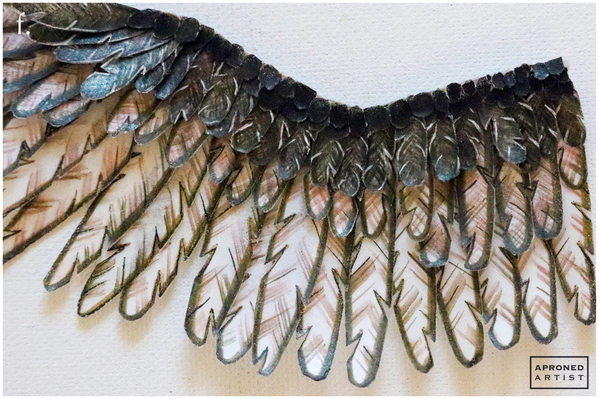
e. For the fourth layer of feathers, start from the armpit, and attach 18 “G” feathers (i) and four darker “E” feathers (ii).
f. The final layer of feathers should cover all of the visible feather tips along the wing bone. Starting from the armpit, add 20 “I” feathers and then 20 “H” feathers.
Mirror Steps 7b through 7f to create the right wing.
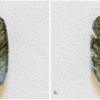
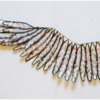
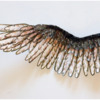
g. Finally, brush the entire left wing bone royal icing transfer with edible glue, and place the left wafer paper wing on top, pressing gently to help the wafer paper wing conform to the bends of the wing bone. The armpit end of the bone should extend slightly beyond the wafer paper wing (to leave an area to attach the wing to the body). Don’t worry if the entire surface of the wing doesn’t make contact with the bone; the bone’s purpose is just to support the wing in a more dynamic, curved position. Repeat with the right wing and wing bone.
Step 8: Paint moon cookie, and attach vulture
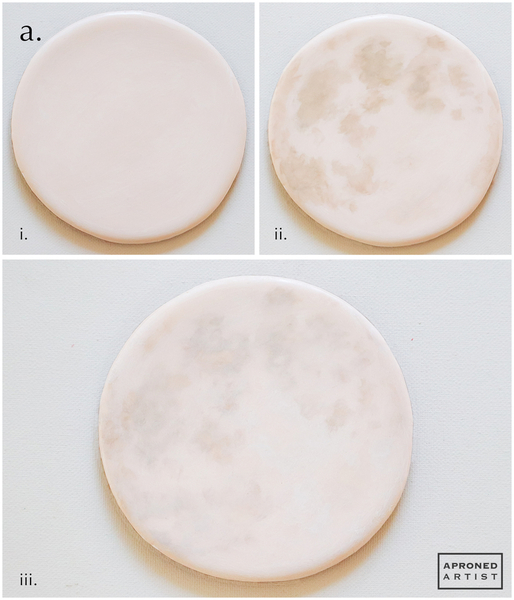
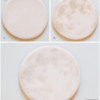
a. Using a flat angled paint brush, cover the surface of the flooded circle cookie with undiluted Bright White gel paste coloring (or equivalent). Immediately, use a clean finger or a dry artist’s sponge to rub the paint in a circular motion to remove any brush strokes (i). Mix Blush gel paste coloring with a touch of Taupe gel paste coloring (or equivalents). Dilute the mixture so that the consistency is like watercolor paint, and use the tip of the angled paint brush to add a darker splotch to a section of the cookie. Again, use your finger or the sponge to blend away any brush strokes. As you blend, the darker paint will mix with the white of the previous layer and become more hazy. Repeat, adding more dark spots and blending them into the white until the cookie looks like a moon with craters (ii). Finally, add more undiluted Bright White gel paste coloring (or equivalent) to a section in between the dark spots. Use your finger or the sponge to blend the white into the darker area to soften its edges slightly. Repeat this final step to soften the edges of all of the dark spots (iii).
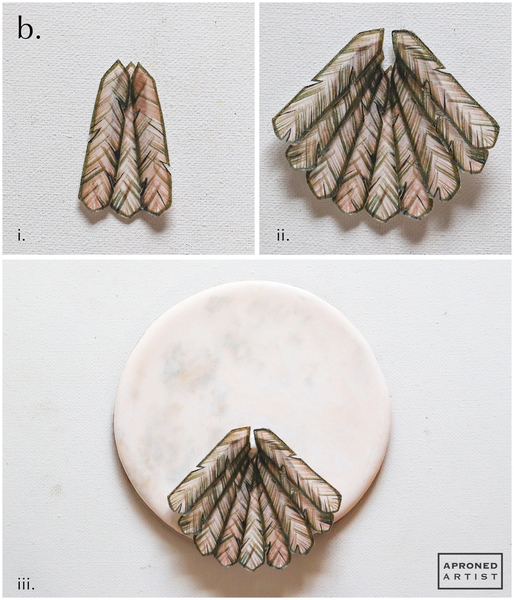
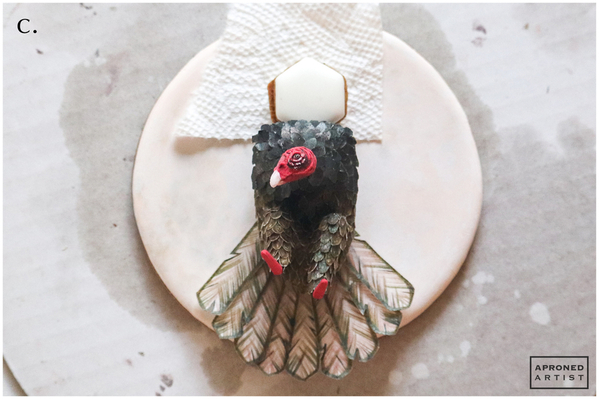
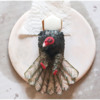
b. Using a tiny liner paint brush, apply a dot of edible glue to the top edges of one tail feather. Attach another tail feather to each side of the first feather so that the ends of the feathers fan out (i). Continue to attach three more feathers to each side of the fan (ii). Attach the top of the tail feathers to the cookie with a dab of icing so that the bottom edge of the tail hangs about 1/2 inch (1.3 centimeters) off of the bottom edge of the cookie (iii).
c. Pipe a dab of icing above the tail, and press the lower back of the vulture body transfer into the icing. Use a small cookie (or equivalent) to prop the upper back of the vulture. Allow the icing to dry completely.
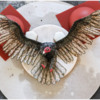
d. Pipe a mound of icing beneath the left side of the raised upper back where the shoulder blade would be, and insert the left wing. Prop the lower section of the wing with a small cookie and the upper section of the wing with a large silicone hemisphere mold (or equivalents). Repeat to attach the right wing. When the icing is completely dry, carefully remove the props.
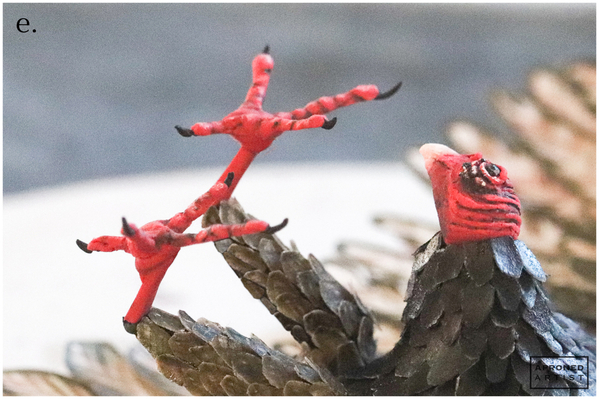
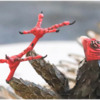
e. Using stiff-consistency pinkish red royal icing and a PME #2 tip (or equivalent), pipe a small mound of icing on the tip of the lower leg. Hold a foot transfer by the longest toe (being careful not to knock off the talons), and place it on top of the mound of icing. Use a dry paint brush to nudge the foot into place so that the back toe is in line with the lower leg. Repeat to attach the other foot.
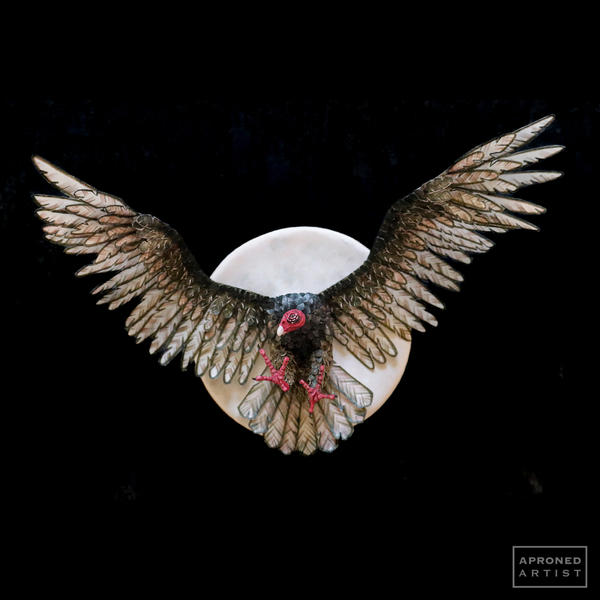
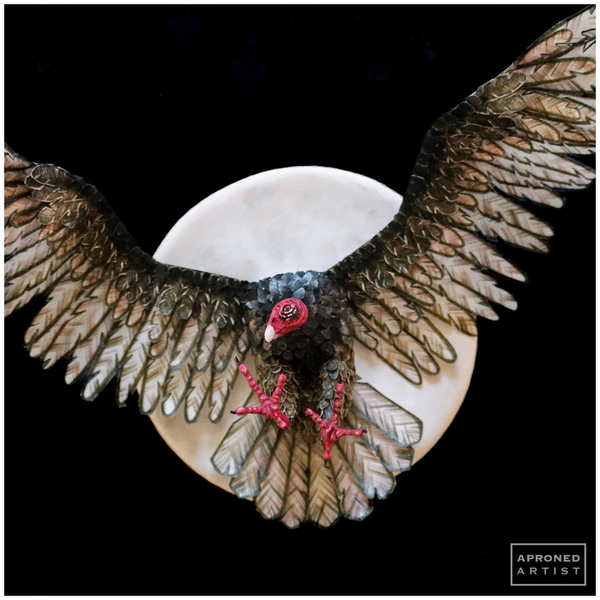
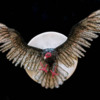
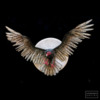
Finished! A massive endeavor for a massive cookie - the final dimensions were 12 inches wide by 9 inches long by 2 1/2 inches tall (30.5 x 22.9 x 6.4 centimeters).
This vulture cookie was definitely a project, but I learned a lot about wafer paper in the process. Now to come up with a use for the other 98 sheets . . .
[EDITOR'S NOTE: A monumental project indeed! Kudos to Samantha! ![]() Even if 800-some feathers are not on your immediate to-do list, just imagine how wonderful a few of these beauties would look on a fall or Halloween cookie! ~ JMU]
Even if 800-some feathers are not on your immediate to-do list, just imagine how wonderful a few of these beauties would look on a fall or Halloween cookie! ~ JMU]


Samantha Yacovetta began cookie decorating in 2013. While working at a local bakery, Samantha became captivated by cookie art when a customer requested princess-themed cookies. Attracted initially to the precision of cookie decorating, Samantha soon found that the limitless design opportunities turned it into her artistic passion. Samantha began regularly stocking the bakery case with decorated cookies and for several years sold cookies through her own company, Aproned Artist, a cottage food operation. Having retired from the business life, Samantha now enjoys making cookies just for fun from her home in San Jose, California, USA. To learn more about Samantha, please check out her Cookie Connection portfolio, her Facebook page, and her past Every Little Detail tutorials here.
Photo and cookie credits: Samantha Yacovetta
Note: Every Little Detail with Aproned Artist is a monthly Cookie Connection blog feature written by Samantha Yacovetta focused on the special little details that make big statements in cookie design. This article expresses the views of the author, and not necessarily those of this site, its owners, its administrators, or its employees. To read all of Samantha's past Every Little Detail tutorials, click here. And to see all of Cookie Connection's tutorials, click here.






















Comments (15)