 My mom can grow anything. It wasn’t always so. She started out a city kid from New York with little opportunity or care to nurture a green thumb. But with the 1960s came a newfound desire to commune with nature. My parents moved to a small blueberry farm in Arkansas to “live off the land”. Unencumbered by such modern conveniences as electricity and plumbing, they set about teaching themselves to become subsistence farmers. Somehow, through a mixture of trial and error, hippie optimism, and necessity, they did just that. Even now, so many lifetimes later, it’s as though my mom and plants have reached a mutual understanding. I swear the seeds just wait for her signal to burst forth from the soil in a torrent of life and abundance. This little garden scene is a celebration of my mom, her unrivaled green thumb, and the fearlessness that earned it.
- 2 oz (57 gm) modeling chocolate, store-bought or homemade*
- Large resealable plastic bag, separated at side seams
- Rolling pin
- Bench scraper or sharp knife
- Royal icing (I used AmeriColor gel paste to color the icing):
- Loose flooding-consistency** terra-cotta (1 part Warm Brown/1 part Regal Purple/1 part Tulip Red/1 part Ivory)
- Stiff-consistency green (3 parts Gold/1 part Leaf Green)
- Stiff-consistency peach (1 part Electric Pink/1 part Gold)
- Stiff-consistency brown (2 parts Chocolate Brown/1 part Super Black)
- Loose flooding-consistency** tan (1 part Warm Brown/1 part Chocolate Brown/1 part Forest Green/1 part Ivory)
- Thick flooding-consistency** dark gray (Super Black)
- Stiff-consistency red (Super Red)
- Flooding-consistency light gray (3 parts Gold/2 parts Regal Purple/1 part Super Black)
- 2 small bowls
- Cake tester (or equivalent)
- Scribe tool (or equivalent)
- Parchment paper
- Tips:
- Small flat angled paint brush
- 2 chocolate sandwich cookies, crushed into fine crumbs
- Butter knife
- Large spatula, with 1/2-in (1.3-cm) diameter handle
- Acetate
- Tape
- 3 1/2-in (8.9-cm) baked square cookie
- Small trowel or offset spatula
- AmeriColor Super Black gel paste food coloring diluted with water, for painting
Notes:
*Modeling chocolate is really easy to make at home, and it’s delicious! There are many recipes available online, but I love Sugar Geek Show’s tutorial. It’s full of tips and tricks to ensure success.
**On icing consistencies: Loose flooding-consistency icing should take about 6 seconds to settle completely after a knife or spatula is drawn through the icing. Thick flooding-consistency icing should be thick enough that it won’t settle without some help from your scribe tool.
Step 1: Create modeling chocolate flowerpot
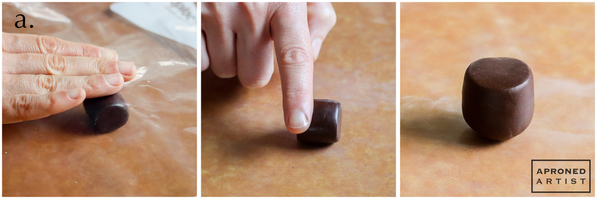
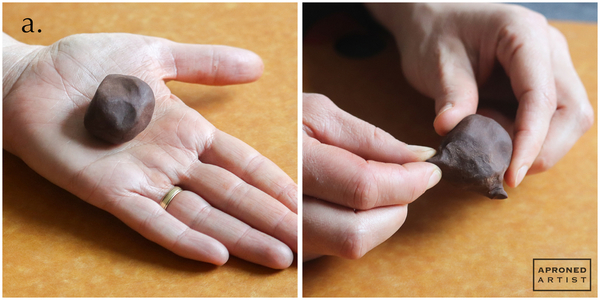
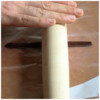
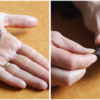
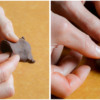
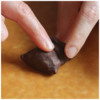
a. Cut off a 1/2-ounce (14-gram) chunk of modeling chocolate. The modeling chocolate will start out hard and crumbly at room temperature, so knead and roll it until you have a smooth ball. Roll the ball against your work surface to form a cylinder (see leftmost image below). Modeling chocolate is very sensitive to the warmth of your hands; if it becomes sticky, roll it between the separated sides of a resealable plastic bag. Taper one end of the cylinder by applying a small amount of pressure to only one of the ends as you roll it (see center image below). The tapered flowerpot should look like the rightmost image below (with the tapered end on the bottom).
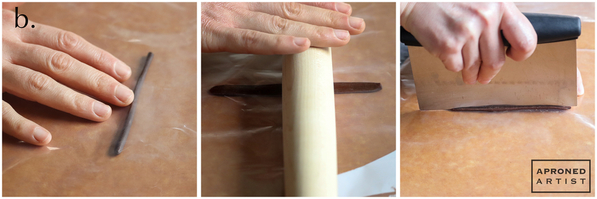
b. Cut off a 1/10-ounce (3-gram) chunk of modeling chocolate. Roll it into a long rope between the separated sides of the resealable bag. When the rope is long enough to wrap around the circumference of the top of the flowerpot (shaped in Step 1a), flatten it with a rolling pin. Use a bench scraper or sharp knife to trim off the sides so that you have an even strip.
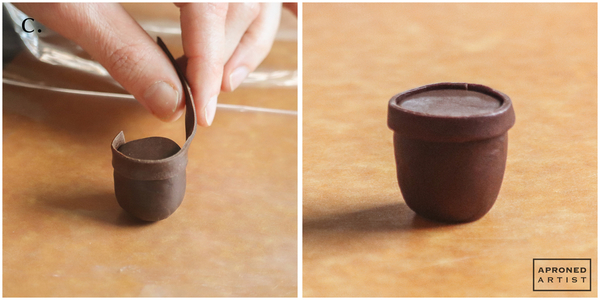
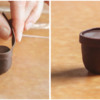
c. To create the rim of the flowerpot, wrap the strip around the top of the flowerpot, allowing it to extend slightly beyond the top edge. Trim the excess where the ends of the strip meet.
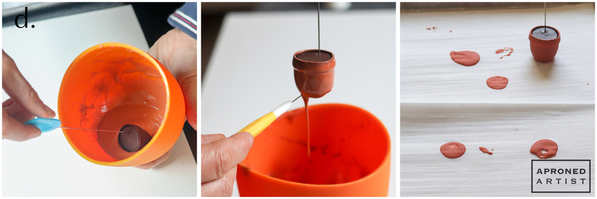
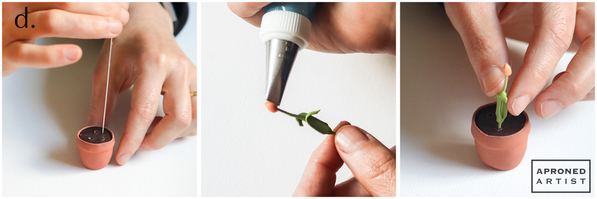
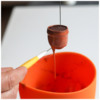
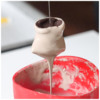
d. Place the loose flooding-consistency terra-cotta icing in a small bowl. Ideally, allow the icing to sit for a few minutes so that some of the air bubbles can rise to the surface. Insert a cake tester (or equivalent) into the top of the modeling chocolate flowerpot. Holding the top of the cake tester, dip the flowerpot into the icing, twirling it gently so that the icing covers the sides and top rim (see leftmost image below). Lift the cake tester up, and allow the excess icing to drip back into the bowl. Remove the dripping icing from the bottom of the flowerpot with the edge of the scribe tool (see center image below). Set the flowerpot down on a piece of parchment paper. The icing will continue to pool slightly at the bottom. After 15 seconds, pick up the flowerpot (using the cake tester which should still be stuck in the top of the pot), and set it on a clean spot on the parchment. If the icing continues to pool, move the flowerpot to a clean spot every 15 seconds or so until the icing crusts enough that it no longer pools at the bottom. (In the rightmost image below, I had to move the flowerpot five times before the icing stopped pooling.) Allow the icing to dry completely before removing the cake tester.
Step 2: Pipe tulips and finish flowerpot
a. Using stiff-consistency green royal icing and a PME #2 tip (or equivalent), pipe several flower stems measuring 2 to 2 3/4 inches (5.1 to 7 centimeters) in length onto a piece of parchment paper. You will only need three stems, however, it’s always nice to have a few extra pieces from which to choose. Allow the stems to dry completely.
b. Hold a stem between your fingers, and pipe a tall leaf on one side of the stem using stiff-consistency green royal icing and an Ateco #65 tip (or equivalent). Start the leaf about 1/2 inch (1.3 centimeters) above the bottom of the stem, and finish the leaf near the top of the stem, leaving enough room to attach a flower. You can either pipe the leaf completely along the length of the stem or allow the tip of the leaf to fold over slightly. Use a damp paint brush to shape the bottom of the leaf where it attaches to the lower portion of the stem. Lay down the stems to allow the leaves to dry, taking care not to mess up the leaves just piped.
c. Once the leaves are dry, pipe another leaf on the opposite side of each stem.
d. Use the cake tester (or equivalent) to bore three holes in the top of the flowerpot. Widen the holes sufficiently to accommodate the stems piped in Step 2a. Use stiff-consistency peach royal icing and an Ateco #101 tip (or equivalent) to pipe the interior of the flower. Hold the tip vertically with the narrow end facing up. While holding the bottom of one of the stems, twirl the stem in your fingers as you pipe to create a small cone of icing at the tip of the stem. Insert the bottom of the stem into one of the holes in the flowerpot to dry. Repeat with two more stems.
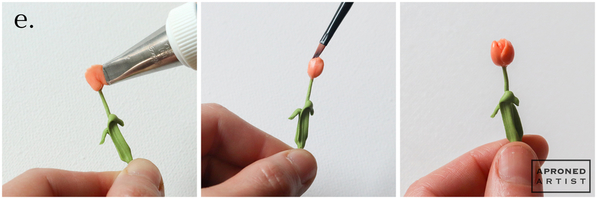
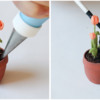
e. Once the interior cone of the flower has dried completely, carefully remove the stem from the flowerpot, and hold it between your fingertips. Use stiff-consistency peach royal icing and the Ateco #101 tip (or equivalent) to pipe a petal. Hold the tip vertically with the large end of the opening against the base of the dried icing cone. Apply pressure to the piping bag as you move the tip up to the top of the dried cone and then down again to meet at the base (see leftmost image below). Use a damp paint brush to shape the petal, smoothing out the crease in the center and lengthening the tip so that it looks more like a tulip (see center image). Pipe and shape another petal directly adjacent to the first (see rightmost image below). If you still have room, pipe and shape one more petal in between the two you just piped. Insert the stem into one of the holes of the flowerpot to dry. Repeat this process for the other two stems.
f. Once dry, carefully remove the flower stems from the holes of the flowerpot, and place them nearby. Using a PME #1 tip (or equivalent), fill each hole with stiff-consistency brown royal icing, and immediately insert the flower stems back into the holes. Allow the icing to dry completely.
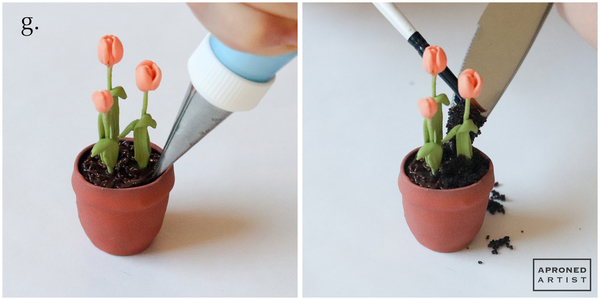
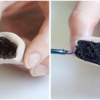
g. Cover the top of the flowerpot with the same stiff-consistency brown royal icing. Immediately cover the icing with crushed cookie crumbs. If necessary, use a dry paint brush to push the crumbs into the tight areas around the flower stems.
Step 3: Shape modeling chocolate dirt sack
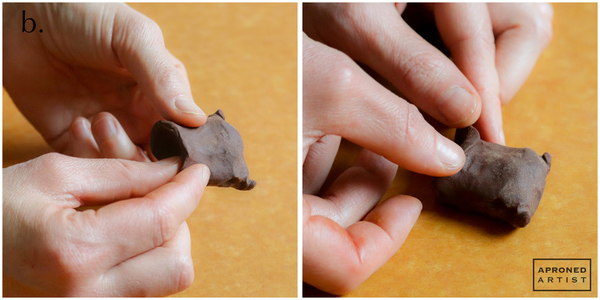
a. Cut off a 3/4-ounce (21-gram) chunk of modeling chocolate, and knead it until smooth and pliable. Flatten it slightly into a rough rectangle. Use your fingers to pinch two of the corners so that they look like the corners on the bottom of a sack.
b. At the opposite end of the pinched corners, use your fingers to thin the modeling chocolate into a collar. Gently roll over the collar to create the opening of the sack. Smooth any rough patches or tears with your fingers.
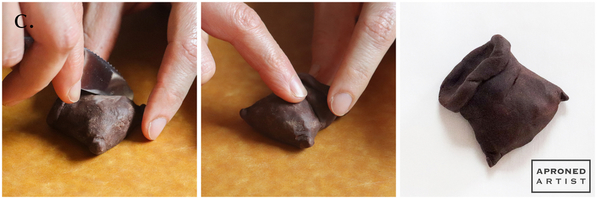
c. Use the back of a butter knife to make a few creases in the sack. Smooth the creases slightly with your fingertips.
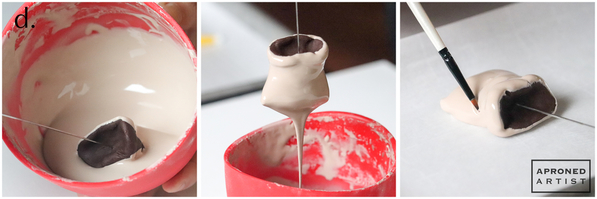
d. Place the loose flooding-consistency tan royal icing in a small bowl. Ideally, allow the icing to sit for a few minutes so that some of the air bubbles can rise to the surface. Insert a cake tester (or equivalent) into the “opening” of the modeling chocolate dirt sack. Holding the top of the cake tester, dip the dirt sack into the icing, twirling it gently so that the icing covers the sides and top rim (see leftmost image below). Lift the cake tester up, and allow the excess icing to drip back into the bowl (see center image below). Scrape the flat underside of the dirt sack along the rim of the bowl to remove excess icing. Set the dirt sack onto a piece of parchment paper. Drag a damp (flat angled) paint brush along the creases of the dirt sack and underneath the collar to help accentuate them (see rightmost image). If the icing has pooled along the sides of the dirt sack, move it to a clean area of the parchment paper. Allow the icing to dry completely before removing the cake tester.
e. Cover the inside of the dirt sack with stiff-consistency brown royal icing, using a damp paint brush to spread the icing to the edges. Immediately cover the icing with crushed cookie crumbs, patting them down gently with the paint brush.
Step 4: Pipe spade royal icing transfer
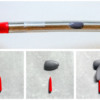
a. Cover the handle of a large spatula with a piece of acetate, taping it at the ends to secure it tightly. Use thick flooding-consistency dark gray royal icing and a PME #1 tip (or equivalent) to pipe the metal portion of the spade, measuring about 1/2 inch (1.3 centimeters) in length. Pipe a few more spade shapes so that you have extras in case any break during removal. Allow the icing to dry completely before carefully removing the transfer from the acetate.
b. Using stiff-consistency red royal icing and a PME #3 tip (or equivalent), pipe a line (also about 1/2 inch or 1.3 centimeters long) for the handle onto a piece of parchment paper. Place one of the extra spade transfers in front of the handle to act as a prop. While the red icing is still wet, carefully press another spade transfer (concave side facing up) into the top of the handle to adhere the two pieces. Rest the tip of the spade on the extra transfer so that the spade is tipped up at a slight angle. Let the icing dry completely before carefully removing the parchment paper from the spade.
Step 5: Decorate stone base cookie
a. Flood a 3 1/2-inch (8.9-centimeter) baked square cookie with flooding-consistency light gray royal icing. Allow the icing to dry completely.
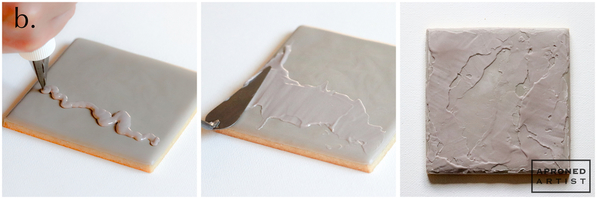
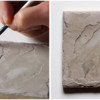
b. Pipe a loose squiggle of the same flooding-consistency light gray icing across the cookie using a PME #2 tip (or equivalent). Immediately use a small trowel or offset spatula to flatten the icing, keeping the smoothed area somewhat irregular in shape. Let the icing crust for a few minutes before piping another squiggle of icing in another section and flattening it in the same fashion. Try to keep the overall texture organic by varying the direction of the icing squiggles and overlapping some smoothed areas. Repeat this process until the entire cookie is textured. Let the icing dry completely.
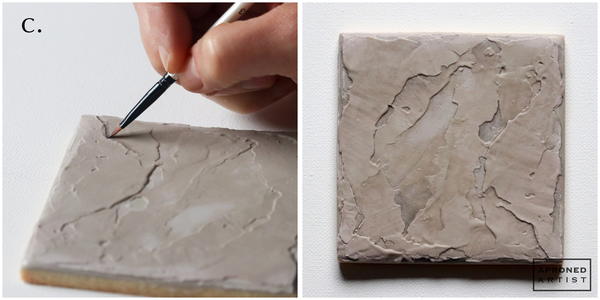
c. Use very diluted black gel paste coloring and a small flat angled paint brush to shade the crevices of the stone texture. Concentrate your painting along the underside of the raised edges of the texture to accentuate the depth of the crevices.
Step 6: Assemble garden scene
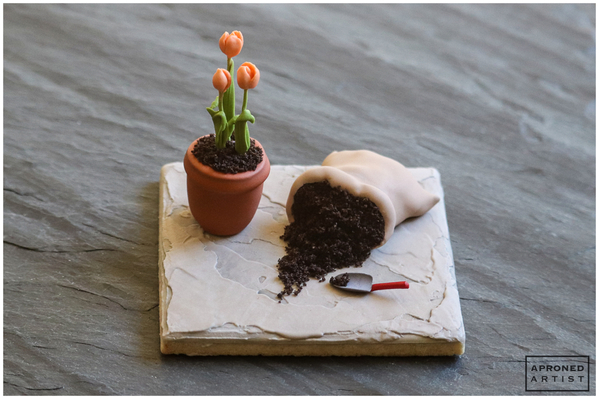
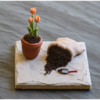
a. Attach the various garden elements to the stone cookie base with small dabs of royal icing. If desired, spread some loose cookie crumbs so that it looks as though the dirt is spilling out of the bag.
Finished - a sweet springtime cookie for a mom, a plant enthusiast, or even just a chocolate lover!
Source:
Liz Marek, Sugar Geek Show, Modeling Chocolate Recipe


Samantha Yacovetta began cookie decorating in 2013. While working at a local bakery, Samantha became captivated by cookie art when a customer requested princess-themed cookies. Attracted initially to the precision of cookie decorating, Samantha soon found that the limitless design opportunities turned it into her artistic passion. Samantha began regularly stocking the bakery case with decorated cookies and for several years sold cookies through her own company, Aproned Artist, a cottage food operation. Having retired from the business life, Samantha now enjoys making cookies just for fun from her home in San Jose, California, USA. To learn more about Samantha, please check out her Cookie Connection portfolio, her Facebook page, and her past Every Little Detail tutorials here.
Photo and cookie credits: Samantha Yacovetta
Note: Every Little Detail with Aproned Artist is a monthly Cookie Connection blog feature written by Samantha Yacovetta focused on the special little details that make big statements in cookie design. This article expresses the views of the author, and not necessarily those of this site, its owners, its administrators, or its employees. To read all of Samantha's past Every Little Detail tutorials, click here. And to see all of Cookie Connection's tutorials, click here.








Comments (56)