 My first child is packing for college as we speak. Her once overcrowded room is looking practically stark as more and more boxes accumulate in the hall. These visual reminders of her departure have me thinking excitedly about where this new journey will take her, but I’ve also been spending a lot of time reminiscing about our early days together. I was a young mom working full time, so life back then was a whirlwind. After shuttling her to and from daycare, working, and cooking dinner, I felt as if the day was over as soon as it started. Finally, just before bed, we’d curl up in a rocking chair to read stories. It was our special time, insulated from the frenzy - just my daughter and me and our favorite storybook characters.
Supplies:
- 4 1/2 x 3 1/2-inch (11.5 x 9-cm) oval cookie flooded with pink royal icing, leaving 1/4-inch (1-cm) border
- Templates (See "Files" in "Attachments" at the end of this post):
- Mother Goose design template
- Wing mold template
- Baby block transfer template
- Royal icing (Wilton gel paste was used to color the icing)*:
- Thick flooding-consistency orange (Buttercup with a touch of Burgundy)
- Thick flooding-consistency cream (Ivory)
- Thick flooding-consistency white
- Stiff-consistency white
- Stiff-consistency dark pink (Burgundy)
- Thick flooding-consistency green (Juniper)
- Tips:
- Scribe tool (or equivalent)
- Small paint brush
- Wilton gel paste colorings diluted with alcohol or water: Burgundy, Juniper, and Copper
- Cardstock
- Parchment paper
- Tape
- Acetate (optional, for baby block only)
- Mini marshmallow
*Notes on consistency: For thick flooding-consistency, aim for about 25 seconds, meaning the "tracks" left by the icing when dropped into the icing bowl should disappear in about 25 seconds. For larger areas, the icing may need some help from your scribe tool to settle smoothly.
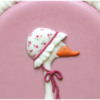
Step 1: Pipe goose and bonnet
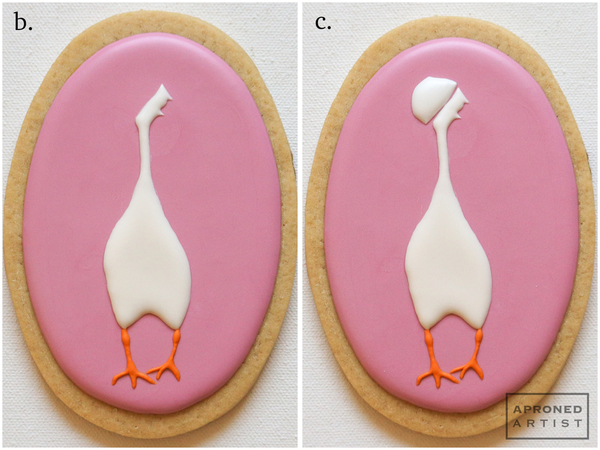
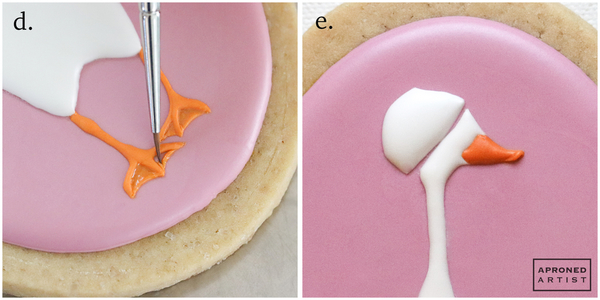
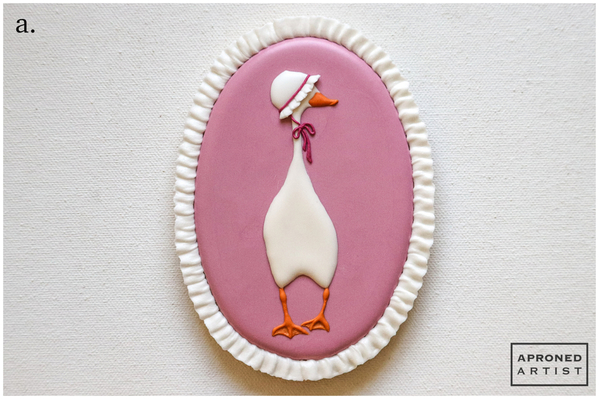
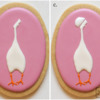
a. Transfer the Mother Goose design (located in “Files” at the end of this post) onto the cookie using a projector, the paper transfer method, or the method of your choice. Begin by piping the goose’s legs and toes with thick flooding-consistency orange royal icing and a PME #0 tip (or equivalent). Leave off the webbing between the toes for now.
b. Using thick flooding-consistency cream royal icing and a PME #1.5 tip (or equivalent), pipe the body of the goose, shaping the points around the bill with your scribe tool.
c. Pipe the cap of the bonnet with thick flooding-consistency white royal icing and a PME #2 tip (or equivalent). Leave a very small gap between the cap and the head of the goose.
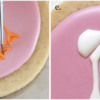
d. Using thick flooding-consistency orange royal icing and a PME #0 tip (or equivalent), add the webbing of the feet by piping an arcing line between two toes. Then, use a small, damp paint brush to dilute and spread the icing to meet the toes. Repeat in the spaces between the remaining toes.
e. With the same icing and tip, pipe the goose’s bill, shaping the icing with the scribe tool so that the bill slightly overlaps the points around the face. Immediately add a teardrop of icing at the tip of the bill. The teardrop should start with the fat part at the top of the bill, and continue with the pointed end bending down and left.
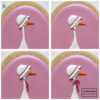
f. Pipe the ruffle of the bonnet with stiff-consistency white royal icing and an Ateco #264 tip (or equivalent). You can pipe it as you would a normal ruffle, but I chose to pipe it like a bead border so that I’d have more control over the shape of the pleats. To do this, flip the cookie around so that the feet of the goose are now at the top. Nestle the fat end of your tip between the bonnet cap and the head of the goose so that the pointed end is at a 45-degree angle to the surface of the cookie and pointing away from you. Briefly apply gentle pressure, and then release the pressure as you pull off to the right. Repeat until you come to the end of the bonnet, shaping the end with a damp paint brush, if necessary.
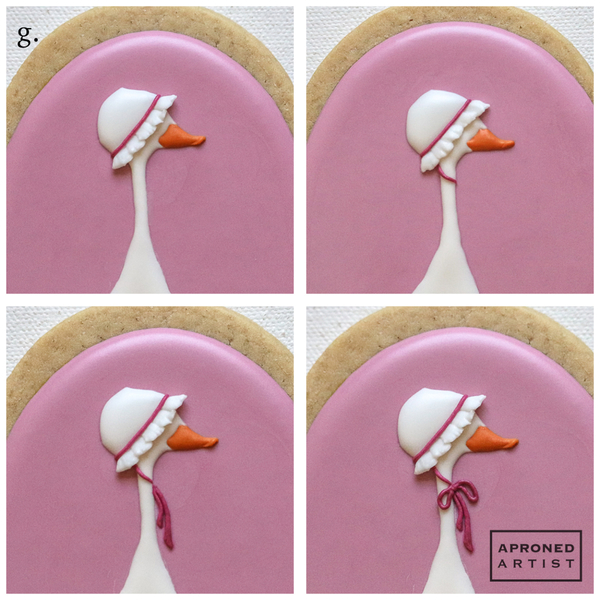
g. Using stiff-consistency dark pink royal icing and a PME #0 tip (or equivalent), pipe a line between the bonnet cap and the ruffle, tucking the ends beneath the edges of the cap with a damp paint brush. Then, pipe the bow. Begin by piping the string that drapes over the neck. Add the ties, shaping the icing with a damp paint brush. Then, add the loops of the bow.
Step 2: Pipe ruffle border
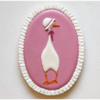
a. With stiff-consistency white royal icing and an Ateco #101 tip (or equivalent), pipe a ruffle border around the edge of the pink icing. Set aside the cookie to allow the icing to dry completely.
Step 3: Paint details
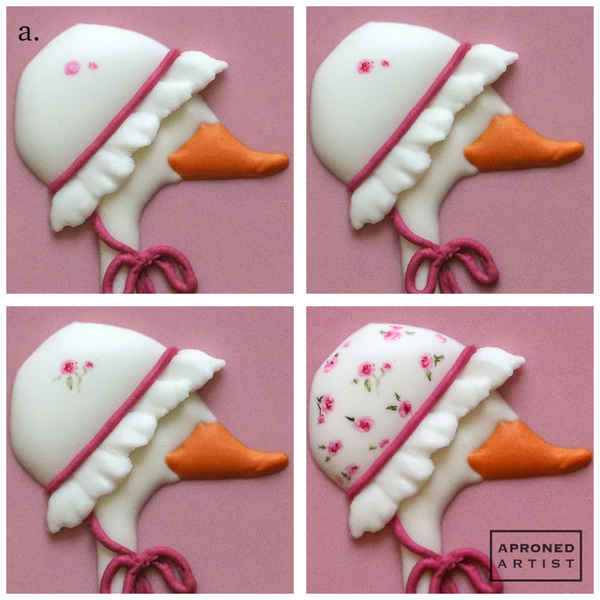
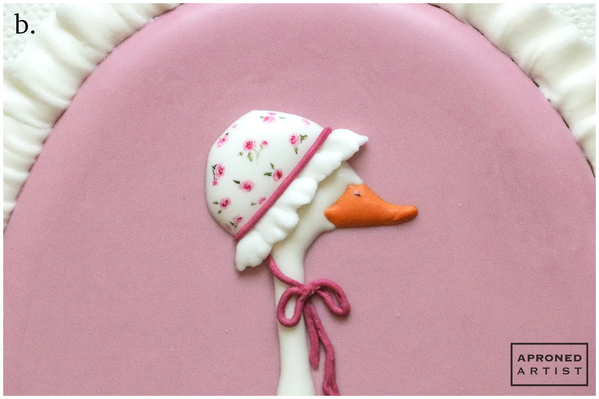
a. Add tiny roses to the cap of the bonnet with a small paint brush and Burgundy gel paste coloring diluted with alcohol or water. For each rose, paint a small ovular scribble with very diluted paint; then add some darker areas toward the center of your scribble. Using Juniper gel paste coloring diluted with alcohol or water, paint some small leaves next to your rose. Continue painting roses and leaves to fill the bonnet cap.
b. Use a small paint brush to add a tiny nostril to the goose’s bill with Copper gel paste coloring diluted with alcohol or water.
Step 4: Create mold and pipe wing transfers
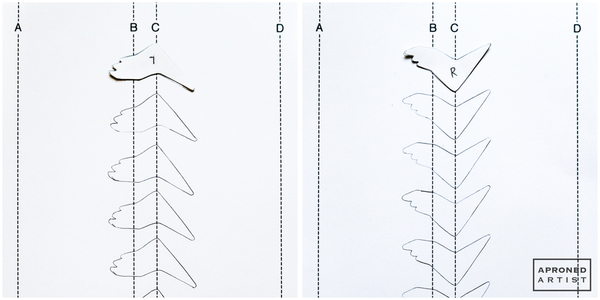
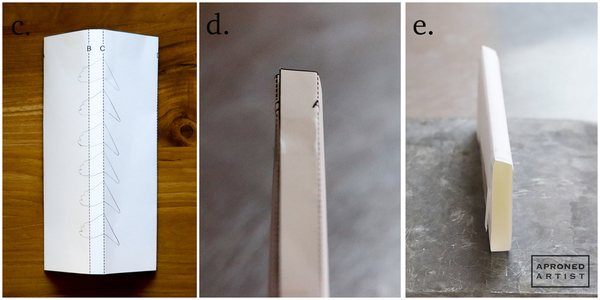
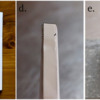
a. Print the wing mold template (located in “Files” at the end of this post) onto a piece of cardstock, and cut along the solid lines, leaving behind four dotted lines labelled A, B, C, and D.
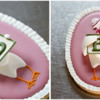
b. Print out the Mother Goose design (also located in “Files” at the end of this post) onto a separate piece of cardstock, and cut out the wing templates. (Note that the wings should remain in proportion to the original Mother Goose design. If you resized the body of the goose, you’ll need to resize the wings as well.) For the left wing (your left, the goose’s right), flip the L wing template upside down, and line up the elbow of the wing template with line C so that the wing tips extend to the left of line B, and the shoulder extends to the right of line C (see left image below). Trace the shape onto the wing mold template. You only need one left wing for a single cookie, but trace a few extra in case some break. Before tracing the R (right) wing template, line up the elbow with line C (right side up this time) so that the wing tips extend to the left of line B, and the shoulder extends to the right of line C (see right image below).
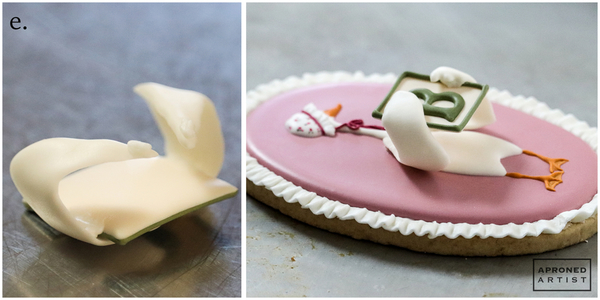
c. Once you have traced the templates onto the center of the mold template, create folds along all of the dashed lines.
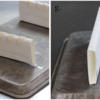
d. Overlap the two folded ends (the areas to the left of line A and to the right of line D) before taping the ends together to create a slim box.
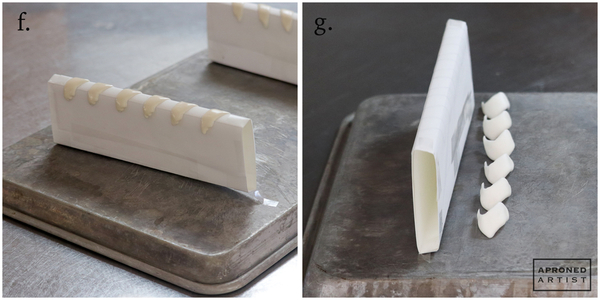
e. Flip over the box so that overlapped seam is facing down. Note that the box will not be even; one side of the box will be longer to create the angle of an open wing. Cover the traced templates on top with parchment paper, taping the parchment paper to the mold (box) so that it doesn’t shift. (Do not use acetate in place of parchment paper here, or the transfers will likely break during removal.) Tape the box to your work surface, with the templates facing up. I attached my box to the back of a sheet tray so that I could move it after piping without disturbing the icing.
f. Using thick flooding-consistency cream royal icing and a PME #1.5 tip (or equivalent), pipe over the traced wing shapes. Don’t worry if the icing pools slightly toward the ends. Set the transfers aside to dry overnight.
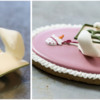
g. Once dry, the molded wings should lift off of the parchment paper without any resistance. Set the wings aside for later use.
Step 5: Pipe baby block transfer
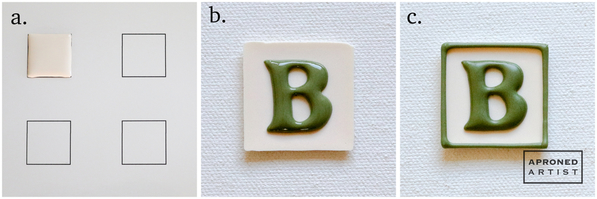
a. Print out the baby block transfer template, located in “Files” at the end of this post. (Again, if you resized the goose design, you’ll need to resize the block template as well.) Cover the template with a piece of acetate (or parchment paper). Using thick flooding-consistency cream royal icing and a PME #2 tip (or equivalent), pipe over a square on the block transfer template. (You only need one block for one cookie.) Set aside to dry overnight.
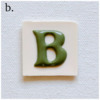
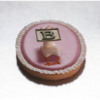
b. Once dry, carefully peel the acetate (or parchment paper) away from the iced square. Flip over the square so that the flat side that was attached to the acetate (or parchment paper) is now facing up. Pipe a letter “B” in the middle of the square with thick flooding-consistency green royal icing and a PME #2 tip (or equivalent).
c. With the same icing and tip used in Step 5b, pipe a line around the edge of the square. Set aside to dry.
Step 6: Attach baby block and wings to goose
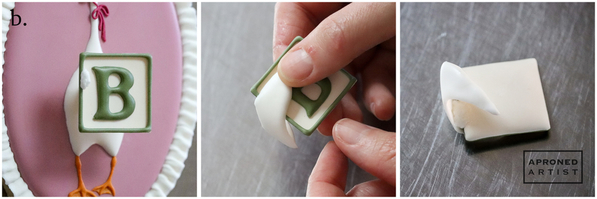
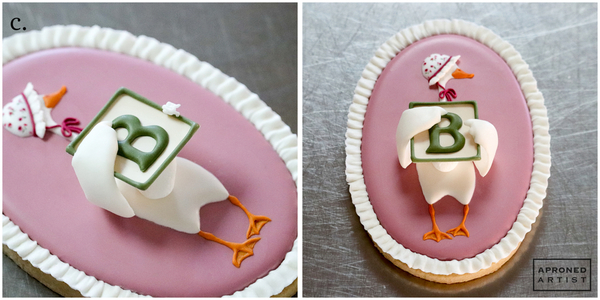
a. Place the flat side of a mini marshmallow on top of the goose’s chest for support, and then balance the block on top of the marshmallow. We are not going to attach the wings to the goose just yet, but it’s easier to correctly align the wings with the block on top of the cookie.
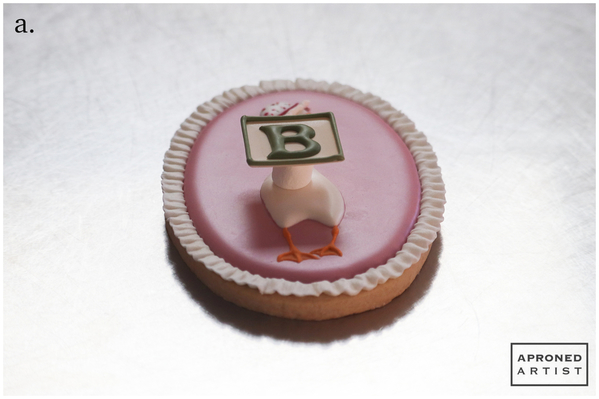
b. Hold a left wing transfer adjacent to the goose so that it looks as though the wing is holding the block. Make note of where the wing tips should attach to the block. Remove the wing transfer, and add some stiff-consistency white royal icing to the block where the wing tips will adhere. Place the wing tips on top of this icing, and while holding the block and wing together, flip them over and gently lay them on your work surface. Add some stiff-consistency white icing to the underside seam between the wing and the block. Use a damp paint brush to brush the icing seam over the edge of the block to ensure the icing is in contact with both pieces. Set aside to dry at least 30 minutes.
c. Flip over the wing and block (which should now be a single, glued piece), and prop them up with the marshmallow on top of the cookie. Attach the right wing's tips to the block with more stiff-consistency white royal icing, this time leaving it to dry on top of the cookie (but still not attached to the cookie). Again, let the icing dry at least 30 minutes.
d. The attached wings and block should now form a table shape. Flip the entire piece over, and cement the seam between the underside of the right wing and the block with stiff-consistency white royal icing (as you did with the left wing in Step 6b).
e. Now attach the wings/block transfer to the cookie. Apply a small dab of stiff-consistency white royal icing to the underside of each shoulder. Place the wings/block transfer on the cookie so the shoulders align correctly with the body (the marshmallow is no longer necessary), and press gently to adhere. Set aside the finished cookie until the icing dries completely.
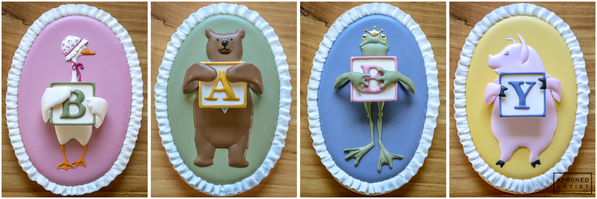
The same wing mold can be reused to create arms for any storybook character. I made a whole set of my daughter's favorite characters. They’re not exactly the cookies you’d expect to be inspired by an 18-year-old, but they’re a good reminder to us both that she’ll always be my baby.
- @Dolce Sentire - Aixa Zunino, Handpainted Rose Cookie: A Tutorial (for paper transfer technique)
- Wilton Brands, LLC, ruffle tutorial


Samantha Yacovetta began cookie decorating in 2013. While working at a local bakery, Samantha became captivated by cookie art when a customer requested princess-themed cookies. Attracted initially to the precision of cookie decorating, Samantha soon found that the limitless design opportunities turned it into her artistic passion. Samantha began regularly stocking the bakery case with decorated cookies and for several years sold cookies through her own company, Aproned Artist, a cottage food operation. Having retired from the business life, Samantha now enjoys making cookies just for fun from her home in San Jose, California, USA. To learn more about Samantha, please check out her Cookie Connection portfolio, her Facebook page, and her past Every Little Detail tutorials here.
Photo and cookie credits: Samantha Yacovetta
Note: Every Little Detail with Aproned Artist is a monthly Cookie Connection blog feature written by Samantha Yacovetta focused on the special little details that make big statements in cookie design. This article expresses the views of the author, and not necessarily those of this site, its owners, its administrators, or its employees. To read all of Samantha's past Every Little Detail tutorials, click here. And to see all of Cookie Connection's tutorials, click here.









Comments (23)