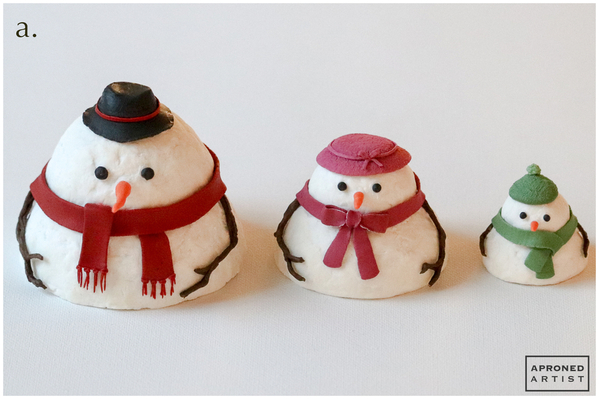
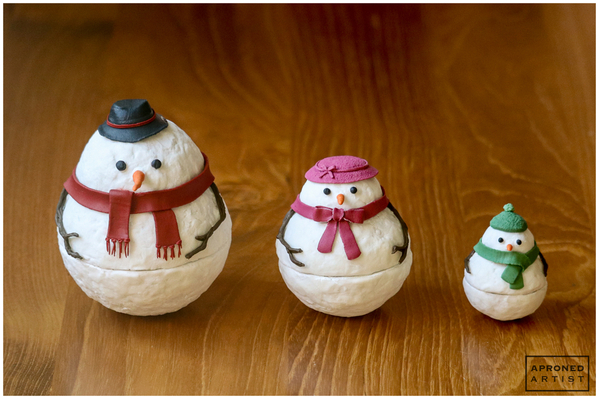
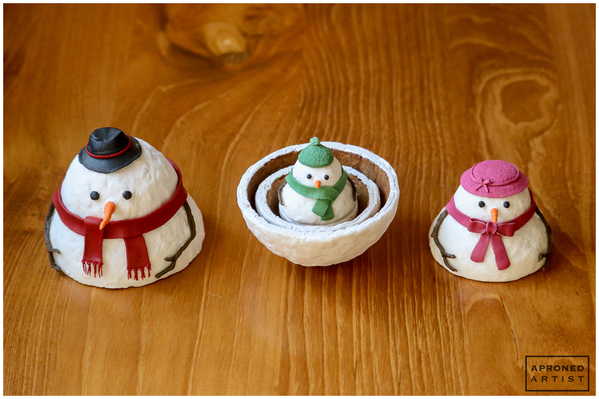
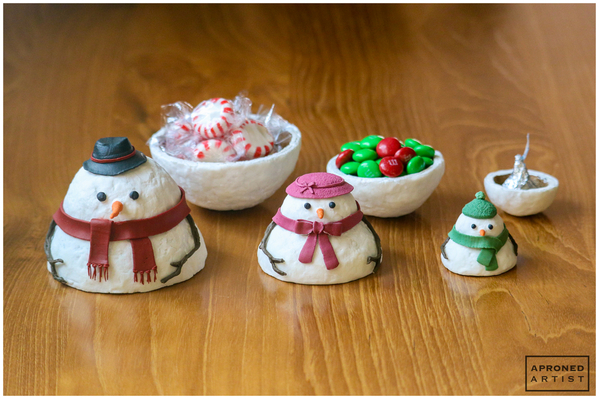
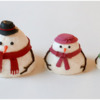
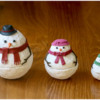
 When I was a small child, we had a family friend who was very old and well-travelled. I loved to visit her house because she kept a display of souvenirs from the various countries she’d visited. There were little wooden turtles whose legs dangled and quivered when you nudged them, giraffes woven from dried grasses, colorfully painted skulls, a tiny intricately decorated teapot, and countless other little treasures. My favorite item in her collection, however, was a set of nesting matryoshka dolls. I would very methodically open each doll to reveal the smaller version inside, close her up (carefully aligning the painted details, of course), and then queue up the girls in order until I finally reached the tiny doll in the center. Then, I’d collapse the troop and start the process all over again. I had been debating how to translate that inspiration into cookies and have finally landed on this fun, wintry rendition. While the cookies do actually nest within one another, they also make great little containers for holiday candies or other goodies.
Supplies:
- Molds:
- Turntable (or equivalent)
- Royal icing (I used AmeriColor gel paste coloring to tint the icing):
- Stiff-consistency black (Super Black)
- Stiff-consistency red (3 parts Super Red/1 part Electric Purple)
- Stiff-consistency pink (1 part Burgundy/1 part Electric Pink)
- Thick flooding-consistency** pink (1 part Burgundy/1 part Electric Pink)
- Thick flooding-consistency** green (1 part Forest Green/1 part Gold)
- Stiff-consistency green (1 part Forest Green/1 part Gold)
- Stiff-consistency orange (1 part Lemon Yellow/1 part Tulip Red/1 part Ivory)
- Stiff-consistency brown (Chocolate Brown with a touch of Forest Green)
- Stiff-consistency white
- Tips:
- Flat paint brush
- Small round paint brush
- Parchment paper (or equivalent)
- Small silicone baking mat (or equivalent)
- Dough suitable for contoured cookies
- Powdered sugar
- White gel paste coloring
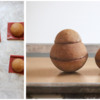
*Note on molds: I used the large silicone mold for the dad snowman’s body and the medium mold for the mom snowman’s body. While they do nest inside of each other, it’s a tight squeeze. For more wiggle room, I would recommend using the extra large mold for the dad’s body if you intend to nest the cookies. If you use the extra large mold for the body, you will need to use the large mold for the dad’s head.
**Note on consistency: Thick flooding-consistency icing should be thick enough that it won’t settle without some help from your scribe tool.
Step 1: Pipe hat transfers
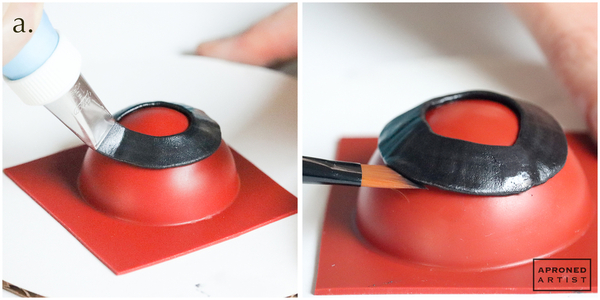
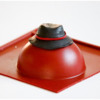
a. For dad’s hat, place a medium silicone hemisphere mold on a turntable (or equivalent) so that the convex side faces up. Use stiff-consistency black royal icing and an Ateco #150 tip (or equivalent) to pipe the brim of the hat around the top of the mold, leaving a circle of empty space about 3/4 inch (1.9 centimeters) in diameter. Pipe with even pressure as you slowly rotate the turntable (or equivalent). Use a damp paint brush to smooth the icing where the two ends meet. Allow the icing to set for a minute before gently lifting the edges of the brim with a flat paint brush.
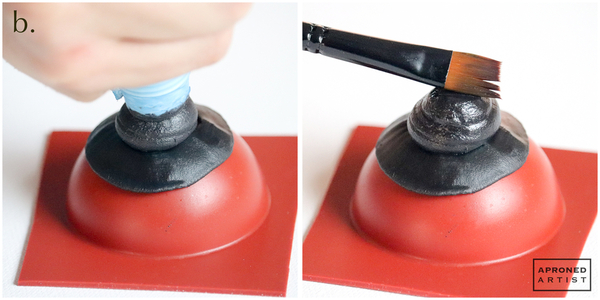
b. Remove the piping tip, and use the coupler base by itself for the next step. Pipe a teardrop of icing in the circle of empty space within the brim. Use a damp flat paint brush to gently flatten the top of the teardrop. Then, angle the paint brush, and use gentle pressure to create a shallow “v”-shaped dent in the center of the flattened teardrop. Use the flat side of the brush to straighten the sides of the teardrop so that it more closely resembles the crown of a hat. Allow the hat to dry completely (I waited one day).
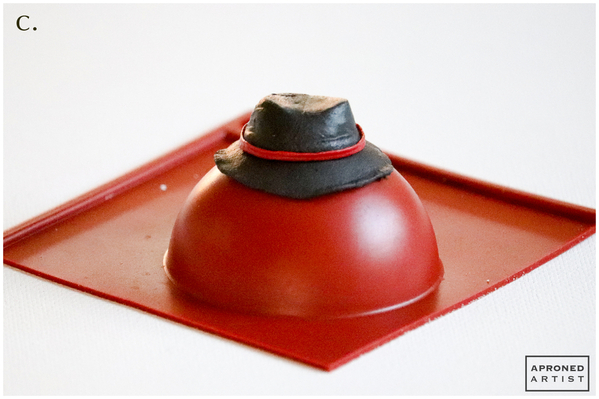
c. Pipe a band of stiff-consistency red royal icing around the base of the crown using a PME #25 tip (or equivalent). Pipe the band with even pressure as you slowly rotate the turntable (or equivalent). Allow the icing to dry completely. To remove the hat from the mold, press down gently on the silicone around the perimeter of the hat.
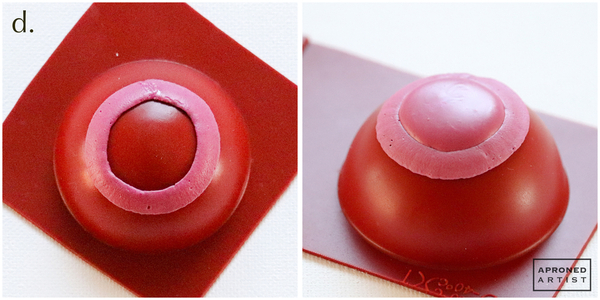
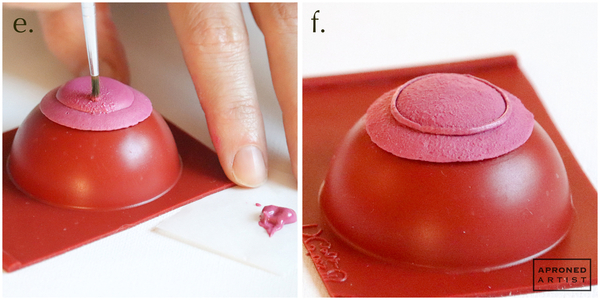
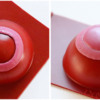
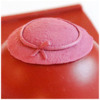
d. For mom’s hat, place a clean medium silicone hemisphere mold on a turntable (or equivalent) so that the convex side faces up. Use stiff-consistency pink royal icing and an Ateco #44 tip (or equivalent) to pipe the brim of the hat around the top of the mold, leaving a circle of empty space about 3/4 inch (1.9 centimeters) in diameter. Pipe with even pressure as you slowly rotate the turntable (or equivalent). Use a damp paint brush to smooth the icing where the two ends meet. Using a PME #3 tip (or equivalent), fill the empty circle within the brim with thick flooding-consistency pink royal icing . Allow the hat to dry completely (I waited one day).
e. Dip a small round paint brush into thick flooding-consistency pink royal icing, and dab the icing onto the hat to lend it a felt-like texture. Continue to dab icing onto the hat until it is completely covered.
f. Pipe a band of stiff-consistency pink royal icing around the base of the crown with a PME #25 tip (or equivalent).
g. Add a bow with the same tip and icing. Begin by piping the two tails of the bow, creating an upside-down "v" beneath the ribbon. Add a loop that begins and ends at the top of one tail, folding over itself. Add an identical loop on the opposite side. Shape the icing, if necessary, with a damp paint brush.
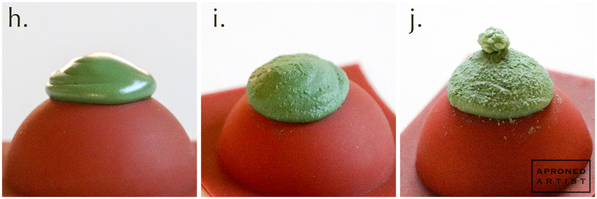
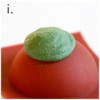
h. For baby’s hat, place a small silicone hemisphere mold on your work surface so that the convex side faces up. Using thick flooding-consistency green royal icing and a PME #3 tip (or equivalent), pipe a circular mound on top of the mold measuring about 1/2 inch (1.3 centimeters) in diameter. Allow the icing to dry completely.
i. Apply a fleece-like texture by dabbing thick flooding-consistency green royal icing on to the hat with the round paint brush (just as described for mom’s hat in Step 1e).
j. Using stiff-consistency green royal icing and a PME #00 tip (or equivalent), pipe the hat's pom pom. Pipe in tight, but messy, overlapping circles to create a small pouf in the center of the hat. Flatten the pom pom slightly with a damp paint brush to condense the circles of icing.
Step 2: Pipe eye, nose, and arm transfers
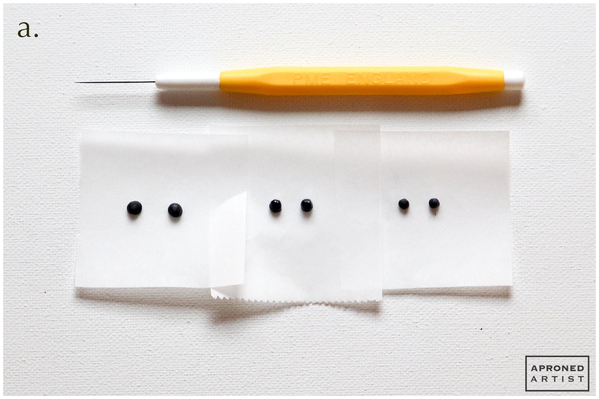
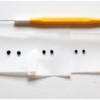
a. Using stiff-consistency black royal icing and a PME #2 tip (or equivalent), pipe eye transfers onto parchment paper. The eyes can be somewhat irregular in shape and texture, like coal. Dad’s eyes should be about 1/8 inch (0.3 centimeter) in diameter. Mom’s eyes should be slightly smaller, and baby’s eyes smaller still.
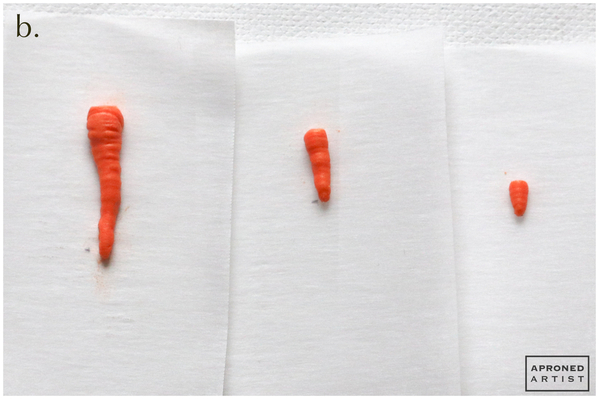
b. Using stiff-consistency orange royal icing and a PME #3 tip (or equivalent), pipe the carrot nose transfers onto parchment paper. Apply more pressure to your piping bag at first at the top of the carrot to widen the icing and create subtle horizontal lines (reminiscent of a real carrot). Gradually decrease the pressure as you extend the length of the carrot. Shape the icing with a damp paint brush if necessary. Dad’s carrot nose should be about 3/4 inch (1.9 centimeters) long. Use slightly less pressure when piping mom's and baby’s carrots to reduce the width of the icing. Mom’s carrot nose should be about half the length of dad’s nose. Baby’s carrot nose should be half the length of mom’s nose. (Note: If you intend to nest the cookies, you may want to pipe just a simple bead of icing for mom's and baby’s noses to minimize the risk of them breaking when nested.)
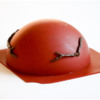
c. Using stiff-consistency brown royal icing and a PME #2 tip (or equivalent), pipe dad’s arms on the sides of a large silicone hemisphere mold. Roughen up the icing slightly with a damp paint brush so that the arms look like branches. Pipe mom’s arms on the large mold, but make them slightly thinner and smaller. Pipe baby’s arms on the medium mold. I’d recommend piping a few extra arms as they break easily. (Alternatively, you could just pipe the arms directly on each body.)
Step 3: Mold, bake, and decorate cookies with snow
a. You will need hemisphere cookies of various sizes to build the bodies and heads of the snowmen, but the process for molding the dough is the same. Generously flour a small silicone baking mat (or piece of parchment paper). Roll a small hunk of cookie dough on the prepared surface to a thickness of 1/8 inch (0.3 centimeter). Transfer the dough to the convex side of the silicone hemisphere mold, and gently use your fingers to shape the dough around the mold. Try not to stretch or dent the dough while shaping to maintain an even thickness. Trim away any excess dough at the base of the mold with a small knife.
Use this process and the respective molds to shape: two large (see Note on molds above) hemispheres for dad’s body and one medium hemisphere for his head; two medium hemispheres for mom’s body and one small hemisphere for her head; and two small hemispheres for baby’s body and one extra small hemisphere for his head. Bake the cookies, checking every few minutes so that you can smooth any bubbles or malformations.
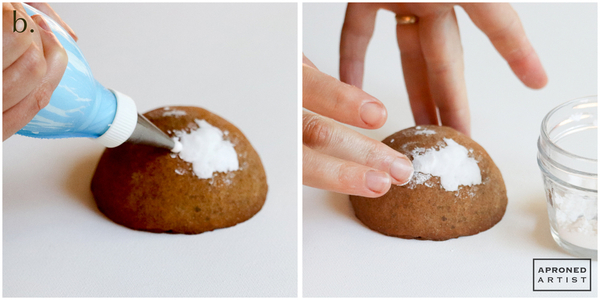
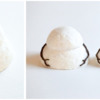
b. To cover the cookies with snow, pipe a dab of stiff-consistency white royal icing onto one of the cookies with an Ateco #6 tip (or equivalent). While the icing is still wet, dip a finger in powdered sugar (to prevent the icing from sticking to you) and flatten the icing. The icing should not be perfectly smooth; it should look as though it was compacted by small hands. Repeat until all of the cookies are covered. (Note: If you intend to nest the cookies but do not increase the size of the dad snowman, be careful how much snow you add to the mom cookies because she may not fit if the snow adds too much height.)
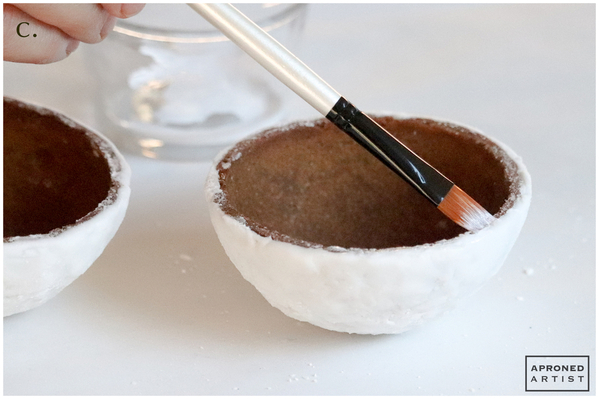
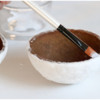
c. Once the icing has dried, paint the exposed edges of the hemispheres that make up the bodies with white gel paste coloring.
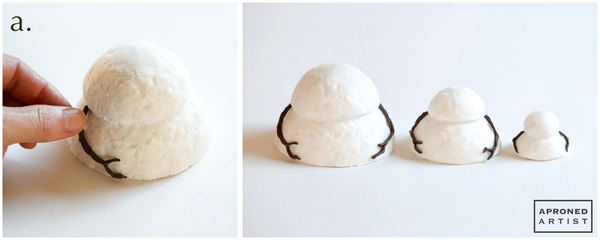
d. When the paint has dried, you can attach the heads. Using a PME #2 tip (or equivalent), pipe stiff-consistency white royal icing along the bottom edge of each head. Immediately center each head on the appropriate body hemisphere. Remove any excess icing that squeezes out with a damp paint brush, but don’t worry too much about the seams; they will be covered in a later step.
Step 4: Attach arms and pipe scarves
a. To attach the arms, apply a dab of stiff-consistency white royal icing to the upper end of an arm transfer. Place it against the appropriate snowman so that the top of the arm sits just below the seam where the head meets the body. If necessary, smooth any excess icing with a damp paint brush. Allow the icing to dry completely before piping the scarves.
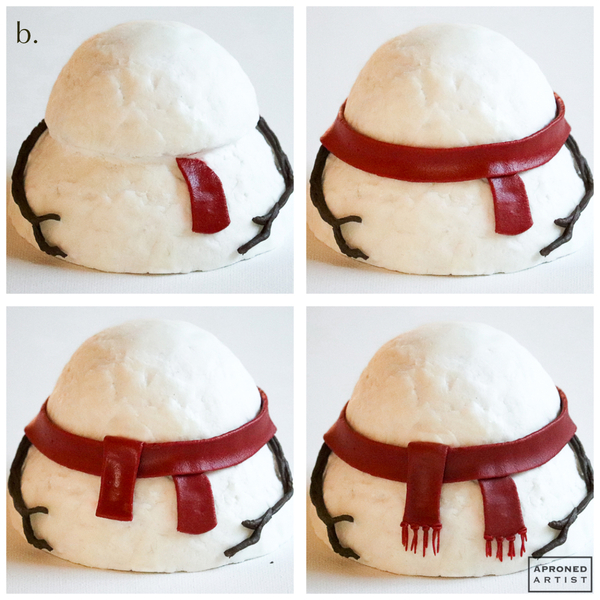
b. Pipe dad’s scarf with stiff-consistency red royal icing and an Ateco #150 tip (or equivalent). Start two-thirds down the body and slightly off-center, and pipe upwards, pulling off at the neck (see top left picture below). If necessary, tuck the icing into the neck seam with a damp paint brush. Next, pipe a band around the neck seam by rotating the turntable (or equivalent) as you pipe. This portion of the scarf should cover the top of the tail just piped as well as the top of the arms (see top right picture below). Nestle the tip behind the scarf at the neck slightly off-center, and pipe downwards to add the other tail (see bottom left picture below). Finally, add tassels to the ends of the tails by piping small groups of short lines with the same icing and a PME #00 tip (or equivalent). To make the knots, pipe two horizontal lines at the top of the tassels, and tuck the ends behind the tassels with a damp paint brush (see bottom right picture below).
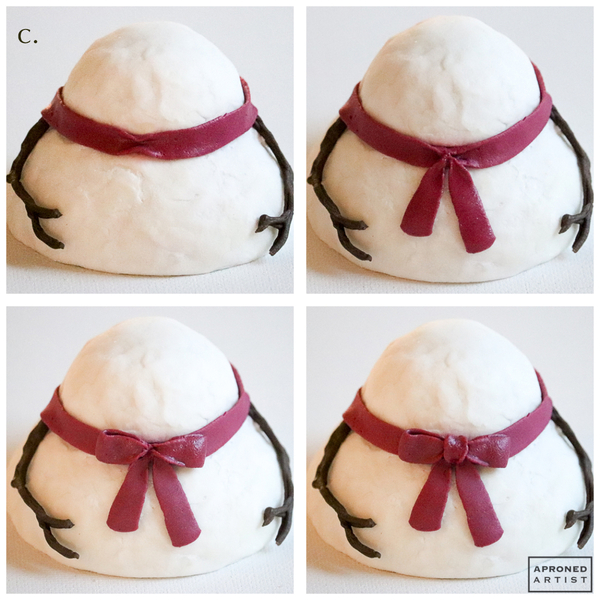
c. Pipe mom’s scarf with stiff-consistency pink royal icing and an Ateco #44 tip (or equivalent). Begin by piping around the neck seam. Let the icing stiffen for about a minute and then use a damp flat paint brush to push the edges of the scarf together beneath mom’s chin (see top left picture below). Allow the icing to crust for about ten minutes before proceeding so that you can shape the wet icing without disturbing the areas you’ve already piped. Start about two-thirds down mom's body and slightly off center, and pipe upwards towards the neck, pulling off at her chin. Mirror this tail on the opposite side of center. Allow the icing to stiffen for a minute before narrowing the ends of the tails at the chin with a damp paint brush (see top right picture below). Next, pipe two opposing loops of icing that meet at the chin. Allow the icing to stiffen for a minute before narrowing the inside ends of the loops with a damp paint brush (see third picture below). Finally, nestle the tip behind the scarf at the chin, and pipe over the narrow ends of the loops. Use a damp paint brush to tuck the end of the icing beneath the loops of the bow, creating the knot.
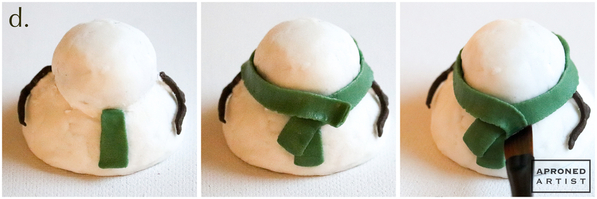
d. Pipe the baby’s scarf with stiff-consistency green royal icing and an Ateco #44 tip (or equivalent). Start most of the way down the body and slightly off center, and pipe upwards, pulling off at the neck (see first picture below). If necessary, tuck the icing into the neck seam with a damp paint brush. Start the next tail overlapping the first but slightly to the left and higher than the first tail. Pipe the tail up toward the neck, and then continue all the way around the neck seam until you overlap the tails (see second picture below). Use a damp paint brush to tuck the end of the icing beneath the tails (see third picture below).
Step 5: Attach transfers
a. Attach the eyes, carrot nose, and hat to each snowman with a small dab of stiff-consistency white royal icing. Use a damp paint brush to smooth any excess icing.
Finished!
Admittedly, it’s been a loooong time since I made a snowman, but playing with these snowmen cookies was just as fun as the real thing.


Samantha Yacovetta began cookie decorating in 2013. While working at a local bakery, Samantha became captivated by cookie art when a customer requested princess-themed cookies. Attracted initially to the precision of cookie decorating, Samantha soon found that the limitless design opportunities turned it into her artistic passion. Samantha began regularly stocking the bakery case with decorated cookies and for several years sold cookies through her own company, Aproned Artist, a cottage food operation. Having retired from the business life, Samantha now enjoys making cookies just for fun from her home in San Jose, California, USA. To learn more about Samantha, please check out her Cookie Connection portfolio, her Facebook page, and her past Every Little Detail tutorials here.
Photo and cookie credits: Samantha Yacovetta
Note: Every Little Detail with Aproned Artist is a monthly Cookie Connection blog feature written by Samantha Yacovetta focused on the special little details that make big statements in cookie design. This article expresses the views of the author, and not necessarily those of this site, its owners, its administrators, or its employees. To read all of Samantha's past Every Little Detail tutorials, click here. And to see all of Cookie Connection's tutorials, click here.














Comments (21)