
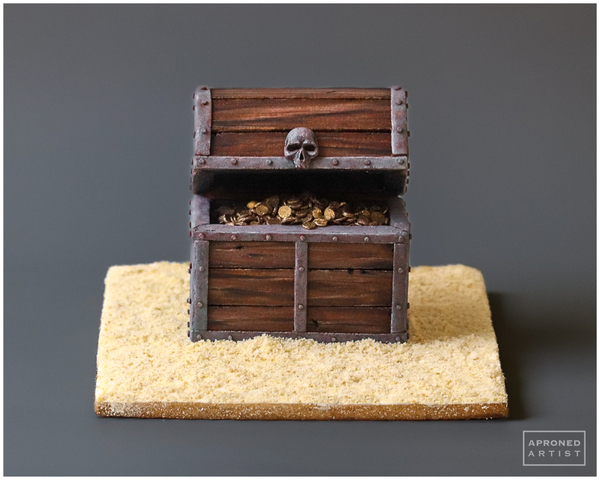
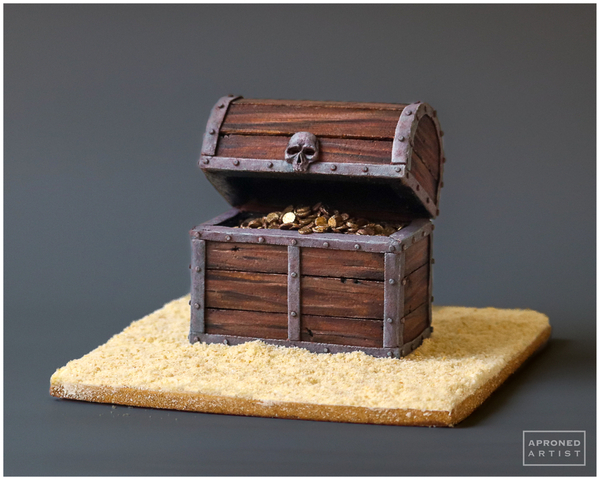
I may have mentioned once or twice that Halloween cookies are my favorite. I pretty much wait all year for that one month. But it’s peak summer right now - time for sun and seashells, not ghosts and ghouls. So what’s a girl to do when she has a hankering for Halloween when it’s not seasonally appropriate? Pirates, of course! We’ve got sand and skulls, the perfect compromise.
Supplies:
- Food-safe file
- Baked gingerbread cookies rolled 3/8 in (1 cm) thick:
- 13 (3 x 1/2-in/7.6 x 1.3-cm) large rectangles for long boards
- 8 (1 1/2 x 1/2-in/3.8 x 1.3-cm) small rectangles for short boards
- 2 (1 1/2 x 9/16-in/3.8 x 1.4-cm) semicircles for boards
- 1 (2 1/2 x 1-in/6.4 x 2.5-cm) rectangle for shelf
- 8 (1 in/2.5-cm) squares for props
- 1 (5 1/2-in/13.9-cm) square for base
- AmeriColor (or equivalent) gel paste colorings for painting: Bright White, Chocolate Brown, Espresso, Gunmetal, Sangria
- Paint brushes:
- Medium flat angled paint brush
- Tiny liner paint brush
- Small round paint brush
- Royal icing:
- Stiff-consistency brown (AmeriColor Espresso)
- Stiff-consistency white
- Tips:
- Large rectangular cookie cutter to square corners (I used a 5-in/12.7-cm square cutter.)
- Small trowel (or equivalent)
- Parchment paper
- Acetate
- Edible gold luster dust
- Alcohol
- Sand ingredients:
- 1/2 cup finely ground sugar cookie crumbs
- 1/4 cup blanched almond flour
- 1/4 cup granulated sugar
- 1 teaspoon dark brown sugar
Step 1: Prepare wooden boards for chest
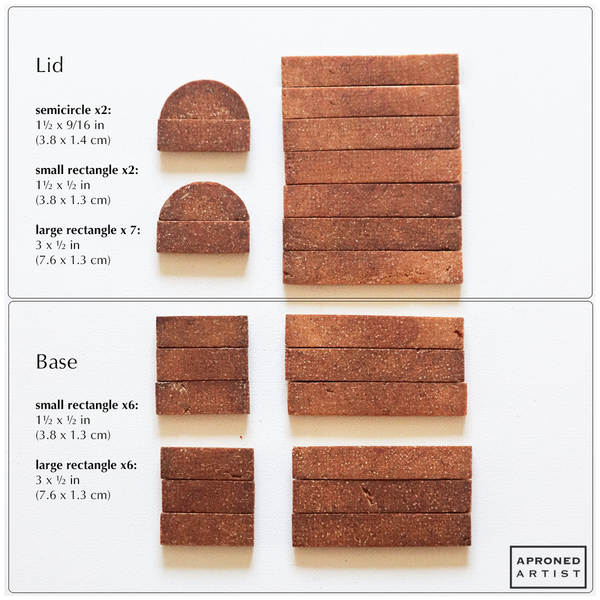
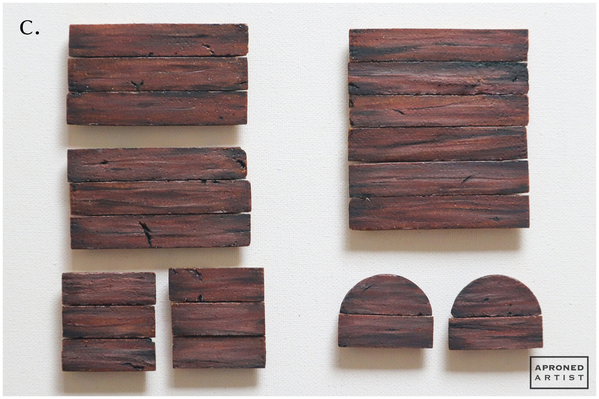
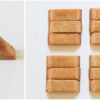
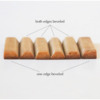
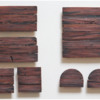
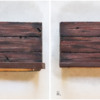
a. Using a food-safe file, file the edges of the board cookies so that they are as uniform and straight as possible. Make sure that all of the large rectangle cookies are the same length; these boards will make up the long walls of the chest. The small rectangle cookies should be the same length as the semicircle cookies; these boards will make up the short sides of the chest. (Note: I flipped my cookies over so that the flat surface that was in contact with the baking sheet became the top surface of my boards.) Separate the cookies into two groups - one group for the cookies that will comprise the lid and one group for the cookies that comprise the base (see the image below).
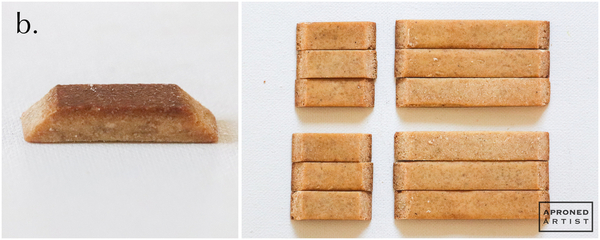
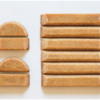
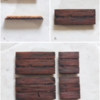
b. Set aside the lid cookies for now. File the short edges of all of the boards that comprise the base to give them a beveled edge (a 45° slope). (This technique is also called mitering.) Make sure you’re filing the underside of the cookie so that the board’s surface is unaffected (the cookies in the pictures below are upside down). These angled edges will help the sides of the chest fit together better. Set aside the cookies for the base.
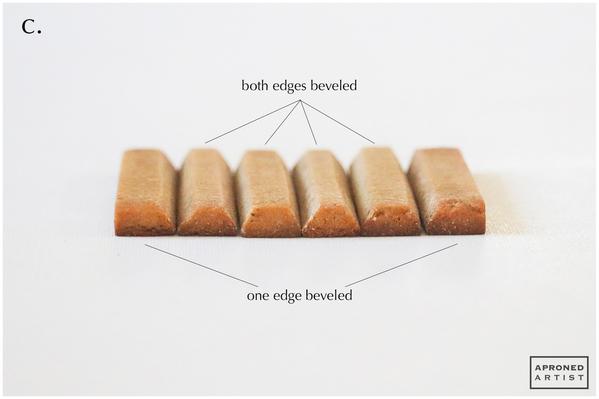
c. Now we will work on the cookies that comprise the chest’s lid. Take one of the long board cookies, and bevel the right long edge. Keep the other long edge intact. Bevel just the left long edge of another long board. These two cookies will be the bottom two boards of the lid’s arch. For the remaining five long boards, bevel both long edges.
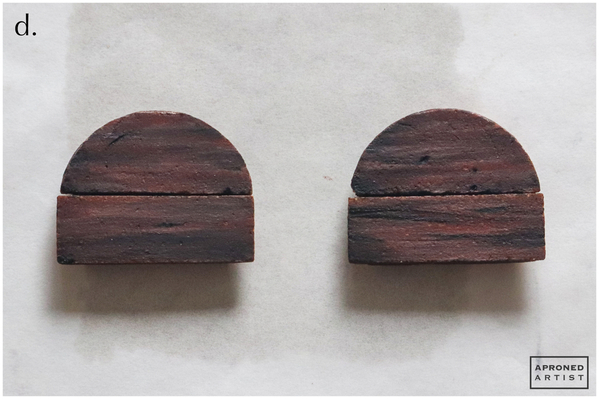
d. Still working on the cookies of the lid, bevel the rounded edges of the two semicircles and the short sides of two short boards. Additionally, bevel the short sides of all seven long boards.
Step 2: Paint boards
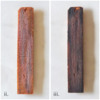
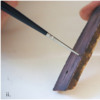
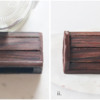
a. Mix a touch of Bright White gel paste coloring into Chocolate Brown gel paste coloring (or equivalents) to achieve a light reddish-brown paint (i). Using a medium flat angled paint brush, paint a few haphazard lines down the length of one board cookie. With a clean, damp paint brush, blend the lines slightly using long strokes (ii). With a slightly wet paint brush, dip just the angled tip into undiluted Chocolate Brown gel paste coloring, and add a few long strokes of darker brown. In the same manner, add a few long strokes of undiluted Espresso gel paste coloring (or equivalent) to add even darker tones (iii). Use a tiny liner paint brush to accentuate any nicks or other imperfections in the cookie with undiluted Espresso gel paste coloring (iv). (Note: you can use a scribe tool to gouge a few imperfections into your cookies if they’re too smooth.)
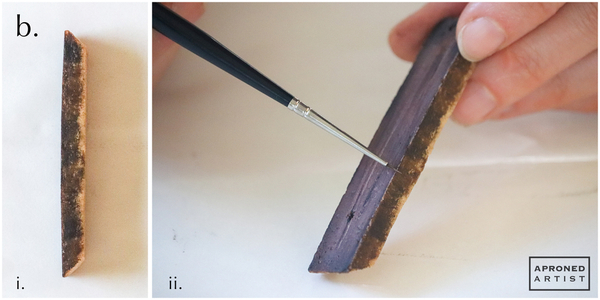
b. Paint all of the side edges of the cookie with undiluted Espresso gel paste coloring and a medium flat angled paint brush (i). Darkening the edges will help to hide the lighter tones of the gingerbread if the cookies don’t fit together perfectly during assembly. Mix equal parts of Bright White and Espresso gel paste colorings, and use the side of a dry tiny liner paint brush to add a thin highlight along the long edges of the board (ii).
c. Repeat Steps 2a and 2b to paint all of the board cookies.
Step 3: Assemble chest base and lid
a. First, gather the cookies to be used for the base of the chest. Using stiff-consistency brown royal icing and a PME #2 tip (or equivalent), pipe a line of icing along the long side edge of one long board cookie (i). Press the icing into the long side of another long board (ii). Repeat these steps to attach a third long board, completing one long wall of the chest’s base. Allow the icing to dry completely. In the same manner, attach the other three long boards to create the second long wall. Repeat with the short boards to create the two short walls (iii).
b. Once all of the walls of the base have dried, pipe stiff-consistency brown royal icing along the beveled edge of one long wall. Position the painted surface of the long wall against the corner of a large rectangular cookie cutter to support it vertically. Position a short wall perpendicular to the long wall, and press the beveled edges together. Use the corner of the cookie cutter to support the walls and ensure that they sit at a 90° angle. Allow the icing to set for a few minutes. Repeat to attach the remaining walls. Allow the icing to dry completely.
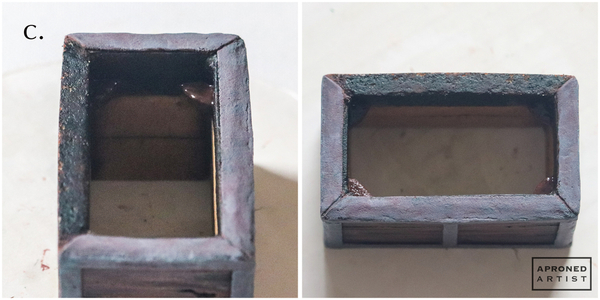
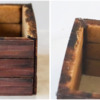
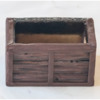
c. To reinforce the structure, pipe icing along the outer seams of the base. Smooth the icing with a damp flat paint brush (i). Additionally, pipe and smooth icing on the inner seams of the base (ii). Allow the icing to dry completely.
d. Next, gather the cookies to be used for the lid of the chest. Using stiff-consistency brown royal icing and a PME #2 tip (or equivalent), pipe a line of icing along the long side edge of one short board cookie. Press the icing into the flat side of a semicircle cookie to create one side wall of the chest’s lid. Repeat with the other short board and semicircle to create the other side wall. Allow the icing to dry completely.
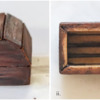
e. Find the two long boards with just one beveled long edge. Pipe stiff-consistency brown royal icing along both short beveled edges of one board. With the board’s flat edge against the work surface, press the icing against the beveled edges of the two side walls. Repeat with the other long board to create a crib-like structure (i). Now we will build the lid from the front to the back. Pipe icing along both the short beveled and the bottom long beveled edges of another long board. Place it adjacent to the front long board (ii). In the same fashion, attach three more long boards (iii).
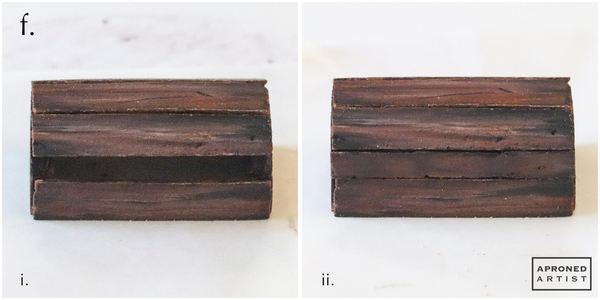
f. Now there will be a gap in the back of the lid (i). File the long beveled edges of the remaining cookie (maintaining the bevel angle) so that it fits into the gap. Pipe icing along all four of the board’s beveled edges, and place the board into the gap (ii). Allow the icing to dry completely.
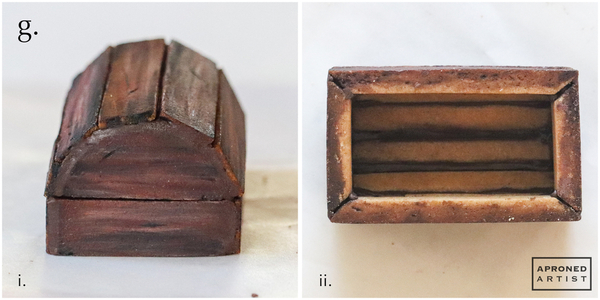
g. To reinforce the lid’s structure, pipe icing along the outer seams of the side walls. Smooth the icing with a damp flat paint brush (i). Additionally, flip over the lid, and pipe and smooth icing on the inner seams of the lid (ii). Allow the icing to dry completely.
Step 4: Pipe metal bands
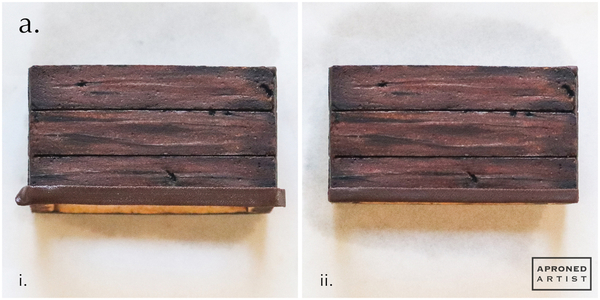
a. Using stiff-consistency brown royal icing and a Wilton #44 tip (or equivalent), pipe a band of icing along the bottom edge of the chest. Pipe the band so that it overhangs both the side edges and also the bottom edge of the chest just slightly (i). Allow the icing to set for a minute or until no longer tacky but not yet crusting. Use a small trowel (or equivalent) to trim the overhanging icing flush to the edges of the chest (ii).
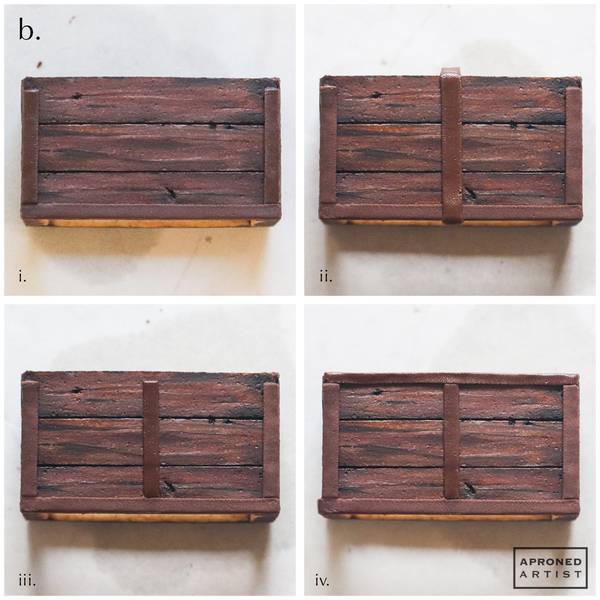
b. Use the same process to pipe and trim bands along the vertical side edges of the same face. Trim the top of the vertical bands to leave enough space for another horizontal band at the top edge of the chest (i). Pipe another vertical band in the center of the chest (ii). Allow the icing (of the center band) to set for a minute before trimming both vertical edges slightly so it is the same thickness as the other bands. Trim the top and bottom of the center band so that it matches the other vertical bands (iii). Pipe and trim another horizontal band along the chest’s top edge (iv). Allow the icing to dry completely before flipping over the chest to repeat Steps 4a and 4b on the back of the chest.
c. Use the same process to pipe and trim bands on one of the side faces. These smaller sides will not require a center vertical band. Use a damp flat paint brush to blend the edge of the fresh icing on the vertical sides into the dried icing on the front and back faces of the chest to minimize the seam where they meet. Allow the icing to dry completely before flipping over the chest to pipe and trim the bands on the opposite side.
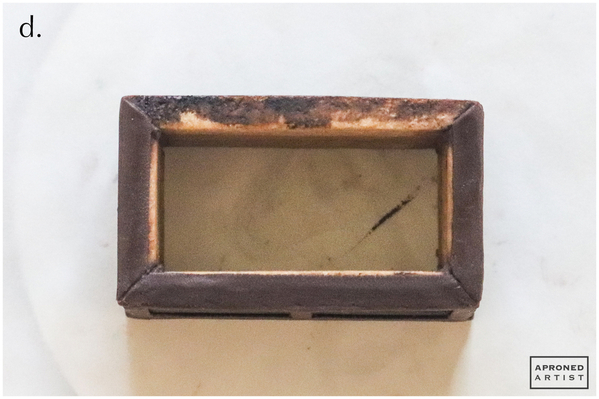
d. Pipe a band along the front lip of the chest. Use the trowel to trim the corners to a 45° angle. Pipe and trim bands along both sides in a similar fashion. Do not pipe any icing along the back edge of the chest (where the hinges would be).
e. Now, move on to the lid of the chest. Place the lid on your work surface so that it is resting on one side face, leaving the other side pointing up. Using the same icing and tip, pipe and trim a band along the bottom edge (i). Pipe a curving band along half of the semicircle (ii). Trim the excess overhang and straighten the ends (iii). Repeat, piping around the other half of the semicircle and trimming (iv). Allow the icing to dry completely before flipping over the chest to repeat this process on the opposite side.
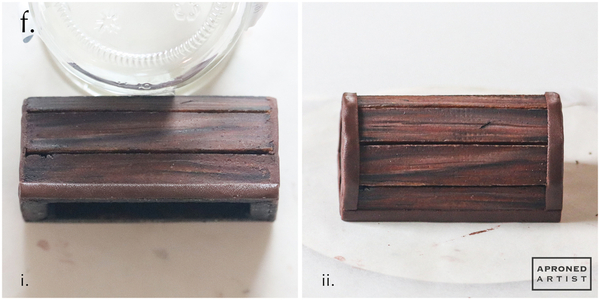
f. Prop the lid against a sturdy object (I used a glass jar) so that the front of the lid is facing up. Pipe and trim a band along the bottom edge (i). Allow the icing to dry before flipping over the chest to repeat on the back face of the lid. Sit the lid on its base to pipe and trim arcing bands over the side edges (ii). Use a damp flat paint brush to blend the edge of the fresh icing into the dried icing on the side lid faces to minimize the seam where they meet.
Step 5: Pipe metal skull
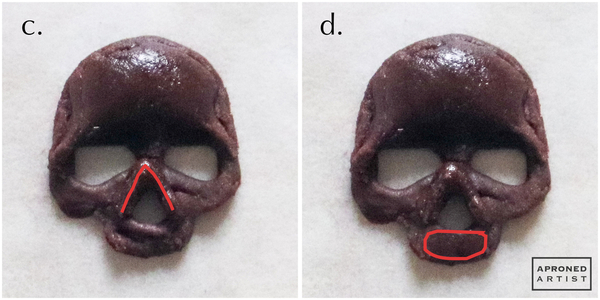
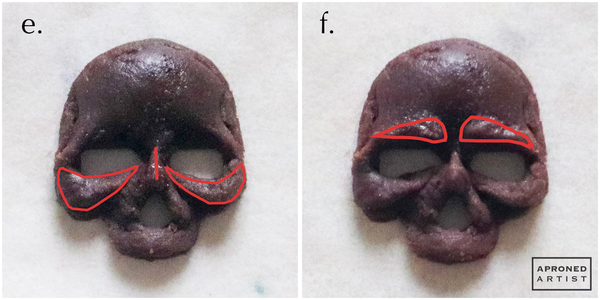
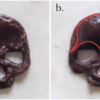
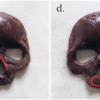
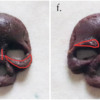
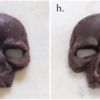
The metal skull royal icing transfer measures about 1/2 inch (1.3 centimeters) tall, about the height of one board. Because the details are so small and dark, I’ve highlighted the added section(s) with a red outline. There’s no need to allow the icing to dry in between each step (I did not), however, letting each step dry does give you the flexibility to scrape off the new icing if you’re unhappy with its shape.
a. Using stiff-consistency brown royal icing and a PME #2 tip (or equivalent), pipe a basic skull shape, about 1/2 inch (1.3 centimeters) tall, on a square of parchment paper. Leave the eye and nose sockets open. Use a damp flat paint brush to spread and shape the icing into a flat layer. It doesn’t have to be perfect; this is just the base shape that will be built upon.
b. Add a mound of icing to the forehead, and smooth it gently with a damp flat paint brush to give the skull a rounded forehead (note the shape highlighted in the rightmost photo below).
c. Pipe an upside-down “V” around the top of the nose to add height to the nose cavity.
d. Add an oval of icing below the nose, and use the damp paint brush to smooth and shape it into a more rounded upper jaw (so that the center is higher than the edges).
e. Pipe a short line along the bridge of the nose, and use the tip of the paint brush to blend the top of the line into the forehead. Next, add a teardrop of icing on each cheek; then shape the teardrops with the damp paint brush to create more exaggerated cheekbones.
f. Pipe two brows above the eyes, and blend the top edges into the icing of the forehead.
g. Pipe four dots below the jaw, and use the paint brush to flatten the bottom edges so that they look like teeth.
h. Using the same icing and a PME #0 tip (or equivalent), pipe an outline around the entire nose socket to further define its shape. Allow the icing to dry completely.
i. Peel the parchment paper away from the transfer to remove it. Place the lid of the chest on top of the base of the chest for reference. Pipe a dab of icing on the back of the forehead portion of the skull transfer, and attach it to the bottom edge of the lid. Position the skull so that it lines up with the middle band on the base of the chest. Make sure the icing used to adhere the transfer is not visible in the empty eye sockets. Allow the icing to dry completely.
Step 6: Paint metalwork, and add rivets
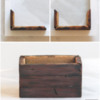
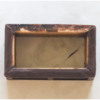
a. Before painting the piped metalwork, use a flat paint brush to paint the top edges of visible cookie on the base of the chest with undiluted Espresso gel paste coloring (or equivalent). Paint about 1/2 inch (1.3 centimeters) down the inside of the chest base, on all four sides. Additionally, paint the inside of the lid. We don’t want any exposed cookie to be noticeable when the chest is open.
b. To paint the metalwork, mix equal amounts of Gunmetal and Bright White gel paste colorings (or equivalents) to make a light gray paint. Use a small round paint brush to dab the paint over the entire metal band. Mix equal amounts of Sangria and Bright White gel paste colorings (or equivalents), and dab a few haphazard spots over the gray paint (i). Repeat on all of the metal bands. Use the same process to paint the skull. Additionally, add a little bit more white gel paste coloring to the light gray paint. Use this lighter paint and a tiny liner paint brush to add highlights along the most raised portions of the skull - the brows, the outline of the top of the nose, the highest ridges of the cheeks, and a dot to accentuate each tooth (ii).
c. Using stiff-consistency brown royal icing and a PME #1.5 tip (or equivalent), pipe small dots for the rivets about 1/2 inch (1.3 centimeters) apart on all of the bands. Flatten the rivets slightly with a flat paint brush. Paint the rivets with a tiny liner paint brush and the light gray paint (using equal amounts of Bright White and Gunmetal gel paste colorings).
Step 7: Pipe, paint, and insert doubloons (aka coins)
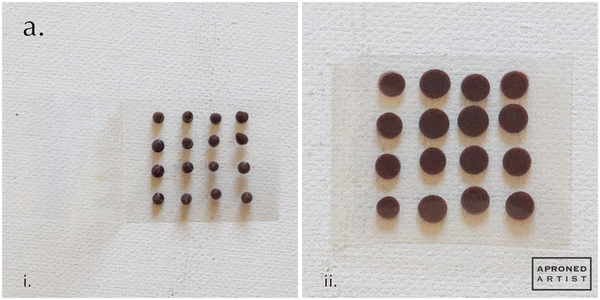
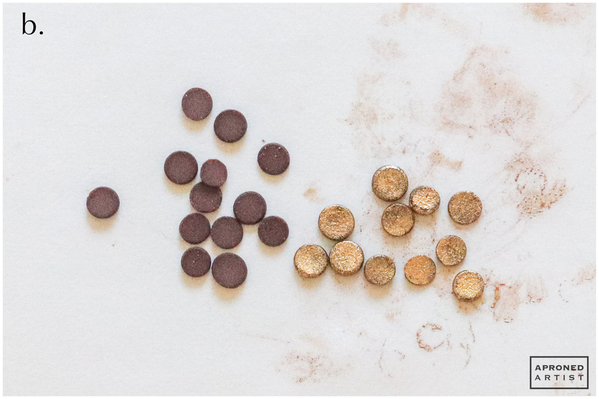
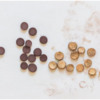
a. Cut a rectangle of acetate measuring roughly 2 x 4 inches (5.1 x 10.2 centimeters), and fold it in half like a greeting card. Using stiff-consistency brown royal icing and a PME #2 tip (or equivalent), pipe 16 small dots on one half of the folded acetate (i). Close the acetate halves, and press down gently to flatten the dots of icing (ii). The resulting doubloons will be about the size of a pepper seed. Repeat to create many more doubloons. I used an entire 8 1/2 x 11-inch (21.6 x 27.9-centimeter) sheet of acetate (cut into small rectangles) to create about 350 doubloons. Allow the icing to dry completely (I let mine dry overnight) before opening the acetate and flaking off the doubloons (they are surprisingly sturdy, so go for speed rather than caution).
b. To paint the doubloons, put a small amount of gold luster dust in the cap of its container. Dampen a round paint brush with alcohol, brushing off the excess onto a towel, and dip it into the dust. Dab the dust over both sides of the doubloons. (Normally, I would mix the dust into the alcohol, however, it’s easy to dissolve the doubloons with too much liquid. Dipping a damp paint brush into the dust ensures that the mixture will be quite dry.)
c. Now we need to create a shelf within the base of the chest to hold the doubloons (so that we don’t have to make more coins to fill the entire chest). First, we’ll create brackets to hold up the shelf. Using stiff-consistency brown royal icing and a Wilton #10 tip (or equivalent), pipe a dot of icing on the inside corners of the base a little way down from the top. (I put my dots at the bottom of the top board, however, you may want to place the brackets higher so that you don’t need 350 doubloons to create a sufficient mound.) Smooth each dot into a flat triangle that sits evenly between the two perpendicular sides.
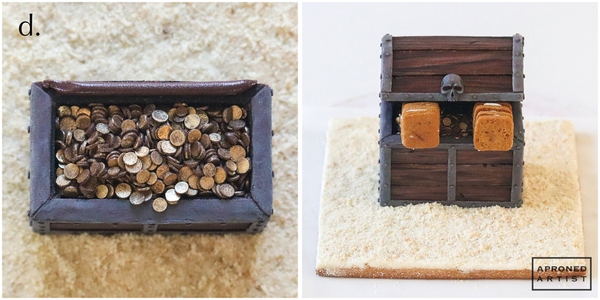
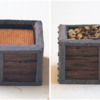
d. File the 2 1/2 x 1-inch (6.4 x 2.5-centimeter) shelf cookie until it just fits inside the base of the chest. Insert the filed cookie so that it rests on the brackets. The top of the shelf cookie should sit just below the lip of the chest. Spoon the doubloon transfers onto the shelf so that they completely cover the surface of the cookie and mound slightly in the center. If desired, allow a few doubloons to spill out onto the front lip of the chest.
Step 8: Assemble scene
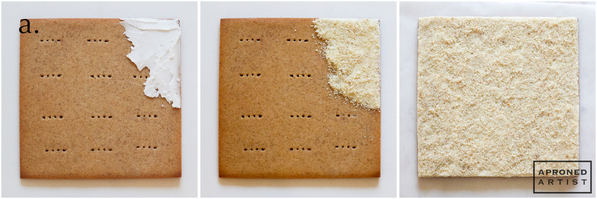
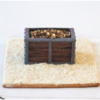
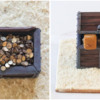
a. Mix the ingredients for the sand. Use a small trowel (or equivalent) to spread stiff-consistency white royal icing on a portion of the 5 1/2-inch (13.9-centimeter) square base cookie. Spoon some sand over the icing, and press it into the icing so that it adheres. Tilt the cookie and gently brush off the excess sand. Use the trowel to trim any icing and sand from the side edges of the cookie. Repeat with another small section until the entire cookie is covered with sand.
b. Attach the base of the chest to the center of the sand-covered cookie with stiff-consistency white royal icing. Cover any exposed icing with more sand.
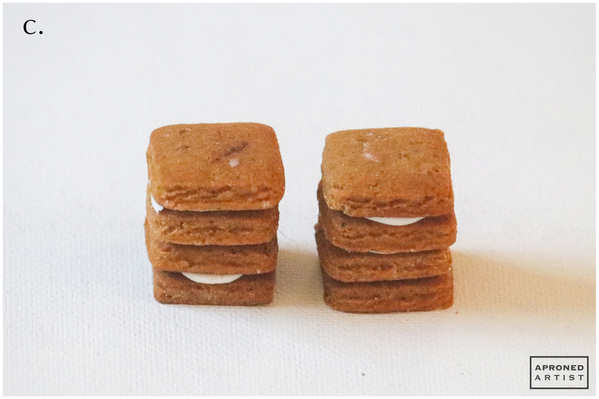
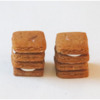
c. Sandwich four of the 1-inch (2.5-centimeter) square cookies together with icing. Repeat with the other four cookies to make two stacks. These cookie stacks will be used as props to keep the lid of the chest ajar. Allow the icing to dry completely.
d. Using stiff-consistency brown royal icing and a Wilton #10 tip (or equivalent), pipe a line of icing along the back top edge of the chest (the edge that does not have a metal band). Place the lid on top of the chest. Use a paint brush to clean up any icing that squeezes out. Lift the front of the chest open, and insert the two stacks of prop cookies horizontally so that the top cookie of each stack faces out. Allow the icing to dry completely before carefully removing the props.
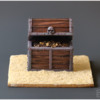
Finished! I had so much fun making this cookie. Pirates might be my new favorite theme.


Samantha Yacovetta began cookie decorating in 2013. While working at a local bakery, Samantha became captivated by cookie art when a customer requested princess-themed cookies. Attracted initially to the precision of cookie decorating, Samantha soon found that the limitless design opportunities turned it into her artistic passion. Samantha began regularly stocking the bakery case with decorated cookies and for several years sold cookies through her own company, Aproned Artist, a cottage food operation. Having retired from the business life, Samantha now enjoys making cookies just for fun from her home in San Jose, California, USA. To learn more about Samantha, please check out her Cookie Connection portfolio, her Facebook page, and her past Every Little Detail tutorials here.
Photo and cookie credits: Samantha Yacovetta
Note: Every Little Detail with Aproned Artist is a monthly Cookie Connection blog feature written by Samantha Yacovetta focused on the special little details that make big statements in cookie design. This article expresses the views of the author, and not necessarily those of this site, its owners, its administrators, or its employees. To read all of Samantha's past Every Little Detail tutorials, click here. And to see all of Cookie Connection's tutorials, click here.

























Comments (15)