[EDITOR'S NOTE: Before we jump into the third how-to in our recent series of back-to-school tutorials, I wanted to extend a special thank-you to @Laegwen, aka Leoni Eckart. While Leoni is theoretically an every-other-month contributor to Cookie Connection, she's be doing double-duty over the last few months, posting every month, to fill some gaps in our posting schedule resulting from changes to our contributors team. She's now posted three or more months in a row! Phew - that's a lot of posts! So, thank you again, Leoni, for going above and beyond the call of duty!
With this post, Leoni will return to her usual bimonthly cycle, posting again in November and then in January. I'll also be trying to even out the peaks and valleys in our tutorial posting by editing to a more "decisive" schedule. That said, plan to start hearing from @Aproned Artist in Leoni's "off" months (i.e., October, December, February, and so on) with Manu continuing to post as usual, once a month. ~JMU]

Time flies? Well, I'd rather say it rushes along at light-speed! My little nephew was just born yesterday, and now his first day of school is already around the corner! And what else could his cookie-crazy aunt give him but a set of school cookies? With faces, of course. He is mad about cookies with faces. Anything goes just as long as it looks back at him. I personally prefer my food not to look at me, but, hey, people are different . . .
I also want to take this opportunity to introduce all of you to a very old German tradition that goes back to about 1800. On the first day of school, girls and boys get school cones from their families. These cones are normally made of cardboard, very colorful, and stuffed with sweets, toys, and useful little things like pens and pencils. They are supposed to make any hardships of going to school a bit sweeter. (For pictures of some typical German school cones, click here.)
I still remember my school cone from so many years ago, and how excited I was to see what was inside it – chewing gum with glitter, heart-shaped lollipops, sour candy, candy necklaces and bracelets, etc. What I don’t remember is everything else that happened on my first day of school, but the cone surely did the trick. It was a very, very sweet day. To make sure that my nephew’s start into this new world will be just as sweet, I made school cone cookies part of his set. And I made plenty, so that he can pass them around to his new classmates.
- 36 (3/4-in/2-cm) square cookies, iced with white royal icing and dried
- Food markers in blue, red, black, yellow, green, and purple (I used Rainbow Dust markers.)
- 25 (1 1/4 x 4 3/4-in/3 x 12-cm) rectangular cookies
- Flooding-consistency royal icing in blue, red, yellow, green, and purple (about 1/2 cup of each); ivory (about 1 tablespoon); and white (about 1/4 cup)
- 7 pastry bags with #3 tips (or equivalent)
- Scribe tool
- 25 (4 x 1 2/3-inch/10 x 3-cm) carrot-shaped cookies, for the school cones
- Ruler
- 25 (6-in/15-cm) pieces thin ribbon in neutral color
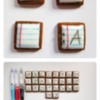
Let's start with some letter cookies! Draw four horizontal lines on each square cookie with a blue food marker; then draw a vertical line along the left side with a red marker. Switch to a black marker, and add two small black dots to the left of each red line. Now you have tiny sheets of paper! If I have counted correctly, you should have enough squares to write the complete alphabet from A to Z, as well as the numbers 0 to 9. Now, write them on the squares with the black marker!

Onto the pencil cookies! Place the blue, red, yellow, green, purple, and ivory flooding-consistency royal icing in piping bags. As always, I didn’t use metal tips, but instead cut openings in the ends of each bag that were equivalent to the opening on a #3 round tip.
Also be sure to have your scribe tool nearby. We will be doing some wet-on-wet piping, and, when doing that technique, it is always advisable to have your icing and everything else you need well within reach, as the piping needs to be done quickly.
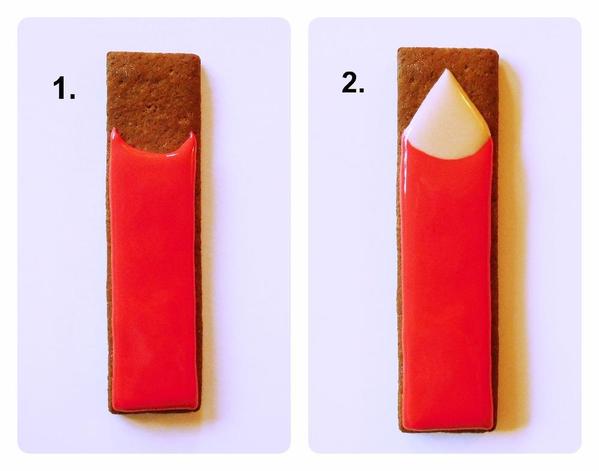
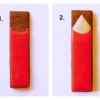
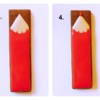
Flood a rectangular cookie with one of the "base" colors (i.e., blue, red, yellow, green, or purple). Leave approximately 1 inch (2 1/2 centimeters) free at the top of the cookie, and end with a concave edge (1). Immediately pipe a pyramid-shaped ivory section on top (2).
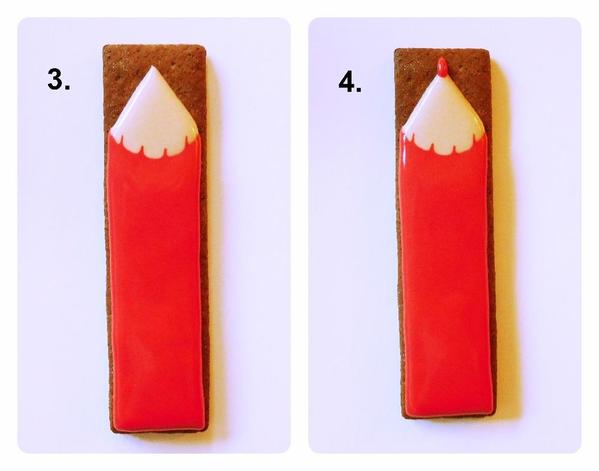
While both icings are still wet, use your scribe tool to pull the base color into the ivory icing in four areas, to mimic the tiny marks on the end of a sharpened pencil (3). Last, for the pencil lead, pipe a small line of the base color on top of the ivory pyramid, and shape it into a point at the end with the scribe tool (4). Repeat Steps 1 to 4 with the remaining 24 rectangular cookies, changing up base colors as you go. Put all 25 pencils aside to dry completely. (If air-drying, allow several hours. The icing will need to be dry all the way through, as we are going to draw on these cookies a bit later.)
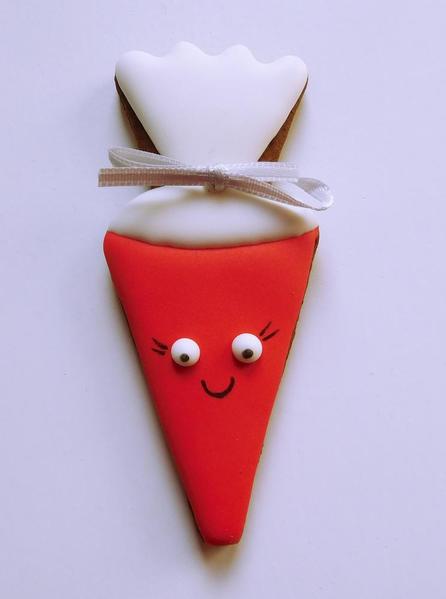
 And, now, for my favorite part, the German school cones! While the pencils are drying, flood the bottom parts of the cone cookies using the same base colors used on the pencils. (Again, change up the colors as you go, so you end up with a nice mix across your set.) Stop flooding about 4/10 inch (1 centimeter) below the narrowest part of the cookie, and end with a slightly concave edge as we did on the pencils (1).
Once you have flooded the last cookie, the first one should be dry enough to proceed to the next step. Take the white flooding-consistency royal icing, and flood the open space between the base color and the narrow part of the cookie, ending with a convex edge this time (2); then repeat this step on the remaining 24 cones. Again, once you have finished this step on the last cookie, the first cookie should be dry enough to proceed to Step 3.
For this last step, flood the top part of each cookie, tapering the icing in at the bottom to leave a little bit of bare cookie on both sides of the narrow section. This way, the cones will look more like they're gathered in the middle. Let the cookies dry completely, ideally overnight.

Once all of your cookies are thoroughly dry, you can proceed with the details.
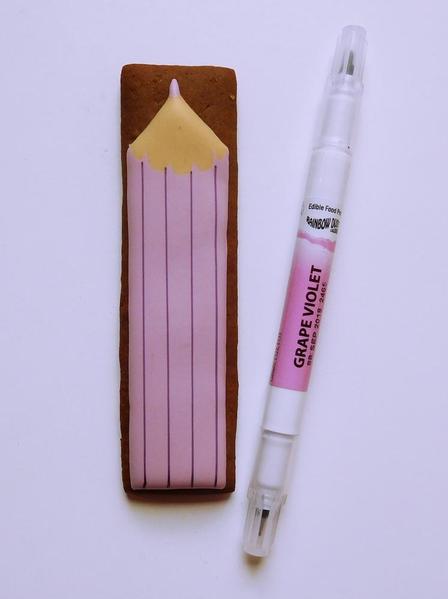
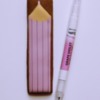
Gather a ruler and food markers in blue, yellow, red, green, and purple, corresponding to the base colors of the pencils. Using a ruler as a guide, and matching marker color to base color, draw four lines along the length of the base color on each pencil.
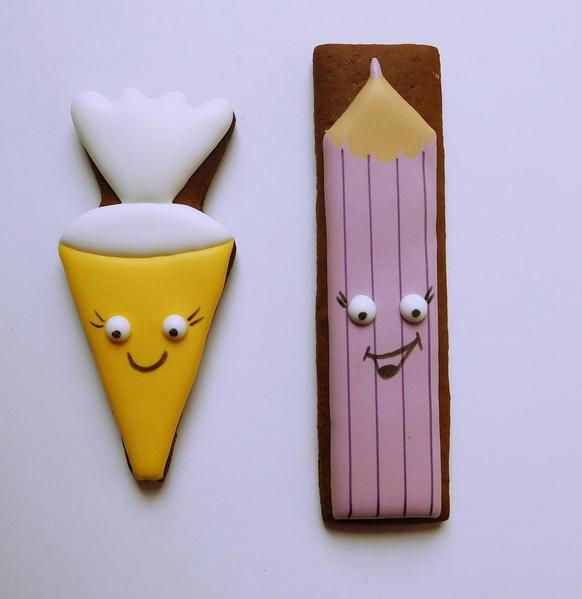
Then, using leftover white flooding-consistency icing and a #3 tip (or equivalent), pipe large dots (for eyes) on all of pencils and school cones. Let the dots dry completely, or you will crush them in the next step.
Draw black dots on the centers of the white dots (for pupils), and, to complete these simple but super cute faces, add eyelashes and a big smile, also with the black food marker.
Now make 25 tiny bows with the ribbon pieces, and try not to knot your fingers in the process! Attach a bow to the narrow part of each cone cookie with a dab of leftover white icing, and let the icing dry completely.
Ta-da! Now you have a set of cookies that should be enough for a whole class of excited little girls and boys on their first day of school.

 Leoni Eckart, aka Laegwen, started her baking career way before her own memory sets in, decorating Christmas cookies with her mother (at least that's what she's been told!), and has never entirely stopped puttering around in the kitchen since. Her first decorated cookies as an adult were her own wedding favors, and then, over Christmas 2014, her cookie fever went into overdrive! As of present, it shows no signs of cooling off. You can find Leoni on Facebook here, or you can reach her by email at laegwen@outlook.de.
Photo credit: Leoni Eckart
Note: Get Inspired with Laegwen is a bimonthly series of cookie decorating tutorials that follow Leoni Eckart's personal experiments with gumpaste, royal icing, and other cookie decorating materials and methods. This article expresses the views of the author, and not necessarily those of this site, its owners, its administrators, or its employees. To read all of Leoni's past Get Inspired tutorials, click here. And to catch all of our Cookie Connection tutorials, click here.




Comments (14)