 Snowflakes are fascinating in their uniqueness. Though all snowflakes have the same structure, no two are alike. This interesting interplay between sameness and uniqueness is the basis for this tutorial. While I use only one cookie shape (a kite) and the same very simple decoration on each cookie, I create several different arrays of six cookies, each resulting in a distinct new snowflake. I chose six cookies, because a snowflake is a crystal with a hexagonal structure (six branches). Sometimes a 12-branch snowflake is generated from the collision of two snowflakes, so I also included some 12-piece arrays among my snowflake compositions. You can read all about snowflakes here, and see amazing real snowflake macro-photos here. But, for now, let’s concentrate on this cookie project, which is particularly suitable and satisfying for beginners. It's a good way to practice piping, and the final outcome will look more elaborate than a beginner project.
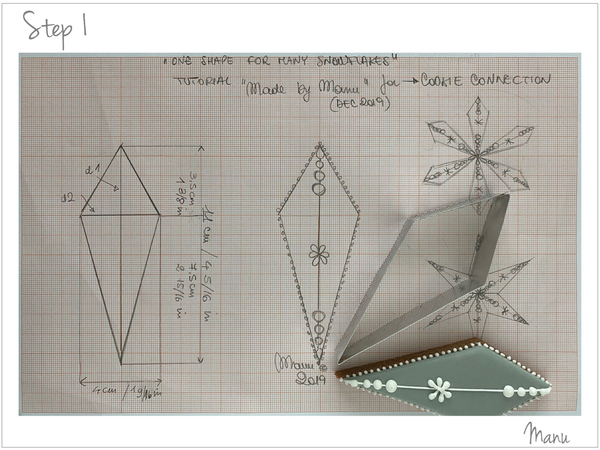
- 6 (11 x 4-cm/4 5/16 x 1 9/16-in) kite cookies, or multiples of 6 cookies (You’ll find the template in "Attachments" under "Files" at the end of this post.)
- Cookie dough of choice
- Scissors and sharp paring knife (for hand-cutting cookies)
- Royal icing:
- Medium-consistency white, in pastry bag with PME #1 tip (to outline, pipe lines, and pipe dots around the cookie edges) and PME #2 tip (to pipe other decorations), or equivalents
- Flooding-consistency grey, in tip-less pastry bag with opening equivalent to PME #2 tip
- Scribe tool
- Parchment paper
- Small paint brush (optional)
Step 1: Cut and bake cookies
- d1 = 11 centimeters (4 5/16 inches) and
- d2 = 4 centimeters (1 9/16 inches), as pictured below.
Note: This kite is rather narrow, with the distance between the topmost point and the intersection of d1 and d2 being 3.5 centimeters (1 3/8 inches), and the distance between the intersection and the bottom being 7.5 centimeters (2 15/16 inches). Again, for reference, see the photo directly below and/or the template in "Attachments".
Roll out your cookie dough to your desired thickness.
To hand-cut the cookies, cut out the template, and place it on top of the cookie dough. Use a sharp paring knife to carefully cut around the template. Repeat this process to cut as many cookies as you desire; then remove the excess dough from around the cookies, and bake them as directed in your recipe.
Alternatively, you could have a custom cutter made, or make your own. I actually did the latter, using aluminum sheet and a Monperamickey kit, which was given to me by my cookie-friend @Ryoko ~Cookie Ave. when I recently visited her in Japan. The best gift a cookier could receive from a fellow cookier! Along with her great tips about how to use it!
Step 2: Decorate cookies
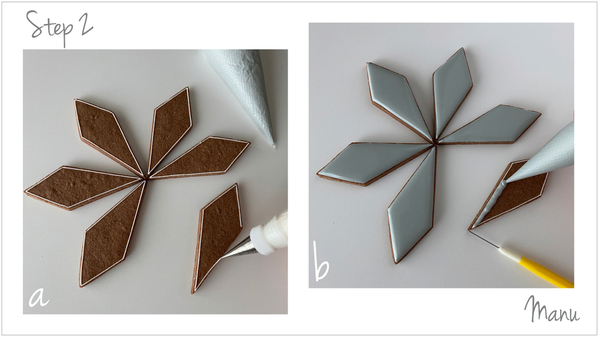
a. Use white medium-consistency royal icing and a PME #1 tip (or equivalent) to outline all of the cookies. Leave about 1 millimeter (1/16 inch) around the edge, as we will fill that space with piped dots in Step 2h.
b. Flood all the cookies, using grey flooding-consistency royal icing and PME #2 tip (or equivalent). Use the scribe tool, as needed, to coax the icing into the sharp angles. Let the icing dry.
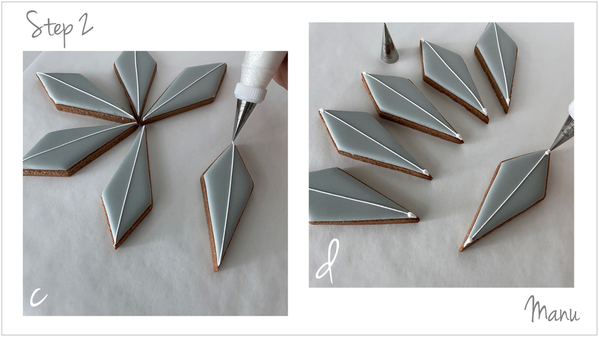
c. Pipe a line along the longest diagonal of each cookie, once again using the same white royal icing, bag, and tip used in Step 2a.
d. Change the tip on the pastry bag to a PME #2 (or equivalent), and pipe a bead on each cookie about 3 millimeters (less than 3/16 inch) inside the end of the line. Then move toward the end of the line while releasing pressure to create a tail on the bead. Repeat this step on the opposite end on all of the cookies.
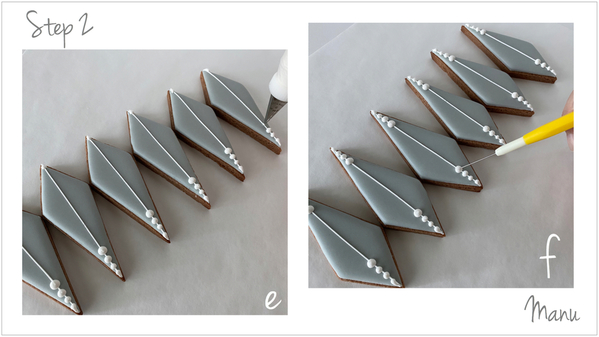
e. Now, starting from the tailed bead piped on the narrowest end, pipe three large dots along the line about 1 millimeter (1/16 inch) apart from each other. Pipe larger (and larger) dots as you move away from the corner. I recommend lining up the cookies on a piece of parchment paper and piping the first dot on all of the cookies, then returning to pipe the next dot on all of the cookies, and so on. This way, the dot sizes and overall design are more likely to be the same on each cookie.
f. Rotate the parchment paper 180 degrees, and repeat Step 2e on the opposite corner. If your icing leaves peaks on the beads, use a damp scribe tool (or small damp paint brush) to smooth it.
g. Pipe a tiny snowflake right in the middle of each line on each cookie by piping six tailed beads (as done previously) whose tails intersect at the snowflake center. Again, rather than working on one cookie at a time and rotating it, it is easier to pipe one bead at a time moving down the line of cookies. After the first bead is piped on all six cookies, rotate the parchment paper about 60 degrees, and pipe the second bead on each cookie. Rotate the parchment paper and pipe beads in this fashion until all of the snowflakes on each cookie are completed.
h. Now, change the tip on the pastry bag to a PME #1 (or equivalent), and pipe little dots all around the edge of each cookie. It is time consuming, I tell you, but a good way to practice piping!
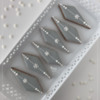
And here they are! The cookies are already nice and elegant displayed like this . . .
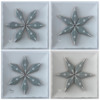
. . . but let’s play a little bit with some possible snowflake cookie platters. It is like looking in a kaleidoscope. In the first row of the photo below, I rotated each cookie in the left composition 180 degrees to get the composition to the right. Then I rotated each of the two plates 90 degrees to get the two snowflake platters in the second row. So easy!

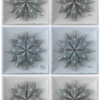
In the picture below, I overlapped two of the compositions in the photo above to get richer patterns with more depth - and more cookies!
See you next year with new cookie projects!
Manu ❄️❄️❄️


Photo and cookie credits: Manuela Pezzopane
Note: Made by Manu is a Cookie Connection blog feature written by Manuela Pezzopane, where each month she shares the method behind a magical cookie of her own making. This article expresses the views of the author, and not necessarily those of this site, its owners, its administrators, or its employees. To read all of Manuela's past Made by Manu tutorials, click here. And to see all of Cookie Connection's tutorials, click here.



Comments (28)