 With Father’s Day coming soon, I’ve been thinking a lot about my dad. He was the kind of person who made every moment feel like an experience. Every errand was an opportunity to get lost and discover something magical. Every day was a chance to break routine and embark on an adventure. So when he’d creep into my room on summer mornings well before daybreak, quietly ushering me to get dressed, I always felt giddy with anticipation. We’d chatter animatedly all the way to the bay. Upon arrival, we’d wordlessly ready our fishing gear so as not to startle the fish. Then we’d sit on the dock for hours, fishing and watching the sun rise, talking quietly or just sitting in amicable silence. Those impromptu fishing trips with my dad are some of my most treasured memories. To this day, whenever I have to wake hours before sunrise, I still feel that same little thrill of anticipation as if I were heading out on an adventure with my dad.
Supplies:
- Royal icing (I used AmeriColor gel paste coloring to tint the icing.):
- Stiff-consistency purple (1 part Super Red/1 part Regal Purple)
- Stiff-consistency pink (Super Red plus a touch of Taupe)
- Stiff-consistency peach (Champagne)
- Stiff-consistency brown (Chocolate Brown)
- Stiff-consistency khaki (1 part Taupe/1 part Warm Brown)
- Stiff-consistency green (Olive)
- Stiff-consistency blue (1 part Navy/1 part Midnight)
- Tips:
- Rectangular silicone mold(s) with straight edge, like this one
- Small paint brush
- Small amount of fondant
- AmeriColor (or equivalent) gel paste colorings for painting: Super Black, Bright White, Espresso
- Silicone mat (or equivalent)
- Small trowel or offset spatula
- Food-safe file
- Medium flat paint brush
- 3 1/2-in (8.9-cm) baked round cookie
- Extra cookie(s) for propping, as needed
- Parchment paper
Step 1: Pipe daughter royal icing transfer
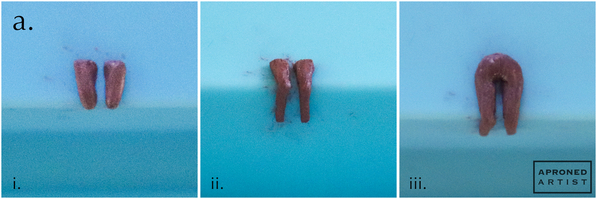
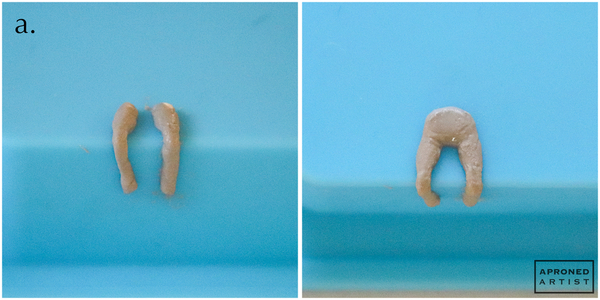
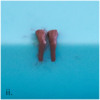
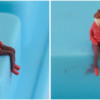
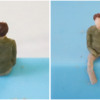
a. Using stiff-consistency purple royal icing and a PME #2 tip (or equivalent), pipe the thighs of the daughter on top of a rectangular silicone mold turned upside down. The thighs should measure approximately 1/4 inch (0.6 centimeter) in length and should extend (at the knee) right to the edge of the mold. Shape the legs with a damp small paint brush (i). Pipe lines extending downward from the knees for the calves. Again, shape the icing with a damp paint brush, tapering the icing toward the ankles and flattening the bottom ends where the shoes will later attach (ii). Pipe a semicircle of icing at the top of the thighs for the lower abdomen. Use the damp paint brush to smooth and shape the icing, blending the icing into the thighs (iii).
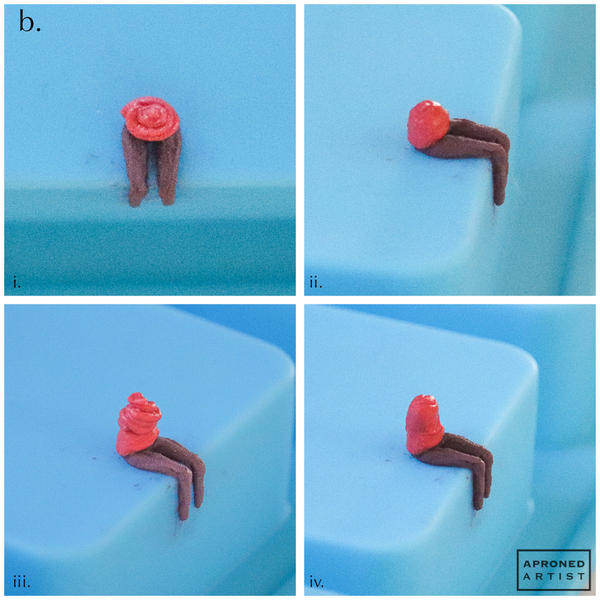
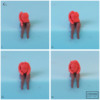
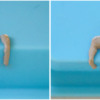
b. Using stiff-consistency pink royal icing and a PME #2 tip (or equivalent), pipe a tall spiral of icing on top of the lower abdomen (i). Use a damp paint brush to smooth and shape the icing, leaving some of the lines of the spiral to represent wrinkles in the fabric of the daughter's sweatshirt (ii). Add another tall spiral of icing on top of the first smoothed spiral (iii). Again, use the damp paint brush to smooth and shape the icing, leaving some texture for wrinkles (iv). The daughter’s torso should narrow slightly at the waist (between the two spirals) and flare slightly at the hip and shoulder.
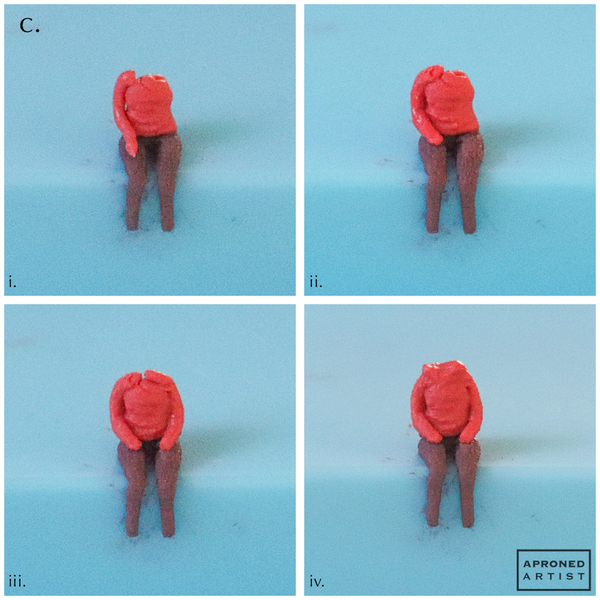
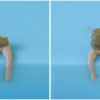
c. For the arm of the sweatshirt, pipe a line of icing starting at the shoulder, running along the side of the torso, and bending to end along the upper thigh (i). Shape the arm with a damp paint brush (ii). Make sure to look at the transfer from all sides to ensure that the anatomy of the arm and the angle of the elbow seem proportionate. Repeat on the other side of the torso to create the other arm (iii). Pipe a smaller spiral of icing between the two shoulders. Use a damp paint brush to flatten the icing, creating a subtle v-shaped collar with a slight indentation in the center for the neck (iv).
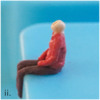
d. Using stiff-consistency peach royal icing and a PME #2 tip (or equivalent), pipe the neck of the daughter within the center indentation of the collar. Shape the icing with a damp paint brush (i). Allow the icing to set for a minute before proceeding. Once the neck has crusted, pipe a bead of icing on top of the neck and shape it into the lower portion of the head (ii). Allow the icing to crust for a minute before piping and shaping the top of the head (iii).
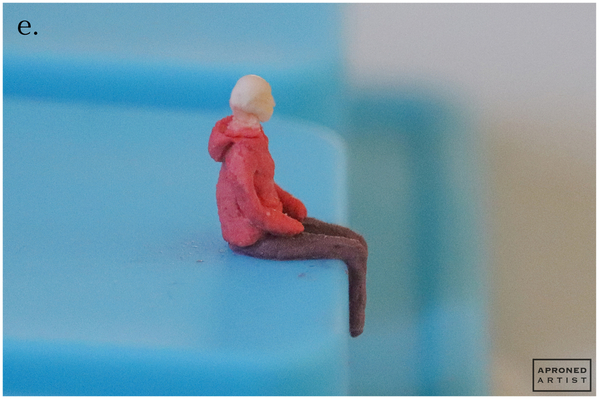
e. With stiff-consistency pink royal icing and a PME #2 tip (or equivalent), pipe a mound of icing on the upper back of the daughter transfer. Use a damp paint brush to shape the icing into a sweatshirt hood.
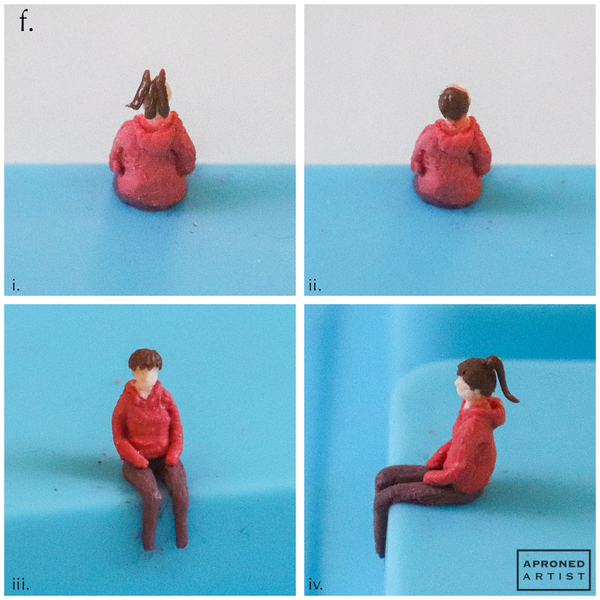
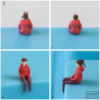
f. Using stiff-consistency brown royal icing and a PME #24 tip (or equivalent), pipe some vertical strips along the back of the head (i). Use a damp paint brush to shape the icing around the head (ii). Repeat on the front of the head with shorter strips to create bangs (iii). Finally, pipe a single long strip hanging off the back of the head for a ponytail (iv).
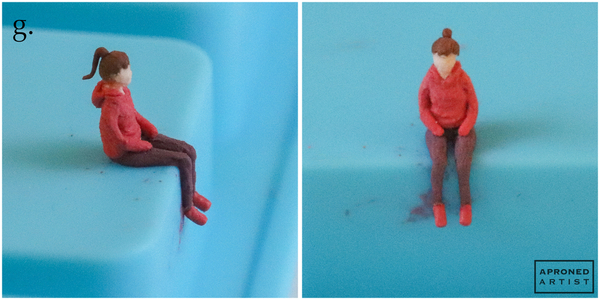
g. For the daughter's shoes, use stiff-consistency pink royal icing and a PME #2 tip (or equivalent) to pipe a short line extending from each ankle. If necessary, shape the icing with a damp paint brush.
Step 2: Pipe dad royal icing transfer
The dad transfer is very similar to the daughter transfer except about one-third larger.
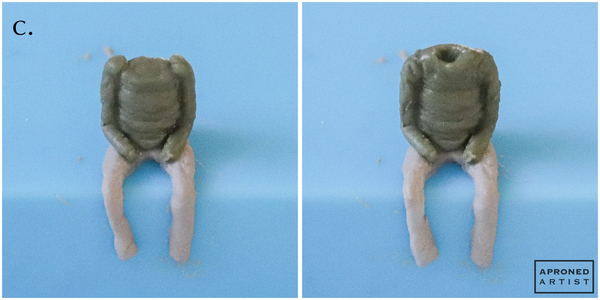
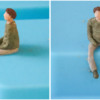
a. Using stiff-consistency khaki royal icing and a PME #2 tip, pipe and shape the dad’s thighs, angling the knees out slightly. Add the calves, blending them into the knees. Pipe and shape a semicircle of icing for the lower abdomen.
b. Using stiff-consistency green royal icing and a PME #2 tip (or equivalent), pipe and smooth the torso in two sections, just as you did with the daughter transfer in Step 1b. The dad’s torso should be a little more blocky than the daughter’s, narrowing very gradually from the hip up to the shoulder.
c. For the dad’s arm, pipe a line of icing starting at the shoulder, running along the side of the torso, and bending to end along the upper thigh. Shape the arm with a damp paint brush. Repeat on the other side to create the other arm. Pipe icing to fill the area between the shoulders. Blend the icing into the rest of the torso, and use the tip of the paint brush to create an indentation in the top for the neck.
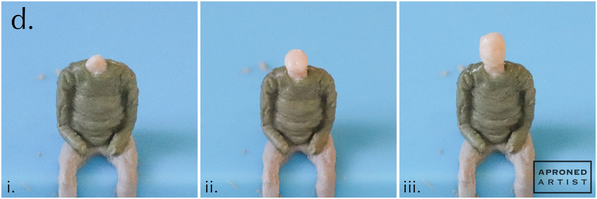
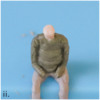
d. Using stiff-consistency peach royal icing and a PME #2 tip (or equivalent), pipe the neck within the center indentation of the collar. Shape the icing with a damp paint brush (i). Allow the icing to set for a minute before piping and shaping the lower portion of the head (ii). Allow the new icing to crust before adding the top of the head (iii). The dad’s head should be slightly more square than the daughter’s.
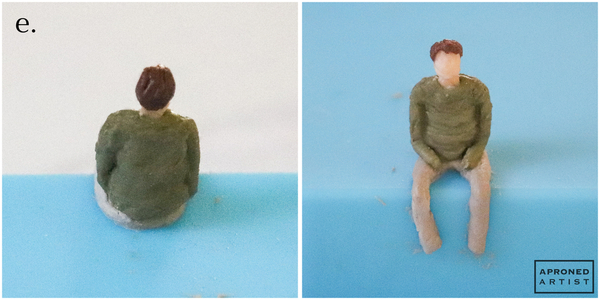
e. Using stiff-consistency brown royal icing and a PME #24 tip (or equivalent), pipe some vertical strips along the back of the dad’s head for hair. Use a damp paint brush to shape the icing around the head. Repeat on the front of the head with shorter strips of icing.
f. For dad’s shoes, use stiff-consistency green royal icing and a PME #2 tip (or equivalent) to pipe a short line extending from each ankle. Use a damp paint brush to widen the toes of the shoes slightly.
Step 3: Create fishing poles and dock components
a. Roll a very small piece of fondant into a rope that tapers on one end. Try to make the rope as thin as possible. Trim the rope to a length of 1 3/4 inches (4.4 centimeters) for the dad’s fishing pole. Repeat to create the daughter’s fishing pole, cutting it to a length of 1 inch (2.5 centimeters). Allow the fondant to harden, and then paint the fishing poles with black gel paste coloring. (You could pipe the fishing poles with black icing if you prefer, however, they will be more fragile.)
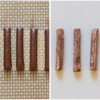
b. For the dock planks, use stiff-consistency brown royal icing and a Wilton #44 tip (or equivalent) to pipe a long band of icing on a silicone mat (or equivalent). Trim the icing on both sides with a small trowel or offset spatula to a length of 1 1/2 inches (3.8 centimeters). Repeat to create at least ten planks. Allow the planks to dry completely. (I let mine dry overnight.) Once the dock planks have dried, remove them from the silicone (or equivalent), and line them up adjacent to one another. Pipe two long bands of icing for the support beams, trimming them to match the cumulative length of the planks. Allow the support beams to dry completely.
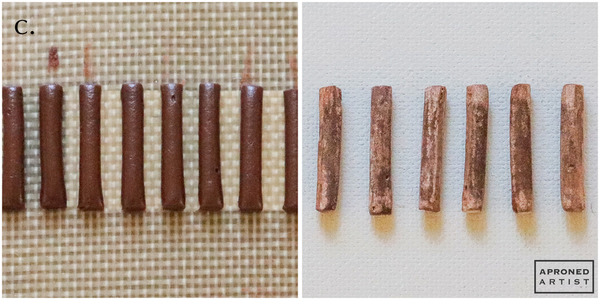
c. For the dock support logs, use the same brown icing and a Wilton #8 tip (or equivalent) to pipe a long line of icing on a silicone mat (or equivalent). Trim the icing to a length of 1 inch (2.5 centimeters). Repeat to create at least six support logs. Allow the icing to dry completely. (I let mine dry overnight.) Once dry, remove the log transfers from the mat, and use a food-safe file to make them more cylindrical.
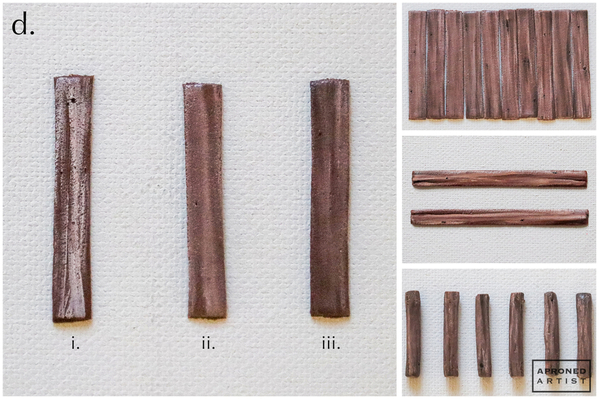
d. To paint the dock pieces, apply a small amount of white gel paste coloring to a transfer (i). Use a slightly damp medium flat paint brush and long brush strokes to blend the white paint (ii). Dip just the tips of the bristles in Espresso gel paste coloring (or equivalent), and brush off some paint so that the brush is fairly dry. Starting at one end of the transfer, use a single long brush stroke to apply streaks of dark brown. Turn the transfer 180 degrees, and repeat to apply dark brown starting at the opposite end (iii). Use the espresso gel paste coloring to accent any little air bubbles in the icing so that they look like knots in the wood. Use this same process to paint all of the dock components.
Step 4: Decorate lake cookie and assemble dock
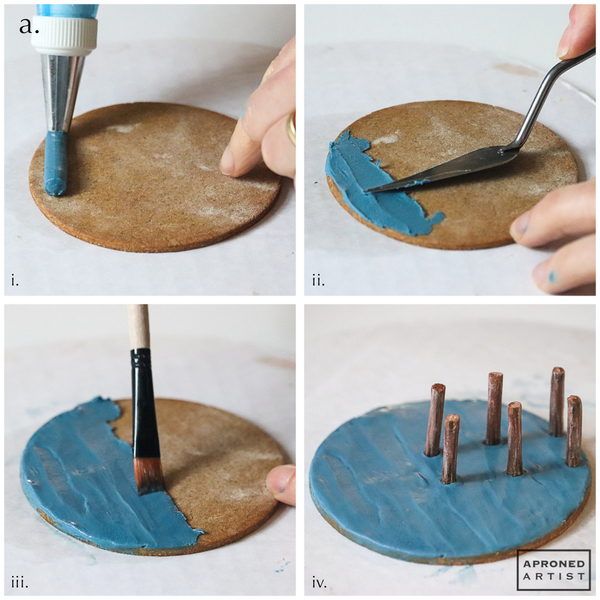
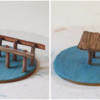
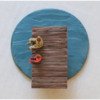
a. Using stiff-consistency blue royal icing and a Wilton #12 tip (or equivalent), pipe a line of icing near the top of the baked cookie (i). Use a small trowel or offset spatula to spread the icing in horizontal lines, creating irregular but roughly parallel ripples (ii). Repeat until you reach the middle of the cookie. Use a damp flat paint brush to lightly blend the icing, softening the texture slightly (iii). Continue to pipe, spread, and blend the icing this fashion until you’ve covered the entire cookie. While the icing is still wet, insert two dock support logs, standing upright, at the edge of the cookie about 1/2 inch (1.3 centimeters) away from each other. Insert another pair of dock support logs in line with the first pair, about 1/2 inch (1.3 centimeters) closer to the cookie center. Repeat with the final pair of dock support logs (iv). Allow the icing to dry completely.
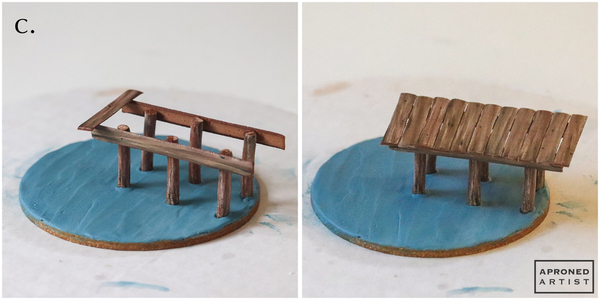
b. To attach one of the long support beam transfers, apply a small bead of stiff-consistency brown royal icing to the outside of the three inline support logs, and press the beam transfer in place. Its top edge should be even with (or slightly above) the top of the logs, and its painted side should be facing out. Repeat to attach the opposite support beam. Allow the icing to set for at least 15 minutes.
c. Apply a small bead of icing to the top edge of each support beam where you intend to place the first dock plank. Gently place the plank on top of the icing. Repeat to attach the remaining planks, spacing the planks as close to each other as possible.
Step 5: Attach remaining transfers
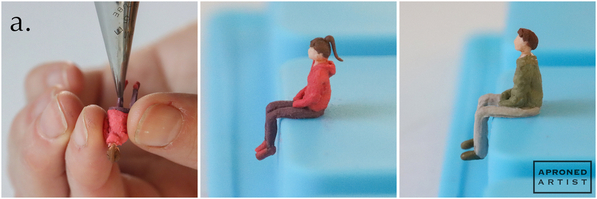
a. Carefully remove the daughter and dad transfers from their silicone mold(s) by gently depressing the silicone around the dried icing. The transfers’ calves will look unnaturally flat where they were making contact with the mold. Using stiff-consistency purple royal icing and a PME #1.5 tip (or equivalent), add some icing to round out the back of the daughter’s calves. Smooth the fresh icing into the dried icing with a damp paint brush. (If the back of her shoes also appear flat, touch them up with pink icing.) Repeat with khaki icing to round out the back of the dad’s calves.
b. Attach each transfer to the assembled dock with a small bead of icing that matches the color of its pants.
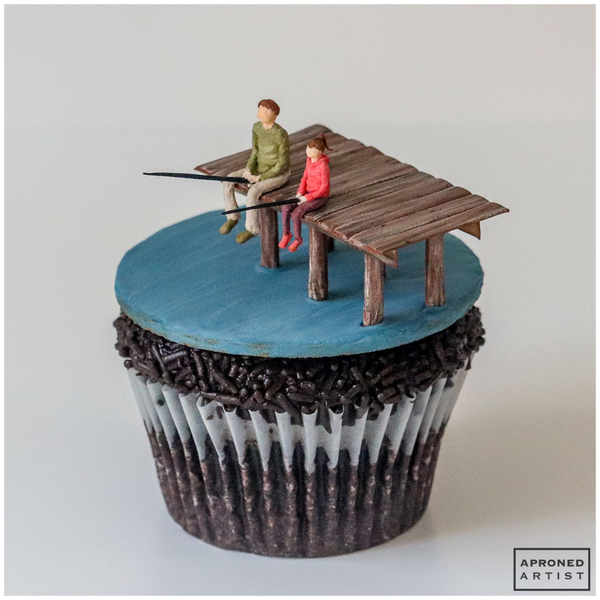
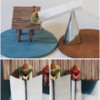
c. Place a Wilton #366 tip (or equivalent) adjacent to the decorated cookie. (You may want to elevate the tip with one or more spare baked cookies depending on the angle at which you want to attach the dad's fishing pole.) Fold a small square of parchment paper in half. Place the paper so that its crease sits within the “v” of the leaf tip opening and it bridges the gap between the leaf tip and the dad’s legs. Pipe a small dot of stiff-consistency peach royal icing between the dad’s legs, and press the thicker end of the large fishing pole into the icing, resting the length of the pole on the parchment paper bridge (i). Pipe two small beads of icing extending from the dad’s wrists to the handle-end of the fishing pole, and shape them with a damp paint brush to approximate hands (ii). Attach the daughter’s fishing pole in the same fashion using a Wilton #352 tip (or equivalent) with a folded square of parchment paper. Position the tip so that it creates the desired fishing pole angle. (I put my tip on the edge of the flooded cookie with a piece of parchment paper beneath it so it wouldn't scratch the blue icing.) Attach the small fishing pole with a small dot of peach icing between the daughter's legs. Pipe her hands with the same icing, and shape them around the pole (iii). Allow the icing to dry before carefully removing the parchment paper and pastry tip supports.
Finished!
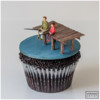
And because no celebration for my dad was complete without chocolate, the cookie is perfectly sized to adorn a jumbo chocolate cupcake.


Samantha Yacovetta began cookie decorating in 2013. While working at a local bakery, Samantha became captivated by cookie art when a customer requested princess-themed cookies. Attracted initially to the precision of cookie decorating, Samantha soon found that the limitless design opportunities turned it into her artistic passion. Samantha began regularly stocking the bakery case with decorated cookies and for several years sold cookies through her own company, Aproned Artist, a cottage food operation. Having retired from the business life, Samantha now enjoys making cookies just for fun from her home in San Jose, California, USA. To learn more about Samantha, please check out her Cookie Connection portfolio, her Facebook page, and her past Every Little Detail tutorials here.
Photo and cookie credits: Samantha Yacovetta
Note: Every Little Detail with Aproned Artist is a monthly Cookie Connection blog feature written by Samantha Yacovetta focused on the special little details that make big statements in cookie design. This article expresses the views of the author, and not necessarily those of this site, its owners, its administrators, or its employees. To read all of Samantha's past Every Little Detail tutorials, click here. And to see all of Cookie Connection's tutorials, click here.



















Comments (10)