Brush embroidery is one of those techniques that has so much potential, yet seems to be stuck in a perpetual rut of ruffles, flowers, and beach scenes. It's time we change all of that. For this challenge, I want you to take the basic brush embroidery technique, and create something completely new and unexpected.
But before I talk about the details of this challenge, let's talk about our PRIZE! One lucky entrant will be chosen at random from among all of the challenge entrants to receive . . .
Yes! A $100 gift certificate to Country Kitchen SweetArt (CKSA), donated by Cookie Connection host @Julia M. Usher. CKSA is one of Julia's favorite online shops, so this prize is one she hopes you'll particularly treasure in this time of decreased mobility.
What is Brush Embroidery?
Brush embroidery is a decorative technique that involves piping lines of royal icing in sections, and then using a damp brush to pull a portion of the icing away from the piped line. The result is a textured brush effect that resembles that of embroidered stitching.
According to Wilton, brush embroidery, as a sugarcraft, was traditionally done using royal or buttercream icing brushed onto fondant-covered cakes. In his book titled The Art of Royal Icing (2010), the legendary Eddie Spence MBE distinguishes among three types of embroidery: shading – where an outline is piped, and then partly brushed away, fully toward the inside or center of the outlined area; skeletonized – where the piped outline is broken but not brushed fully toward the center; and, stitched – where icing "stitches" of different shades and tones are piped to build up the design. (For the purpose of this challenge, we will NOT be using the stitched technique.)
Brush Embroidery Roses by CookiesArtByShirlyn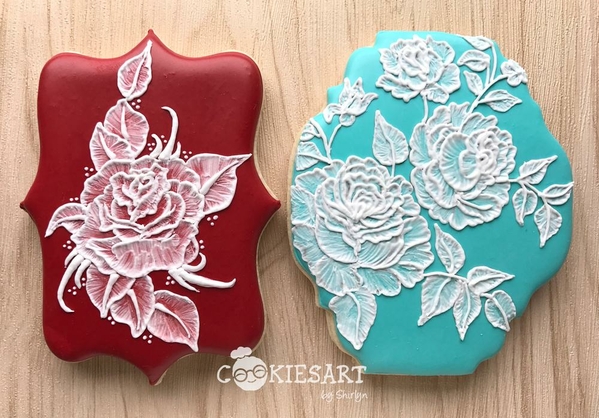 These cookies by @CookiesArtByShirlyn are an example of the shading technique.
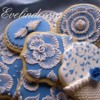
Royal Blue Cookies by Evelindecora In this set by @Evelindecora, the cookie in the top right is a good example of the skeletonized technique.
Embroidered with Icing by Ewa Kiszowara MOJE PIERNIKI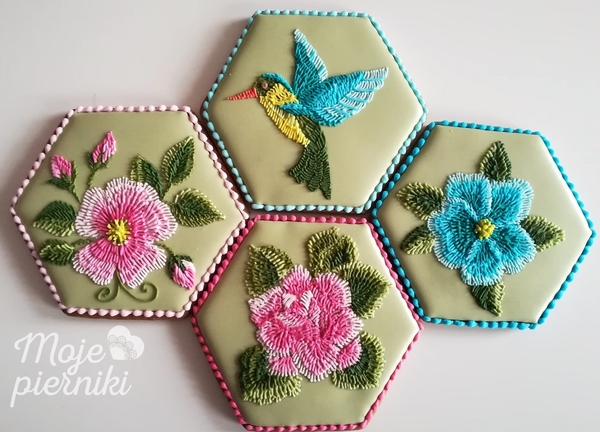
This set by @Ewa Kiszowara MOJE PIERNIKI is an example of the stitched technique. (Again, for the purpose of this challenge, we will NOT be using the stitched technique.)
Brush Embroidery Basics
Nowadays, brush embroidery is also used to embellish other types of sweets including cookies, and, luckily, there are plenty of tutorials to show us how it is done.
This video tutorial from Wilton is one that I highly recommend watching. It offers some very useful pointers as you are walked, step by step, through the complete process. This Sweet Sugarbelle guest post with Angela Rudy of Oh, Sugar! Events teaches how to make brush embroidery royal icing transfers, and also provides a few dos and don'ts.
Our own @Ewa Kiszowara MOJE PIERNIKI puts a twist on the brush embroidery technique by using piped dots in place of piped lines in her video tutorial.
Other tutorials such as this blog post and this video by @SweetAmbs (who certainly popularized this technique on cookies with her early tutorials) show us how to create elegant designs. I would also recommend you check out other tutorials like this Bluprint tutorial, this Jacqui Kelly post, or this Wilton video, which show how to create brush embroidery on fondant.
Inspiration can also be drawn from outside the sugar art world. Margo A. Clark uses a completely different medium to achieve her brush embroidery look. It is also interesting to see this technique being used as a decorative element in this soap bar challenge. I especially like this challenge entrant's video showing how she achieved her look on a three-dimensional surface, and how this entrant teaches us what can be achieved with a little practice.
Tips and Techniques
One thing you may have noticed from the above videos and blogs is that the consistency of the icing is not always consistent (pun intended). And that brings me to the technical side of things.
- Icing consistencies vary. There seems to be a difference of opinions when it comes to what the optimum consistency should be. Some favor a more loose consistency (i.e., Sweet Sugarbelle's tutorial) while others opt for a thicker consistency (i.e., SweetAmbs' tutorial). Part of this challenge is to experiment and see which consistency works best for you since it can depend upon the technique, the design, and the application.
- There is more than one technique. If you scroll through any of the countless brush embroidery images online, you will notice that the techniques used to achieve these looks can be as varied as the designs themselves. Icing lines can be pulled completely down to the center, creating a somewhat flatter appearance, and they can also be broken and only partially pulled, resulting in a design that has greater depth.
- Consider the size of your piping tip. Different tip sizes will produce different line thicknesses. A number two tip seems to be the most common size recommended, but you may want to experiment with different sizes, taking into consideration how they relate to other variables such as the technique you are using and the scale of your work.
- Brush type matters. Most tutorials recommend using the wide side of a square-tipped brush, but I would also encourage you to experiment using other types of brushes since different brushes can yield their own unique results.
- Color can create an impact. Most often we see white icing brushed against a dark background, which can look stunning – but there is a world of color out there. Multiple colors can be piped and then brushed one at a time, or they can be brushed and blended together all at once. The colors you choose and how you apply them are equally important as any other technique that you use.
Learn from the pros. In this hot-off-the-video-cam live Facebook demo, industry expert Susan Trianos teaches how to apply brush embroidery like a pro. She also shares the secret royal icing ingredient that helps her to achieve optimal results: piping gel. This demo is filled with useful information and is well worth watching. If you can't find piping gel, this Veena Azmanov post shows you two ways to create your own.
The Challenge
In short, do as I say, and NOT as I show! Do NOT recreate the traditional flower/leaf, ruffle, and wave designs depicted directly below or above.
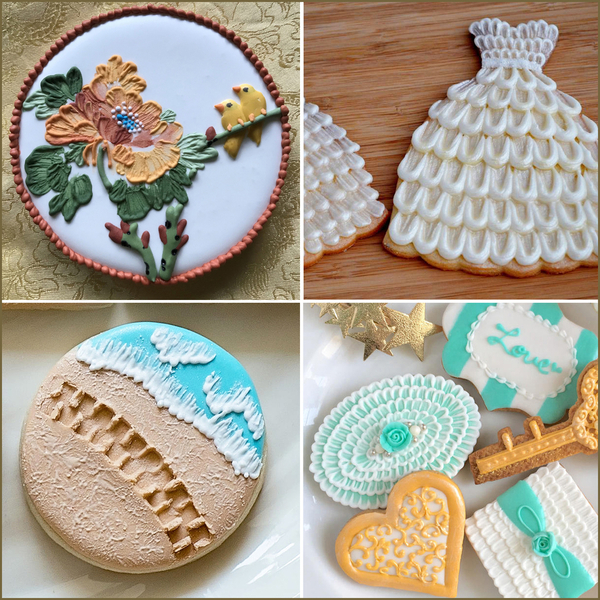 Note: Cookies and photos, clockwise from top left, by Karen C.W. (flowers/leaves), Belleissimo Cookies (ruffles), yokko (more ruffles), and joyks (waves on beach).
While all of the photos are beautiful and the above tutorials offer a wealth of information, I will admit that I had a hard time finding inspirational images for this challenge that went beyond these designs that have become so synonymous with brush embroidery. I did, however, find a few examples here on Cookie Connection that use brush embroidery in creative ways.
Spring is Coming by CHIKAKO.F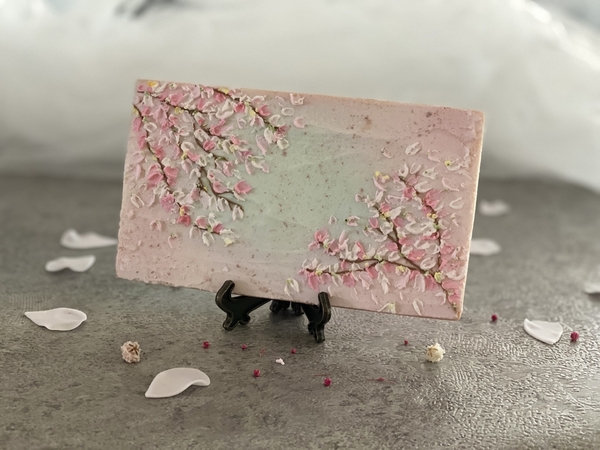
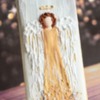
Angel by Karen from Piped Dreams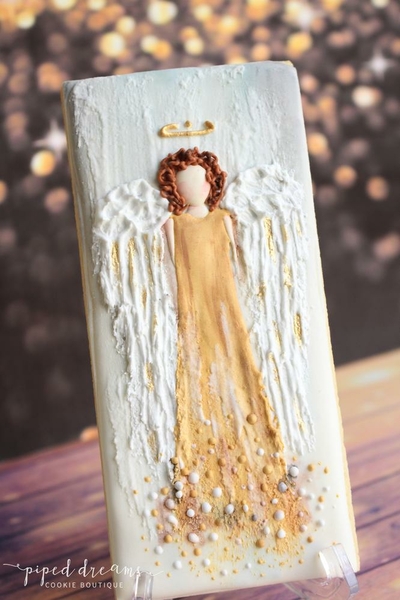
Season's Greetings by Michelle west Sion
The key to creating an original design is to forget about brush embroidery designs as we have come to know them, and focus solely on technique. For example, what if you could use brush embroidery to create a beautiful impressionist painting? Or, what if your brush strokes became the soft, colorful feathers of a bird in flight? Experiment. Start by piping your designs on parchment paper or acetate; see what happens when you combine different patterns and color. If you like what you have created, why not turn your experiments into royal icing transfers to use in your design? And who says your creation has to be two-dimensional, or piped flat onto your cookie? Hopefully, I have given you enough inspiration that you can begin to create your own original masterpiece.
RULES:
PLEASE READ THEM CAREFULLY. I would hate to disqualify an entry because someone failed to read ALL of the rules.
1. Create one cookie or a set of cookies that has brush embroidery as the dominant feature. Any other techniques or media that you use should be kept to a minimum, or omitted altogether.
2. You may NOT make cookies that depict traditional brush embroidery, which includes flowers/leaves, ruffles, or beach scenes/waves like, or similar to, the ones shown above.
3. Your brush embroidery design must be original, and not a copy of any other artist's design. And, remember, no copyrighted designs may be used without written permission.
4. As always, we ask that you make a brand new cookie project for this challenge.
And because Cookie Connection is all about learning and sharing, I would love for you to share in the comments section under your entry the different methods you experimented with, and how you achieved your brush embroidery design.
TO ENTER:
- Please post an image of your cookie OR cookie set to the site under the Practice Bakes Perfect clip set no later than July 5, 2020 at 5 pm central.
- Because these challenges are ongoing, we ask that you put "Practice Bakes Perfect Challenge #40" in your photo caption AND in a tag, so that we can tell the challenges apart from month to month. Please use the main title field to uniquely name your cookies as you normally would.
- Please also assign other relevant clip sets and tags to your images, as you normally would (meaning don't just use the Practice Bakes Perfect clip set and leave it at that, or your photos won't easily be found with keyword searches).
- You can enter more than once, but please post only one clip of each distinct entry. Multiple clips of the same entry are not allowed unless added in a comment beneath the one primary clip.
- The prize is given entirely at random. This means that everyone who participates in the challenge has an opportunity to be rewarded with our fantastic prize!
After the challenge has closed on July 5, we will announce the winner in the Saturday Spotlight on July 11. The next challenge will be announced about a week after that Spotlight.
And, remember, these challenges are NOT a competition. They are intended to inspire and motivate you to step outside of your comfort zone, to experiment and be creative, and to try something new. The goal is for you to challenge yourself artistically and technically, and to develop your skills so that you may reach your full potential as a cookie artist, and, of course, the goal is also to have fun along the way.
I can't wait to see what you create. If you have any questions about this challenge, or if you are looking for ideas, technical advice, or creative help - or if you just want to talk cookies - I would love to chat. You can leave me a comment below, or you can send me a private Cookie Connection message.

 Christine Dutcher's journey as a cookier began in early 2013 when an online search led her to the amazing world of cookie decorating. After spending countless hours learning all that she could, Christine decorated her first set of cookies in October 2013. In 2016, she decided that she would begin to focus on perfecting her skills, challenging herself each time to create more detailed and progressively complex pieces of cookie art. In 2019, Christine became one of the very first sugar artists from around the world to be named as an "Honourary PME Five Star Sugar Artist" by Knightsbridge PME. You can learn more about Christine's work here on Cookie Connection, and by following her Facebook and Instagram pages.
Photo credit: Christine Dutcher
Note: Practice Bakes Perfect is a bimonthly Cookie Connection blog feature written by Christine Dutcher that poses inspiration or challenges to get you to stretch as a cookie artist - for practice, for prizes, and for fun! Its content expresses the views of the author and not necessarily those of this site, its owners, its administrators, or its employees. Catch up on all of Christine's past Cookie Connection posts here.







Comments (18)