
It's clearly the season for hens! After Dolce Sentire's lovely Easter hen cookie box tutorial, I thought twice about presenting my own version. But perhaps you can't have too many hens approaching Easter, and there's always room for more eggs! [EDITOR'S NOTE: I agree! Plus, it's always fun to see different people's takes on similar themes.]
I had a vision of an Easter wreath-like nest, with eggs and feathers fitting in somewhere, and once I'd been sketching a while, I realised the feathers could be the nest. Arranged around eggs and/or hens, the "nest" can be made as large as you want, and built up with many layers. You can even "glue" the cookies together to form a proper wreath as a table centrepiece.
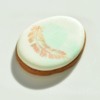
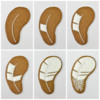
I think these designs, being pale, look best against a dark dough - chocolate would of course be appropriate, but I used gingerbread. I had some left over, so I shall get to eat it afterwards, and I'm rather partial to gingerbread! I don't have a feather cutter, and so I simply hand-cut an elongated "jellybean" shape for the feathers, above.
- Large (3-inch/7.5 cm) circle cookie
- A few medium (2-inch/5 cm) egg cookies
- At least 10 (3-inch/7.5 cm) feather cookies
- White royal icing (RI) in stiff, thick flood, and thin flood consistencies
- Piping bags and tips (specifically, Wilton leaf tip no. 67, which is about 1/4 inch/6 mm wide at the base, and PME writing tube no. 1.5, or their equivalents)
- Scribe tool
- Black sugar pearl (or small spot of black RI)
- Food colours: blue, green, brown, and red (I used Sugarflair Ice Blue, Party Green, Chestnut Brown, and Christmas Red)
- Clear, flavourless alcohol, i.e., vodka
- Wide food-use-only paint brush
- Gold lustre paint (or dust)
- Fine food-use-only paint brush
The Hen:
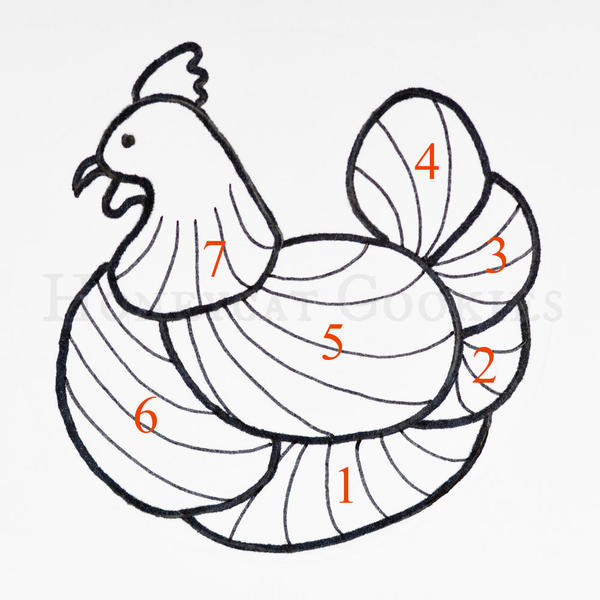
This little hen is all about texture. I planned the sections of the design to overlap, suggestive of the various overlapping sections of feathers on a real hen. The finer lines on the diagram indicate the direction of the piping within that section, and the numbers denote the order of piping the sections.
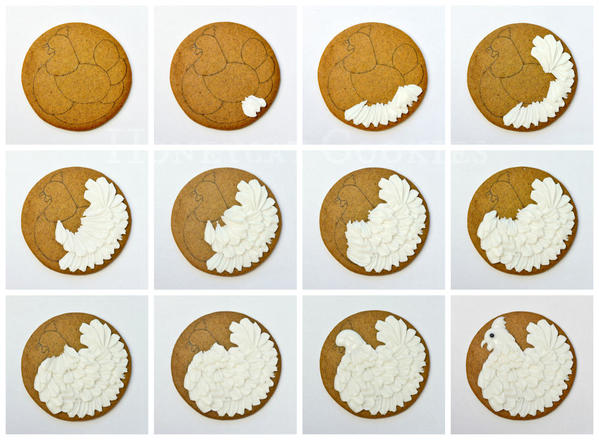
Once you have transferred the hen design to the circle cookie, use the stiff white icing with the leaf tip, and start piping "feathers" in rows from the outside in, with each feather and each row overlapping the previous one slightly. Move onto each section in turn, piping your feathers in the direction indicated by the fine lines, and ultimately ending with the neck of the hen.
Pipe the head with the thick white flood icing and the tip no. 1.5, allowing the softer icing to overlap the final neck feathers. Use a scribe tool, if needed, to get into any small spaces. Drop the black sugar pearl into the wet icing to create an eye. When the head has crusted slightly, pipe the wattle and comb.
The Feathers:
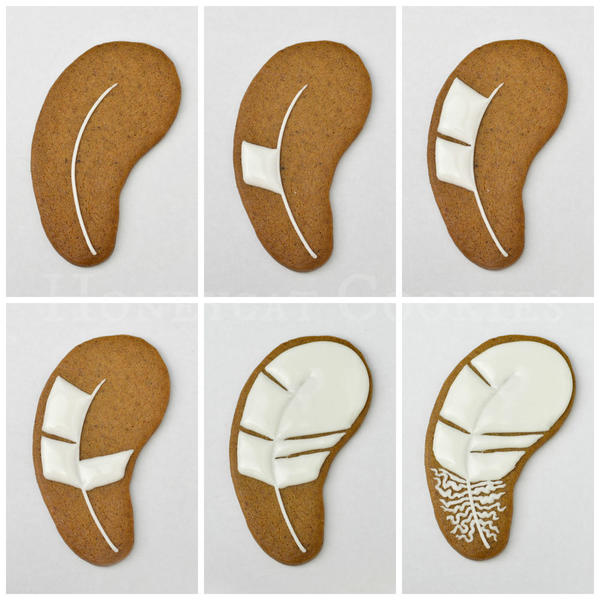
Using the thick flood icing and the tip no. 1.5, pipe the shaft of the feather. Start adding sections of the vane (aka upper feathers) partway up the shaft, and continue over the top and down the other side, with unevenly spaced fine breaks here and there. (To create more interest, vary all of these dimensions on each feather.) Finally, add wriggly afterfeathers on the exposed section of the shaft. (I had to research the anatomy of feathers simply to be able to write this paragraph!) [EDITOR'S NOTE: I can see that! I had to look up "vane" myself. ![]() ]
]
The Eggs:
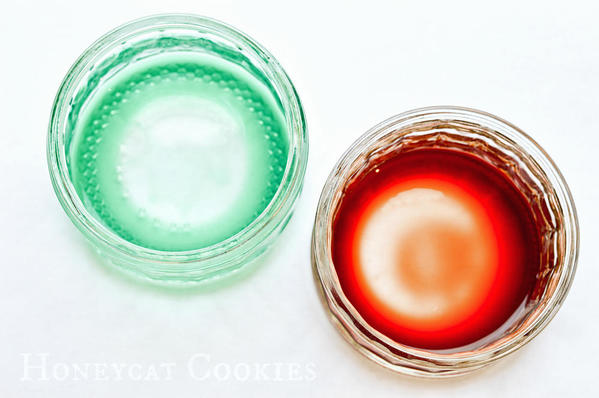
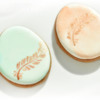
This one's easy. Flood the eggs in white and let them dry! Then we're on to the painting. I mixed up two basic colours: light blue-green and light reddish-brown, very much thinned with vodka. I wanted to try out a very "splashy" (i.e., watery) method of painting on these eggs, so I hoped the vodka would dry more quickly (than water or extract) and better preserve the RI surface. It did a bit, but not perfectly; the eggs lost the shine the dehydrator had given them. (In the UK, I can't seem to find very high proof, inexpensive alcohol like Everclear, only prohibitively expensive imported vodka. I need to do more investigating to see if higher proof alcohol will evaporate quickly enough to preserve the icing sheen.)
Using the wide brush, I then applied the "watercolours" to the cookies in broad, quick strokes, every so often adjusting the colours slightly, whilst using them, by adding a little more blue or green (or red or brown) to get a variety of shades across the cookie set. I painted the vanes of the feather cookies too, and added a little reddish-brown to the comb and wattle of the hen. All of the cookies were then set to dry briefly in the dehydrator.
Finally, using the fine paint brush, I painted the hen's beak with gold, added spots of gold to the feathers, and painted simple gold feathers "stuck" to the eggs, as pictured above. You could also speckle the eggs instead.
And now that we're done, I think I shall settle down with a coffee, a book, and a few feathers. [EDITOR'S NOTE: Yum! Sounds like a tasty plan to me!]

Cookie and photo credits: Lucy Samuels

 Lucy Samuels is the owner of UK-based Honeycat Cookies. Originally with an art-based career in mind, Lucy attended art college for a year after school but switched to nursing where she spent twenty years specializing in cardiology. After becoming a stay-at-home mom to her daughter Jess, Lucy experimented with a range of crafts, alighting upon decorative cookies almost by accident. In late 2011, she was persuaded to start her business Honeycat Cookies following several requests to place orders. She set about learning the craft from books, the internet, and trial and error. Lucy has a YouTube channel as well as a blog, Honeycat Cookies, that document some of her wider adventures in confectionery.
Photo credit: Lucy Samuels
Note: What's New, Honeycat? is a bimonthly Cookie Connection blog feature written by Lucy Samuels, which pushes the cookie envelope every other month with innovative cookie design ideas and tutorials. Its content expresses the views of the author and not necessarily those of this site, its owners, its administrators, or its employees. To catch up on all of Lucy's past posts, click here. And to see all of Cookie Connection's tutorials, click here.








Comments (21)