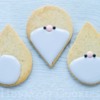
 I have always loved those funny little Nordic gnomes that pop up all over the place - in illustrations, as felt toys, as holiday cookies . . . Normally they're long and tall, with high hats and flowing beards. However, I ship most of my cookies, and try to avoid long thin shapes for fear of breakage. But I can't resist these little fellows, so I decided mine would have to be roly-poly chaps, bowling over their winter wonderland amongst the snowflakes and toadstools. I found the ideal cookie cutter shape was a teardrop, created with the largest cutters in this Ateco cutter set. And, of course, the pointy bit can be used for either the hat or the beard, and the gnomes can face any which way you like!
- Cellophane, acetate, or parchment paper for piping royal icing transfers*
- Royal icing:
- Thick flood-consistency in flesh, dark green, light grey, and three bright colours (i.e., green, blue, and red; see "Notes on Colours", below.)
- Stiff white
- Piping bags and PME #2 and #1.5 tips (or equivalents)
- Pink lustre dust (I used Sugarflair Shimmer Pink.)
- Medium and fine food-use-only paint brushes
- Granulated or sanding sugar, or disco dust
- Large (3 3/8- to 3 3/4-in/8.6- to 9.5-cm-long) teardrop cookies (Again, cutters can be found here.)
- Small black sugar pearls (I used these Wilton pearls.)
- Toothpick or scribe tool
- Metallic lustre paint or lustre dust mixed with alcohol, i.e., vodka or Everclear (I used Truly Mad Plastics Copper/Super Rose Gold lustre dust extended with a little Sugarflair Rejuvenator Spirit, which is fancy-speak for food-grade isopropyl alcohol.)
*Transfers are simply royal icing that has been piped on a surface other than the cookie, allowed to dry, and then transferred to the cookie. Piping shapes as transfers allows for more piping control, and minimizes the risk of messing up cookies by piping directly on them!
Notes on Colours:
For the flesh colour, I used Sugarflair Chestnut in a tiny amount. I chose a grey background for the beards, as it adds a little contrast to the white hair, and therefore increases the impression of depth and detail. To make a soft, warm grey, try adding a tiny bit of brown (again, I used Sugarflair Chestnut) as well as black (I used AmeriColor Black) to your white royal icing.
As for the other colours, you can, of course, use whatever you like, but for the wet-on-wet patterns on the gnome hats, it's best if you pick colours that contrast one another. To create the green and blue, I used Sugarflair Ice Blue and Melon Yellow in differing quantities. The rich red was created with AmeriColor Burgundy and Sugarflair Rose Pink. The dark green for the pom-poms was made with Sugarflair Spruce Green.
But, have fun and experiment with the colourings you have! I often find that necessity is the mother of invention. Mixing leftover batches of icing with fresh icing and new food colouring can create great new colour combinations!
Method:
1. First, create royal icing transfers for the noses and pom-poms. (I prefer to pipe my transfers on cellophane, as it is very flexible and dry transfers come off it easily. I cello-tape it to cardstock or directly to my dehydrator shelf.)

For the noses, use the flesh thick flood-consistency royal icing and a PME #2 tip (or equivalent) to pipe blobs, both round and oval, in different sizes. Once these blobs are fully dry, use a dry medium paint brush to dust them with a little pink lustre dust. These are chilly gnomes, and they have pink noses!
For the pom-poms, I have a store of previously created blobs of colour, sprinkled with granulated sugar, and packed away in airtight jars. I often use up leftover icing this way, as these pieces will last for years, and are excellent to have on hand for centres of flowers, buttons, abstract designs, and gnome pom-poms!

For some of these gnomes' pom-poms, I used my colourful sparkly blobs, and, for others, I chose to pipe new ones using dark green thick flood-consistency royal icing and a PME #2 tip, much like I piped the noses. The dark green added contrast and a mossy look, which went well with the mushrooms I paired up with these gnomes for Christmas.
Simply pipe blobs closely in rows (again, directly on cellophane, acetate, or parchment paper); then, while the icing is still wet, sprinkle the whole lot with granulated sugar, sanding sugar, or disco dust. Let the icing dry thoroughly, shake off the excess sugar or dust, and use immediately or pack away for later.
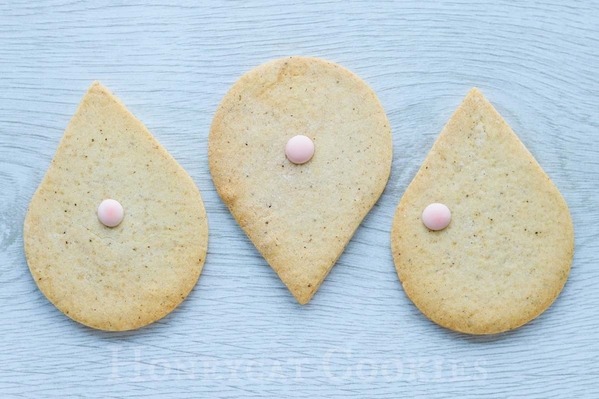
2. Use a small blob of stiff white royal icing to attach a nose to each cookie. Vary where you place the noses, and the orientation of your cookies. Some gnomes can have round hats, some can be facing sideways . . .
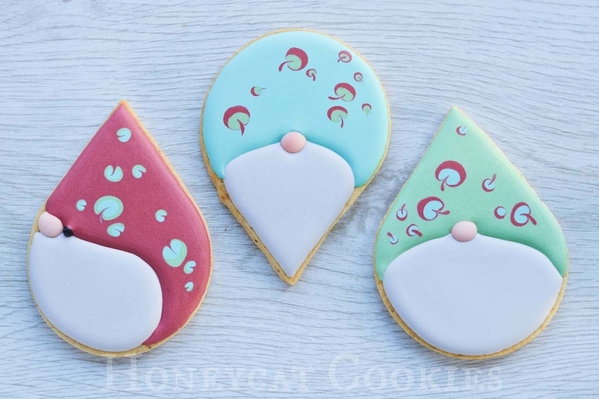
3. Now, using light grey thick flood-consistency royal icing and a PME #2 tip (or equivalent), pipe a beard tucked into the base of each nose and all over the bottom half of the cookie. (You can also use tip-less bags cut to an equivalent size, of course.) If you wish to add eyes, add the black sugar pearls while the grey royal icing is still wet. Allow this icing to crust.
4. Put all three bright thick flood-consistency icings into pastry bags fitted with PME #2 tips (or equivalents). (Again, you can also use tip-less bags cut to an equivalent size.) Work on one cookie at time. To form the hat, flood the remaining open area on the cookie with one of the bright colours, making sure it meets the gray beard and slightly covers the nose and any eyes. Immediately use the other two colours to create wet-on-wet or marbled patterns on top.
I made the little marbled toadstool shapes (below) by first piping large blobs of the darker colour on the base hat icing. Next, I superimposed a smaller blob of the remaining colour on top of each dark blob. And last, I picked up a tiny dot of the dark colour with a toothpick (or scribe tool) directly from the piping tip and swiped a little "stalk" up to and into each blob. But, again, get creative! You can make any wet-on-wet or marbled patterns you like - just be sure to work quickly when applying the colors so that none of the icing sets up as you work. (For more tips about the wet-on-wet and marbling techniques, please check out this Cookie Connection tutorial by @Manu biscotti decorati, here.)
Repeat this step on all of your cookies, and then let the royal icing dry thoroughly (several hours in a dehydrator or overnight).
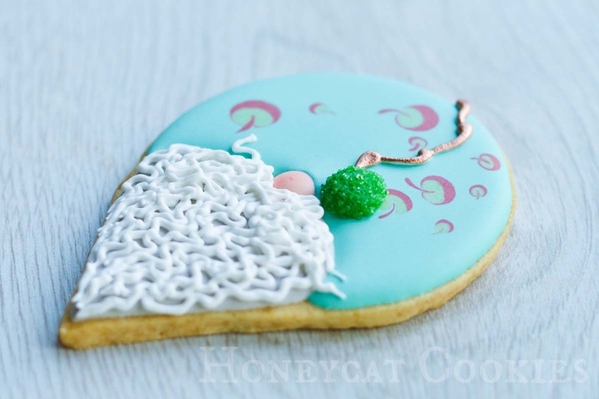
5. We're ready to pipe the beard hair! Using the stiff white royal icing and a PME #2 tip (or equivalent), start by piping a first layer of wiggly lines radiating from the nose on each cookie to the edge of the beard. Allow this layer to dry.

6. Switch to a PME #1.5 tip (or equivalent), and pipe more wiggly lines between the first ones, building up density in areas such as the moustache. Make sure to add little flyaway pieces on the hats and around the noses, and perhaps add eyebrows.

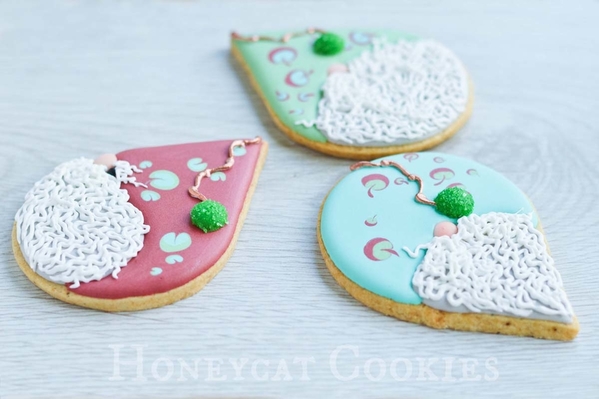
7. Now for the hat tassels! Start by piping cords from the tips of the hats in varying directions. (Use the same icing and tip used in Step 6.) I simply piped little overlapping segments of royal icing. But there are many ways to pipe cords, ranging from plain single lines to really realistic rope, as in this tutorial by @SweetAmbs. Attach a pom-pom to the end of each cord with a small blob of stiff white royal icing. Let the icing dry.
8. Using a fine food-use-only paint brush, paint the cords with metallic paint or lustre dust mixed with alcohol.
Have fun with your gnomes! Vary their shapes and their beards, add extravagant moustaches or hat brims . . . try different cookie shapes. Add a few snowflakes for winter, or flowers for summer, or toadstools and leaves for autumn. Who could resist these simple and versatile little guys bouncing their way across the cookie landscape?!
Happy New Year to everyone at Cookie Connection, and to all cookiers everywhere, from Honeycat Cookies!

 Lucy Samuels is the owner of UK-based Honeycat Cookies. Originally with an art-based career in mind, Lucy attended art college for a year after school but switched to nursing where she spent twenty years specializing in cardiology. After becoming a stay-at-home mom to her daughter Jess, Lucy experimented with a range of crafts, alighting upon decorative cookies almost by accident. In late 2011, she was persuaded to start her business Honeycat Cookies following several requests to place orders. She set about learning the craft from books, the internet, and trial and error. Lucy has a YouTube channel as well as a blog, Honeycat Cookies, that document some of her wider adventures in confectionery.
Photo credit: Lucy Samuels
Note: What's New, Honeycat? is a bimonthly Cookie Connection blog feature written by Lucy Samuels, which pushes the cookie envelope every other month with innovative cookie design ideas and tutorials. Its content expresses the views of the author and not necessarily those of this site, its owners, its administrators, or its employees. To catch up on all of Lucy's past posts, click here.












Comments (14)