 Merry Christmas, everyone! I think this is the first time I've had the opportunity to create a tutorial so close to Christmas. There are cookies everywhere! My dining room has been taken over with boxes and platters and tins and gingerbread . . . To top it all, the Honeykitten's birthday is just two days before Christmas, and I have been given very long and very descriptive orders of non-Christmas themed cookies to fulfill, which may or may not find themselves on my ever-growing to-do list.
And so it's lovely to be able to create these hanging bauble cookies that are fairly simple in execution, but rather elegant and luxurious in effect.
- Stiff(ish) gold, dark blue flooding consistency, and stiff green royal icing (RI) (See below for tips on consistency and colouring.)
- Piping bags fitted with round PME tips #1.5 and #3, and a small leaf tip (ST-50 or equivalent)
- Cellophane or acetate, onto which to pipe RI transfers
- Edible metallic paint in bright and dark gold (I used Rainbow Dust edible metallic paints.)
- Fine food-use-only paint brushes
- 3-inch (7 1/2-cm) round cookies with holes for ribbon, baked and cooled
- Scribe tool
- 4 1/2 x 6-inch (11 1/2 x 15-cm) cellophane bags
- Heat sealer (optional; I used one similar to this one, though I don't have a particular brand I recommend.)
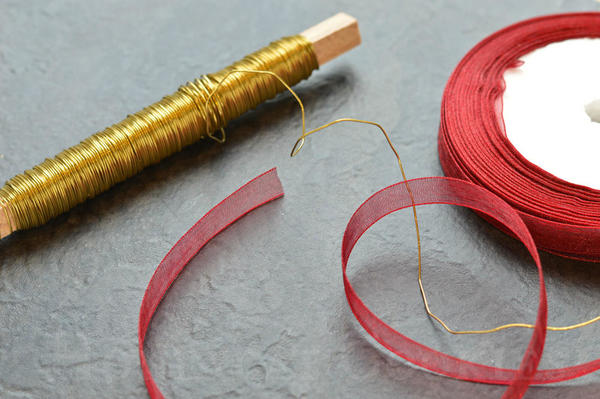
- Ribbon in 18-inch (45 3/4-cm) lengths (I used 1/3-inch-wide, or 1-cm-wide, organza.)
- Clip (I used OXO Good Grips Bag Cinches.)
- Fine, coloured floral wire in 10-inch (25 1/2-cm) lengths (I used this gold wire from my local craft shop.)
- Christmas tree!
Note on Colours:
To make the gold RI, I used my favourite combination: Sugarflair Melon Yellow with a touch of Chestnut. For the dark blue, I switched to AmeriColor, as dark RI with the Sugarflair equivalents won't dry as hard. I used Navy Blue and Violet with a touch of Black. For the green, I used Sugarflair Party Green, Spruce Green, and a touch of Chestnut.
Note on Consistencies:
The gold icing consistency is probably the trickiest to achieve. You want it to be stiff enough to hold a shape, but thin enough to smooth over when agitated with a scribe tool. When I'm not sure about the consistency, I will test the icing whilst it's still in the mixing bowl, ruffling it up and then using my scribe tool to move it around. This consistency will do for both the pears and the branches. The blue icing needs to be a 10- to 15-second flooding consistency, so that it settles with a little shake or tap, but doesn't flow over the edges of the cookies. The green needs to be nice and stiff to hold the leaf shape.
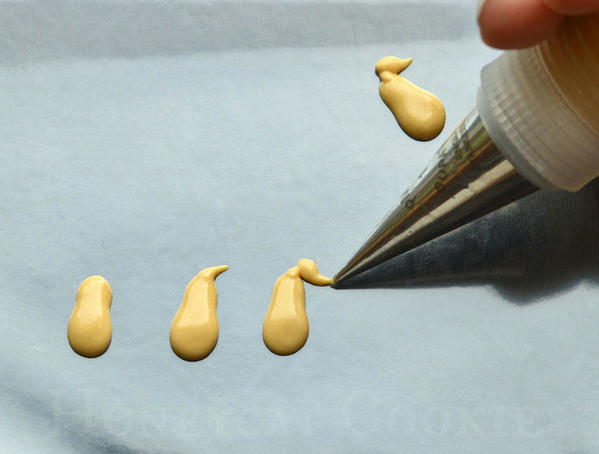
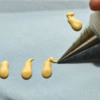
Step 1: Start by making the pears ahead of time (below). Pipe a fat pear shape, approximately 1/2 inch (1 1/2 cm) long, onto cellophane (or acetate) using a round PME #1.5 tip. Pipe a little stalk from the top, and then if you wish, pipe a little leaf. You'll need three pears per cookie. Let the transfers dry at least 24 hours.
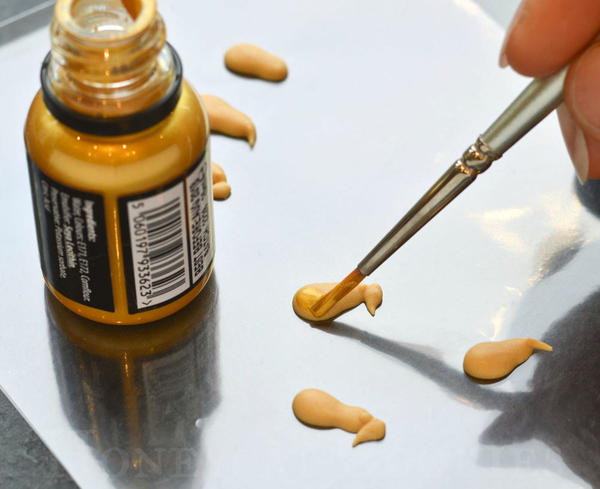
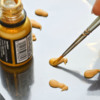
Step 2: Paint each pear with metallic gold paint (below), ideally while still stuck to the cellophane (or acetate) so it doesn't move, and let dry. Then remove from the cellophane.
Step 3: Now it's time to flood the cookies. I use SweetAmbs' technique (see her video here). For lots more tips on how to create perfectly iced cookie circles, see my Shabby Chic Summer Garden Cookies tutorial.
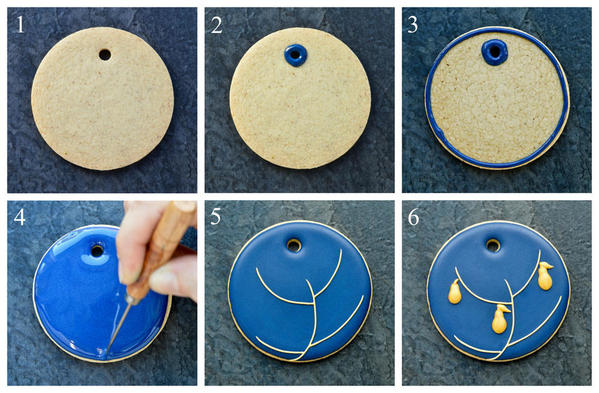
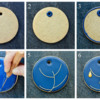
Aside: Use a large straw or piping tip to cut out the holes (1; below) before baking the cookies.
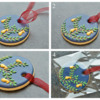
Using the dark blue RI and a round PME tip #3, pipe a circle around the hole in the cookie (2). Immediately pipe an outline around the whole cookie, but don't worry too much if it's not perfectly circular (3). Flood the cookie. Using your scribe tool, swirl the icing around the edges, easing out the perimeter where necessary, until the cookie is almost completely covered (4). Let the icing dry completely.
Step 4: Once the base flooding icing is completely dry, pipe the branches of your tree with the gold RI and a PME tip #1.5 (5). Using the same icing, pipe a little bit under each pear to "glue" all three into place (6).
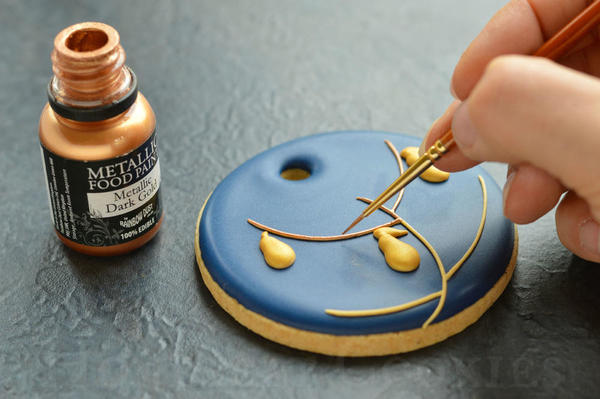
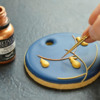
 Step 5: After the branches have dried, paint them with dark gold paint.
Step 6: Using your stiff green RI and small leaf tip, pipe leaves around all of the branches (below). As these cookies are going to be bagged to hang on a Christmas tree, I've found that where the leaf tips stick up, they are liable to be broken. So, after every four or five leaves, I take my scribe tool and gently push the tips down to touch the blue surface. This step is annoying to do, but it does protect the design. Allow some of the leaves to overlap the pears. Let the leaves dry thoroughly.
Step 7: Now it's time to package the cookie so it will look good on the tree, but also stay fresh until it's time to eat. You'll need your cellophane bags, a heat sealer (if you're using one), and ribbon. I like to use organza ribbon as it is pretty and inexpensive, comes in every colour you could want, and grips really well when you tie a knot in it. I discovered the wire whilst browsing in my local craft store. It's lovely and bright, and I bought several colours - before I knew what I wanted to use it for!
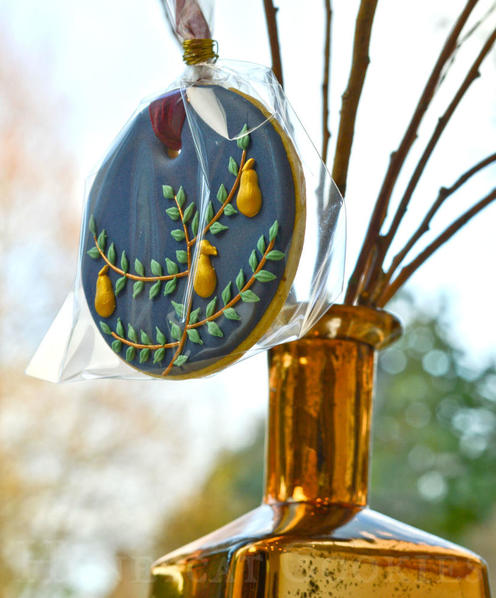
You want this cookie to display really well on the tree, and so be careful to keep the decorated side as visible as possible through the cellophane. Tying the ribbon so that the ends emerge on the back of the cookie helps (below).
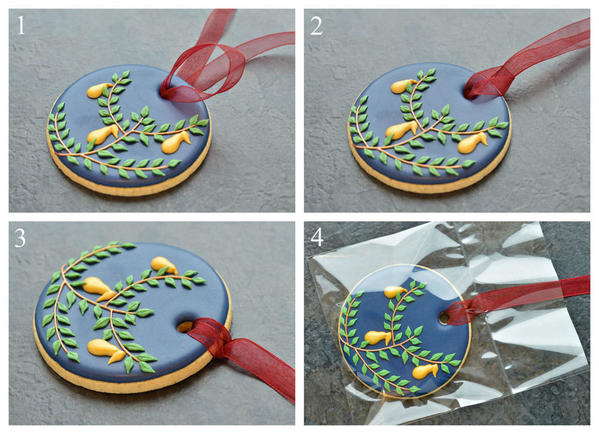
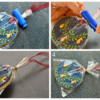
First, make a loop at the midpoint of the ribbon length; then push the loop through the hole from back to front (1). Pull the long ends of the ribbon through the loop (2). Gently, but firmly, ease the loop snugly into place over the top of the cookie, until the ends rise straight up from the back of the cookie (3). Keeping the ribbon flat, slide the cookie into the cellophane bag. If you are heat-sealing, do it now, and take care to keep the ribbons together and flat in the exact middle (4).
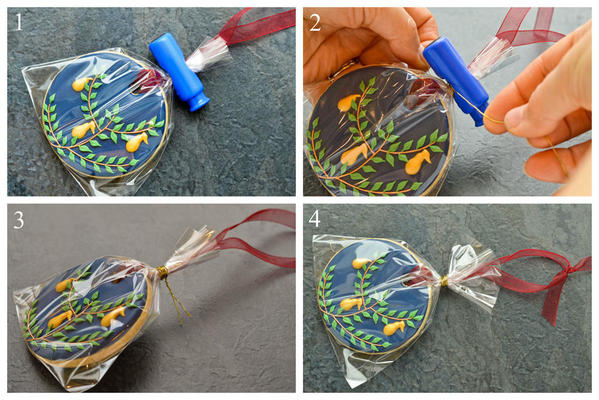
Neatly bunch the bag around the ribbon and hold in place with the clip (1; below). Taking your length of wire, wind it a couple of times tightly below the clip, starting about 1 inch (2 1/2 cm) from the end of the wire (2). Remove the clip and neatly wind the rest of the wire around the neck of the bag to form a little coil, leaving another inch at the end of the wire. Now twist the two ends together to hold the wire in place (3). Firmly bend down the twisted ends so they are out of the way, fan out the top of the bag, and tie a knot in the top of the ribbon (4).
Your bauble is ready to hang! Why not try different designs with different coloured ribbons and wires? These baubles will look so pretty and still be good to eat after many days on the tree.
Merry Christmas, and a Happy New Year to you all! I will see you in 2017 with my next tutorial!
Cookie and photo credits: Lucy Samuels

 Lucy Samuels is the owner of UK-based Honeycat Cookies. Originally with an art-based career in mind, Lucy attended art college for a year after school but switched to nursing where she spent twenty years specializing in cardiology. After becoming a stay-at-home mom to her daughter Jess, Lucy experimented with a range of crafts, alighting upon decorative cookies almost by accident. In late 2011, she was persuaded to start her business Honeycat Cookies following several requests to place orders. She set about learning the craft from books, the internet, and trial and error. Lucy has a YouTube channel as well as a blog, Honeycat Cookies, that document some of her wider adventures in confectionery.
Photo credit: Lucy Samuels
Note: What's New, Honeycat? is a bimonthly Cookie Connection blog feature written by Lucy Samuels, which pushes the cookie envelope every other month with innovative cookie design ideas and tutorials. Its content expresses the views of the author and not necessarily those of this site, its owners, its administrators, or its employees. To catch up on all of Lucy's past posts, click here.





Comments (11)