 Following on from my wisteria and butterfly post, I’m still in a flowery, summery mood (ignoring the rain outside). Unlike many of my tutorials, where I plan carefully in advance, sketching out ideas, or even drawing out designs in detail, this tutorial became one of those where my ideas evolved as I went along. It’s a risky (lack of) strategy, and usually causes a mixture of anxiety and delight, but it feels like winning a prize when the end result works!
This is essentially a beginner-level tutorial where we'll create a really easy, but richly decorated design that tests some basic cookie decorating skills. A flooded cookie, a simple stencil, and a bit of "painting by numbers" are all it takes. But like my garden in all this rain, this cookie grew into more than I intended! The postscript is more intermediate-level, requiring royal icing roses - but only if you fancy, or just can’t help yourself like me!
- Plain (about 3-inch) round cookies, baked and cooled
- Pastry bag fitted with PME #3 tip or equivalent
- Dusky pink flood icing and dove grey stiff icing (See colour and consistency notes below.)
- Scribe tool or toothpick
- Stencil with fairly small flower/plant design (I used one from Killer Zebras, which is not currently in production, but any similar floral pattern will work.)
- Flat-edged or offset spatula, for spreading icing over stencil
- Petal and lustre dusts in pinks and greens (See colour note below.)
- Clear, flavourless alcohol, i.e., vodka
- Fine food-use-only paint brushes
- Royal icing roses in white, pre-made and dried
- Petal or lustre dusts in bronze, and dark and light greens (See colour note below.)
- Fat food-use-only paint brush
- Pearl lustre spray
- Leftover stiff icing for "glue"
- Royal Icing: To create the dusky pink icing, I used Sugarflair paste in Claret and Chestnut Brown, and, for the dove grey, I used tiny amounts of Dark Brown, Royal Blue, and Pink.
- Painting: I used Rainbow Dust petal dusts in Autumn Green, Citrus Green, and Salmon, plus a little Sugarflair Claret Wine lustre dust.
- "Aging" effect: I used Sugarflair Bronze Splendour lustre dust.
- Roses: I used Sugarflair Bronze Splendour lustre dust and Dr. Oetker Silver Shimmer Spray (which comes out pearl white rather than silver), plus Rainbow Dust Citrus Green petal dust and Sugarflair Claret Wine lustre dust.
Note on Consistencies:
For flooding the circles, I used ten-second icing, which is where ruffles and peaks will sink back into the base icing, leaving a mostly flat surface within ten seconds. This consistency is thick enough to pipe controlled circles without running off the cookie, whilst being thin enough to work around the edges with a scribe tool before the icing crusts. For stenciling, I used stiff icing, like soft butter, easily spreadable with a spatula.
Flooding a Circle:
This is something I avoided for a long time by designing around it (read: persuading customers that there were much more effective shapes for their cookies than "boring old circles")! But with practice, piping perfect circles really does get easy. There are several ways to approach the task, and I tried most before settling on the method I first spotted SweetAmbs demonstrating here. You can see me using this method in my video below.
- Try to mix your dough as little as possible. This approach avoids whipping in air and overworking the gluten, both of which cause shapes to deform while baking.
- Use as little raising agent as possible.
- If you have a flimsy cutter, try using a plastic plate to press down on it evenly so it doesn’t distort when cutting the dough.
- Roll and cut very cold dough, so shapes don’t deform as you’re transferring them to the baking sheet.
- Freeze your cut cookies about 15 minutes before baking.
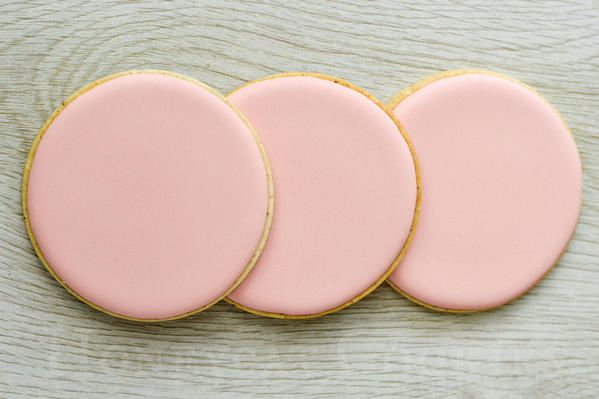
Next, pipe the outside circle as a "dam" for the flood icing. In the past, I have tried drawing a circle with a scribe tool as a guide, but if you have reasonably circular cookies, it's more straightforward to use the cookie edge itself as a guide. Leave a small gap around the edge, and pipe a fat outline with your ten-second flood icing, using either a PME #3 tip (or equivalent) or a tipless bag with the end snipped off to a similar diameter. Don’t worry about little shakes and unevenness at this stage.
Immediately fill in the circle with flood icing, giving it a shake or a tap if necessary to help settle the surface. (We’ll need a really smooth flat surface for stenciling.) Use the scribe tool in a circular motion to ease out uneven areas around the edge. I prefer to do this all by eye, because rarely will either the cookie or my piped outline be perfectly circular, and often it’s more a matter of getting a compromise that looks right to a cookie admirer rather than to an expert in Euclidean geometry! (And don’t forget: dots and beads piped around the edge can disguise all manner of irregularities.)
Let the cookies dry thoroughly – the icing needs to be hard enough to take the pressure of stenciling. I dried mine overnight.
Stenciling:
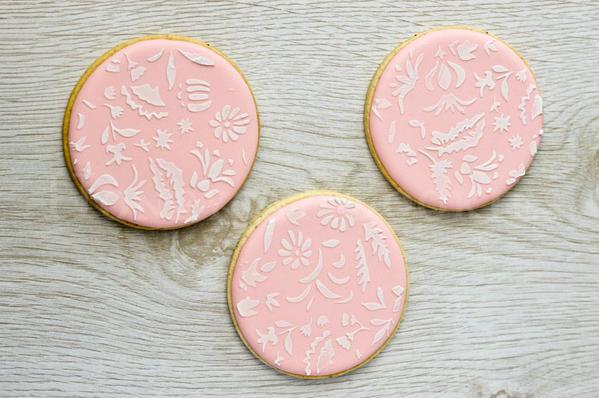
For tips on stenciling, it makes much more sense to hand you over to the Stencil Professor (aka Julia) than repeat it all here, as I’m barely used to it myself (you might notice a little cack-handedness in my video). Pop over to Julia's video, and see how to stencil properly! Then once you’ve stenciled your cookies, had a break, and let them dry, head back here for the rest of this tutorial . . . [EDITOR'S NOTE: Thanks for the shout-out, Lucy! I'd also like to encourage readers to check out our latest Practice Bakes Perfect challenge for a great overview of stenciling methods and, of course, challenge rules - there's still time to enter!]
Painting:
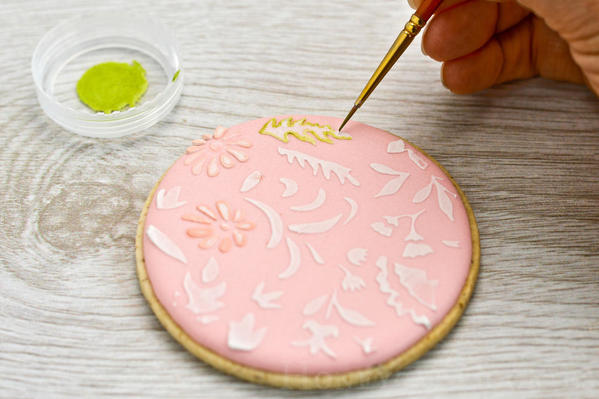
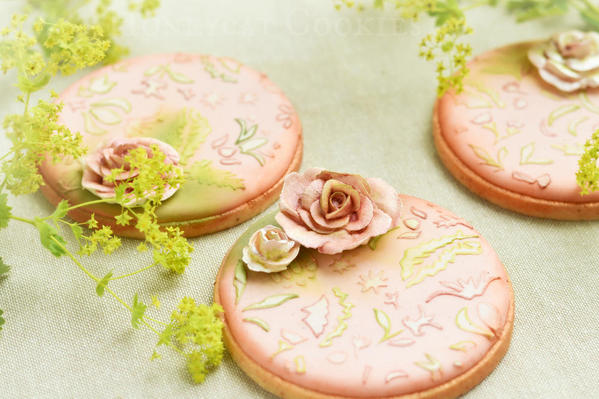
For the painting, I decided to use my petal dust, mixed with a little vodka, as it makes an opaque paint. Don’t worry too much about being perfect; just use a fine paint brush, and paint the edges of all the little pieces. Easy, pleasant work.
"Aging" the Cookie Edges:
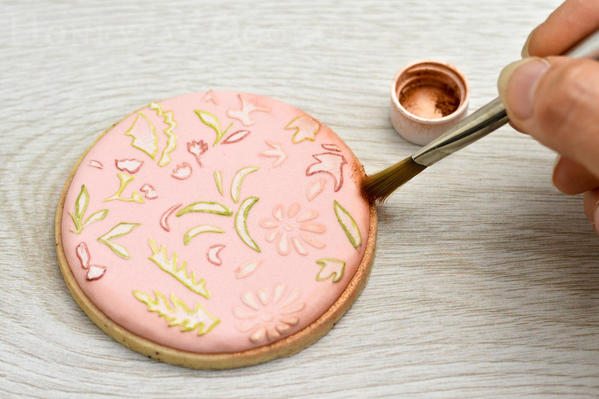
To get a really "shabby chic" look, dust all around the cookie edge with bronze lustre dust. I initially tried a plain brown petal dust, but found it just looked "dirty" against these rich colours; then something told me that lustre dust was needed. (Or is that my addiction again?!)
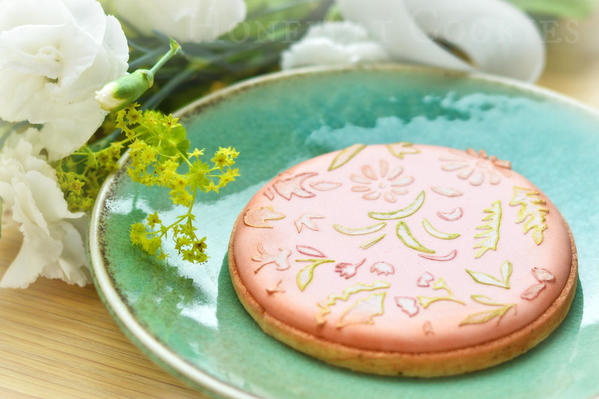
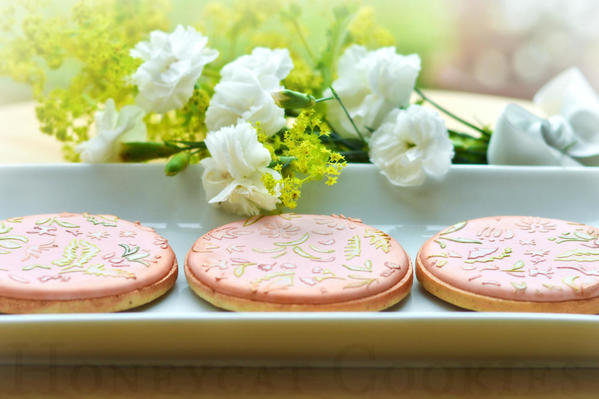
And that’s it - all you need to create perfectly simple summer shabby chic cookies! Take a look at my little video below, showing all the steps I've described above.
But wait . . . there’s more. Why do something simple when you can make it complicated? We’re cookiers, that’s what we do . . .
Postscript:
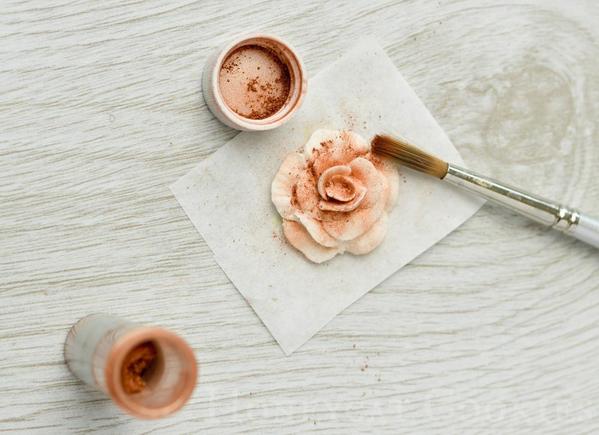
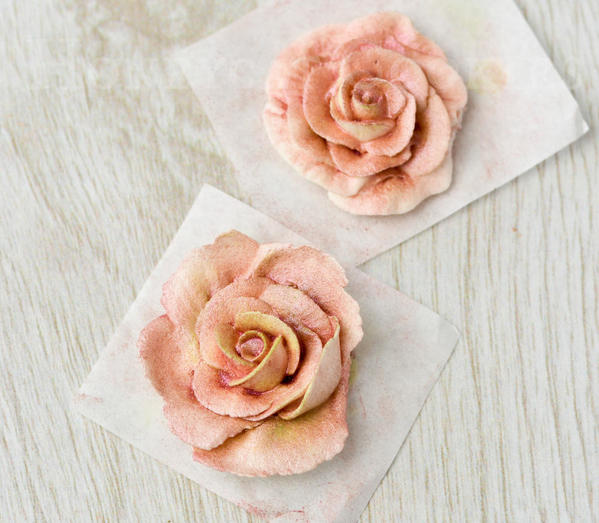
To dress up these cookies, I used some leftover white royal icing roses, which I gave the "shabby chic" treatment using dusts. For an excellent roundup of royal icing rose advice and tutorials, pop over to Bakerloo Station's (aka Christine Donnelly's) Practice Bakes Perfect Challenge #16 (now completed).
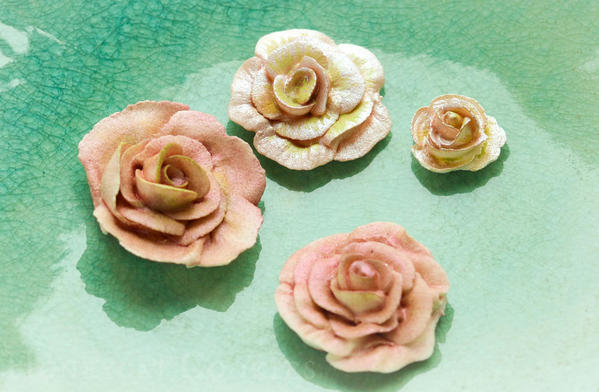
For the gleaming ones (top right), I first dusted with Bronze Splendour, and then sprayed with Dr. Oetker Silver Shimmer Spray (which is really a pearly white), which gave them a lovely dusky pink shine.
Then I added just a little Citrus Green paint on a few of the petals.
Whereas for the darker ones (below), I dusted with Citrus Green around the edges, and then with Claret Wine everywhere else. I love the deep dusky look that the latter dust gave them.
Prior to sticking the roses onto the cookies, I had to decide whether to mix up some green icing for leaves. Mix icing? Nope – not when I can use more dusts instead! I simply dusted a patch of each cookie with the Citrus Green and Autumn Green, plus a little Salmon Pink to blend the edges. This dusting created a "leafy" background onto which I "glued" the roses with a little of the leftover grey stiff icing.
I love how these cookies turned out. Perfect at an evening garden party. I can picture it now: the setting sun, a light breeze, straw hats, gauzy scarves, lanterns being lit, prosecco in one hand, a cookie in the other . . .
Cookie and photo credits: Lucy Samuels

 Lucy Samuels is the owner of UK-based Honeycat Cookies. Originally with an art-based career in mind, Lucy attended art college for a year after school but switched to nursing where she spent twenty years specializing in cardiology. After becoming a stay-at-home mom to her daughter Jess, Lucy experimented with a range of crafts, alighting upon decorative cookies almost by accident. In late 2011, she was persuaded to start her business Honeycat Cookies following several requests to place orders. She set about learning the craft from books, the internet, and trial and error. Lucy has a YouTube channel as well as a blog, Honeycat Cookies, that document some of her wider adventures in confectionery.
Photo credit: Lucy Samuels
Note: What's New, Honeycat? is a bimonthly Cookie Connection blog feature written by Lucy Samuels, which pushes the cookie envelope every other month with innovative cookie design ideas and tutorials. Its content expresses the views of the author and not necessarily those of this site, its owners, its administrators, or its employees. To catch up on all of Lucy's past posts, click here.







Comments (13)