Well, hello, sweet peeps! I have a great challenge in store for you this time. Our subject is lace, and with so many "lacy" holidays coming up - Valentine's Day, St. Patrick's Day, and Easter - I am looking forward to seeing Cookie Connection overflowing with a ton of gorgeous lacy creations! The possibilities for this challenge are literally endless, so get those creative juices flowing and let's go!
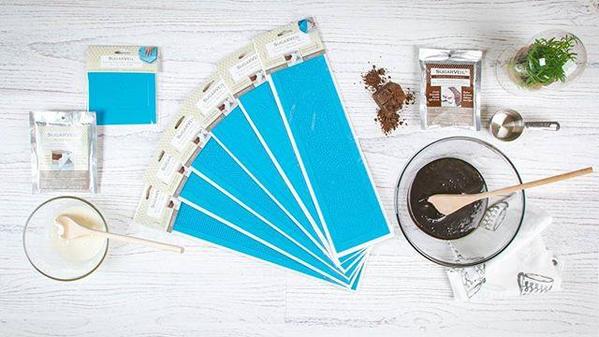
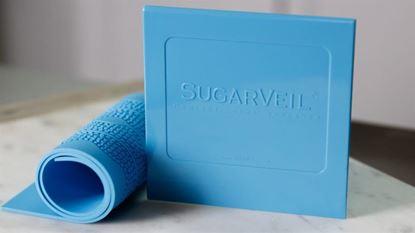
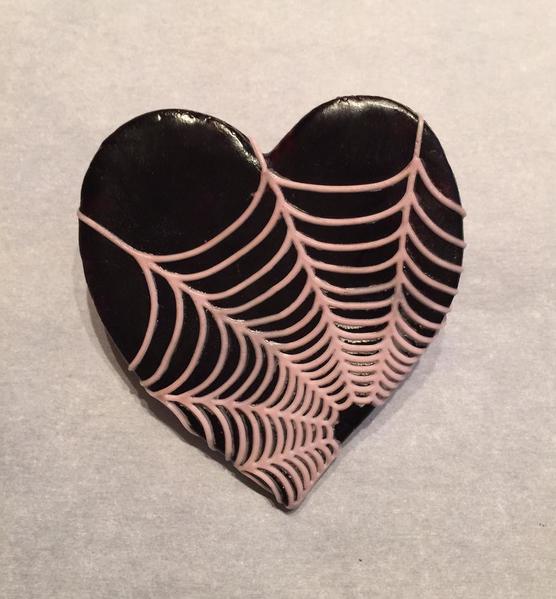
As with all of our Practice Bakes Perfect challenges, this one will involve a prize, which will be awarded entirely at random to one lucky entrant. Very appropriately, the prize for the challenge is being generously donated by none other than Michele Hester, owner and founder of SugarVeil®, the original edible sugar lace. And just what IS this spectacular prize, you ask? It's a WHOPPING $100 gift certificate to use on your own choice of SugarVeil® products in their online store. Now THAT is what I call a prize! (In the following five photos, you'll see a small sampling of the SugarVeil® line, as well as some heart cookies, courtesy of Michele, that make stunning use of her edible sugar lace.)
So, with visions of that amazing prize dancing in your heads, let's talk about the details and rules for this challenge. What I want you to do is create a large-format cookie or set of smaller cookies using two or more lace techniques. For purposes of this challenge, the lace-making techniques we will be exploring include: edible sugar lace made with mats, such as SugarVeil®; piped lace; and needlepoint lace (made both with and without edible lace). Now, let's break down these techniques with some examples and links to tutorials to help you acquire some mad lace skills!
1. Edible Sugar Lace, including SugarVeil®
Edible sugar lace, which was originally invented by Michele Hester, owner of SugarVeil®, is an ultra-flexible lace made of (in the case of SugarVeil®) sugar, maltodextrin, dried egg whites, cornstarch, and xanthan gum. It comes in powdered form, and can be used for decorating a wide variety of edible items, from cakes to cookies and puddings, and lots more. Edible sugar lace is made by first mixing the sugar powder with water, in most cases. The mixture is then spread onto a textured silicone mat, the excess is scraped off, and the residual material is left to dry in the mat. Once dry, the lace can be removed from the mat and shaped as desired to accommodate whatever pastry, cake, or cookie you have. Watch Michele Hester herself show how to make SugarVeil® lace in this video tutorial. You can also see an incredible array of cookie projects that utilize SugarVeil® lace (all of which have accompanying tutorials!) in this collaboration that was previously featured on Cookie Connection. And here are a few other examples of cookies using edible lace, made by members of the Cookie Connection community:
SugarVeil® Series by Cookies Fantastique by Carol
Boho Neon Cookies by Lorena Rodriguez
Valentines by SugarVeil®
2. Hand-Piped Lace
Edible lace, such as SugarVeil®, gives you a lot of options for creating very intricate lacework in a short amount of time, even if you don't have super piping skills. However, if you've got more piping experience, or if you don't have access to the silicone mats necessary for edible lace products, then hand-piped lace is an excellent option for you. Here are some examples of piped lace:
80th Birthday Keepsake by Teri Pringle Wood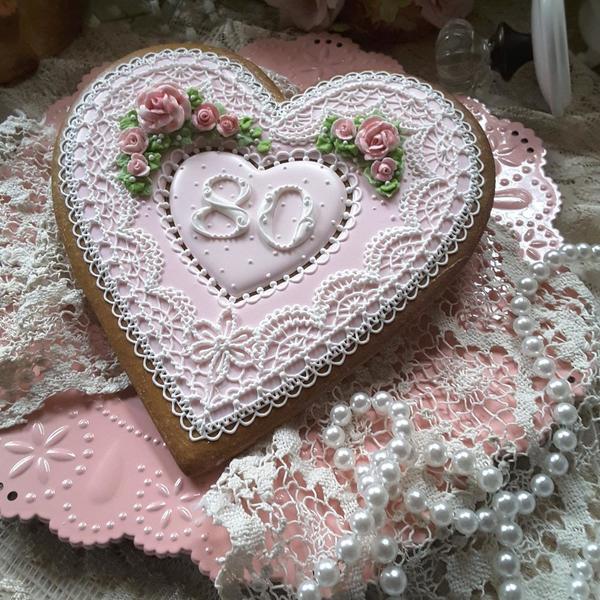
Birthday Keepsake by Teri Pringle Wood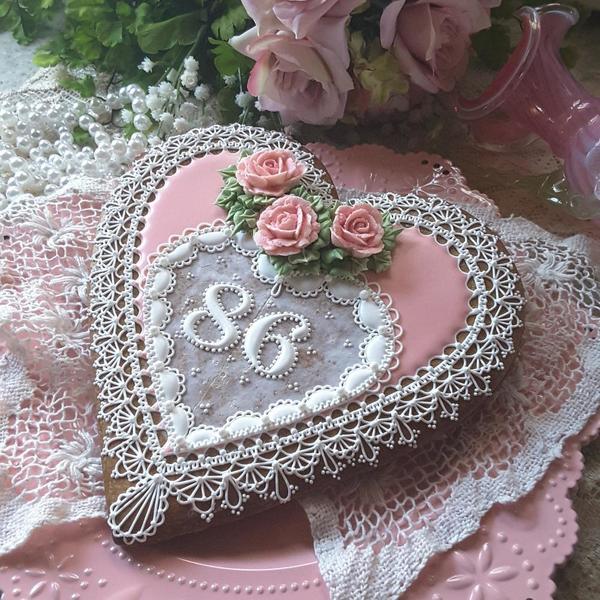
Easter Cookies with White Lace Design by Tunde
You can see how Tunde created her special pipe-and-flood (aka eyelet) lace, shown in the example above, in this tutorial.
Or, you could combine techniques, as Tina did below, and use both edible lace elements and hand-piped elements:
Hearts by Tina at Sugar Wishes
3. Needlepoint
Our last category of lace is needlepoint, which can be done one of two ways: with an edible lace grid or with a hand-piped grid. A needlepoint effect is achieved by piping tiny dots in an arranged pattern on a tiny, regular grid. Here is a gorgeous example of both needlepoint (with hand-piped grid) and hand-piped lace (similar to the lace used in Tunde's Easter egg cookies in the example above):
White Needlepoint Hearts by Natasha Rusak
Needlepoint Heart Detail by Julia M. Usher
I can hardly believe it, but Julia's needlepoint grid in the example above is hand-piped! However, for those of us who do not have quite as steady a hand as Julia, you could use edible lace grids to create your needlepoint, as in the following two examples. [EDITOR'S NOTE: Actually, the trick to grid piping isn't so much a steady hand as having the right icing consistency. The icing needs to have enough body that the fine lines don't spread much when they hit the cookie, but it can't be so thick as to cause breaking of the lines when piping.]
Cross-Stitch/Needlepoint Valentines by SugarVeil®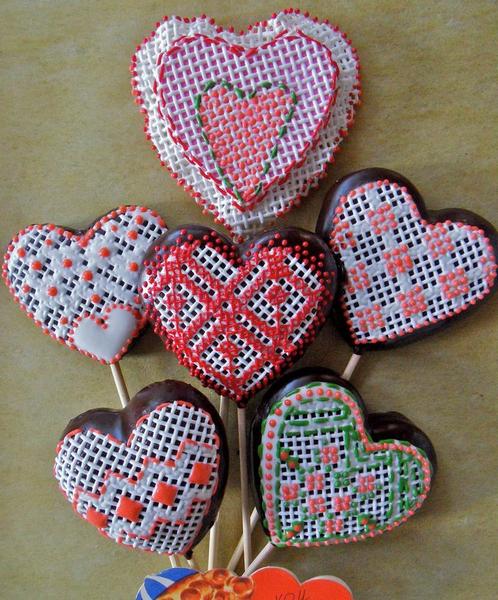
3-D Easter Baskets by Julia M. Usher
Julia used the SugarVeil® Needlepoint mat for her grid on these baskets because it's much easier to wrap an edible lace grid around curved cookies than it is to pipe straight lines on them! Julia even has a tutorial for these needlepoint baskets.
Now that you're familiar with all of the relevant techniques for this challenge and are armed with enough tutorials to make you a lace expert, let's talk about the rules for this challenge. Please read and follow them carefully.
Rules:
1. Create one large format (6-inch or greater) cookie or set of at least five (5) smaller cookies using two or more of the lace techniques listed above. For example, a single cookie might use hand-piped needlepoint and SugarVeil® (or other brand) lace details, or a set of cookies may have some cookies that use SugarVeil® and others that have hand-piped lace. If you make a set of cookies, you may distribute the two techniques across the set; however, every cookie in the set must have at least one lace element, and the set must have a total of at least two lace elements.
2. In the first comment under your entry, please list the lace techniques that you used.
3. As always, we ask that you make a brand new cookie (or cookies) for this challenge.
4. Think outside the box, take some healthy risks, and HAVE SOME FUN.
- Please post an image of your cookie (or cookies) to the site under the Practice Bakes Perfect clip set no later than March 19, 2017 at 5 pm central.
- Please state which lace techniques you used in the first comment under your entry photo. This information is a requirement of the challenge; photos without it will be disqualified.
- Because these challenges will be ongoing, we ask that you put "Practice Bakes Perfect Challenge #21" in your photo caption field AND in a tag, so that we can tell the challenges apart from month to month. Please use the main title field to uniquely name your cookie as you normally would.
- Please also assign other relevant clip sets and tags to your image, as you normally would. (Meaning don't just use the Practice Bakes Perfect clip set and leave it at that, or your photo won't easily be found with keyword searches.)
- You can enter more than once, but please post only one clip of each distinct entry/cookie. Multiple clips of the same entry/cookie are not allowed unless added in a comment beneath the one primary clip.
After the challenge has closed on March 19, we will announce the winner in the Saturday Spotlight the following weekend (March 25). The next challenge will be announced after that Spotlight.
And one last thing . . . This is NOT meant to be a competition. The only person you should be competing against is yourself. Period. These challenges are intended to inspire the artist in you and push you to be the best cookie artist YOU can be at this snapshot in time. Remember, the whole point of this exercise is to get you out of your comfort zone - to "take healthy risks," as my wise-beyond-his-years son always reminds me. Plus, prizes are given entirely at random, so healthy risk-taking has its own rewards!
I would love to chat with you as you journey through this process, so if you have any questions about the challenge, are having trouble getting started, need help bringing an idea to life, or want technical advice, please leave a comment below.

 Christine Donnelly began her professional baking career at 16, when she was hired on the spot at her local bakery to work the counter and decorate cakes. After detours to college and law school, she worked as a trial lawyer in Chicago for many years, ultimately leaving that career to become a stay-at-home mother to her two children. In her “retirement,” she continued to bake at home, at last finding her preferred artistic medium in decorated cookies. In February 2013, Bakerloo Station was born with a presence on both Facebook and Instagram. Christine makes cookies to balance her left brain, to inspire and share creative ideas, and to feed those needs that only art can satisfy.
Photo credit: Christine Donnelly
Note: Practice Bakes Perfect is a bimonthly Cookie Connection blog feature written by Christine Donnelly that poses inspiration or challenges to get you to stretch as a cookie artist - for practice, for prizes, and for fun! Its content expresses the views of the author and not necessarily those of this site, its owners, its administrators, or its employees. Catch up on all of Christine's past Cookie Connection posts here.




Comments (19)