
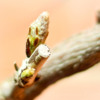
I was inspired to create these cookies by this odd little thing (below). Doesn't look like much, does it? But it's the most exciting thing I've seen in my garden for years! It's a tiny flower bud on my wisteria. I've had this plant for eight years, and each year I've trained it and pruned it properly in both summer and winter, and each year I've watched it carefully for any signs of any flowers. At all. Nothing! Eight years! But then this year, at least fifty buds are clearly turning into flowers. I've been checking on them every day, just in case it's some kind of horticultural fraud, but, no, my wisteria is finally flowering! [EDITOR'S NOTE: Yay! I love wisteria!]

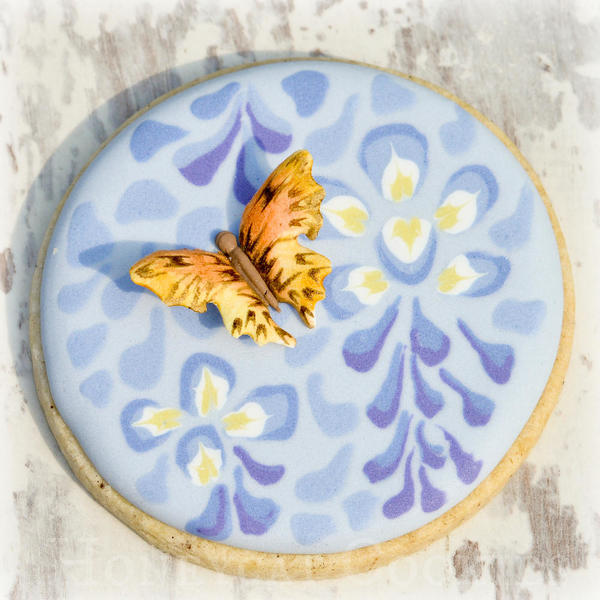
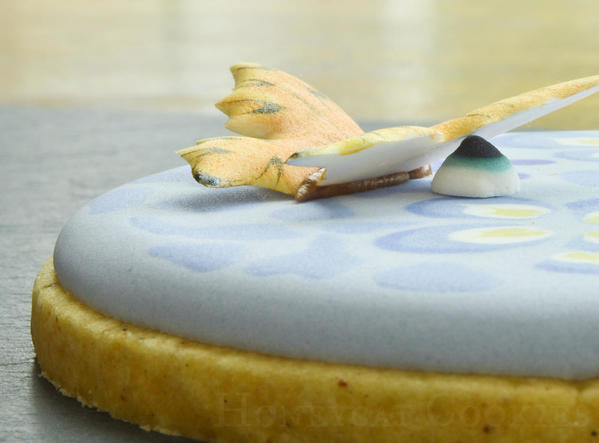
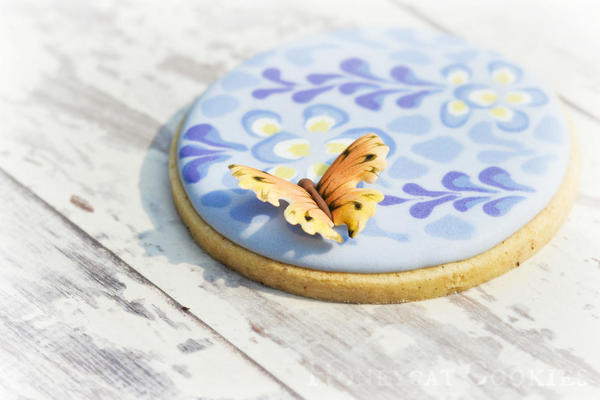
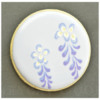
And so, of course, I had to cookie this news! This is a fairly simple wet-on-wet technique, which looks lovely by itself, but dressed up with a delicate three-dimensional handpainted butterfly, it becomes a perfect wedding favour or gift. I particularly like the strong colour and pattern of the butterfly in contrast to the soft, almost bokeh-like effect of the background.
- Butterfly templates
- Cellophane, acetate, or translucent wax paper
- Three shades of blue/lavender, plus purple, white, yellow-green, and brown royal icing, aka RI (See note below about colours and consistencies.)
- Pastry bags fitted with PME #1.5 and #2 tips, or equivalents
- Orange, yellow, brown, and black food colouring
- Water or clear alcohol (like vodka), for extending colours into paints
- Fine and very fine food-use-only paint brushes
- Plain round (about 3-inch) cookies, baked and cooled
- Scribe tool or toothpick
- Tweezers
- Tiny food-safe objects for supporting wings (I used RI transfer eyes from my stock!)
Note on RI Colours and Consistencies:
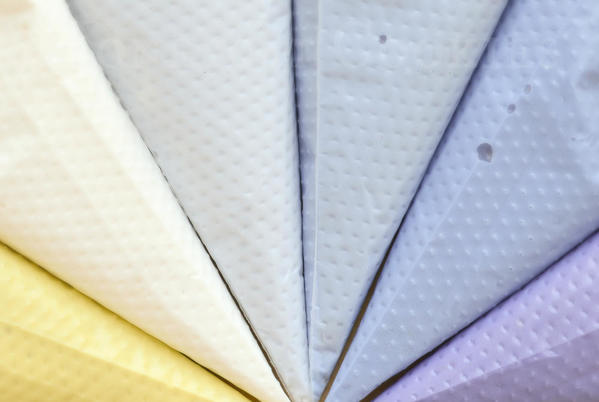
To create the wisteria flowers, I used three lavender-blues ranging from very pale to light to medium, plus a stronger, more purply blue, white, and light yellow-green. You will need most of the palest lavender-blue color, as this will create the background flood colour, and much smaller amounts of all the others.
To work with these colours wet on wet, they need to be the same consistency and as thick as possible to prevent bleeding. I used a 5-second consistency, as I was working on a dry, sunny day when fast crusting was a concern. However, this then gave me a problem with "overflow" on my practice runs! I therefore thickened a small amount of the palest lavender-blue flood colour to 10-second consistency to use as an outline to create a "dam". No more overflow, but still soft enough for the outline to merge into a single smooth surface with the flood icing.
You will also need a small amount of very stiff brown RI to create the head and body of the butterfly.
Colours used: Wilton Cornflower Blue; Sugarflair Grape Violet, Melon Yellow, and Dark Brown.
Step 1 - Creating the Butterflies:
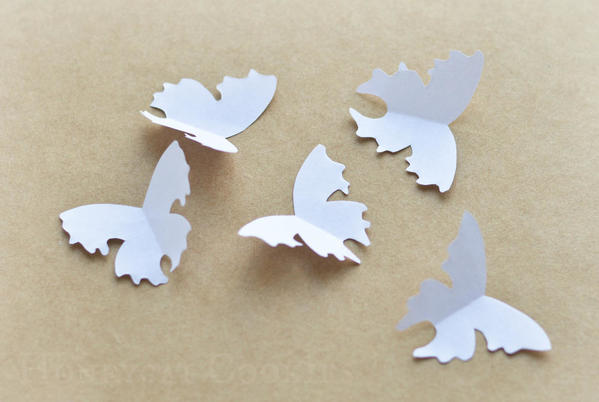
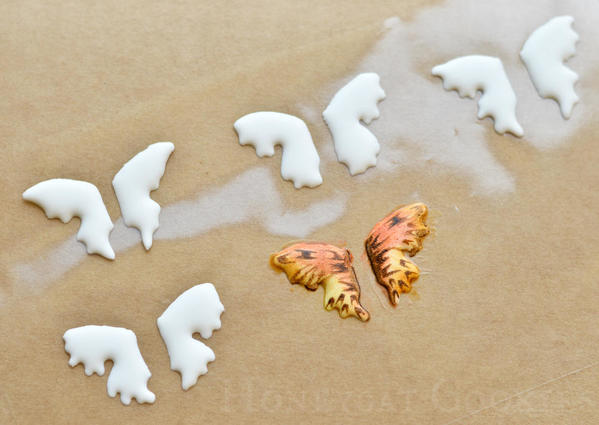
Either draw or print out suitable one-inch-long butterfly wing shapes, two (mirror images of each other) for each cookie, and tape down with your cellophane/acetate on top. (I tape mine directly to the dehydrator tray for convenience.)
I created my shapes by folding paper in half and drawing single wings along the fold. I cut out the shapes, opened the paper to reveal the whole butterfly, and then cut along the fold to separate the butterfly into two wings.
With your white flood icing and a PME #1.5 tip (or equivalent), pipe over the butterfly wings and set to dry at least two days if the weather is humid, or less time if conditions are dry or you are using a dehydrator.
Paint your butterflies using food colours mixed with a tiny amount of water or vodka. I chose to paint mine in a stylised Comma butterfly design, as it contrasts nicely with the blue cookie base and is fairly easy to reproduce. Start with a rich orange base and, when dry, paint small, symmetrical "U" and "H" shapes in dark brown with a very fine brush. Finally, emphasize some of the markings with a tiny amount of black. Leave to dry.
Step 2 - Creating Wet-on-Wet Wisteria:
You need to work quickly through this process before the icing crusts, so be sure you're familiar with the steps and colours before you start. I found I needed to first practice a few times on spare cookies to get the hang of it.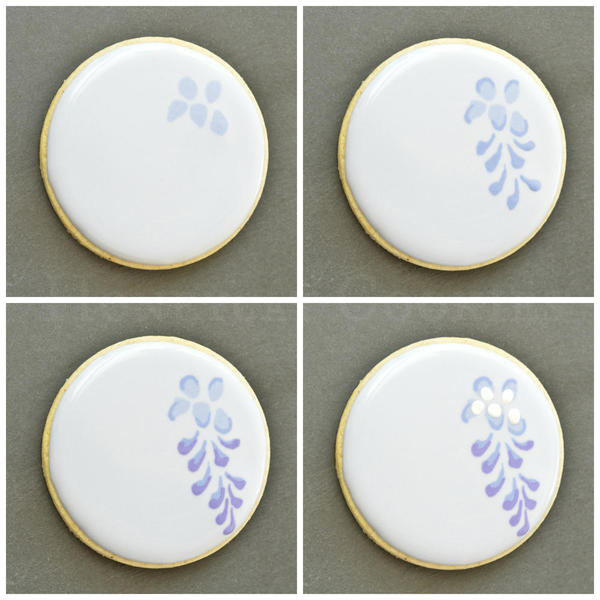
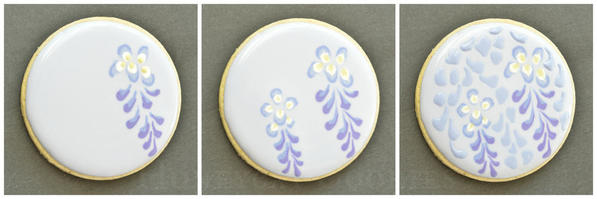
- Flood your cookie in the palest blue icing, if necessary outlining first in slightly thicker RI to create a "dam" (as I ended up doing).
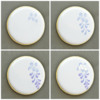
- Add a set of four to six petals in the medium blue shade (upper left image).
- Outline the petals in the strongest blue icing, and add teardrop-shaped "closed" petals cascading beneath the first set of light blue petals (upper right image).
- Using the purple icing, outline the "teardrops", and add one or two tiny, all-purple teardrops at the bottom of the cascade (lower left image).
- Add white blobs to the top of each of the open petals (lower right image).
- Add yellow-green spots to the white (left image).
- Using a scribe tool or toothpick, draw through the yellow-green and white and into the blue of each open petal (center image).
- Repeat the entire process elsewhere on the cookie (center image).
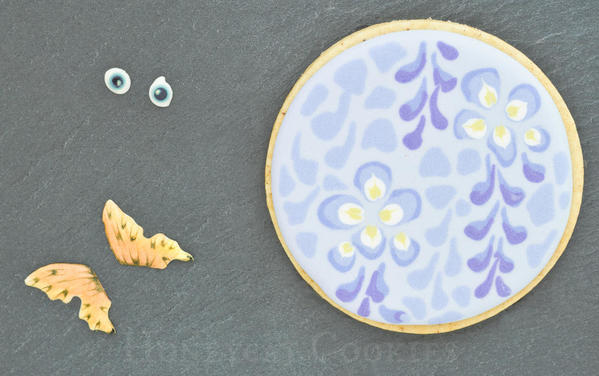
- Going back to the medium blue shade, pipe plain petals and teardrops throughout the cookie, filling the gaps (right image).
- If you find some areas haven't settled by this stage, use the scribe tool (or a toothpick) to "jiggle" those spots until they settle flat.
- Set the cookies aside to dry thoroughly, at least eight hours.
Again, for this technique, it's important to pipe as quickly as possible before the icing crusts. After some practice, my total piping time per cookie for this step was about seven minutes, which is still a lot! Fortunately, the pattern is fairly forgiving, and doesn't require great accuracy of piping.
Step 3 - Assembling the Butterfly:
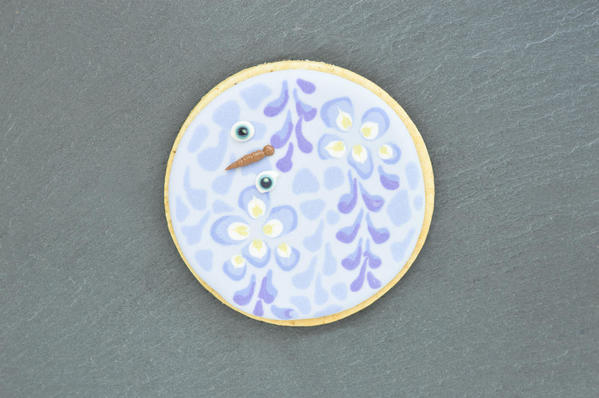
Gather your dried RI wing transfers, tweezers, two tiny "props", and stiff brown RI in a bag fitted with a PME #2 tip or equivalent. Decide where you'd like to place your butterfly on the cookie, and pipe a small head and tapering body at that point. The body needs to be thick enough to accommodate the two wings and still be visible from above. Position (don't stick!) your "props" to each side of the body.
Before the icing sets, use tweezers to gently push each wing into the body and down toward the cookie. Slide the props in or out until they support the wings at an angle you like. It's important to push the wings into the body from slightly above, rather than slide them in from the side (as I did at first), as there needs to be enough icing to support the wings from underneath. If you don't do this, the wings will fall out too easily when you remove the props. (This may or may not have happened to the author!)
And here's the cookie in action! I have very slightly sped up the film (about 1.25 x normal speed), and edited out all the gaps where I'm changing bags or cleaning tips, to make the video flow better. This editing makes the work seem to go much more swiftly and efficiently than in real life. But with a scribe tool and the right icing consistency, it really is possible to fit all that wet-on-wet work onto one cookie!
Finally, after the body has thoroughly dried, remove the props. Run around showing everyone your lovely cookie. Or eat. It's up to you!
Cookie and photo credits: Lucy Samuels

 Lucy Samuels is the owner of UK-based Honeycat Cookies. Originally with an art-based career in mind, Lucy attended art college for a year after school but switched to nursing where she spent twenty years specializing in cardiology. After becoming a stay-at-home mom to her daughter Jess, Lucy experimented with a range of crafts, alighting upon decorative cookies almost by accident. In late 2011, she was persuaded to start her business Honeycat Cookies following several requests to place orders. She set about learning the craft from books, the internet, and trial and error. Lucy has a YouTube channel as well as a blog, Honeycat Cookies, that document some of her wider adventures in confectionery.
Photo credit: Lucy Samuels
Note: What's New, Honeycat? is a bimonthly Cookie Connection blog feature written by Lucy Samuels, which pushes the cookie envelope every other month with innovative cookie design ideas and tutorials. Its content expresses the views of the author and not necessarily those of this site, its owners, its administrators, or its employees. To catch up on all of Lucy's past posts, click here.





Comments (14)