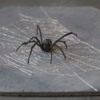
 Years ago, my husband and I decided to bring in a sofa that we’d been storing in our garage. After lugging in the unwieldy piece of furniture, we plopped down on it in triumph. I turned to look at my husband, and my smile melted into horror. Perched on his neck was a giant black widow spider. Luckily, she quickly scurried off, leaving my husband unscathed. But ever since, I’m extra vigilant when I’m in the garage (or the backyard or really anywhere that a black widow might be lurking). This black widow cookie looks every bit as spooky but is a whole lot more fun!
Supplies:
- Spiderweb Transfer and Cookie Cutting Template (See “Files” in “Attachments” at the end of this post)
- Parchment paper
- Edible glue
- Tips: PME #00, 1.5, 3 (or equivalents)
- Scribe tool (or equivalent)
- Black Widow Spider Transfer Template (See “Files” in “Attachments” at the end of this post)
- Royal icing (I used AmeriColor gel paste to tint the icing):
- Stiff-consistency red (Super Red), optional
- Stiff-consistency black (Super Black)
- Medium flat paint brush
- Cookie with a small straw-sized hole (or equivalent) for support
- Plastic wrap (or equivalent) for support
- Baked cookie (cut with provided template)
- AmeriColor gel paste coloring (or equivalent) for painting: Slate, Bright White
- Culinary tweezers
Note: I used a 5 1/4 x 6 3/4-in (13.3 x 17.1-cm) cookie, and my assembled spider spans about 1 3/4 W x 2 1/2 T inches (4.4 W x 6.4 T centimeters), but you can scale either element up or down. The dimensions are also included in the template files.
Step 1: Pipe spiderweb
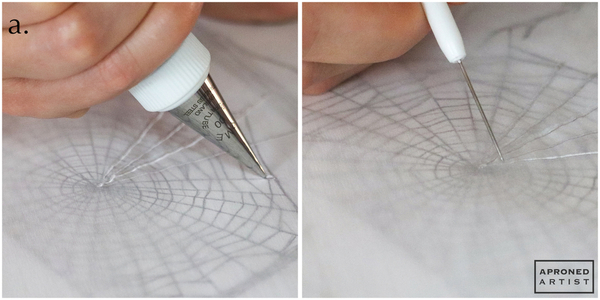
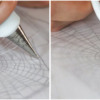
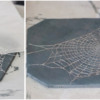
a. Print out the Spiderweb Transfer and Cookie Cutting Template (located in “Files” in “Attachments” at the end of this post), and tape a sheet of parchment paper over the spiderweb template. Transfer the edible glue to a piping bag fitted with a PME #00 tip (or equivalent). Begin by piping a radial thread (one of the lines that are like the spokes of a wheel) by dragging the piping tip from the outside of the web toward the center. Dragging the tip along the parchment paper (as opposed to holding it above the surface as you would typically pipe icing) will create a thinner line. Stop just short of the center, and use a scribe tool (or equivalent) to drag the edible glue to the center. This step will help maintain the definition between the lines and prevent them from merging into a large blob in the center. Repeat to pipe all of the radial threads on the template.
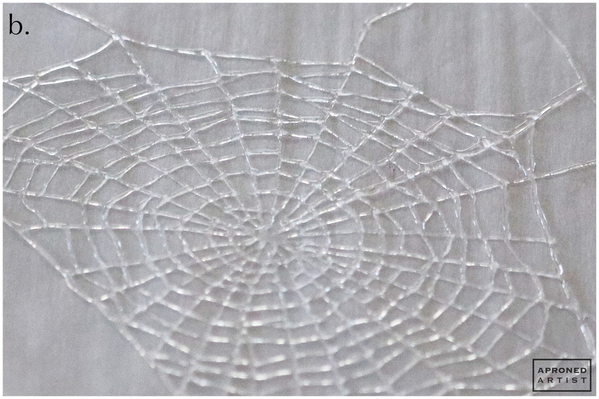
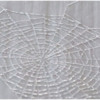
b. Next, pipe the spiraling threads that cut between the radial threads, beginning from the center of the web and working outward. At this point, do not drag the piping tip along the surface anymore as it will pull the radial threads sideways, but do keep the tip as close to the surface as possible. Pipe as thin a line as you can from one radial thread to the next. If the line breaks and the edible glue beads up, use a scribe tool (or equivalent) to drag the bead of glue to the next intersection with a radial thread. Once you have piped the entire spiderweb, allow the glue to dry for a minimum of two days. Drying time will vary with ambient humidity and temperature. The dried web should still be somewhat flexible but dry enough to release from the parchment paper.
Step 2: Pipe and assemble spider royal icing transfer
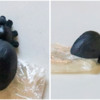
a. Print out the Black Widow Spider Transfer Template (located in “Files” in “Attachments” at the end of this post). Tape a small square of parchment paper over the spider abdomen on the template. Optionally, to embed a black widow’s hourglass in the abdomen, use stiff-consistency red royal icing and a PME #1.5 tip (or equivalent) to pipe over the hourglass on the template. Use a damp flat paint brush to flatten and refine the shape of the hourglass (i). Using stiff-consistency black royal icing and a PME #3 tip (or equivalent), pipe a mound of icing directly over the hourglass to cover the abdomen on the template. Shape the mound of black icing with a damp flat paint brush so that when viewing the abdomen from the side, it looks like a domed teardrop (ii). Allow the abdomen to dry completely before removing it from the parchment paper (iii).
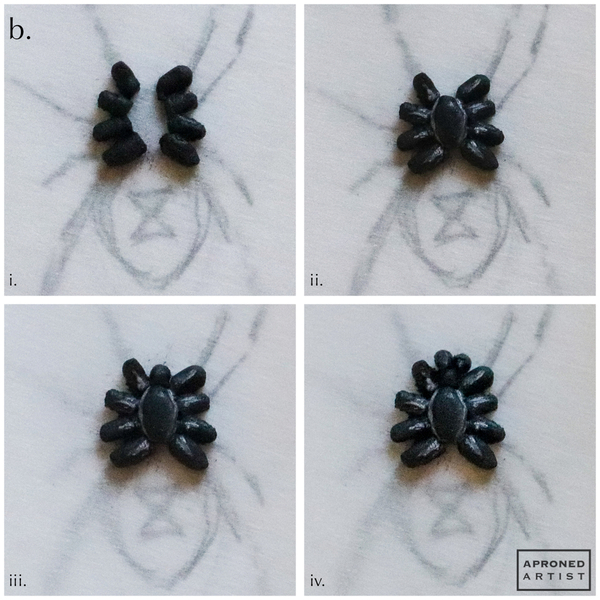
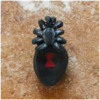
b. To pipe the underside of the spider’s body, cover the body portion of the black widow template with a clean square of parchment paper. Use stiff-consistency black royal icing and a PME #1.5 tip (or equivalent) to pipe the starting segment of each of the spider’s eight legs (i). Fill the oval body section with more black icing (ii). (I painted white highlights on the sections only to distinguish the tiny black-on-black details for the photo below.) Add a small dot of icing above the oval body for the spider’s head (iii). Finally add two dots at the top edge of the head for the spider’s fangs (iv). Allow the icing to dry completely before carefully peeling the parchment paper away from the transfer.
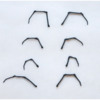
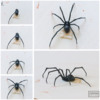
c. Meanwhile, cover the leg templates with a clean sheet of parchment paper, and use the same icing and tip to pipe the spider’s legs. Pipe the leg segments so that the segment closest to the spider’s body (the innermost segments on the templates) are thicker, and the segments thin as they reach the leg’s tip (the outermost segment on the templates). The joints between the segments should be noticeably thicker as well. Shape the icing with a damp paint brush if necessary.
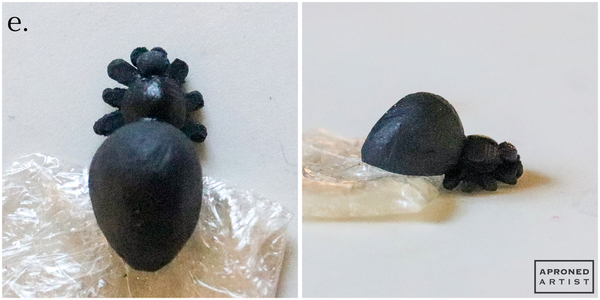
d. Once the abdomen and body transfers have dried, flip over the abdomen so that the flat side faces up. Use a cookie with a small straw-sized hole (or equivalent) to cradle the abdomen while you work so it does not roll. Pipe a dab of icing at the top of the abdomen, and press the body transfer (right side up) into the icing. (The flatter bottom of the body transfer will face up once the spider is turned over in the next step. But, we will pipe over it to give it more dimension.) From the side view (see the rightmost picture below), most of the body will be suspended off of the abdomen. Allow the icing to dry completely.
e. Flip over the spider, and support the abdomen with a square of plastic wrap (or equivalent). Use the same icing and tip to pipe a bead of icing to cover the flat side of the oval underbody and a smaller bead above it for the head.
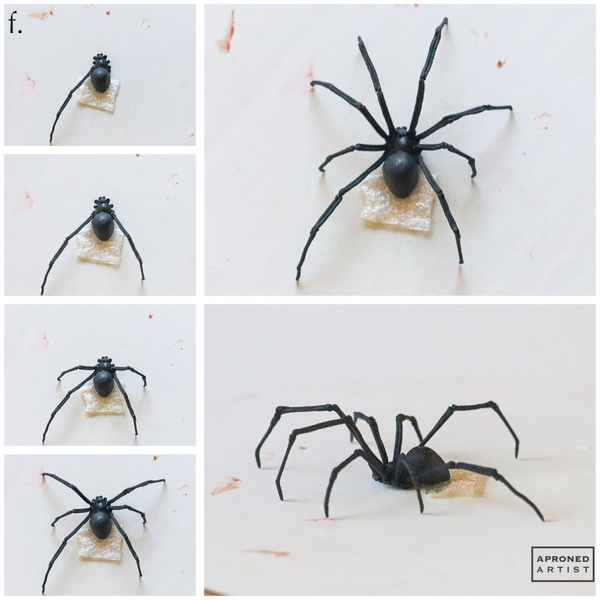
f. Pipe a dab of icing on one of the starting leg segments on the body piped in Step 2b, and attach the corresponding leg. (See template for leg locations.) Repeat to attach each remaining leg to its corresponding segment. Alternatively, you may find it easier to attach the legs after securing the body to the cookie in Step 3d.
Step 3: Decorate base cookie, and attach web and spider
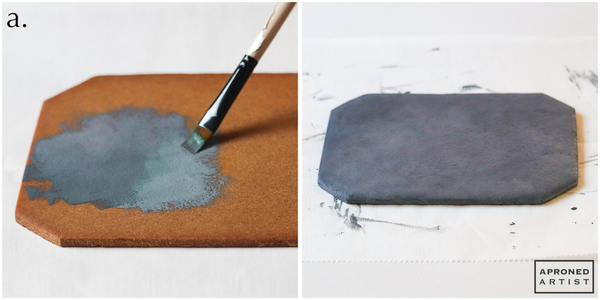
a. Lightly mix Slate gel paste coloring with Bright White gel paste coloring (or equivalents) in an approximate ratio of four parts Slate to one part Bright White. Using a medium flat paint brush, paint the mixture onto the baked cookie using haphazard brush strokes. Continue blending the paint until the brush runs dry. Repeat, covering the entire top and the sides of the cookie. Allow the paint to dry completely. The paint will look surprisingly green while wet, but will dry to a stony gray color.
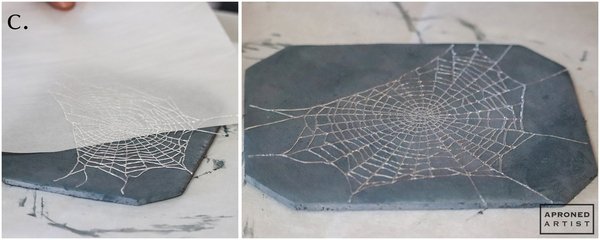
b. Place the parchment paper with the spiderweb at the edge of your countertop. Grip the parchment paper closest to the edge of the countertop, and pull it downward as you guide the web slowly over the edge. Stop once the center of the spiderweb reaches the edge of the countertop. If dry, the web should release from the parchment paper. If the web sticks slightly, you can run your scribe tool (or equivalent) underneath the sticking thread to help it release. Rotate the web a quarter turn, and guide the next edge over the countertop in the same fashion. Repeat this process until the web is fully detached from (but still on top of) the parchment paper. The ends of the radial threads of the web may curl and twist slightly during this process, but they can be moved back into place when the web is attached to the cookie in a later step. (Note: If a thread breaks while you’re removing the web, you can repair it with a small drop of edible glue. Use your scribe tool to guide the glue across the break. Allow the repaired web to dry for at least another day before removing it from the parchment paper.)
c. Hover the parchment paper over the cookie in the orientation that you intend to attach it. Slide the web off the paper and onto the cookie. Reposition the web as necessary, straightening the ends of any radial threads that have curled. Gently press down on the web to secure it to the cookie. If the web is in need of repair at this point, or you need to extend the radial threads to the edge of the cookie, do not apply wet edible glue. The glue will pick up the paint and become dark gray. Instead, dry a thread of web separately on another piece of parchment paper, and use a portion of the dried thread to repair the web on the cookie.
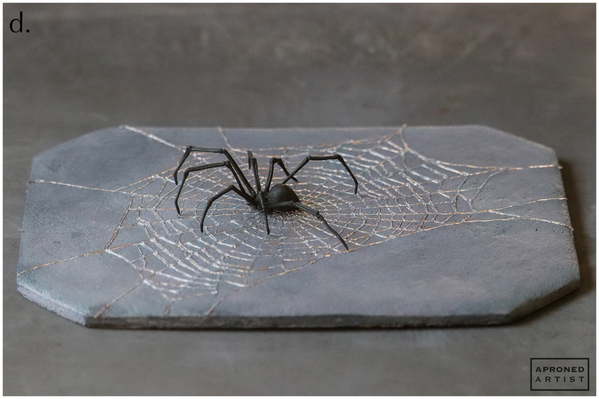
d. Pick up the spider transfer by the back of the abdomen with a pair of culinary tweezers. Apply a small amount of edible glue to the underside of the body, and attach the transfer to the web. If you have not already adhered the spider leg transfers in Step 2f, do so now.
Finished! Hope you all have a super spooky Halloween.


Samantha Yacovetta began cookie decorating in 2013. While working at a local bakery, Samantha became captivated by cookie art when a customer requested princess-themed cookies. Attracted initially to the precision of cookie decorating, Samantha soon found that the limitless design opportunities turned it into her artistic passion. Samantha began regularly stocking the bakery case with decorated cookies and for several years sold cookies through her own company, Aproned Artist, a cottage food operation. Having retired from the business life, Samantha now enjoys making cookies just for fun from her home in San Jose, California, USA. To learn more about Samantha, please check out her Cookie Connection portfolio, her Facebook page, and her past Every Little Detail tutorials here.
Photo and cookie credits: Samantha Yacovetta
Note: Every Little Detail with Aproned Artist is a monthly Cookie Connection blog feature written by Samantha Yacovetta focused on the special little details that make big statements in cookie design. This article expresses the views of the author, and not necessarily those of this site, its owners, its administrators, or its employees. To read all of Samantha's past Every Little Detail tutorials, click here. And to see all of Cookie Connection's tutorials, click here.











Comments (26)